目录
0 程序环境与所学函数
本章程序运行需要导入下面三个库,并定义了一个显示图像的函数
import cv2 as cv
import numpy as np
import matplotlib.pyplot as plt
?
def show(img):
? ? if img.ndim == 2:
? ? ? ? plt.imshow(img, cmap='gray')
? ? else:
? ? ? ? plt.imshow(cv.cvtColor(img, cv.COLOR_BGR2RGB))
? ? plt.show()
所学函数
Premitt、Roberts算子
cv.filter2D(img, -1, kernel)Sobel、Scharr算子
cv.Sobel(img, cv.CV_16S, 1, 0, ksize=3)
cv.Scharr(img, cv.CV_64F, 0, 1, ksize=3)
Laplacian、LoG算子
cv.Laplacian(img, cv.CV_16S)Canny边缘检测
cv.Canny(img, 20, 200)
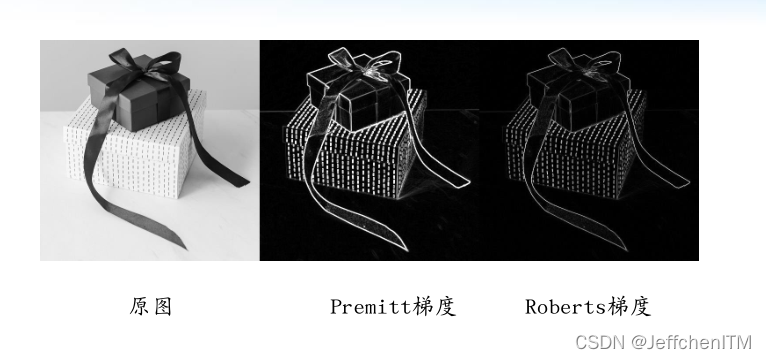
1 Prewitt、Robert 算子
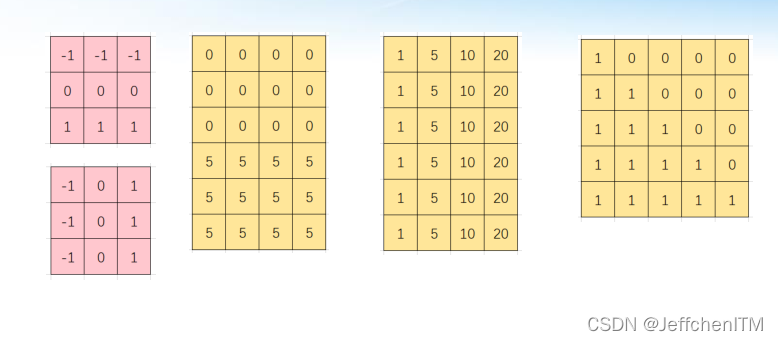
Prewitt原理:红色矩阵代表两个不同方向的算子(水平方向与竖直方向)
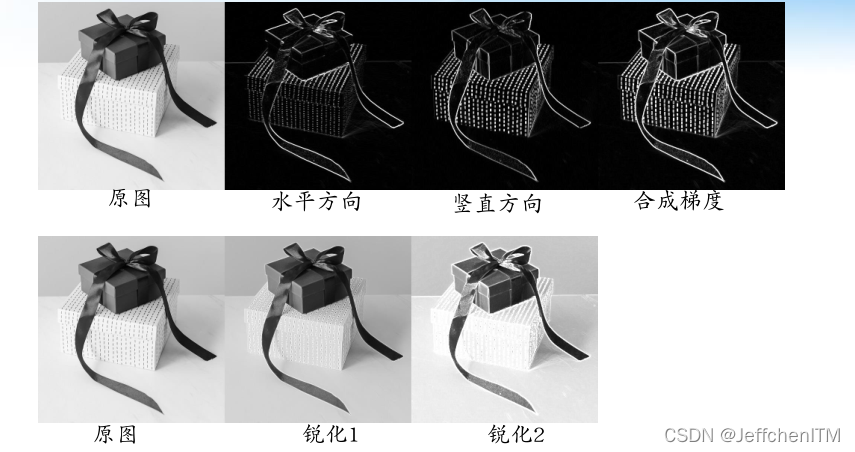
效果
?编程实现
# Prewitt算子
img = cv.imread('pic/gift500x500.jpg', 0)

kx = np.array([[1, 1, 1], [0, 0, 0], [-1, -1, -1]], dtype=np.float32)
ky = np.array([[-1,0, 1], [-1,0, 1], [-1,  0,  1]], dtype=np.float32)

imgx = cv.filter2D(img, cv.CV_16S, kx) #CV_16S是数据类型
imgy = cv.filter2D(img, cv.CV_16S, ky)

absX = cv.convertScaleAbs(imgx)
absY = cv.convertScaleAbs(imgy)

img_prewitt = cv.add(absX, absY) # np.uint8
show(img_prewitt)
显示
# 锐化
img_pre_sharp1 = cv.addWeighted(img, 0.9, img_prewitt, 0.2, 0)
img_pre_sharp2 = cv.add(img, img_prewitt)
cv.imwrite('pic/gift_sharp.jpg', np.hstack([img, img_pre_sharp1, img_pre_sharp2]))
?Roberts算子原理
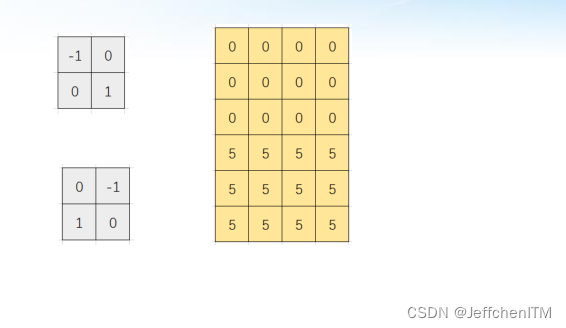
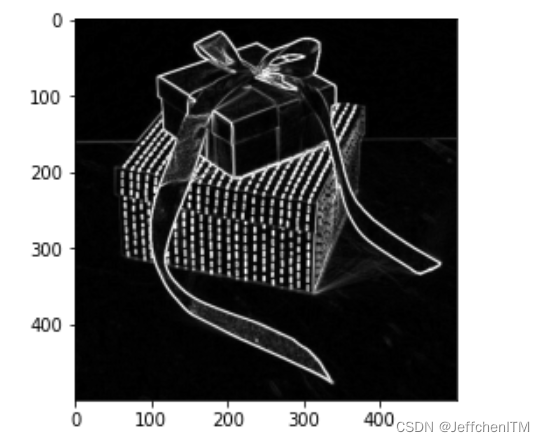
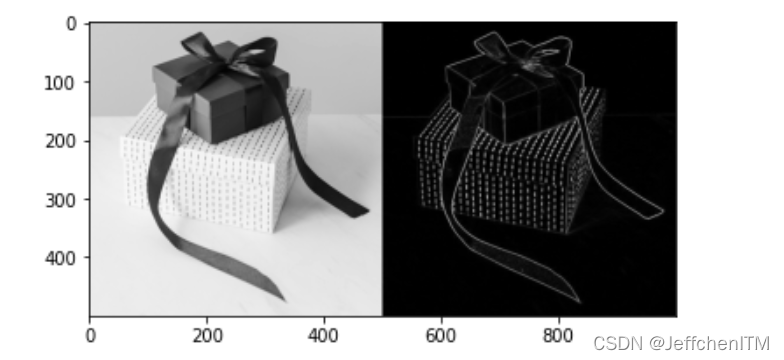
?效果
?程序实现
# Roberts算子
img = cv.imread('pic/gift500x500.jpg', 0)

kx = np.array([[-1, 0], [0, 1]], dtype=np.float32)
ky = np.array([[0, -1], [1, 0]], dtype=np.float32)

imgx = np.abs(cv.filter2D(img, cv.CV_16S, kx))
imgy = np.abs(cv.filter2D(img, cv.CV_16S, ky))

img_robert = cv.convertScaleAbs(np.abs(imgx) + np.abs(imgy)) # np.uint8

show(np.hstack([img, img_robert]))
显示
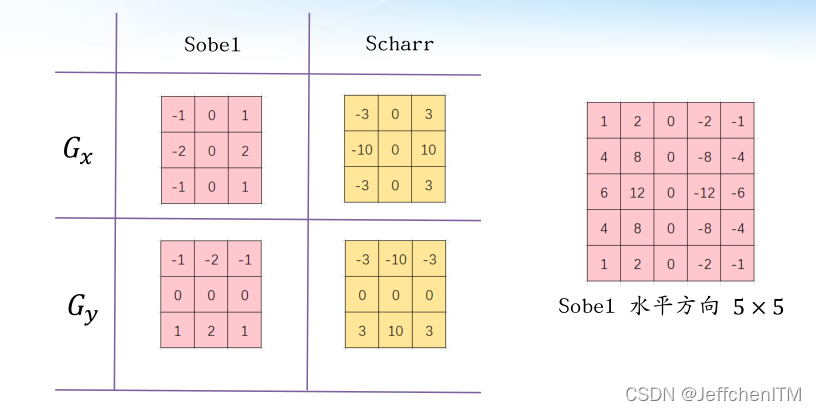
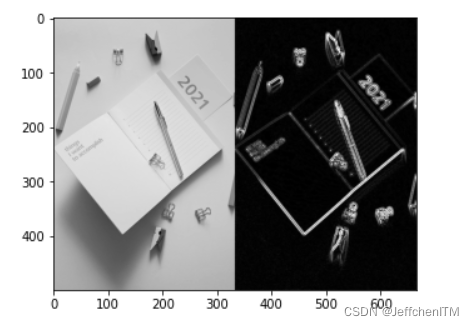
?2 sobel 、scharr算子
原理
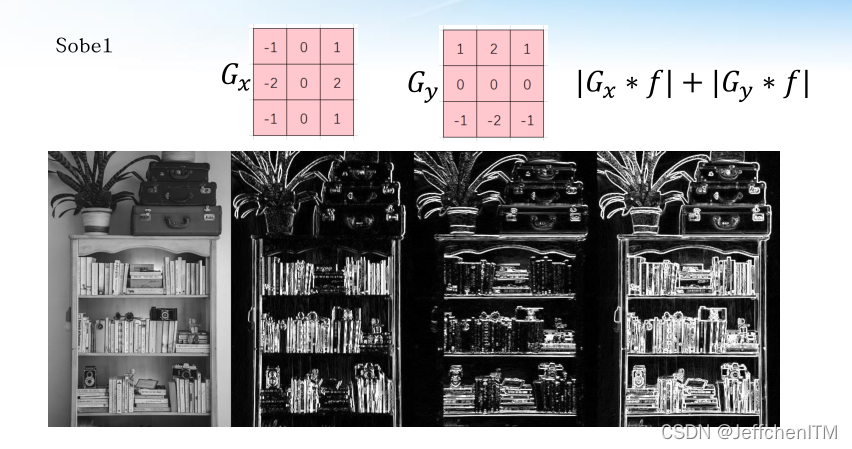
?sobel算子编程实现
#sobel算子
img = cv.imread('pic/bookshelf500x333.jpg', 0)
show(img)

grad_x = cv.Sobel(img, cv.CV_16S, 1, 0, ksize=3)#1表示dx工作0表示dy不工作
grad_y = cv.Sobel(img, cv.CV_16S, 0, 1, ksize=3)

grad_xabs = np.abs(grad_x)
grad_yabs = np.abs(grad_y)
grad_xy   = grad_xabs + grad_yabs

show(np.hstack([img, grad_xabs, grad_yabs, grad_xy]))
显示
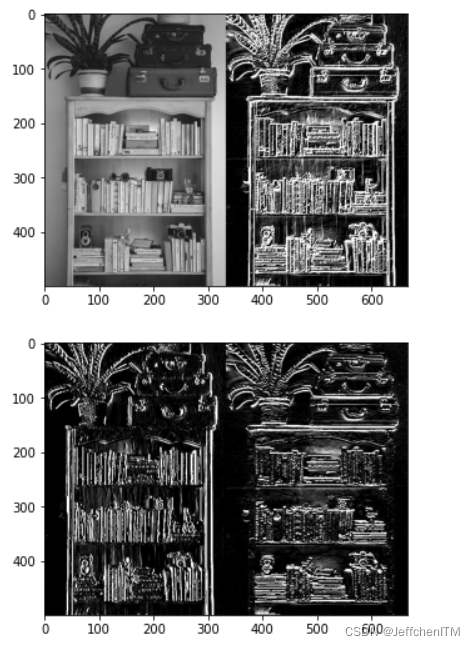
??Scharr算子编程实现
img = cv.imread('pic/bookshelf500x333.jpg', 0)

grad_x = np.abs(cv.Scharr(img, -1, 1, 0))
grad_y = np.abs(cv.Scharr(img, -1, 0, 1))
img_grad = cv.add(grad_x, abs(grad_y))

show(np.hstack([img, img_grad]))
show(np.hstack([grad_x, grad_y]))
显示
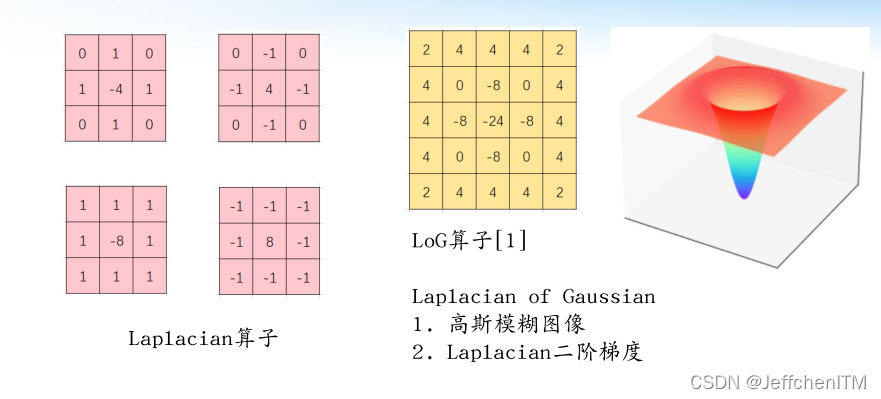
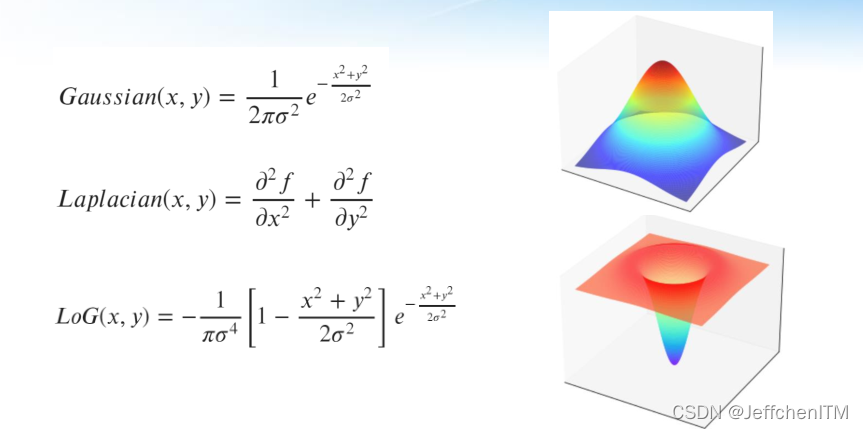
3 Laplacian 、 LoG算子
原理:
?
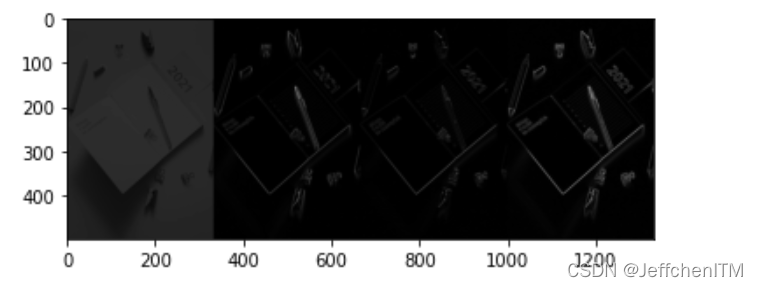
?效果
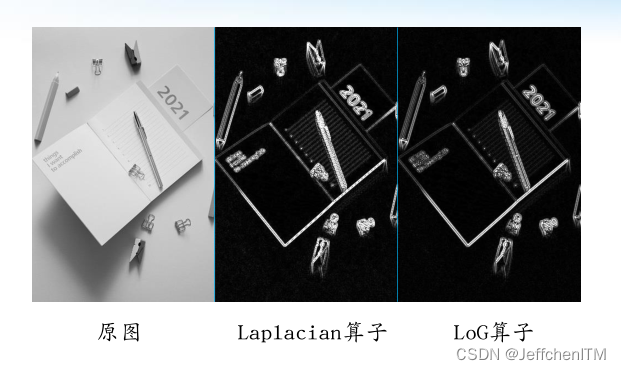
?Laplacian算子编程实现
img = cv.imread('pic/notebook500x333.jpg', 0)

img_lap = cv.Laplacian(img, cv.CV_16S, ksize=5, scale=0.2)

img_lap2 = np.abs(img_lap).clip(0, 255)
show(np.hstack([img, img_lap2]))
显示

?LoG算子编程实现
img = cv.imread('pic/notebook500x333.jpg', 0)

img_g = cv.GaussianBlur(img, (3,3), 0)
img_log = cv.Laplacian(img_g, cv.CV_16S, ksize=5, scale=0.2)

img_log2 = np.abs(img_log).clip(0, 255)
show(np.hstack([img, img_log2]))
显示
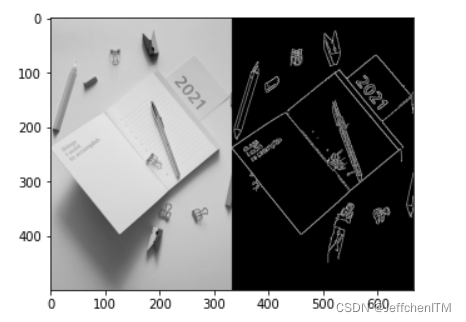
?4 Canny边缘检测
原理:
?效果
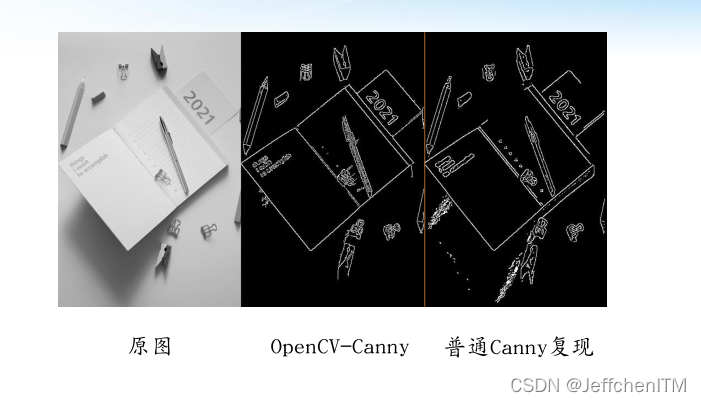
?编程实现
img = cv.imread('pic/notebook500x333.jpg', 0)

img_canny = cv.Canny(img, 20, 200) #小于20设为0大于200设为255

show(np.hstack([img, img_canny]))
显示
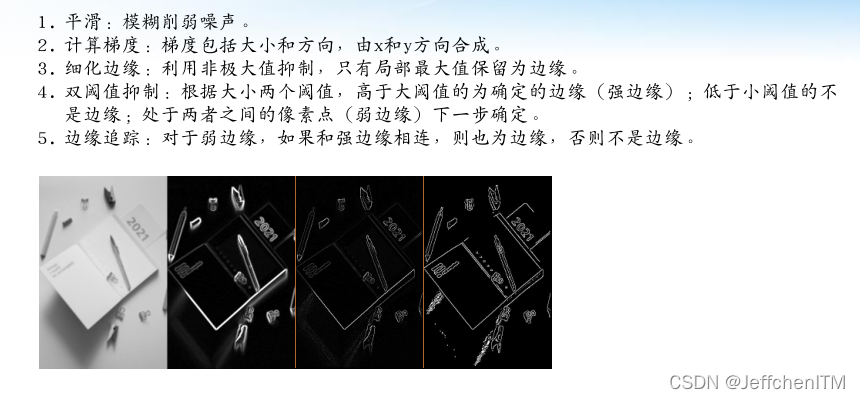
5 Canny边缘检测底层代码实现
原理

?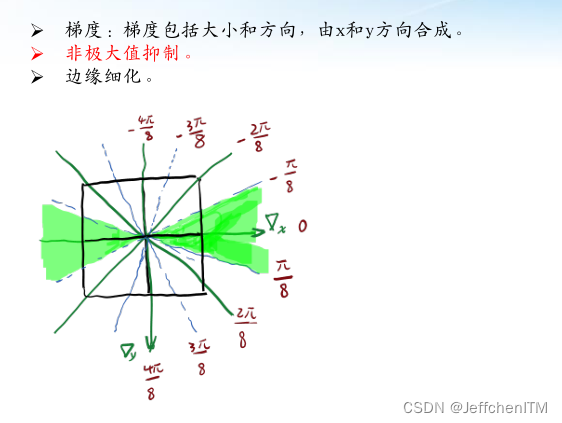
?代码实现
img = cv.imread('pic/notebook500x333.jpg', 0)

# 1. 平滑
img_blur = cv.GaussianBlur(img, (5,5), 2)

# 2. 计算梯度
gradx = cv.Sobel(img_blur, cv.CV_64F, 1, 0)
grady = cv.Sobel(img_blur, cv.CV_64F, 0, 1)
R = np.abs(gradx) + np.abs(grady)
T = np.arctan(grady / (gradx + 1e-3))

# 3. 细化边缘
h, w = R.shape
img_thin = np.zeros_like(R)

for i in range(1, h-1):
    for j in range(1, w-1):
        theta = T[i,j]
        if -np.pi / 8 <= theta < np.pi / 8:
            if R[i,j] == max([R[i,j], R[i,j-1], R[i, j+1]]):
                img_thin[i,j] = R[i,j]
        elif -3 * np.pi / 8 <= theta < -np.pi / 8:
            if R[i,j] == max([R[i,j], R[i-1,j+1], R[i+1,j-1]]):
                img_thin[i,j] = R[i,j]
        elif np.pi / 8 <= theta < 3 * np.pi / 8:
            if R[i,j] == max([R[i,j], R[i-1,j-1], R[i+1,j+1]]):
                img_thin[i,j] = R[i,j]
        else:
            if R[i,j] == max([R[i,j], R[i-1,j], R[i+1,j]]):
                img_thin[i,j] = R[i,j]

show(img_thin)

th1 = 20
th2 = 200

h, w = img_thin.shape
img_edge = np.zeros_like(img_thin, dtype=np.uint8)

for i in range(1, h-1):
    for j in range(1, w-1):
        if img_thin[i,j] >= th2:
            img_edge[i,j] = img_thin[i,j]
        elif img_thin[i,j] > th1:
            around = img_thin[i-1:i+2, j-1:j+2]
            if around.max() >= th2:
                img_edge[i,j] = img_thin[i,j]

show(img_edge)
?
?