前言
????????第一次发博客,也是当记笔记,主要是为了下次更改关键点个数的时候能更方便。本文主要是针对yolov5-face和在yolov5的区别进行归纳总结,并着重复述了更改关键点个数的详细操作流程,并记录自己踩过的一些坑。
yolov5-face是在yolov5的基础上添加了人眼关键点检测。
首先放上大佬的开源代码:https://github.com/deepcam-cn/yolov5-face
一 代码复现
原作者代码的注释非常少,很难直接跑通。
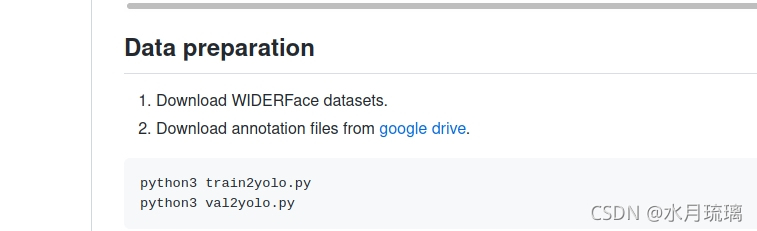
1.下载WIDERFace数据集图片
?
上图为https://github.com/deepcam-cn/yolov5-face中内容
WIDERFace数据集可参考本链接:WIDER FACE数据集简介 - 知乎,链接中也有下载地址。
如果不科学上网的话只能用腾讯微云下,网速慢不说还特别容易断。
2.下载WIDERFace数据集txt文件
????????下载WIDERFace数据集txt文件对应上图第二步,可以从github处点击下载;知乎的数据集有中的第四个(下图)应该是与其对应的。我是直接从github下载的

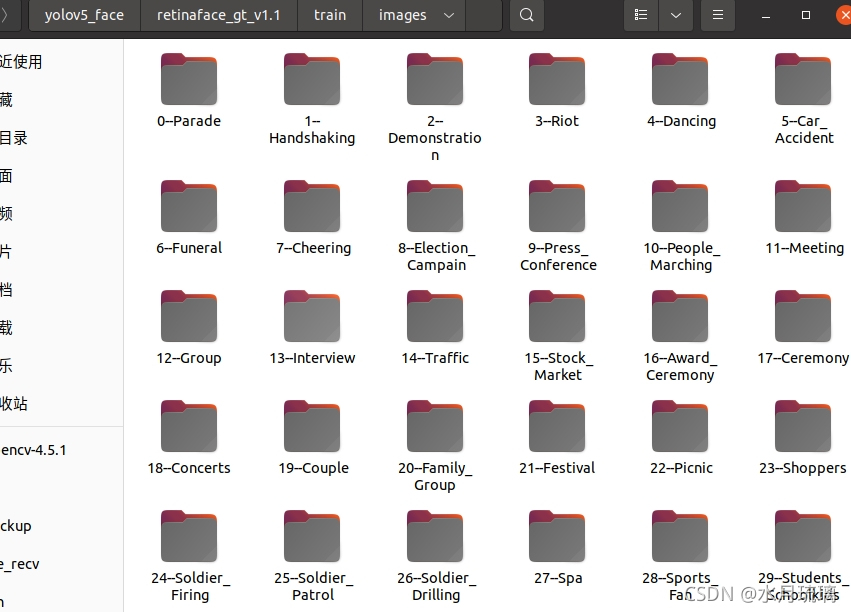
3.数据准备
????????下载好的数据集解压到你想解压的文件夹中 。以train文件夹为例,里面应该包含一个文件夹和一个文件,如下图
?????????接着在shell中执行这两行代码
python3 train2yolo.py
python3 val2yolo.py
????????当然大概率是执行不了的,原文档中的路径设置有些阴间,需要改一下查找路径
train2yolo: 
读取图片的路径就是上面截图中的label.txt文件
val2yolo:
????????这个路径改变稍微有些麻烦,他的思想是找到label.txt文件后,按行读取代码,如果本行中有#的行就看做是路径进行寻找。但源码中用的函数只能找到文件的名字,不能找到文件路径。在尝试了许多办法无果之后,迫不得已采取了最笨的办法:将读取到的路径转化为list,然后对其进行修改,修改后再拼接回字符串。终于修改之后,img能读取到图片。
??????? 之后再改一下下面的out_img和out_txt,改到你想输出的文件夹即可(我这里用的是绝对路径,你也可以用相对路径)
?
?4.开始训练
????????开始训练,需要修改widerface.yaml文件,具体操作是打开这个文件,将我们之前设置的输出路径粘贴到对应的train或val文件后面。
??????? 训练过程中,会默认下载VOC数据集。但如果我们只想训练人脸识别,这个数据集是不需要的,如果不想下载,可以将download: bash data/scripts/get_voc.sh行注释掉。
??????? 你可以将预训练权重放在weights文件夹中,我这里下载了yolov5s.pt
??????? 之后,在shell中执行代码
python3 train.py --data data/widerface.yaml --cfg models/yolov5s.yaml --weights 'weights/yolov5s.pt'????????如果显存不够,请减少batch
二 代码详解
yolov5_face主要改动在detect模块和损失函数模块,接下来按照源码分析
1.detect模块(在yolo.py中)
??????? 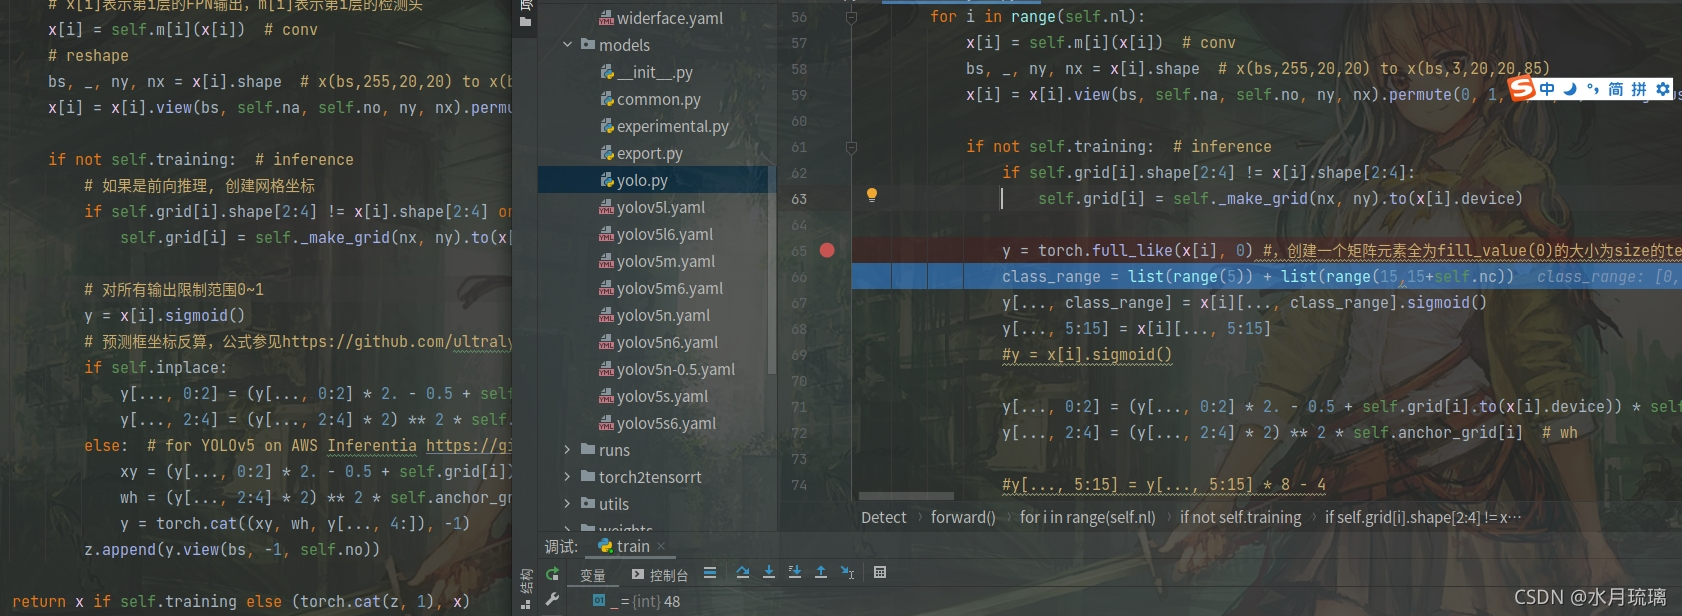
?对照两份代码可以发现,detect模块的改动主要是改变了传入数据的数目。原来传入的只有xywh和类别,而现在还传入了五个边角点的横纵坐标。
 #y[..., 5:15] = y[..., 5:15] * 8 - 4
                y[..., 5:7]   = y[..., 5:7] *   self.anchor_grid[i] + self.grid[i].to(x[i].device) * self.stride[i] # landmark x1 y1  得到实际像素坐标
                y[..., 7:9]   = y[..., 7:9] *   self.anchor_grid[i] + self.grid[i].to(x[i].device) * self.stride[i]# landmark x2 y2
                y[..., 9:11]  = y[..., 9:11] *  self.anchor_grid[i] + self.grid[i].to(x[i].device) * self.stride[i]# landmark x3 y3
                y[..., 11:13] = y[..., 11:13] * self.anchor_grid[i] + self.grid[i].to(x[i].device) * self.stride[i]# landmark x4 y4
                y[..., 13:15] = y[..., 13:15] * self.anchor_grid[i] + self.grid[i].to(x[i].device) * self.stride[i]# landmark x5 y5
这里anchor_grid[i]保存了每个预测框的长宽,每个grid[i]保存了这个东西在第几个格子里;计算完之后得到的值是关键点的实际像素坐标
?注:
y = torch.full_like(x[i], 0) 是创建一个矩阵元素全为第二个参数,大小为第一个参数的tensor
2.loss.py
loss.py主要改动是创造了一个landmarkloss损失函数
在这里,我们初始化了一个landmarks_loss 的类(后面的1.0推测为alpha)(179行),然后传入参数分别为真实,预测和mask。
            plandmarks = ps[:,5:15]

            plandmarks[:, 0:2] = plandmarks[:, 0:2] * anchors[i] #缩放回原来的坐标
            plandmarks[:, 2:4] = plandmarks[:, 2:4] * anchors[i]
            plandmarks[:, 4:6] = plandmarks[:, 4:6] * anchors[i]
            plandmarks[:, 6:8] = plandmarks[:, 6:8] * anchors[i]
            plandmarks[:, 8:10] = plandmarks[:,8:10] * anchors[i]

            lmark += landmarks_loss(plandmarks, tlandmarks[i], lmks_mask[i]) #这里才是传入参数进行计算 lamrk是一个值 forward是在__call__中调用的,而__call__函数是在类的对象使用‘()’时被调用
这里的mask推测为删除掉那些没有标签的(是值全为0,1的tensor),mask的值通过下面这个语句得到(bulid_target语句中)(如下)?
lks_mask = torch.where(lks < 0, torch.full_like(lks, 0.), torch.full_like(lks, 1.0))?ps:这里的最后一行才是真正调用了landmarkloss中的forward函数。注意.forward是写在__call__中的,只要执行了这个类就会调用.forward。
?同样,LandmarkLoss类中还定义了一个WingLoss损失函数并调用,wingloss中的x,t对应着LandmarkLoss中的pred,truel,也对应预测值和真实值;alpha,w,e等都是权重。首先得到真实值和预测值的差,乘以权重并存在diff中,然后用函数对其进行平滑等一系列操作,如下。
class WingLoss(nn.Module):
    def __init__(self, w=10, e=2):
        super(WingLoss, self).__init__()
        # https://arxiv.org/pdf/1711.06753v4.pdf   Figure 5
        self.w = w
        self.e = e
        self.C = self.w - self.w * np.log(1 + self.w / self.e)

    def forward(self, x, t, sigma=1):  #这里的x,t分别对应之后的pret,truel
        weight = torch.ones_like(t) #返回一个大小为1的张量,大小与t相同
        weight[torch.where(t==-1)] = 0
        diff = weight * (x - t)
        abs_diff = diff.abs()
        flag = (abs_diff.data < self.w).float()
        y = flag * self.w * torch.log(1 + abs_diff / self.e) + (1 - flag) * (abs_diff - self.C) #全是0,1
        return y.sum()

class LandmarksLoss(nn.Module):
    # BCEwithLogitLoss() with reduced missing label effects.
    def __init__(self, alpha=1.0):
        super(LandmarksLoss, self).__init__()
        self.loss_fcn = WingLoss()#nn.SmoothL1Loss(reduction='sum')
        self.alpha = alpha

    def forward(self, pred, truel, mask): #预测的,真实的 600(原来为62*10)(推测是去掉了那些没有标注的值)
        loss = self.loss_fcn(pred*mask, truel*mask)  #一个值(tensor)
        return loss / (torch.sum(mask) + 10e-14)
然后我们回到LandmarkLoss类,如下段代码,我们通过?loss = self.loss_fcn(pred*mask, truel*mask)语句将真实值和预测值传入。
class LandmarksLoss(nn.Module):
    # BCEwithLogitLoss() with reduced missing label effects.
    def __init__(self, alpha=1.0):
        super(LandmarksLoss, self).__init__()
        self.loss_fcn = WingLoss()#nn.SmoothL1Loss(reduction='sum')
        self.alpha = alpha

    def forward(self, pred, truel, mask):
        loss = self.loss_fcn(pred*mask, truel*mask)
return loss / (torch.sum(mask) + 10e-14)(与正文无关)在182行这一段
            # 计算objectness的损失
            obji = self.BCEobj(pi[..., 4], tobj)
            lobj += obji * self.balance[i]  # obj loss  也是一个值
这里是一个新的tensor,相当于取最后一维取到第四行的时候,前面n-1维对应的数
如a[[1,2][3,4]],则,a[...,2]=[2,4]
与之类似,还有a[...,1:2]=[[2,4]],元素和上面是一样的,但是高一维
(无关结束)
????????landmarkloss损失函数是在computeLoss函数中调用的,这里只截取这个函数一部分(如下)。
def compute_loss(p, targets, model):  # predictions, targets, model
    device = targets.device
    lcls, lbox, lobj, lmark = torch.zeros(1, device=device), torch.zeros(1, device=device), torch.zeros(1, device=device), torch.zeros(1, device=device)
    tcls, tbox, indices, anchors, tlandmarks, lmks_mask = build_targets(p, targets, model)  # targets
    h = model.hyp  # hyperparameters

    # Define criteria
    BCEcls = nn.BCEWithLogitsLoss(pos_weight=torch.tensor([h['cls_pw']], device=device))  # weight=model.class_weights)
    BCEobj = nn.BCEWithLogitsLoss(pos_weight=torch.tensor([h['obj_pw']], device=device))

    landmarks_loss = LandmarksLoss(1.0) #这里只是初始化了一个landmarks_loss的类

    # Class label smoothing https://arxiv.org/pdf/1902.04103.pdf eqn 3
    cp, cn = smooth_BCE(eps=0.0)
...
...
...
            plandmarks = ps[:,5:13]

            plandmarks[:, 0:2] = plandmarks[:, 0:2] * anchors[i]
            plandmarks[:, 2:4] = plandmarks[:, 2:4] * anchors[i]
            plandmarks[:, 4:6] = plandmarks[:, 4:6] * anchors[i]
            plandmarks[:, 6:8] = plandmarks[:, 6:8] * anchors[i]
            # plandmarks[:, 8:10] = plandmarks[:,8:10] * anchors[i]

            lmark += landmarks_loss(plandmarks, tlandmarks[i], lmks_mask[i])
????????我们可以看到,大部分用到的关键参数是通过build_tragets得到的。所以想研究这些参数的具体含义,我们还要进入build_tragets类,如下
def build_targets(p, targets, model):
    # Build targets for compute_loss(), input targets(image,class,x,y,w,h)
    det = model.module.model[-1] if is_parallel(model) else model.model[-1]  # Detect() module
    na, nt = det.na, targets.shape[0]  # number of anchors, targets
    tcls, tbox, indices, anch, landmarks, lmks_mask = [], [], [], [], [], []
    #gain = torch.ones(7, device=targets.device)  # normalized to gridspace gain
    gain = torch.ones(15, device=targets.device)
    ai = torch.arange(na, device=targets.device).float().view(na, 1).repeat(1, nt)  # same as .repeat_interleave(nt)
    targets = torch.cat((targets.repeat(na, 1, 1), ai[:, :, None]), 2)  # append anchor indices

    g = 0.5  # bias
    off = torch.tensor([[0, 0],
                        [1, 0], [0, 1], [-1, 0], [0, -1],  # j,k,l,m
                        # [1, 1], [1, -1], [-1, 1], [-1, -1],  # jk,jm,lk,lm
                        ], device=targets.device).float() * g  # offsets

    for i in range(det.nl):
        anchors = det.anchors[i]
        gain[2:6] = torch.tensor(p[i].shape)[[3, 2, 3, 2]]  # xyxy gain
        #landmarks 10
        gain[6:14] = torch.tensor(p[i].shape)[[3, 2, 3, 2, 3, 2, 3, 2]]  # xyxy gain

        # Match targets to anchors
        t = targets * gain
        if nt:
            # Matches
            r = t[:, :, 4:6] / anchors[:, None]  # wh ratio
            j = torch.max(r, 1. / r).max(2)[0] < model.hyp['anchor_t']  # compare
            # j = wh_iou(anchors, t[:, 4:6]) > model.hyp['iou_t']  # iou(3,n)=wh_iou(anchors(3,2), gwh(n,2))
            t = t[j]  # filter

            # Offsets
            gxy = t[:, 2:4]  # grid xy
            gxi = gain[[2, 3]] - gxy  # inverse
            j, k = ((gxy % 1. < g) & (gxy > 1.)).T
            l, m = ((gxi % 1. < g) & (gxi > 1.)).T
            j = torch.stack((torch.ones_like(j), j, k, l, m))
            t = t.repeat((5, 1, 1))[j]
            offsets = (torch.zeros_like(gxy)[None] + off[:, None])[j]
        else:
            t = targets[0]
            offsets = 0

        # Define
        b, c = t[:, :2].long().T  # image, class
        gxy = t[:, 2:4]  # grid xy
        gwh = t[:, 4:6]  # grid wh
        gij = (gxy - offsets).long()
        gi, gj = gij.T  # grid xy indices

        # Append
        a = t[:, 14].long()  # anchor indices
        indices.append((b, a, gj.clamp_(0, gain[3] - 1), gi.clamp_(0, gain[2] - 1)))  # image, anchor, grid indices
        tbox.append(torch.cat((gxy - gij, gwh), 1))  # box
        anch.append(anchors[a])  # anchors
        tcls.append(c)  # class

        #landmarks
        lks = t[:,6:14]
        #lks_mask = lks > 0
        #lks_mask = lks_mask.float()
        lks_mask = torch.where(lks < 0, torch.full_like(lks, 0.), torch.full_like(lks, 1.0))

        #应该是关键点的坐标除以anch的宽高才对,便于模型学习。使用gwh会导致不同关键点的编码不同,没有统一的参考标准

        lks[:, [0, 1]] = (lks[:, [0, 1]] - gij)
        lks[:, [2, 3]] = (lks[:, [2, 3]] - gij)
        lks[:, [4, 5]] = (lks[:, [4, 5]] - gij)
        lks[:, [6, 7]] = (lks[:, [6, 7]] - gij)
        # lks[:, [8, 9]] = (lks[:, [8, 9]] - gij)


        lks_mask_new = lks_mask
        lmks_mask.append(lks_mask_new)
        landmarks.append(lks)
        #print('lks: ',  lks.size())

    return tcls, tbox, indices, anch, landmarks, lmks_mask
调试代码可以发现,lks原来为实际的坐标(基于格子),也就是假设位于第三个格子,那他就是2.x。之后通过lks-gij操作得到了在这个格子的相对坐标,并把其作为参数传入LandmarkLoss中,传入损失函数。
三 代码改写
1.逻辑理清
yolov5-face检测的是五点坐标,本次改写要将五点坐标改写为四点坐标
首先找到yolo.py的 Detect类.我们不知道train.py中哪一步用到了Detect类,所以采取调试的方式查找,发现这行代码调用了Detect类(通过Model类)(92行左右)
    else:
        model = Model(opt.cfg, ch=3, nc=nc).to(device)  # create 本行核心
继续找Model类中相关的代码,
        # Build strides, anchors
        m = self.model[-1]  # Detect() 这里m读取的是yaml中的最后一层,但是还没有运行Detect类
        if isinstance(m, Detect):
            s = 128  # 2x min stride
            m.stride = torch.tensor([s / x.shape[-2] for x in self.forward(torch.zeros(1, ch, s, s))])  # forward
            m.anchors /= m.stride.view(-1, 1, 1)
            check_anchor_order(m)
            self.stride = m.stride
            self._initialize_biases()  # only run once
            # print('Strides: %s' % m.stride.tolist())
上面这段代码第二行m = self.model[-1],是读取yaml,但还没有实际调用Detect.实际调用的是
m.stride = torch....这一行,这一行通过一次前向推理获得了每层的步长。
为了方便对比,我同时运行了原版yolov5 5.0代码,用的数据集是coco128,共80个类,同样在这一行打了断点train.py中。调试可发现,face中输出的层数为48(一类),源代码为255(80类)
Detect(
  (m): ModuleList(
    (0): Conv2d(128, 255, kernel_size=(1, 1), stride=(1, 1))
    (1): Conv2d(256, 255, kernel_size=(1, 1), stride=(1, 1))
    (2): Conv2d(512, 255, kernel_size=(1, 1), stride=(1, 1))
  )
)
我们都知道,源yolo中255=3*(80+4+1),80对应类别,4对应xywh,1对应置信度
face中 48=3*(1+14+1) ,1对应置信度,14对应xywh和五个坐标点,1对应类别(这里的顺序和上面应该不同,推测进行了调序,具体原因下面会说)。因此需要首先将其更改为42=3*(1+12+1)(但是我们没有办法直接更改,只能先进行下面的步骤)
继续调试到下面这行
m.stride = torch.tensor([s / x.shape[-2] for x in self.forward(torch.zeros(1, ch, s, s))]) # forward可以看出,self.forward(torch.zeros(1, ch, s, s))是一个list,shape如下(源代码)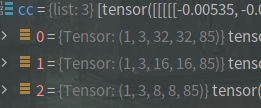
而face中这个列表如下:
torch.zeros(1, ch, s, s)是传入的tensor,对这个tensor进行一次前向推理,输出的就是上面显示的。因此我们继续找到self.forward函数对其进行修改(147行)
self.forward函数如下,我们继续找
 def forward(self, x, augment=False, profile=False, visualize=False):
        """前向推理"""
        if augment:
            return self.forward_augment(x)  # augmented inference, None
        return self.forward_once(x, profile, visualize)  # single-scale inference, train
?因为默认augment为False,所以我们先对self.forward_once(即正常的前向推理)函数进行修改。
    def forward_once(self, x, profile=False, visualize=False):
        """正常前向推理,一层一层执行"""
        y, dt = [], []  # outputs
        for m in self.model:
            if m.f != -1:  # if not from previous layer
                x = y[m.f] if isinstance(m.f, int) else [x if j == -1 else y[j] for j in m.f]  # from earlier layers

            if profile:
                # 显示模型的信息,每一层网络信息,推理速度,参数量GFLOPs等
                o = thop.profile(m, inputs=(x,), verbose=False)[0] / 1E9 * 2 if thop else 0  # FLOPs
                t = time_synchronized()
                for _ in range(10):
                    _ = m(x)
                dt.append((time_synchronized() - t) * 100)
                if m == self.model[0]:
                    logger.info(f"{'time (ms)':>10s} {'GFLOPs':>10s} {'params':>10s}  {'module'}")
                logger.info(f'{dt[-1]:10.2f} {o:10.2f} {m.np:10.0f}  {m.type}')

            x = m(x)  # run
            y.append(x if m.i in self.save else None)  # save output

            if visualize:
                # 可视化每一层网络的预测
                feature_visualization(x, m.type, m.i, save_dir=visualize)

        if profile:
            logger.info('%.1fms total' % sum(dt))
        return x
去掉一些修饰语句,代码的主要逻辑是读取model中每一层网络,然后依次执行
这段代码有一行比较难理解
 if m.f != -1:
x = y[m.f] if isinstance(m.f, int) else [x if j == -1 else y[j] for j in m.f]
在m.f != -1的条件下(不来自上一层)
如果isinstance(m.f, int)为真,则x=y[m.f];如果isinstance(m.f, int)为假,且j == -1,则x=x;如果如果isinstance(m.f, int)为假,且j != -1,则x=y[j] for j in m.f
这段代码实际执行过程是按照self.model走的,所以一切问题又回到了self.model上
self.model在113行左右定义
self.model, self.save = parse_model(deepcopy(self.yaml), ch=[ch]) # model, savelist最后发现self.model只有主干网络信息,并没有最后一层detect。也就是说想改还要回到detect模块
2.yolo.py detect模块改写
首先改变yolo.py中detect模块35行,将10改为8
self.no = nc + 5 + 8 # number of outputs per anchor65行,这里通过class_range得到y需要添加sigmold的列。在源代码中挑出了0,1,2,3,4。15这六行进行sigmold分别对应类别,然后其他的不进行sigmold直接和x相等。推测分别对应置信度,xywh和类别。list(range(15,15+self.nc))就是从15行开始,长度为类别数。(所以推测在face里类别数在后面)
因此将66行和68行的15都改为13,如下(注:如果这里不更改的话,可能对train的过程没有影响,但会在前向推理时产生影响)
                y = torch.full_like(x[i], 0)
                class_range = list(range(5)) + list(range(13,13+self.nc))
                y[..., class_range] = x[i][..., class_range].sigmoid()
                y[..., 5:13] = x[i][..., 5:13]
y[..., 5:13] = x[i][..., 5:13]源代码y最后一维长度为16=(1+14+1) ,1对应置信度14对应xywh和五个坐标点,1对应类别。新代码有4个类,应该为17=(4+12+1)
注释掉detect模块中的79行(这条和上面一条应该只对detect有影响)
y[..., 13:15] = y[..., 13:15] * self.anchor_grid[i] + self.grid[i].to(x[i].device) * self.stride[i]# landmark x5 y5
3.loss.py 改写
将然后找到损失函数loss.py,第160行开始,代码段如下,将所有15改成13,注释掉plandmarks,16改成14。共将三个15改为13,注释一条
            # Classification
            if model.nc > 1:  # cls loss (only if multiple classes)
                t = torch.full_like(ps[:, 13:], cn, device=device)  # targets
                t[range(n), tcls[i]] = cp
                lcls += BCEcls(ps[:, 13:], t)  # BCE

            # Append targets to text file
            # with open('targets.txt', 'a') as file:
            #     [file.write('%11.5g ' * 4 % tuple(x) + '\n') for x in torch.cat((txy[i], twh[i]), 1)]

            #landmarks loss
            #plandmarks = ps[:,5:15].sigmoid() * 8. - 4.
            plandmarks = ps[:,5:13]

            plandmarks[:, 0:2] = plandmarks[:, 0:2] * anchors[i] #缩放回原来的坐标
            plandmarks[:, 2:4] = plandmarks[:, 2:4] * anchors[i]
            plandmarks[:, 4:6] = plandmarks[:, 4:6] * anchors[i]
            plandmarks[:, 6:8] = plandmarks[:, 6:8] * anchors[i]
            # plandmarks[:, 8:10] = plandmarks[:,8:10] * anchors[i]
202行17改成15
gain = torch.ones(15, device=targets.device)212行,将16改为14,同时后面去掉一个3,2
    for i in range(det.nl):
        anchors = det.anchors[i]
        gain[2:6] = torch.tensor(p[i].shape)[[3, 2, 3, 2]]  # xyxy gain
        #landmarks 10
        gain[6:14] = torch.tensor(p[i].shape)[[3, 2, 3, 2, 3, 2, 3, 2]]  # xyxy gain
247行,将a = t[:, 16]的16改为14
        a = t[:, 14].long()  # anchor indices
        indices.append((b, a, gj.clamp_(0, gain[3] - 1), gi.clamp_(0, gain[2] - 1)))  # image, anchor, grid indices
        tbox.append(torch.cat((gxy - gij, gwh), 1))  # box
        anch.append(anchors[a])  # anchors
        tcls.append(c)  # class
254行,将lks = t[:, 16]的16改为14
        #landmarks
        lks = t[:,6:14]
        #lks_mask = lks > 0
        #lks_mask = lks_mask.float()
        lks_mask = torch.where(lks < 0, torch.full_like(lks, 0.), torch.full_like(lks, 1.0))
261行,将下面的lks[:, [8, 9]] = (lks[:, [8, 9]] - gij)注释掉
        lks[:, [0, 1]] = (lks[:, [0, 1]] - gij)
        lks[:, [2, 3]] = (lks[:, [2, 3]] - gij)
        lks[:, [4, 5]] = (lks[:, [4, 5]] - gij)
        lks[:, [6, 7]] = (lks[:, [6, 7]] - gij)
        # lks[:, [8, 9]] = (lks[:, [8, 9]] - gij)
上面这些改完之后运行,在219行
t = targets * gain报错:RuntimeError: The size of tensor a (17) must match the size of tensor b (15) at non-singleton dimension 2
经检查发现,targets得到的是17维向量(在204行从16加到17维,如下)
targets = torch.cat((targets.repeat(na, 1, 1), ai[:, :, None]), 2) # append anchor indicestargets是直接传入196行定义的build_targets函数的15维tensor
而build_targets函数在compute_loss函数中调用(119行),也就是说targets先被传入compute_loss函数,
继续追查发现,compute_loss函数在train.py第290行被调用
loss, loss_items = compute_loss(pred, targets.to(device), model) # loss scaled by batch_size
继续向上找,第一次出现有意义的targets是在第264行(for那一行),也就是说targets源头为pbar;而pbar源头为dataloader(259行,即下图第一行)
        pbar = enumerate(dataloader)
        logger.info(('\n' + '%10s' * 9) % ('Epoch', 'gpu_mem', 'box', 'obj', 'cls', 'landmark', 'total', 'targets', 'img_size'))
        if rank in [-1, 0]:
            pbar = tqdm(pbar, total=nb)  # progress bar
        optimizer.zero_grad()
        for i, (imgs, targets, paths, _) in pbar:  # batch -------------------------------------------------------------
            ni = i + nb * epoch  # number integrated batches (since train start)
            imgs = imgs.to(device, non_blocking=True).float() / 255.0  # uint8 to float32, 0-255 to 0.0-1.0
dataloader由187行函数create_dataloader引入,这个函数定义在face_datasets.py中
    dataloader, dataset = create_dataloader(train_path, imgsz, batch_size, gs, opt,
                                            hyp=hyp, augment=True, cache=opt.cache_images, rect=opt.rect, rank=rank,
                                            world_size=opt.world_size, workers=opt.workers,
                                            image_weights=opt.image_weights)
也就是说,想获得正确结果,我们还要去face_datasets.py进行修改
4.face_datasets.py修改
????????之前我在修改的时候,因为一些意外,忘记修改widerface.yaml,所以可能有些地方没有报错。在对其修改之后,在_methods.py39行出现报错:ValueError: zero-size array to reduction operation maximum which has no identity。
????????推测是数据集引入的格式和detect模块改完后的格式不同引起的。不管怎么说,我们还是要修改face_datasets.py。(create_dataloader函数定义在第58行),而实际导入数据集分为两部分,dataset和dataloader,这两个量分别用到了LoadFaceImagesAndLabels函数(如下)
 with torch_distributed_zero_first(rank):
        dataset = LoadFaceImagesAndLabels(path, imgsz, batch_size,
                                      augment=augment,  # augment images
                                      hyp=hyp,  # augmentation hyperparameters
                                      rect=rect,  # rectangular training
                                      cache_images=cache,
                                      single_cls=opt.single_cls,
                                      stride=int(stride),
                                      pad=pad,
                                      image_weights=image_weights,
                                    )
和loader函数(如下)
dataloader = loader(dataset,
                        batch_size=batch_size,
                        num_workers=nw,
                        sampler=sampler,
                        pin_memory=True,
                        collate_fn=LoadFaceImagesAndLabels.collate_fn4 if quad else LoadFaceImagesAndLabels.collate_fn)
但loader函数有一个参数就是之前得到的dataset,所以应该进入LoadFaceImagesAndLabels这段代码进行修改就可以。
追查这段代码,发现最新引入15的量来自164行,代码段如下
labels, shapes = zip(*cache.values())也就是cache引入的。?但是正常cache的dict中应该包含了所有读取到内容的,但这里的cache得到的全是没有对应txt文件的照片,说明cache引入出现了问题
????????检查后发现,是154行处cache_labels()函数得到的文件不正确(如果你之前运行过,那么要调试找到cache文件所在目录并删除这个文件,否则运行时系统会默认优先寻找已经存在的cache文件)
        else:
            cache = self.cache_labels(cache_path)  # cache
?发现定义在216行的cache_labels()函数,存在一个参数检查,会直接忽略掉读入数据长度不为15的数据。所以我们现在的任务是修改cache_labels()函数,如下:
   def cache_labels(self, path=Path('./labels.cache')):
        # Cache dataset labels, check images and read shapes
        x = {}  # dict
        nm, nf, ne, nc = 0, 0, 0, 0  # number missing, found, empty, duplicate
        pbar = tqdm(zip(self.img_files, self.label_files), desc='Scanning images', total=len(self.img_files))
        for i, (im_file, lb_file) in enumerate(pbar):
            try:
                # verify images
                im = Image.open(im_file)
                im.verify()  # PIL verify
                shape = exif_size(im)  # image size
                assert (shape[0] > 9) & (shape[1] > 9), 'image size <10 pixels'

                # verify labels
                if os.path.isfile(lb_file):
                    nf += 1  # label found
                    with open(lb_file, 'r') as f:
                        l = np.array([x.split() for x in f.read().strip().splitlines()], dtype=np.float32)  # labels
                    if len(l):
                        assert l.shape[1] == 15, 'labels require 15 columns each'
                        assert (l >= -1).all(), 'negative labels'
                        assert (l[:, 1:] <= 1).all(), 'non-normalized or out of bounds coordinate labels'
                        assert np.unique(l, axis=0).shape[0] == l.shape[0], 'duplicate labels'
                    else:
                        ne += 1  # label empty
                        l = np.zeros((0, 15), dtype=np.float32)
                else:
                    nm += 1  # label missing
                    l = np.zeros((0, 15), dtype=np.float32)
                x[im_file] = [l, shape]
            except Exception as e:
                nc += 1
                print('WARNING: Ignoring corrupted image and/or label %s: %s' % (im_file, e))

            pbar.desc = f"Scanning '{path.parent / path.stem}' for images and labels... " \
                        f"{nf} found, {nm} missing, {ne} empty, {nc} corrupted"

        if nf == 0:
            print(f'WARNING: No labels found in {path}. See {help_url}')

        x['hash'] = get_hash(self.label_files + self.img_files)
        x['results'] = [nf, nm, ne, nc, i + 1]
        torch.save(x, path)  # save for next time
        logging.info(f"New cache created: {path}")
        return x
首先将235行的15改为13
assert l.shape[1] == 13, 'labels require 13 columns each'接下来将下面的两个else内的15页改为13
else:
ne += 1 # label empty
l = np.zeros((0, 13), dtype=np.float32)
else:
nm += 1 # label missing
l = np.zeros((0, 13), dtype=np.float32)
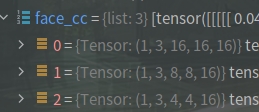
x[im_file] = [l, shape]修改后,程序运行正常,cache输出为正常内容,如下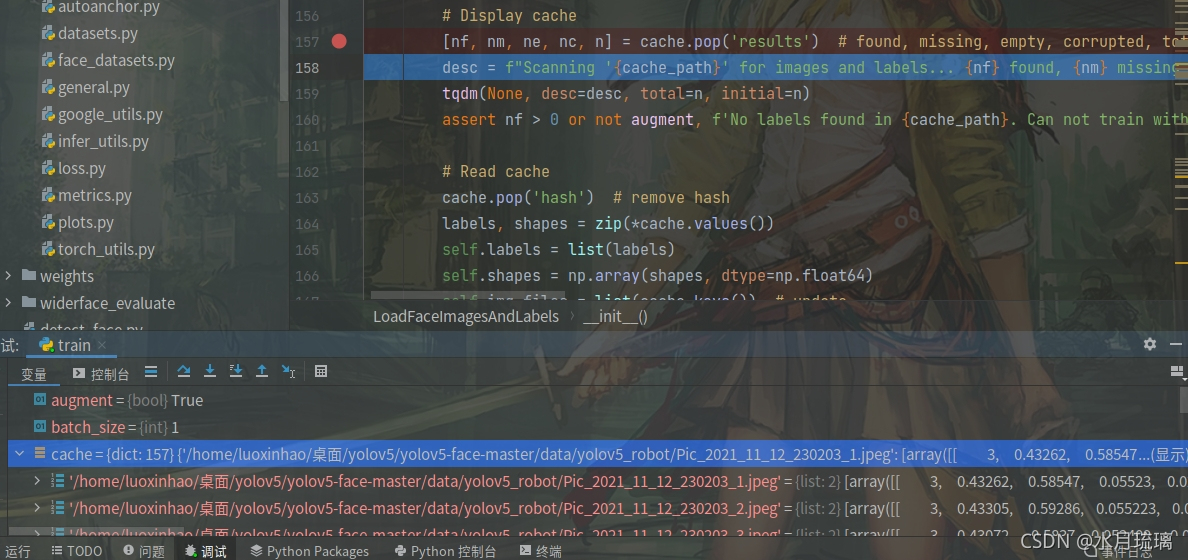
????????继续运行,在train.py第193行报错:AssertionError: Label class 5 exceeds nc=1 in data/widerface.yaml. Possible class labels are 0-0
assert mlc < nc, 'Label class %g exceeds nc=%g in %s. Possible class labels are 0-%g' % (mlc, nc, opt.data, nc - 1)????????检查发现,mlc的值为3.0,而正常mlc的值为0.0,检查数据集发现,我的数据集由于标注错误出现了3(那个类别名称是3,但是类的编号,也就是txt文件中应该是0)。修改后此处不报错
(face_datasets.py第288处,有个else判断,当不进行mosaic数据增强时走此路。但本次训练时我们进行了数据增强,这里先不对这条支路进行修改。)
??????? 继续调试,程序运行到load_mosaic_face函数。我们将474,475行注释掉,如下
# labels[:, 13] = np.array(x[:, 13] > 0, dtype=np.int32) * (w * x[:, 13] + padw) + (np.array(x[:, 13] > 0, dtype=np.int32) - 1)
# labels[:, 14] = np.array(x[:, 14] > 0, dtype=np.int32) * (h * x[:, 14] + padh) + (np.array(x[:, 14] > 0, dtype=np.int32) - 1)
(解释:这段代码的意思推测是得到关键点的xy实际像素坐标)????????
继续调试,代码段第479行如下:
    if len(labels4):
        labels4 = np.concatenate(labels4, 0)
        np.clip(labels4[:, 1:5], 0, 2 * s, out=labels4[:, 1:5])  # use with random_perspective
        # img4, labels4 = replicate(img4, labels4)  # replicate

        #landmarks
        labels4[:, 5:] = np.where(labels4[:, 5:] < 0, -1, labels4[:, 5:])
        labels4[:, 5:] = np.where(labels4[:, 5:] > 2 * s, -1, labels4[:, 5:])

        labels4[:, 5] = np.where(labels4[:, 6] == -1, -1, labels4[:, 5])
        labels4[:, 6] = np.where(labels4[:, 5] == -1, -1, labels4[:, 6])

        labels4[:, 7] = np.where(labels4[:, 8] == -1, -1, labels4[:, 7])
        labels4[:, 8] = np.where(labels4[:, 7] == -1, -1, labels4[:, 8])

        labels4[:, 9] = np.where(labels4[:, 10] == -1, -1, labels4[:, 9])
        labels4[:, 10] = np.where(labels4[:, 9] == -1, -1, labels4[:, 10])

        labels4[:, 11] = np.where(labels4[:, 12] == -1, -1, labels4[:, 11])
        labels4[:, 12] = np.where(labels4[:, 11] == -1, -1, labels4[:, 12])

        # labels4[:, 13] = np.where(labels4[:, 14] == -1, -1, labels4[:, 13])
        # labels4[:, 14] = np.where(labels4[:, 13] == -1, -1, labels4[:, 14])
(解释:np.where(condition, x, y)函数用法:满足条件(condition),输出x,不满足输出y。
所以这段代码的意思,首先将第五位以后的值,如果是超过范围[小于0或者大于2s(推测为图片边长)],就直接改为-1;之后8行的作用是:如果一个点(x,y两个数据)有一个为-1,则两个都置为-1)
继续调试,程序在504行,调用函数random_perspective()过程中报错。追查这个函数,发现如下段落出现问题(targets只有十三列,这里调整targets元素位置时出现了13,14引发报错),修改办法为将这一行最后的13,14去掉;同时因为5个点变成了四个点,因此n后面的乘数要相应减1(这里一个n对应一个坐标而不是一个值),而最下面一行的reshape(n,18)要改为reshape(n,16),如下:
    if n:
        # warp points
        #xy = np.ones((n * 4, 3))
        xy = np.ones((n * 8, 3))
        xy[:, :2] = targets[:, [1, 2, 3, 4, 1, 4, 3, 2, 5, 6, 7, 8, 9, 10, 11, 12]].reshape(n * 8, 2)  # x1y1, x2y2, x1y2, x2y1
        xy = xy @ M.T  # transform
        if perspective:
            xy = (xy[:, :2] / xy[:, 2:3]).reshape(n, 16)  # rescale
        else:  # affine
            xy = xy[:, :2].reshape(n, 16)
继续向下看,666行开始,landmark的长度也要相应更改。之后的逻辑与前面类似,这里的landmark是乘上了mask之后的,也就是去除了有遮挡的点(多为口罩),然后用上面相同的逻辑变为-1。更改后代码如下:
        landmarks = xy[:, [8, 9, 10, 11, 12, 13, 14, 15]]
        mask = np.array(targets[:, 5:] > 0, dtype=np.int32)
        landmarks = landmarks * mask
        landmarks = landmarks + mask - 1

        landmarks = np.where(landmarks < 0, -1, landmarks)
        landmarks[:, [0, 2, 4, 6]] = np.where(landmarks[:, [0, 2, 4, 6]] > width, -1, landmarks[:, [0, 2, 4, 6]])
        landmarks[:, [1, 3, 5, 7]] = np.where(landmarks[:, [1, 3, 5, 7]] > height, -1,landmarks[:, [1, 3, 5, 7]])

        landmarks[:, 0] = np.where(landmarks[:, 1] == -1, -1, landmarks[:, 0])
        landmarks[:, 1] = np.where(landmarks[:, 0] == -1, -1, landmarks[:, 1])

        landmarks[:, 2] = np.where(landmarks[:, 3] == -1, -1, landmarks[:, 2])
        landmarks[:, 3] = np.where(landmarks[:, 2] == -1, -1, landmarks[:, 3])

        landmarks[:, 4] = np.where(landmarks[:, 5] == -1, -1, landmarks[:, 4])
        landmarks[:, 5] = np.where(landmarks[:, 4] == -1, -1, landmarks[:, 5])

        landmarks[:, 6] = np.where(landmarks[:, 7] == -1, -1, landmarks[:, 6])
        landmarks[:, 7] = np.where(landmarks[:, 6] == -1, -1, landmarks[:, 7])

        # landmarks[:, 8] = np.where(landmarks[:, 9] == -1, -1, landmarks[:, 8])
        # landmarks[:, 9] = np.where(landmarks[:, 8] == -1, -1, landmarks[:, 9])

        targets[:,5:] = landmarks

        xy = np.concatenate((x.min(1), y.min(1), x.max(1), y.max(1))).reshape(4, n).T
????????更改完这些后,mosaic部分的修改完成
????????继续调试,程序来到face.datasets.py第348行,这里要对坐标进行转换。首先类似上面的,将五点对应参数改为四点,之后由于我的四点模型并不是对称的,所以将383行下面一小段直接注释掉。更改后如下:
        if nL:
            labels[:, 1:5] = xyxy2xywh(labels[:, 1:5])  # convert xyxy to xywh
            labels[:, [2, 4]] /= img.shape[0]  # normalized height 0-1
            labels[:, [1, 3]] /= img.shape[1]  # normalized width 0-1

            labels[:, [5, 7, 9, 11]] /= img.shape[1]  # normalized landmark x 0-1
            labels[:, [5, 7, 9, 11]] = np.where(labels[:, [5, 7, 9, 11]] < 0, -1, labels[:, [5, 7, 9, 11]])
            labels[:, [6, 8, 10, 12]] /= img.shape[0]  # normalized landmark y 0-1
            labels[:, [6, 8, 10, 12]] = np.where(labels[:, [6, 8, 10, 12]] < 0, -1, labels[:, [6, 8, 10, 12]])

        if self.augment:
            # flip up-down
            if random.random() < hyp['flipud']:
                img = np.flipud(img)
                if nL:
                    labels[:, 2] = 1 - labels[:, 2]

                    labels[:, 6] = np.where(labels[:,6] < 0, -1, 1 - labels[:, 6])
                    labels[:, 8] = np.where(labels[:, 8] < 0, -1, 1 - labels[:, 8])
                    labels[:, 10] = np.where(labels[:, 10] < 0, -1, 1 - labels[:, 10])
                    labels[:, 12] = np.where(labels[:, 12] < 0, -1, 1 - labels[:, 12])
                    # labels[:, 14] = np.where(labels[:, 14] < 0, -1, 1 - labels[:, 14])

            # flip left-right
            if random.random() < hyp['fliplr']:
                img = np.fliplr(img)
                if nL:
                    labels[:, 1] = 1 - labels[:, 1]

                    labels[:, 5] = np.where(labels[:, 5] < 0, -1, 1 - labels[:, 5])
                    labels[:, 7] = np.where(labels[:, 7] < 0, -1, 1 - labels[:, 7])
                    labels[:, 9] = np.where(labels[:, 9] < 0, -1, 1 - labels[:, 9])
                    labels[:, 11] = np.where(labels[:, 11] < 0, -1, 1 - labels[:, 11])
                    # labels[:, 13] = np.where(labels[:, 13] < 0, -1, 1 - labels[:, 13])

                    # #左右镜像的时候,左眼、右眼, 左嘴角、右嘴角无法区分, 应该交换位置,便于网络学习
                    # eye_left = np.copy(labels[:, [5, 6]])
                    # mouth_left = np.copy(labels[:, [11, 12]])
                    # labels[:, [5, 6]] = labels[:, [7, 8]]
                    # labels[:, [7, 8]] = eye_left
                    # labels[:, [11, 12]] = labels[:, [13, 14]]
                    # labels[:, [13, 14]] = mouth_left

        labels_out = torch.zeros((nL, 14))
继续运行,发现到face_datasets.py第325行处报错(没有进行数据增强的支线)。推测为这条支线是test时走的,将对应四行注释掉,如下
                # labels[:, 13] = np.array(x[:, 13] > 0, dtype=np.int32) * (ratio[0] * w * x[:, 13] + pad[0]) + (
                #     np.array(x[:, 13] > 0, dtype=np.int32) - 1)
                # labels[:, 14] = np.array(x[:, 14] > 0, dtype=np.int32) * (ratio[1] * h * x[:, 14] + pad[1]) + (
                #     np.array(x[:, 14] > 0, dtype=np.int32) - 1)
更改后,可以正常进行训练(由于我添加了类的数目,从一个类变成4个,因此model最后一层变为51)
5.train.py修改
上述修改完成之后,程序可以正常训练,一切显得如此美好,但是在训练结束的时候,程序突然报错(AssertionError: No results.txt files found in /home/luoxinhao/桌面/yolov5/新版yolov5-face-master/runs/train/exp114, nothing to plot.),主要原因是train.py 400行
plot_results(save_dir=save_dir) # save as results.png语句报错。这行语句要根据某个.txt文件进行绘图,但是并没有找到这个文件。
??????? 因为这行语句并不重要,我就没有仔细分析问题,在我索性注释掉这行之后,发现了一个更麻烦的问题.......并没有找到保存的权重。查找原因后发现是train.py第331行
if rank in [-1, 0] and epoch > 20: #只有在满足如上条件时,才会保存代码,但我只训练了十轮,系统默认不保存。于是我将and epoch > 20 部分注释掉,程序开始执行保存模型的部分,代码段如下:
            if ema:
                ema.update_attr(model, include=['yaml', 'nc', 'hyp', 'gr', 'names', 'stride', 'class_weights'])
            final_epoch = epoch + 1 == epochs
            if not opt.notest or final_epoch:  # Calculate mAP
                # results, maps, times = test.test(opt.data,
                #                                  batch_size=total_batch_size,
                #                                  imgsz=imgsz_test,
                #                                  model=ema.ema,
                #                                  single_cls=opt.single_cls,
                #                                  dataloader=testloader,
                #                                  save_dir=save_dir,
                #                                  plots=False,
                #                                  log_imgs=opt.log_imgs if wandb else 0)
                print("hello")

            # Write
            with open(results_file, 'a') as f:
                f.write(s + '%10.4g' * 7 % results + '\n')  # P, R, mAP@.5, mAP@.5-.95, val_loss(box, obj, cls)
            if len(opt.name) and opt.bucket:
                os.system('gsutil cp %s gs://%s/results/results%s.txt' % (results_file, opt.bucket, opt.name))

            # Log
            tags = ['train/box_loss', 'train/obj_loss', 'train/cls_loss',  # train loss
                    'metrics/precision', 'metrics/recall', 'metrics/mAP_0.5', 'metrics/mAP_0.5:0.95',
                    'val/box_loss', 'val/obj_loss', 'val/cls_loss',  # val loss
                    'x/lr0', 'x/lr1', 'x/lr2']  # params
            for x, tag in zip(list(mloss[:-1]) + list(results) + lr, tags):
                if tb_writer:
                    tb_writer.add_scalar(tag, x, epoch)  # tensorboard
                if wandb:
                    wandb.log({tag: x})  # W&B

            # Update best mAP
            fi = fitness(np.array(results).reshape(1, -1))  # weighted combination of [P, R, mAP@.5, mAP@.5-.95]
            if fi > best_fitness:
                best_fitness = fi

            # Save model
            save = (not opt.nosave) or (final_epoch and not opt.evolve)
            if save:
                with open(results_file, 'r') as f:  # create checkpoint
                    ckpt = {'epoch': epoch,
                            'best_fitness': best_fitness,
                            'training_results': f.read(),
                            'model': ema.ema,
                            'optimizer': None if final_epoch else optimizer.state_dict(),
                            'wandb_id': wandb_run.id if wandb else None}

                # Save last, best and delete
                torch.save(ckpt, last)
                if best_fitness == fi:
                    torch.save(ckpt, best)
                del ckpt
        # end epoch ----------------------------------------------------------------------------------------------------
    # end training
??????? 于是,新的问题出现了:程序在第337行(上述代码test.test行)报错:RuntimeError: CUDA error: device-side assert triggered
CUDA kernel errors might be asynchronously reported at some other API call,so the stacktrace below might be incorrect.
For debugging consider passing CUDA_LAUNCH_BLOCKING=1.
可能是因为test文件需要进行一些更改,也可能是test的数据集格式不对,但由于时间紧迫,我先将test相关代码注释掉,如上。此时程序(姑且)正常运行并保存了权重模型。
6.test.py修改
????????首先在第125行
       for si, pred in enumerate(output):
            pred = torch.cat((pred[:, :5], pred[:, 13:]), 1) # throw landmark in thresh
            labels = targets[targets[:, 0] == si, 1:]
            nl = len(labels)
            tcls = labels[:, 0].tolist() if nl else []  # target class
            path = Path(paths[si])
            seen += 1
????????这里要将关键点以外的结果拼接起来,但是关键点的数目被咱们改成了4个,所以这里的15也要改为13,如上图
7.detect_face.py修改
执行detect_face.py,可能会出现如下报错:
?UserWarning: Named tensors and all their associated APIs are an experimental feature and subject to change. Please do not use them for anything important until they are released as stable. (Triggered internally at? /opt/conda/conda-bld/pytorch_1623448278899/work/c10/core/TensorImpl.h:1156.)
? return torch.max_pool2d(input, kernel_size, stride, padding, dilation, ceil_mode)
这个报错目测影响不大,不用管;
之后在是59行:因为我们改为了四点模型,所以绘制部分也要进行更改。将clors中五个颜色的点改为4个,并将下面的循环改为range(4),如下
    clors = [(255,0,0),(0,255,0),(0,0,255),(255,255,0)]

    for i in range(4):
        point_x = int(landmarks[2 * i] * w)
        point_y = int(landmarks[2 * i + 1] * h)
        cv2.circle(img, (point_x, point_y), tl+1, clors[i], -1)