关于opencv的学习是基于vs2017和opencv-4.5.4-vc14_vc15的环境之下。
在vs中配置opencv
参考书籍: OpenCV计算机视觉编程攻略(第3版)
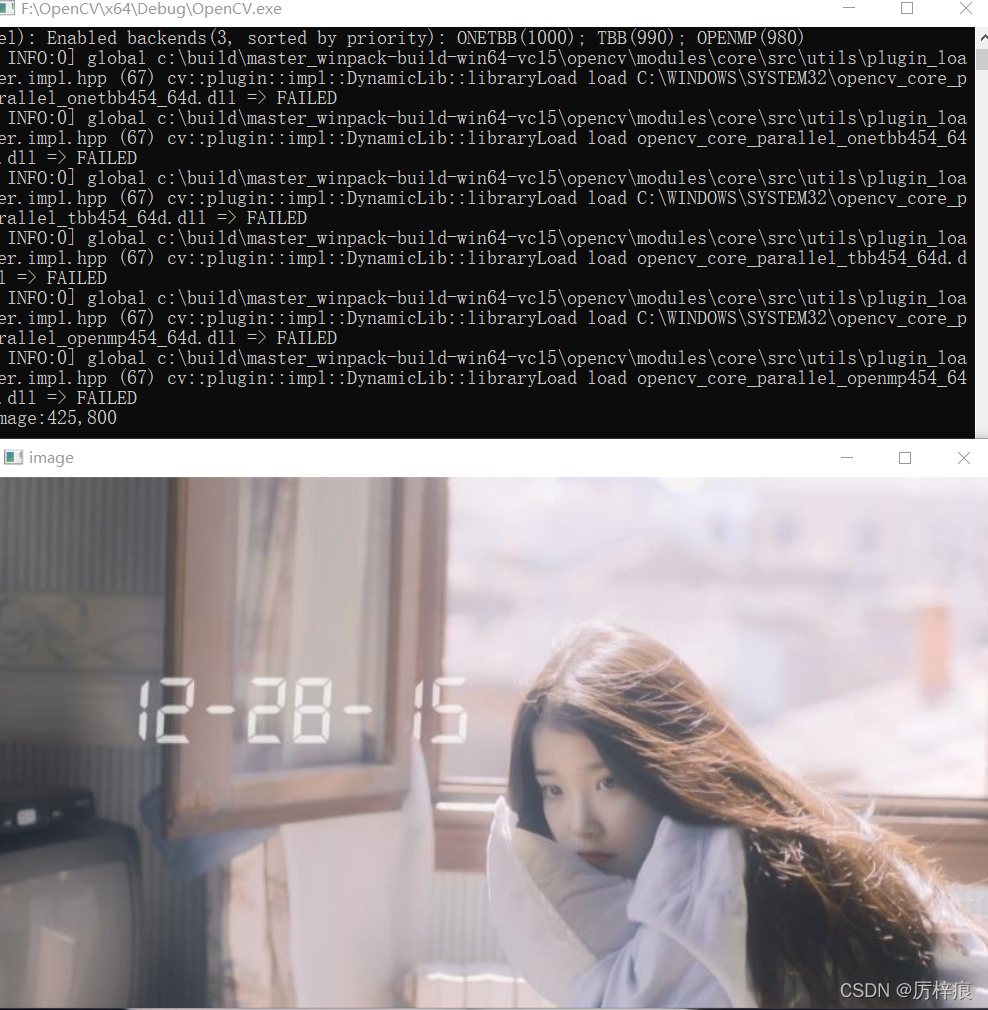
显示图片代码:
#include<opencv2/core.hpp> /*包含库的核心功能*/
#include<opencv2/imgproc.hpp> /*包括主要的图像处理函数*/
#include<opencv2/highgui.hpp> /*提供了读写图像和视频的函数以及一些用户交互函数*/
#include<iostream>
using namespace std;
using namespace cv;

Mat image_show(const char*image_path)
{
	//从文件中读入图像
	Mat img = imread(image_path, 1);

	//如果读入图像失败
	if (img.empty())
	{
		cerr << "Can not load image:" << image_path << endl;
		//fprintf(stderr, "Can not load image %s\n", image_path);
		abort();//异常退出
	}
	//显示图像
	imshow("image", img);
	cout << "image:" << img.rows << "," << img.cols << endl;
	//此函数等待按键,按键盘任意键就返回
	waitKey(0);
	/*官方解释是highgui
	*没有给imshow绘制处理的时间。
	*需要在imshow添加waitKey()
	*waitKey()单位是ms*/
	return img;
}
int main()
{
	const char* imagename = "iu.jpg";//此处为你自己的图片路径
	image_show(imagename);
	return 0;
}
显示结果:

Mat imread( const String& filename, int flags = IMREAD_COLOR ),参数flag的取值
//! Imread flags
enum ImreadModes {
       IMREAD_UNCHANGED            = -1, //!< If set, return the loaded image as is (with alpha channel, otherwise it gets cropped). Ignore EXIF orientation.
       //返回加载的图像的原样(带alpha通道,否则会被裁剪)。忽略EXIF方向。

       IMREAD_GRAYSCALE            = 0,  //!< If set, always convert image to the single channel grayscale image (codec internal conversion).
       //始终将图像转换为单通道灰度图像(编解码器内部转换)。

       IMREAD_COLOR                = 1,  //!< If set, always convert image to the 3 channel BGR color image.
       //始终将图像转换为3通道BGR彩色图像。

       IMREAD_ANYDEPTH             = 2,  //!< If set, return 16-bit/32-bit image when the input has the corresponding depth, otherwise convert it to 8-bit.
       //当输入的图像具有相应的深度时,返回16位/32位图像,否则将其转换为8位。

       IMREAD_ANYCOLOR             = 4,  //!< If set, the image is read in any possible color format.
       //图像以任何可能的颜色格式读取。

       IMREAD_LOAD_GDAL            = 8,  //!< If set, use the gdal driver for loading the image.
       //使用gdal驱动程序加载图像。

       IMREAD_REDUCED_GRAYSCALE_2  = 16, //!< If set, always convert image to the single channel grayscale image and the image size reduced 1/2.
       //始终将图像转换为单通道灰度图像,并将图像尺寸缩小1/2。

       IMREAD_REDUCED_COLOR_2      = 17, //!< If set, always convert image to the 3 channel BGR color image and the image size reduced 1/2.
       //始终将图像转换为3通道BGR彩色图像,并将图像尺寸缩小1/2。

       IMREAD_REDUCED_GRAYSCALE_4  = 32, //!< If set, always convert image to the single channel grayscale image and the image size reduced 1/4.
       IMREAD_REDUCED_COLOR_4      = 33, //!< If set, always convert image to the 3 channel BGR color image and the image size reduced 1/4.
       IMREAD_REDUCED_GRAYSCALE_8  = 64, //!< If set, always convert image to the single channel grayscale image and the image size reduced 1/8.
       IMREAD_REDUCED_COLOR_8      = 65, //!< If set, always convert image to the 3 channel BGR color image and the image size reduced 1/8.

       IMREAD_IGNORE_ORIENTATION   = 128 //!< If set, do not rotate the image according to EXIF's orientation flag.
       //不根据EXIF的方向标志旋转图像。
     };
注意: opencv读取彩色通道的顺序是BGR
OpenCV计算机视觉编程攻略(第3版)第1章和第2章部分代码内容
#include<opencv2/core.hpp> /*包含库的核心功能*/
#include<opencv2/imgproc.hpp> /*包括主要的图像处理函数*/
#include<opencv2/highgui.hpp> /*提供了读写图像和视频的函数以及一些用户交互函数*/
#include<iostream>
#include<random>
using namespace std;

/*
*函数名:image_show(const char*image_path)
*功能:通过图片路径显示图片的1/2
*参数:
*@parm1:图片路径
*返回:如果失败程序停止报错,如果成功则返回存储图片的Mat格式
*/
cv::Mat image_show(const char*image_path)
{
	//从文件中读入图像
	cv::Mat img = cv::imread(image_path, cv::IMREAD_REDUCED_COLOR_2); //始终将图像转换为3通道BGR彩色图像,并将图像尺寸缩小1/2。

	//如果读入图像失败
	if (img.empty())
	{
		cerr << "Can not load image:" << image_path << endl;
		//fprintf(stderr, "Can not load image %s\n", image_path);
		abort();//异常退出
	}
	//显示图像
	imshow("image", img);
	cout << "image:" << img.rows << "," << img.cols << endl;
	//此函数等待按键,按键盘任意键就返回
	cv::waitKey(0);
	/*官方解释是highgui
	*没有给imshow绘制处理的时间。
	*需要在imshow添加waitKey()
	*waitKey()单位是ms*/
	return img;
}

/*
*函数名:onMouse(int event, int x, int y, int flags, void *param)
*功能:与图像窗口建立关联,将显示图像的地址传给函数,每当遇到点击
*鼠标事件时,控制台显示对应像素的值。(这里默认是灰度图)
*参数:
*@parm1:触发回调函数的鼠标事件的类型
*@parm2,@parm3:事件发生时鼠标的位置
*@parm4:事件发生时鼠标按下了哪个键
*@parm5:指向任意对象的指针,作为附加的参数传给调用函数
*/
void onMouse(int event, int x, int y, int flags, void *param)
{
	cv::Mat *im = reinterpret_cast<cv::Mat*>(param);
	switch (event)
	{
	case cv::EVENT_LBUTTONDOWN://鼠标左键按下
		cout << "at(" << x << "," << y << ")value is:" << static_cast<int>(im->at<uchar>(cv::Point(x, y))) << endl;
		break;
	}
}

/*
*函数名:salt(cv::Mat image, int n)
*功能:椒盐噪声,随机选择一些像素将它们的颜色换成黑色或白色
*参数:
*@parm1:输入图像
*@parm2:修改像素值数量
*/
void salt(cv::Mat image, int n)
{
	//c++11随机生成器
	default_random_engine generator;
	uniform_int_distribution<int>randomRow(0, image.rows - 1);
	uniform_int_distribution<int>randomCol(0, image.cols - 1);

	int i, j;
	for (int k = 0; k < n; ++k)
	{
		i = randomCol(generator);
		j = randomRow(generator);
		if (image.type() == CV_8UC1)
		{
			//灰度图
			image.at<uchar>(j, i) = 255;
		}
		else if (image.type() == CV_8UC3) {
			//彩色图
			image.at<cv::Vec3b>(j, i)[0] = 255;
			image.at<cv::Vec3b>(j, i)[1] = 255;
			image.at<cv::Vec3b>(j, i)[2] = 255;
		}
	}
}

/*
*函数名:colorReduce(cv::Mat image, int div = 64)
*功能:减少图像中颜色的数量
*参数:
*@parm1:输入图像
*@parm2:减色因子
*/
void colorReduce(cv::Mat image, int div = 64)
{
	int n1 = image.rows;//行数
	int nc = image.cols*image.channels();//获得每行的像素个数
	for (int j = 0; j < n1; ++j)
	{
		//取得行j的地址
		uchar*data = image.ptr<uchar>(j);

		for (int i = 0; i < nc; ++i)
		{
			//处理每个像素
			/*这里data[i] = data[i] / div * div + div / 2;
			*就已经将像素值固定在一个范围,将像素值相差不超过div的
			*都取同一个平均值,就减少了整个图像的颜色种类数
			*/
			data[i] = data[i] / div * div + div / 2;/*等价写法:*data++=*data/div*div+div/2;*/


			/*
			*其他减色算法:
			*【1】取模运算:data[i]=data[i]%div+div/2;
			*【2】位运算:
			*	uchar mask=0xff<<n;
			*	*data &=mask;
			*	*data++ +=div>>1;
			*/
		}
	}
}

/*
*函数名:void sharpen(const cv::Mat &image, cv::Mat &result)
*功能:基于拉普拉斯算子的图像锐化函数
*参数:
*@parm1:输入图像
*@parm2:输出图像
*/
void sharpen(const cv::Mat &image, cv::Mat &result)
{
	//分配图像数据
	result.create(image.size(), image.type());
	int nchannels = image.channels();//获得通道数

	/*计算锐化的数值,5*current-left-right-up-down;*/
	//处理所有行,(除了第一行和最后一行)
	for (int j = 1; j < image.rows - 1; ++j)
	{
		const uchar*previous = image.ptr<const uchar>(j - 1);//上一行
		const uchar*current = image.ptr<const uchar>(j);//当前行
		const uchar*next = image.ptr<const uchar>(j+1);//下一行

		uchar*output = result.ptr<uchar>(j);//输出行

		for (int i = nch0annels; i < (image.cols - 1)*nchannels; ++i)
		{
			//应用锐化算子
			*output++ = cv::saturate_cast<uchar>(5 * current[i] - current[i - nchannels]
				- current[i + nchannels] - previous[i] - next[i]);

			/*cv::saturate_cast<uchar>把结果调整到8位无符号数的范围内*/
		}
	}
	//把未处理的像素设为0
	result.row(0).setTo(cv::Scalar(0));
	result.row(result.rows-1).setTo(cv::Scalar(0));
	result.col(0).setTo(cv::Scalar(0));
	result.col(result.cols-1).setTo(cv::Scalar(0));
}

/*
*函数名:void sharpen2D(const cv::Mat &image, cv::Mat &result)
*功能:基于拉普拉斯算子的图像锐化函数,使用3*3的锐化滤波器,‘
*参数:
*@parm1:输入图像
*@parm2:输出图像
*/
void sharpen2D(const cv::Mat &image, cv::Mat &result)
{
	//制造内核,(所有入口都初始化为0)
	cv::Mat kernel(3, 3, CV_32F, cv::Scalar(0));
	//对内核赋值
	kernel.at<float>(1, 1) = 5.0;
	kernel.at<float>(0, 1) = -1.0;
	kernel.at<float>(2, 1) = -1.0;
	kernel.at<float>(1, 0) = -1.0;
	kernel.at<float>(1, 2) = -1.0;

	/*
	*	0	-1	0
	*	-1	5	-1
	*	0	-1	0
	*/

	//对图像滤波
	cv::filter2D(image, result, image.depth(), kernel);
}

int main()
{
	const char* imagename = "iu.jpg";//此处为你自己的图片路径
	cv::Mat img=image_show(imagename);

	cv::Mat result;
	//cv::flip(img, result, 0);//正数表示水平,0表示垂直,负数表示水平和垂直

	/*在图像上绘图*/
	//cv::circle(result, cv::Point(100, 100), 50, 0, 3);
	//cv::putText(result, "iu", cv::Point(100, 100), cv::FONT_HERSHEY_PLAIN, 3.0, 0, 2);

	//椒盐噪声
	/*salt(result, 200);*/

	对图片进行减色处理
	//colorReduce(img,64);


	//对图像进行锐化处理
	sharpen(img, result);
	//cv::namedWindow("output image");
	cv::imshow("sharpen image", result);

	sharpen2D(img, result);
	cv::imshow("sharpen2D image", result);
	/*每当遇到点击鼠标事件时,控制台显示对应像素的值。(这里默认是灰度图)*/
	//cv::setMouseCallback("output image", onMouse, reinterpret_cast<void*>(&result));

	cv::waitKey(0);
	return 0;
}