上一章 初识Pytorch之完整的模型套路-合在一个.py文件中 Complete model routine - in one .py file
本章是将上一章合在一起的代码,整理成更加符合可读性或者可用性的方式。
This chapter is a combination of code from the previous chapter, organized into a more readable or usable way.

注意:本次实验的训练均在谷歌免费的GPU中进行,且谷歌免费的GPU每周可以使用30个小时,别问我为什么不用自己的服务器来跑,问就是穷。
PS:The training of this experiment is carried out in Google's free GPU, and Google's free GPU can be used for 30 hours a week. Don't ask me why I don't use my own server to run, it's just poor.

下一章,将如何使用GPU(cuda)对模型进行训练与测试(或者使用GPU训练,cpu测试)。
In the next chapter, I will tell you how to use GPU (cuda) to train and test the model (or use GPU training, and cpu testing).

如果感兴趣谷歌免费的GPU如何使用,点赞或者收藏超过十个,我就出一期如何使用谷歌免费的GPU。
**1**.Ready model

对之前的LeNet_5模型进行了优化,加入了激活函数
The previous LeNet_5 model was optimized and activation functions were added.

LeNet_5.py

from torch import nn


class LeNet_5(nn.Module):
    def __init__(self):
        super(LeNet_5, self).__init__()
        self.model = nn.Sequential(
            # input:3@32x32
            # 6@28x28
            nn.Conv2d(in_channels=3, out_channels=6, kernel_size=5, padding=0, stride=1),
            nn.ReLU(inplace=True),
            # 6@14x14
            nn.MaxPool2d(kernel_size=2, stride=2, padding=0),
            #  16@10x10
            nn.Conv2d(in_channels=6, out_channels=16, kernel_size=5, padding=0, stride=1),
            nn.ReLU(inplace=True),
            # 16@5x5
            nn.MaxPool2d(kernel_size=2, stride=2, padding=0),
            nn.Flatten(),
            nn.Linear(16 * 5 * 5, 120),
            nn.Linear(120, 84),
            nn.Linear(84, 10),
        )

    def forward(self, x):
        x = self.model(x)
        return x
**2**.Ready train

在谷歌免费的GPU中,使用cuda进行训练
In Google's free GPU,use cuda for training.

train_GPU.py

PS:参数是我凭着感觉和设置的,没有调参,大家可以自己去调试
The parameters are set by my feeling, there is no parameter adjustment, you can debug it yourself.

from torch.utils.data import DataLoader
from LeNet_5 import *
import torchvision
import torch
from torch import nn
from torch.utils.tensorboard import SummaryWriter

# 1. torch choose cuda or cpu
if torch.cuda.is_available():
    device = torch.device("cuda")
else:
    device = torch.device("cpu")

# 2.Create SummaryWriter
writer = SummaryWriter("log_loss")

# 3.Ready dataset
train_dataset = torchvision.datasets.CIFAR10(root="data", train=True, transform=torchvision.transforms.ToTensor(),
                                             download=True)

# 4.Length
train_dataset_size = len(train_dataset)
print("the train dataset size is {}".format(train_dataset_size))

# 5.DataLoader
train_dataloader = DataLoader(dataset=train_dataset, batch_size=64)

# 6.Create model
model = LeNet_5()
# a.add cuda
model = model.to(device=device)

# 7.Create loss
cross_entropy_loss = nn.CrossEntropyLoss()
# b.add cuda
cross_entropy_loss = cross_entropy_loss.to(device=device)

# 8.Optimizer
learning_rate = 1e-2
optim = torch.optim.SGD(model.parameters(), lr=learning_rate)

# 9. Set some parameters to control loop
# epoch
epoch = 80

total_train_step = 0

for i in range(epoch):
    print(" -----------------the {} number of training epoch --------------".format(i + 1))
    model.train()
    for data in train_dataloader:
        # c.add cuda
        imgs, targets = data
        imgs = imgs.to(device)
        targets = targets.to(device)
        outputs = model(imgs)
        loss_train = cross_entropy_loss(outputs, targets)

        optim.zero_grad()
        loss_train.backward()
        optim.step()
        total_train_step = total_train_step + 1
        if total_train_step % 100 == 0:
            print("the training step is {} and its loss of model is {}".format(total_train_step, loss_train.item()))
            writer.add_scalar("train_loss", loss_train.item(), total_train_step)
            if total_train_step % 10000 == 0:
                torch.save(model.state_dict(), "model_save/model_{}_GPU.pth".format(total_train_step))
                print("the model of {} training step was saved! ".format(total_train_step))
            if i == (epoch - 1):
                torch.save(model.state_dict(), "model_save/model_{}_GPU.pth".format(total_train_step))
                print("the model of {} training step was saved! ".format(total_train_step))
writer.close()
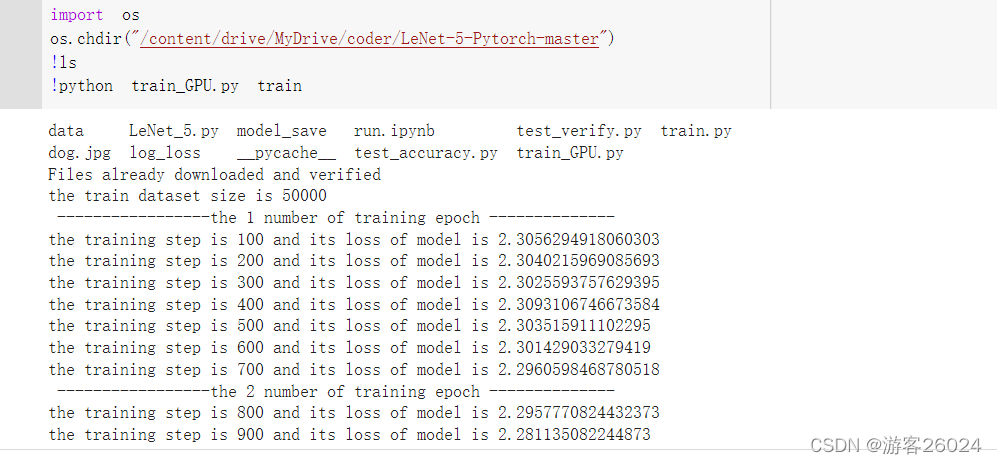
result:
!python train_GPU.py train


Tensorboard:
train


**3**.test_accuracy

使用cuda进行训练,之后用cpu进行测试
Use cuda for training, then test with cpu.

test_accuracy_GPU.py

import torch
from torch.utils.data import DataLoader
from LeNet_5 import *
import torchvision

# test

# 1.Create model
model = LeNet_5()

# 2.Ready Dataset
test_dataset = torchvision.datasets.CIFAR10(root="data", train=False, transform=torchvision.transforms.ToTensor(),
                                            download=True)
# 3.Length
test_dataset_size = len(test_dataset)
print("the test dataset size is {}".format(test_dataset_size))

# 4.DataLoader
test_dataloader = DataLoader(dataset=test_dataset, batch_size=64)

# 5. Set some parameters for testing the network
total_accuracy = 0

# test
model.eval()
with torch.no_grad():
    for data in test_dataloader:
        imgs, targets = data
        model_load = torch.load("model_save/model_62500_GPU.pth", map_location=torch.device("cpu"))
        model.load_state_dict(model_load)
        outputs = model(imgs)
        accuracy = (outputs.argmax(1) == targets).sum()
        total_accuracy = total_accuracy + accuracy
        accuracy = total_accuracy / test_dataset_size
    print("the total accuracy is {}".format(accuracy))
result:
(run) python test_accuracy_GPU.py

**4**.test_verify

使用cuda进行训练,之后用cpu进行验证
Use cuda for training, then verify with cpu.

test_verify_GPU.py

import torch
import cv2
import torchvision

from LeNet_5 import *

# test

# 1.Create model
model = LeNet_5()

# 2.Ready Data
img = cv2.imread("dog.jpg")

transform = torchvision.transforms.Compose([torchvision.transforms.ToTensor(),
                                            torchvision.transforms.Resize((32, 32))])
img = transform(img)
img = img.reshape(1, 3, 32, 32)

# test
model.eval()
model_load = torch.load("model_save/model_62500_GPU.pth", map_location=torch.device("cpu"))
model.load_state_dict(model_load)
with torch.no_grad():
    output = model(img)
    print(output)
    cls = output.argmax(1)

    print("the classification of object is {}".format(cls))
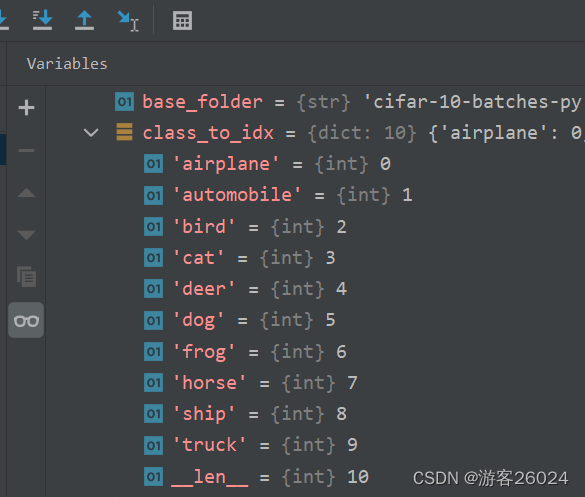
其验证的图像为下图
Its verified image is as follows

(run) python test_verify_GPU.py

 成功!
成功!
上一章 18.初识Pytorch之完整的模型套路-合在一个.py文件中 Complete model routine - in one .py file
下一章 20.初识Pytorch使用cuda对模型进行训练和测试或使用cuda对模型进行训练再用cpu测试 Use cuda to train and test the model or use cuda to train the model and then test with cpu