一、搭建过程
conda create -n iod python=3.7 -y
conda activate iod
pip install torch==1.8.1+cu101 torchvision==0.9.1+cu101 torchaudio==0.8.1 -f https://download.pytorch.org/whl/torch_stable.html
pip install opencv-python
pip install fvcore
pip install cython; pip install 'git+https://github.com/cocodataset/cocoapi.git#subdirectory=PythonAPI'
安装pytorch要根据cuda版本选择适合的https://pytorch.org/get-started/previous-versions/
这一步不知道需要不,但是我做了
git clone https://github.com/facebookresearch/detectron2.git
python -m pip install -e detectron2
下载iod,并编译
git clone https://github.com/JosephKJ/iOD.git
cd iOD
pip install -v -e .
二、遇到问题
1.error: ‘AT_CHECK’ was not declared in this scope
报错RuntimeError: Error compiling objects for extension,往前查看错误原因,好多文件出现error: ‘AT_CHECK’ was not declared in this scope
错误原因:AT_CHECK is deprecated in torch 1.5
高版本的pytorch不再使用AT_CHECK,而是使用 TORCH_CHECK。
解决方法:找到报错的文件,将里面的‘AT_CHECK’全部替换为‘TORCH_CHECK’。
参考:https://blog.csdn.net/qq_21388689/article/details/117129404
2.linux怎么启动.sh文件,Linux下面如何运行.sh文件
参考: https://blog.csdn.net/weixin_32149339/article/details/116583758
3.AssertionError: Checkpoint detectron2://ImageNetPretrained/MSRA/R-50.pkl not found!
下载R-50.pkl到文件夹 ,将iOD/detectron2/engine/defaults.py中312行加载路径改为自己下载pkl文件的路径
https://github.com/Majiker/BalancedMetaSoftmax-InstanceSeg/issues/3
还有一种说法是 force版本问题,重新运行一下
pip install fvcore==0.1.1.dev200512
更多解决可参考:
https://github.com/Majiker/BalancedMetaSoftmax-InstanceSeg/issues/3
4.RuntimeError: CUDA out of memory. Tried to allocate 1.53 GiB
nvidia-smi,会显示GPU的使用情况,以及占用GPU的应用程序
输入taskkill -PID 进程号 -F 结束占用的进程,比如 taskkill -PID 7392 -F
再次输入 nvidia-smi 查看GPU使用情况,会发现GPU被占用的空间大大降低,这样我们就可以愉快地使用GPU运行程序了
我的解决问题:
之前输入–num-gpus 1 用一个gpu
服务区中有8个gpu没有使用,
5.RuntimeError: Address already in use
端口被占用
参考 多GPU训练出现RUNTIMEERROR: ADDRESS ALREADY IN USE解决 https://www.freesion.com/article/77681373376/
CUDA_VISIBLE_DEVICES='0,1,2,3' python tools/train_net.py --dist-url tcp://127.0.0.1:50001 --num-gpus 4 --config-file ./configs/PascalVOC-Detection/iOD/base_19.yaml SOLVER.IMS_PER_BATCH 8 SOLVER.BASE_LR 0.005
重点: --dist-url tcp://127.0.0.1:50001 应该放在num-gpus 前面,放在最后面一直不成功,还是报原来的错误,放在前面就可以了
或者关掉占用端口号
释放端口,需要完成三步操作:
- 找到系统当前所有的端口 netstat -tln
- 找到对应端口在系统中的进程 ID(PID) lsof -i :端口号
- 使用 kill -9 [PID]命令结束进程 kill -9 [PID]
参考 Linux 释放占用端口 https://cloud.tencent.com/developer/article/1340493
三、pycharm连接远程服务器

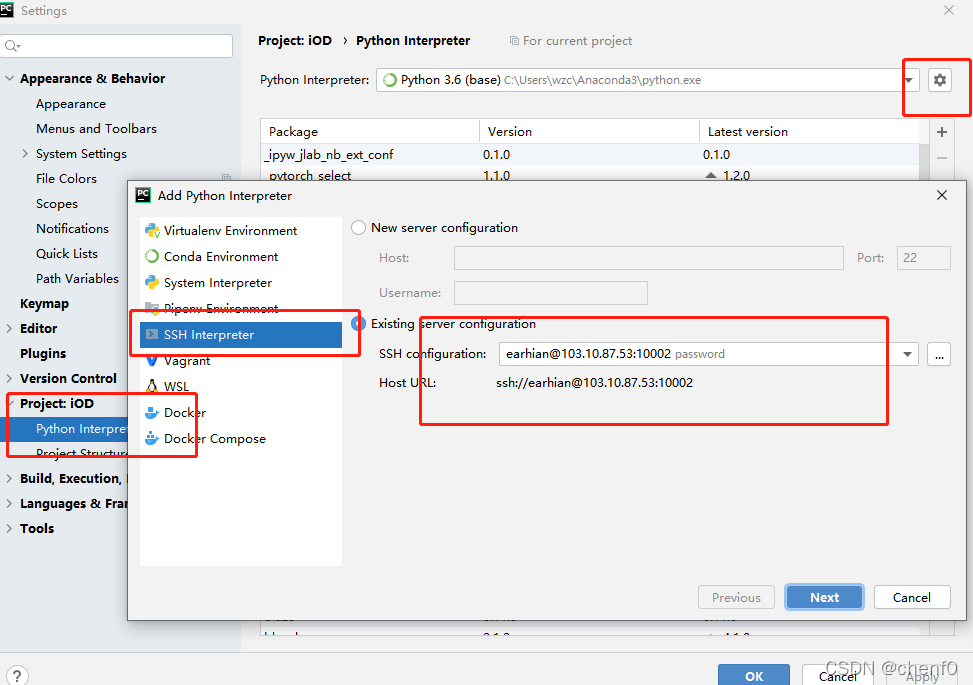
选择对应的虚拟环境和对应的文件路径


