opencv/opencv at 3.4 (github.com)下载地址
sudo apt-get install build-essential sudo apt-get install cmake git libgtk2.0-dev pkg-config libavcodec-dev libavformat-dev libswscale-dev sudo apt-get install python-dev python-numpy libtbb2 libtbb-dev libjpeg-dev libpng-dev libtiff-dev libjasper-dev libdc1394-22-dev
sudo apt-get install camke-qt-guimkdir opencv
cd opencv
unzip 你的两个压缩包mkdir build
cd build
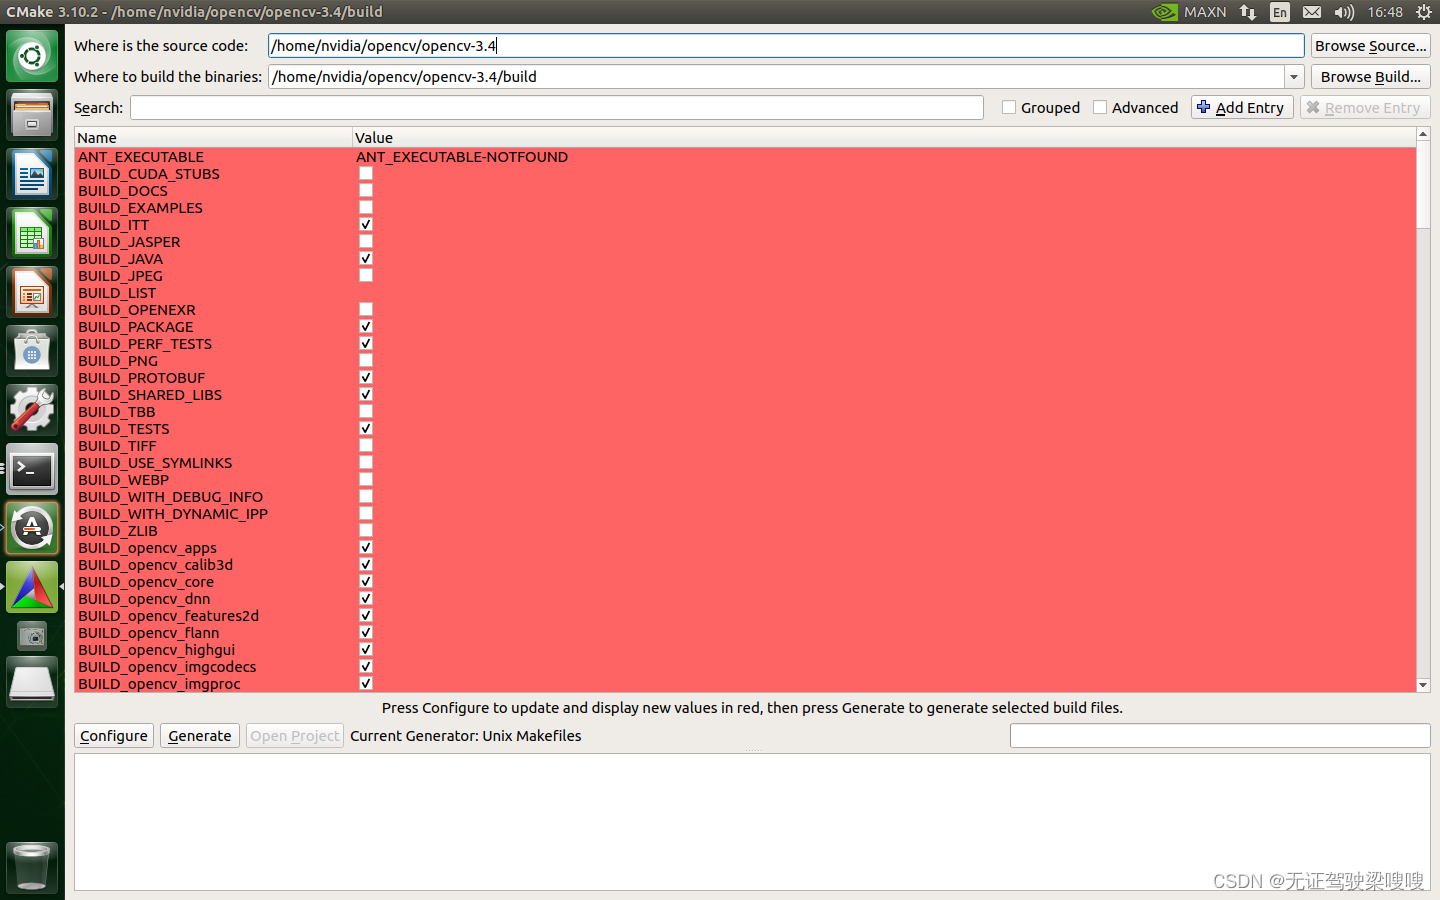
cmake-gui .. 然后会弹出CMake的图形化界面,在上方的两个路径里面,选择好代码所在文件夹的路径和要安装的路径

- ?点击左下方的Configure按钮,选择Unix Makefiles,选择Use default native compilers(默认),然后点击Finish
- 窗口的中间部分即配置列表,这里和使用cmake命令直接生成makefile文件一致的。正如上文所述,这里通过图形界面的方式来进行配置,更加直观方便。
- 这里需要对两个地方进行修改:
- 在CMAKE_BUILD_TYPE 值处输入RELEASE,其他保持不变(如果已经存在就不必修改)。
.CMAKE_BUILD_TYPE 改成Release
- CMAKE_INSTALL_PREFIX 改成自己的路径,默认为/usr/local
- 勾选WITH_CUDA
- 确认OPENCV_GENERATE_PKGCONFIG勾选
- 确认INSTALL_PYTHON_EXAMPLES为OFF
- OPENCV_EXTRA_MODULES_PATH设定为: xxx/opencv_contrib-3.4.0/modules
- OPENGL 为ON
- OPENCV_ENABLE_NONFREE为ON ,这是安装opencv专利模块的语句
- 下方的CMAKE_INSTALL_PREFIX显示了默认的安装目录,生成makefile文件最后执行 make install时就会安装到这个目录,这里可以根据个人需求更改。我这里就不做修改了。
- 在OPENCV_EXTRA_MODULES_PATH处,选择输入目录(单击这一行后方空白处即可选中)然后选择opencv_contrib-3.4.0文件夹中的modules文件夹,注意,不是只选中opencv_contrib-3.4.0文件夹就好了,需要选中里面的modules文件夹!? ? 如下图所示,然后点Choose。
注:OPENCV_EXTRA_MODULES_PATH 是用来指定要编译的扩展模块,其中包括OpenCV_contrib模块- 点击Generate生成配置文件,这一步应该比较快就完成了
- 接着,在build目录下打开终端,输入
make -j6
sudo make install
然后就开始安装了,这一步又需要等比较长的时间了,差不多就可以了
pkg-config --modversion opencv
pkg-config --cflags --libs opencv
?这里发现python3无法import cv2
Command "/usr/bin/python3 -u -c "import setuptools, tokenize;__file__='/tmp/pip-build-tlieahtc/numpy/setup.py';f=getattr(tokenize, 'open', open)(__file__);code=f.read().replace('\r\n', '\n');f.close();exec(compile(code, __file__, 'exec'))" install --record /tmp/pip-4la3zbzc-record/install-record.txt --single-version-externally-managed --compile --user --prefix=" failed with error code 1 in /tmp/pip-build-tlieahtc/numpy/
nvidia@nvidia-desktop:~$ pip3 install --upgrade pip -i https://pypi.tuna.tsinghua.edu.cn/simple
Collecting pip
  Downloading https://pypi.tuna.tsinghua.edu.cn/packages/a4/6d/6463d49a933f547439d6b5b98b46af8742cc03ae83543e4d7688c2420f8b/pip-21.3.1-py3-none-any.whl (1.7MB)
    100% |████████████████████████████████| 1.7MB 369kB/s
Installing collected packages: pip
Successfully installed pip-21.3.1
nvidia@nvidia-desktop:~$ pip3 install -i https://pypi.tuna.tsinghua.edu.cn/simple opencv-python
WARNING: pip is being invoked by an old script wrapper. This will fail in a future version of pip.
Please see https://github.com/pypa/pip/issues/5599 for advice on fixing the underlying issue.
To avoid this problem you can invoke Python with '-m pip' instead of running pip directly.
Defaulting to user installation because normal site-packages is not writeable
Looking in indexes: https://pypi.tuna.tsinghua.edu.cn/simple
Collecting opencv-python
  Downloading https://pypi.tuna.tsinghua.edu.cn/packages/e0/a3/f1df79206764a122f7fe05084909cf20581cfb66a78677636382ec1b2231/opencv_python-4.5.5.64-cp36-abi3-manylinux_2_17_aarch64.manylinux2014_aarch64.whl (39.2 MB)
     |████████████████████████████████| 39.2 MB 150 kB/s
Collecting numpy>=1.19.3
  Downloading https://pypi.tuna.tsinghua.edu.cn/packages/ab/f6/6cb12866511a564dde8208111b551f9469ba1c3963a63077afbb8a070a4a/numpy-1.19.5-cp36-cp36m-manylinux2014_aarch64.whl (12.4 MB)
     |████████████████████████████████| 12.4 MB 194 kB/s
Installing collected packages: numpy, opencv-python
ERROR: pip's dependency resolver does not currently take into account all the packages that are installed. This behaviour is the source of the following dependency conflicts.
uff 0.6.9 requires protobuf>=3.3.0, but you have protobuf 3.0.0 which is incompatible.
Successfully installed numpy-1.19.5 opencv-python-4.5.5.64
