一.前期工作
1.确定自己使用的YOLO是哪个版本
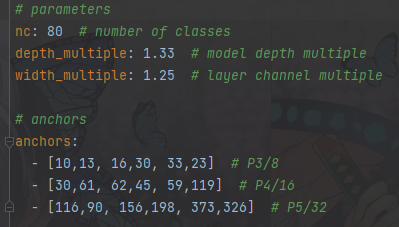
2.确定自己训练模型的类别
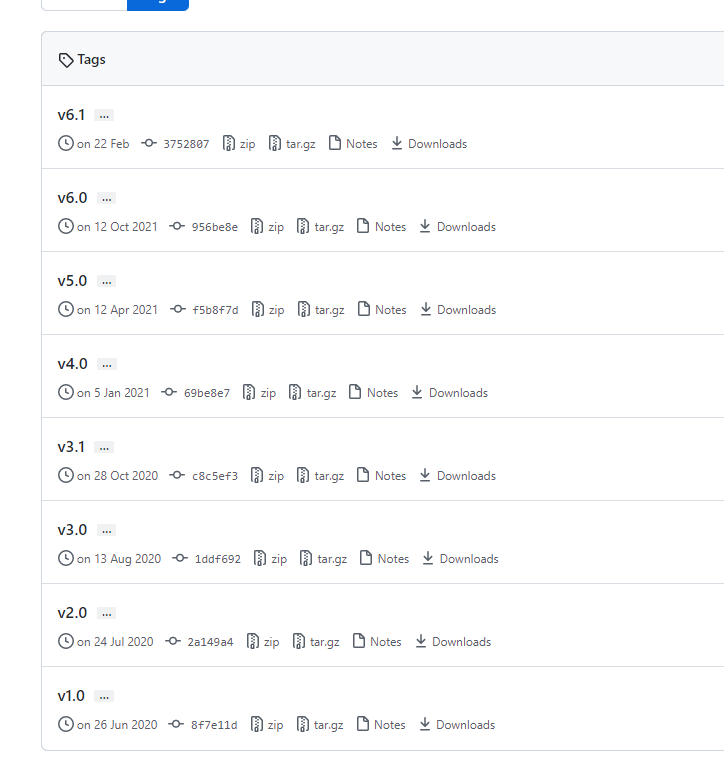
3.确定自己训练模型是使用的预训练模型是哪个对应的YOLOv5的那个版本
参数对应的模型网络层,要和预训练模型对应

权重文件下载路径: 不同的版本的权重文件,版本要对应
https://github.com/ultralytics/yolov5/tags

二.模型转换
1.下载对应的tensorrt转换代码和容器运行代码
https://github.com/wang-xinyu/tensorrtx/tree/yolov5-v5.0/yolov5
2.代码转换
git clone -b v5.0 https://github.com/ultralytics/yolov5.git  #拷贝代码
git clone https://github.com/wang-xinyu/tensorrtx.git  #拷贝代码  已经手动下载了的不用管
// download https://github.com/ultralytics/yolov5/releases/download/v5.0/yolov5s.pt
cp {tensorrtx}/yolov5/gen_wts.py {ultralytics}/yolov5  #将tensorrtx对应的py文件,复制到YOLO训练模型的项目中去
cd {ultralytics}/yolov5  #进入YOLO项目
python gen_wts.py -w yolov5s.pt -o yolov5s.wts  #运行生成容器
// a file 'yolov5s.wts' will be generated.
3.tensorrt/opencv准备
安装tensorrt:
参考如下网址:
https://blog.csdn.net/zong596568821xp/article/details/86077553?ops_request_misc=%257B%2522request%255Fid%2522%253A%2522165087078916781483722867%2522%252C%2522scm%2522%253A%252220140713.130102334..%2522%257D&request_id=165087078916781483722867&biz_id=0&utm_medium=distribute.pc_search_result.none-task-blog-2~all~top_positive~default-1-86077553.142^v9^control,157^v4^new_style&utm_term=tensorrt%E5%AE%89%E8%A3%85&spm=1018.2226.3001.4187
https://blog.csdn.net/introsend/article/details/105103487?ops_request_misc=&request_id=&biz_id=102&utm_term=tensorrt%E5%AE%89%E8%A3%85&utm_medium=distribute.pc_search_result.none-task-blog-2~all~sobaiduweb~default-8-105103487.nonecase&spm=1018.2226.3001.4187
https://blog.csdn.net/m0_37605642/article/details/120095114?ops_request_misc=%257B%2522request%255Fid%2522%253A%2522165087078916781483783014%2522%252C%2522scm%2522%253A%252220140713.130102334.pc%255Fall.%2522%257D&request_id=165087078916781483783014&biz_id=0&utm_medium=distribute.pc_search_result.none-task-blog-2~all~first_rank_ecpm_v1~rank_v31_ecpm-9-120095114.142^v9^control,157^v4^new_style&utm_term=tensorrt%E5%AE%89%E8%A3%85&spm=1018.2226.3001.4187
opencv安装
参考文档:
https://blog.csdn.net/public669/article/details/99044895?ops_request_misc=&request_id=&biz_id=102&utm_term=%E4%B9%8C%E7%8F%AD%E5%9B%BE%20opencv%E5%AE%89%E8%A3%85%E6%95%99%E7%A8%8B&utm_medium=distribute.pc_search_result.none-task-blog-2~all~sobaiduweb~default-0-99044895.142^v9^control,157^v4^new_style&spm=1018.2226.3001.4187
https://blog.csdn.net/public669/article/details/99044895
4.代码修改
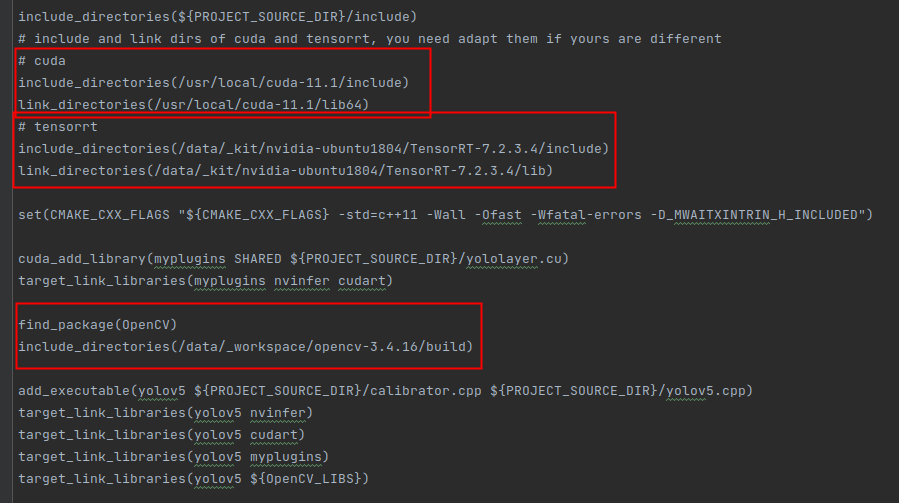
修改对应的cuda/tensorrt/opencv路径

修改yololayer.h文件中static constexpr int CLASS_NUM=你训练的类别数
这些修改完了,记得一定要保存一次在进行后面的步骤。
三.容器生成
cd {tensorrtx}/yolov5/  #进入tensorrt
// update CLASS_NUM in yololayer.h if your model is trained on custom dataset
mkdir build  #建立新文件夹
cd build  # 进入建立的文件夹
cp {ultralytics}/yolov5/yolov5s.wts {tensorrtx}/yolov5/build  # 将前面转换的wts复制过来
cmake ..  # 编译
make   # 转换
sudo ./yolov5 -s [.wts] [.engine] [s/m/l/x/s6/m6/l6/x6 or c/c6 gd gw]  // serialize model to plan file  #运行转换的文件生成对应的engine容器  sudo ./yolov5 -s yolov5s.wts yolov5s.engine s  后面的s对应预训练模型的yolov5s.pt 所以前期要确定你的是哪个模型,对应的是v5的那个版本,这个版本一定要对应,否则转换会出错
sudo ./yolov5 -d [.engine] [image folder]  // deserialize and run inference, the images in [image folder] will be processed.
// For example yolov5s
sudo ./yolov5 -s yolov5s.wts yolov5s.engine s
sudo ./yolov5 -d yolov5s.engine ../samples
// For example Custom model with depth_multiple=0.17, width_multiple=0.25 in yolov5.yaml
sudo ./yolov5 -s yolov5_custom.wts yolov5.engine c 0.17 0.25
sudo ./yolov5 -d yolov5.engine ../samples
四.代码运行
// install python-tensorrt, pycuda, etc.
// ensure the yolov5s.engine and libmyplugins.so have been built
python yolov5_trt.py  # python进入对应的环境直接运行
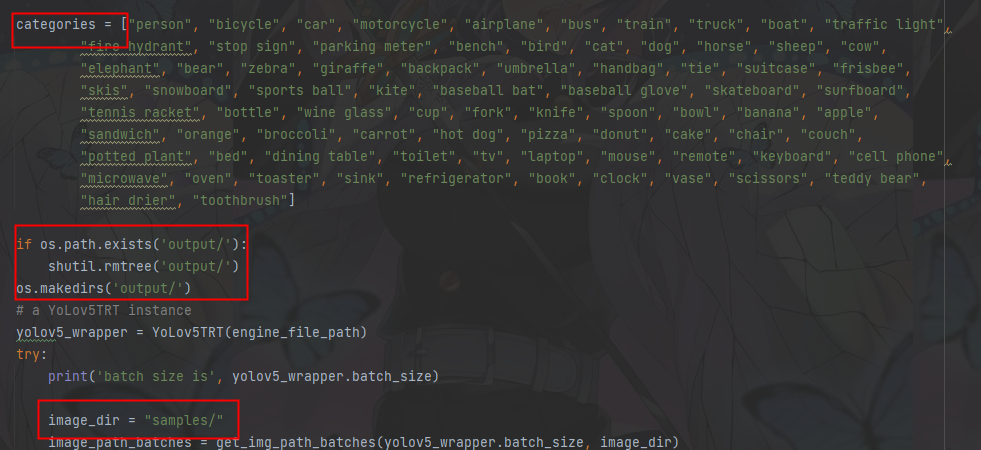
对应修改:
生成的容器位置

训练的类别名,对应输出图片位置,输入图片位置

五.其它
中途可能会有一些库未安装,所以遇到这个问题在对应的虚拟环境当中安装就可以了
