时隔很久的第一篇blog。最近在学CNN,记录自己的一些见解。
MNIST数据集的介绍有很多了,可以自行了解,最重要的是了解其格式。CNN(卷积神经网络)的理论介绍也有很多了,这里结合代码做一些说明。
第一部分导入库
这里用到了glob,这个库在后面用来自己检测模型识别率时用到。
import torch
from PIL import Image
import torch.nn as nn
import torch.nn.functional as F
import torch.optim as optim
from torchvision import datasets, transforms
import glob
第二部分建立网络
class Net(nn.Module):
    def __init__(self):
        super(Net, self).__init__()
        self.conv1 = nn.Conv2d(1, 10, kernel_size=5)  #(输入通道,输出通道,卷积核大小)
        self.conv2 = nn.Conv2d(10, 20, kernel_size=5 ) #二次卷积(输入通道,输出通道,卷积核大小)
        self.pooling=nn.MaxPool2d(2)
        self.fc=nn.Linear(320,10)

    def forward(self,x):
        batch_size = x.size(0)    #查看维度
        x=F.relu(self.pooling(self.conv1(x)))
        x=F.relu(self.pooling(self.conv2(x)))
        x=x.view(batch_size,-1)   #线性
        x=self.fc(x)
        return x
self.conv1 = nn.Conv2d(1, 10, kernel_size=5)
self.conv2 = nn.Conv2d(10, 20, kernel_size=5 )
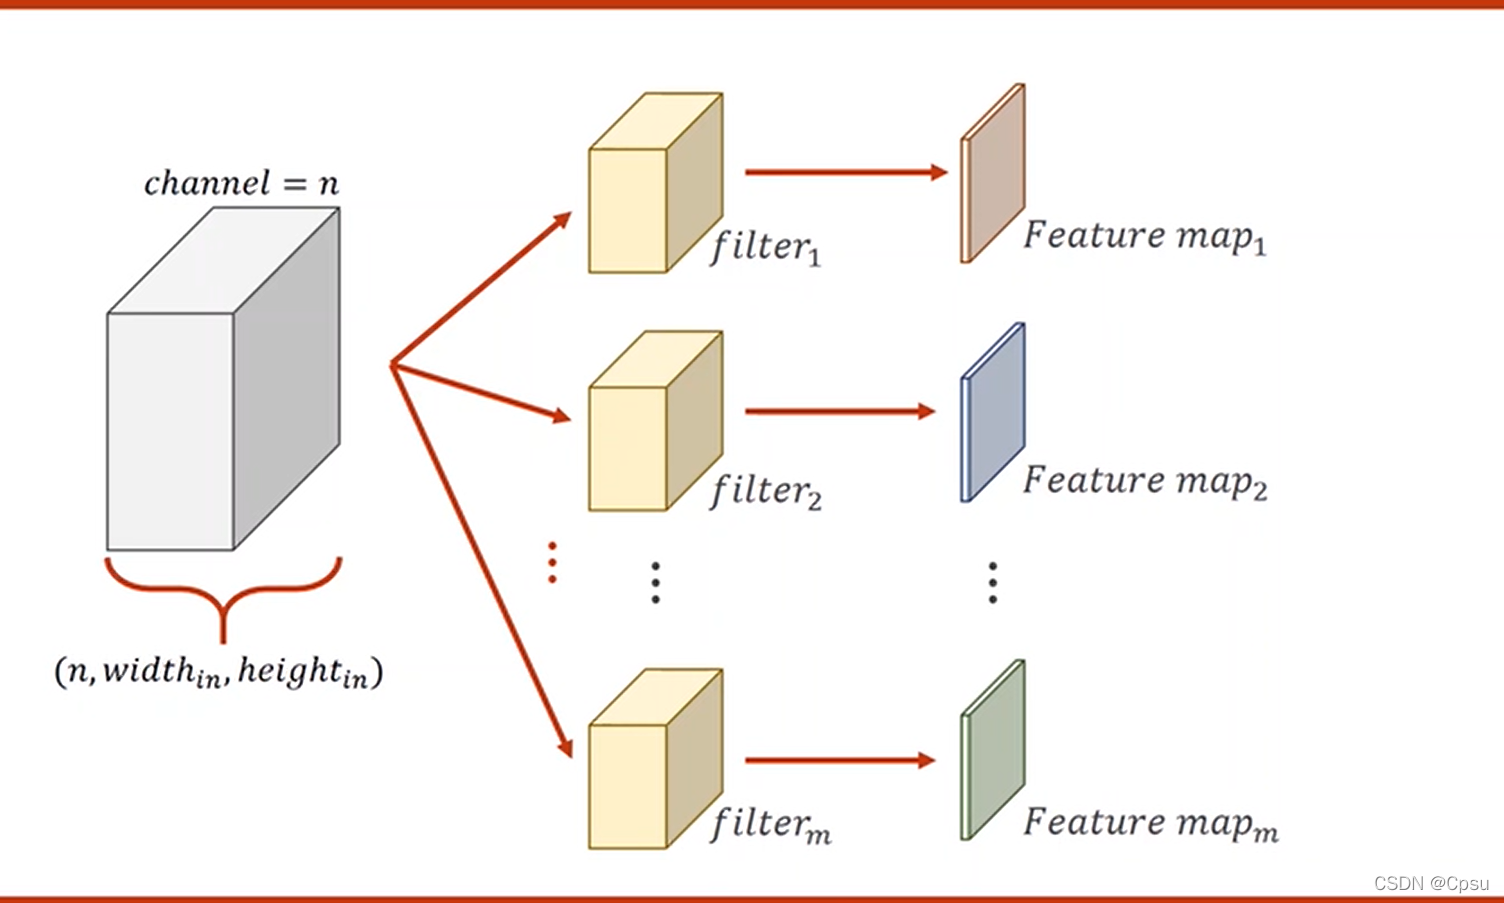
第一句代码可以说是第一次卷积,最重要的是理解括号的参数(1,10,5)的含义。这里的1是输入的通道数,因为MNIST数据集的图像是黑白所以是单通道,如果是彩色的输入通道数就是3;10代表的是第一次卷积的输出通道数,输出通道数取决于卷积核的个数;5代表卷积核是一个5x5大小的。第二句代码同理。
self.pooling=nn.MaxPool2d(2)
这句代码也就是池化层。原理大概就是矩阵的缩小。比如把一个4x4的矩阵划分为4个2x2的矩阵,再取每个2x2矩阵中的最大值也就是取出4个最大值组成一个新的2x2的矩阵。
self.fc=nn.Linear(320,10)
这个代码是全连接层。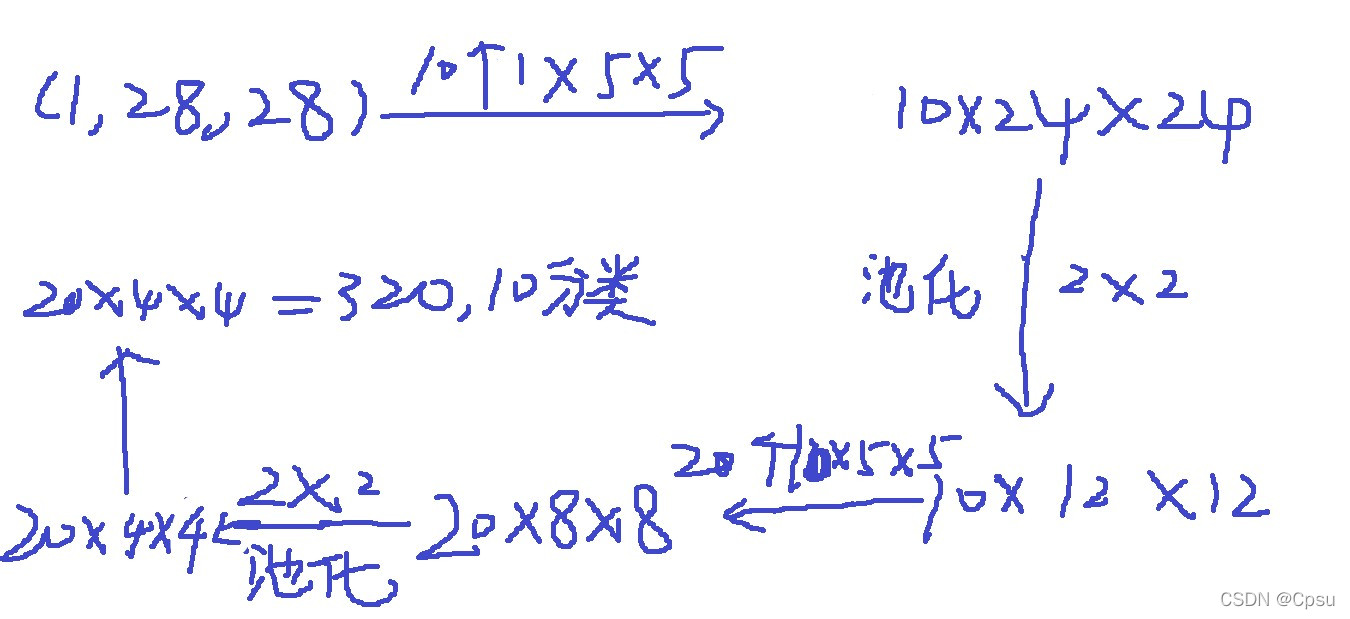
完整代码
import torch
from PIL import Image
import torch.nn as nn
import torch.nn.functional as F
import torch.optim as optim
from torchvision import datasets, transforms
import glob


class Net(nn.Module):
    def __init__(self):
        super(Net, self).__init__()
        self.conv1 = nn.Conv2d(1, 10, kernel_size=5)  #(输入通道,输出通道,卷积核大小)
        self.conv2 = nn.Conv2d(10, 20, kernel_size=5 ) #二次卷积(输入通道,输出通道,卷积核大小)
        self.pooling=nn.MaxPool2d(2)
        self.fc=nn.Linear(320,10)

    def forward(self,x):
        batch_size = x.size(0)    #查看维度
        x=F.relu(self.pooling(self.conv1(x)))
        x=F.relu(self.pooling(self.conv2(x)))
        x=x.view(batch_size,-1)   #线性
        x=self.fc(x)
        return x

def test():
    correct = 0
    total = 0
    with torch.no_grad():  # 测试集不用算梯度
        for data in test_loader:
            inputs,target = data
            inputs,target=inputs.to(device),target.to(device)
            outputs = model(inputs)
            _, predicted = torch.max(outputs.data, dim=1)  # dim = 1 列是第0个维度,行是第1个维度,沿着行(第1个维度)去找1.最大值和2.最大值的下标
            total += target.size(0)  # 张量之间的比较运算
            correct += (predicted == target).sum().item()
    acc = correct / total
    print('[%d / %d]: Accuracy on test set: %.1f %% ' % (epoch+1, EPOCH, 100 * acc))  # 求测试的准确率,正确数/总数

if __name__ == '__main__':
    for epoch in range(10):
        train(epoch)
        acc_test = test()
    torch.save(model, "my_model.pth")

if __name__ =='__main__':
    device = torch.device('cuda' if torch.cuda.is_available() else 'cpu')
    model = torch.load('my_model.pth') #加载模型
    model = model.to("cpu")
    model.eval()


    for jpg_file in glob.glob(r'./*.jpg'):
        print(jpg_file)
        img = Image.open(jpg_file)
        if img.mode != 'L':
            img = img.convert('L')
        transform = transforms.Compose([transforms.Resize((28, 28)),
                                        transforms.ToTensor()])
        img = transform(img)
        img=  torch.reshape(img, ( 1,1, 28, 28))
        #print(img.shape)
        with torch.no_grad():
            output = model(img)
        probability, predicted = torch.max(output.data, 1)
        print(output.to('cpu').detach().numpy().squeeze())
        print("the probability of this number being {} "
                    .format(predicted.numpy().squeeze()))    # 预测结果
模型测试结果
自己用画图工具手写了几张数字。


测试结果
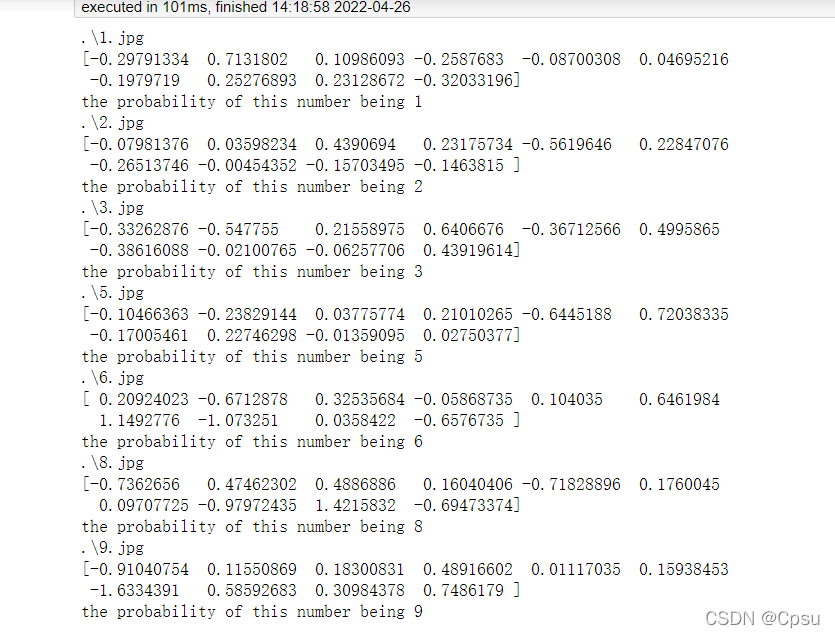
测试结果还不错,只不过对图片要求比较高,必须是黑底白字,因为MNIST的数据是这种形式。自己在草稿纸上拍照的图片暂时识别不了,还要改进。

