简要说一下nndetection的安装步骤吧:
github:https://github.com/open-mmlab/mmdetection
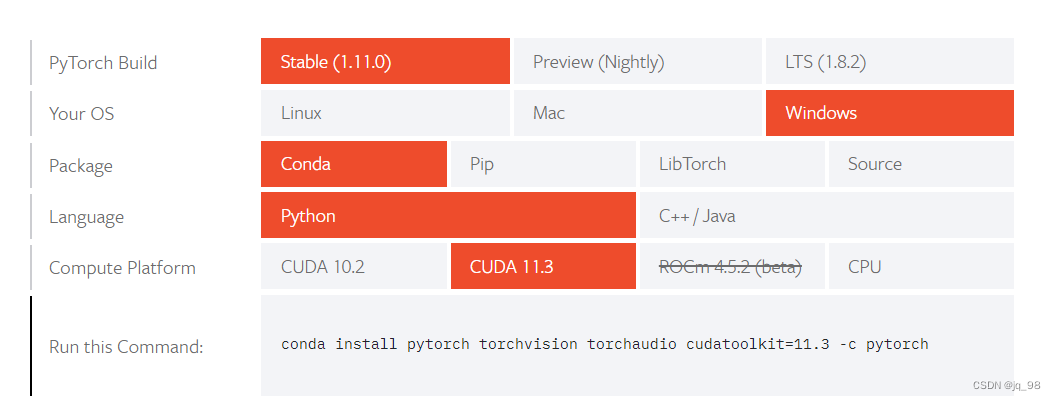
1、首先看一下自己的cuda版本是多少,根据自己的cuda版本安装对应的pytorch版本
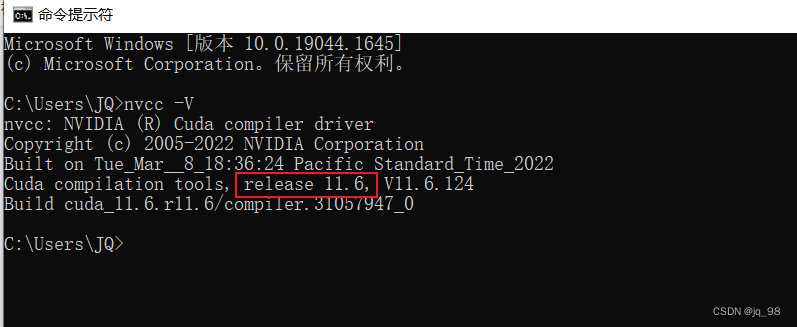
由于我是最新版本,所以直接进行pytorch官网安装最新版本就好了
2、之后创建并激活环境conda环境
conda create -n mmdetection python=3.7
conda activate mmdetection
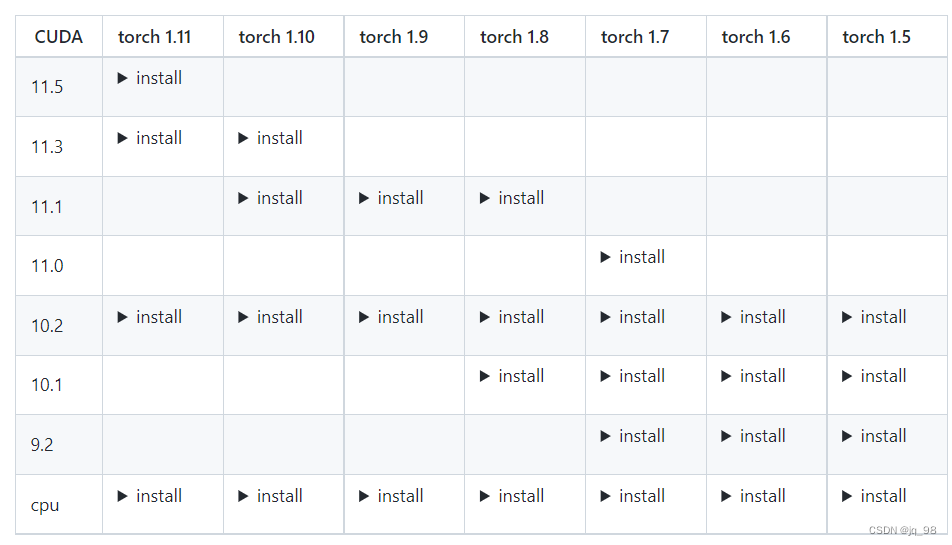
3、根据环境安装mmcv
这里有一个官方出的版本对应表,只要到里面找到对应符合自己电脑所安装版本的cuda以及pytorch就复制命令安装即可
https://github.com/open-mmlab/mmcv#installation
4、安装mmdetection
git clone https://github.com/open-mmlab/mmdetection.git
cd mmdetection # 文件所在位置
pip install -r requirement.txt
pip install -v -e .
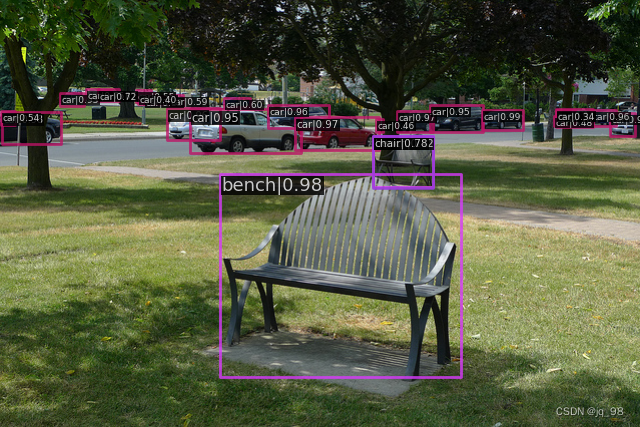
5、检验是否安装成功
权重下载
from mmdet.apis import init_detector, inference_detector,show_result_pyplot

config_file = 'configs/faster_rcnn/faster_rcnn_r50_fpn_1x_coco.py'
# download the checkpoint from model zoo and put it in `checkpoints/`
# url: https://download.openmmlab.com/mmdetection/v2.0/faster_rcnn/faster_rcnn_r50_fpn_1x_coco/faster_rcnn_r50_fpn_1x_coco_20200130-047c8118.pth
checkpoint_file = 'checkpoints/faster_rcnn_r50_fpn_1x_coco_20200130-047c8118.pth'
device = 'cuda:0'
# init a detector
model = init_detector(config_file, checkpoint_file, device=device)
# inference the demo image
img = 'demo/demo.jpg'
result = inference_detector(model, img)
show_result_pyplot(model,img,result)
出现检测结果即为成功
6、进入项目根目录
python setup.py install
7、完成

