Keras is a powerful and easy-to-use Python library for developing and evaluating deep learning models. It wraps the efficient numerical computation libraries Theano and TensorFlow and allows you to define and train neural network models in a few short lines of code.
After completing this blog you will know:
- How to load a CSV dataset ready for use with Keras.
- How to define and compile a Multilayer Perception model in Keras.
- How to evaluate a Keras model on a validation dataset.
7.1 Tutorial Overview
How to create your own models step by step in the future. The steps you are going to cover in this tutorial are as follows:
- Load Data
- Define Model
- Compile Model
- Fit Model
- Evaluate Model
- Tie It All Together
7.2 Pima Indians Onset of Diabetes Dataset
This is a standard machine learning dataset available for free download the UCI Machine Learning repository. It describes patient medical record data for Pima Indians and whether they had an onset of diabetes within five years. It is a binary classification problem (onset of diabetes as 1 or not as 0). The input variables that describe each patient are numerical and have varying scales. Below lists the eight attributes for the dataset:
- Number of times pregnant
- Plasma glucose concentration a 2 hours in an oral glucose tolerance test.
- Diastolic blood pressure(mm Hg)
- Triceps skim fold thickness(mm)
- 2-Hour serum insulin(mm U/ml)
- Body mass index
- Diabetes pedigree function
- Age(years)
- Class,onset of diabetes within five years.
dataset file :
6,148,72,35,0,33.6,0.627,50,1
1,85,66,29,0,26.6,0.351,31,0
8,183,64,0,0,23.3,0.672,32,1
1,89,66,23,94,28.1,0.167,21,0
0,137,40,35,168,43.1,2.288,33,1
?7.3 Load Data
Whenever we work with machine learning algorithms that use a stochastic process(ep.random numbers), it is a good idea to initilize the random number generator with a fixed seed value.This is so that you can run the same code again? and again and get the same result.This is useful if you need to demonstrate a result.compare algorithms using the same source of randomness or to debug a part of your code. You can initialize the random number generator with any seed you like :
# Initialize the random number generator with any seed you like

from keras.models import Sequential
from keras.layers import Dense
import numpy as np
# fix random seed for reproducibility
seed = 7
np.random.seed(seed)

# Load our Pima Indians dataset. You can load the file directly using the NumPy function loadtext()

# Load pima indians dataset
dataset = np.loadtxt("pima-indians-diabetes.csv",delimiter=",")
# split into input (X) and output(Y) variables
X = dataset[:,0:8]
Y = dataset[:,8]
?We have initialized our random number generator to ensure results are reproducible and loaded our data.We are now ready to define our neural network model.
7.4 Define Model
Models in Keras are defined as a sequence of layers. We create a Sequential model and add layers one at a time until we are happy with our network topology. he first thing to get right is to ensure the input layer has the right number of inputs. This can be specified when creating the first layer with the input dim argument and setting it to 8 for the 8 input variables.
In this example we will use a fully-connected network structure with three layers. Fully connected layers are defined using the Dense class. We can specify the number of neurons in the layer as the first argument, the initialization method as the second argument as init and specify the activation function using the activation argument. In this case we initialize the network weights to a small random number generated from a uniform distribution (uniform), in this case between 0 and 0.05 because that is the default uniform weight initialization in Keras. Another traditional alternative would be normal for small random numbers generated from a Gaussian distribution.
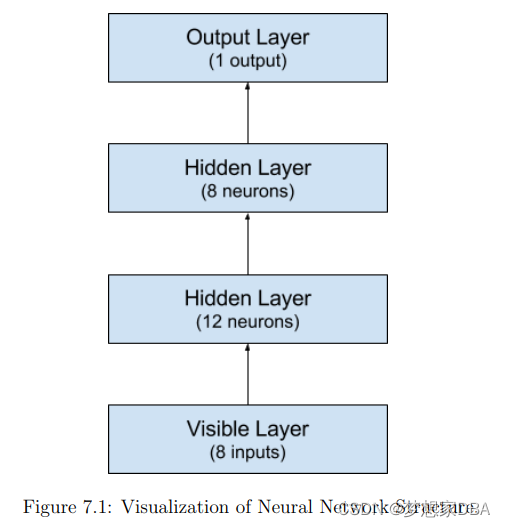
We will use the rectifier (relu) activation function on the first two layers and the sigmoid activation function in the output layer. It used to be the case that sigmoid and tanh activation functions were preferred for all layers. These days, better performance is seen using the rectifier activation function. We use a sigmoid activation function on the output layer to ensure our network output is between 0 and 1 and easy to map to either a probability of class 1 or snap to a hard classification of either class with a default threshold of 0.5. We can piece it all together by adding each layer. The first hidden layer has 12 neurons and expects 8 input variables. The second hidden layer has 8 neurons and finally the output layer has 1 neuron to predict the class (onset of diabetes or not).

# create model
model = Sequential()
model.add(Dense(12, input_dim=8, kernel_initializer='uniform',activation='relu'))
model.add(Dense(8, bias_initializer='uniform',activation='relu'))
model.add(Dense(1, kernel_initializer='random_uniform',activation='sigmoid'))
?Below provides a? depiction of the network structure.

7.5 Compile Model
Now that the model is defined , we can compile it, Compiling the model uses the efficient numerical libraries under the covers.(the so-called backend) such as Theano or TensorFlow. Remember training a network means finding the best set of weights to make predictions for this problem.
We must specify the loss function to use to evaluate a set of weights, the optimizer used to search through di?erent weights for the network and any optional metrics we would like to collect and report during training.In this case we will use logarithmic loss, which for a binary classification problem is defined in Keras as binary crossentropy. We will also use the efficient ? gradient descent algorithm adam for no other reason that it is an efficient default. Learn more about the Adam optimization algorithm in the paper Adam: A Method for Stochastic Optimization4. Finally, because it is a classification problem, we will collect and report the classification accuracy as the metric.
# Compile model
model.compile(loss='binary_crossentropy',optimizer='adam',metrics=['accuracy'])
?7.6 Fit Model
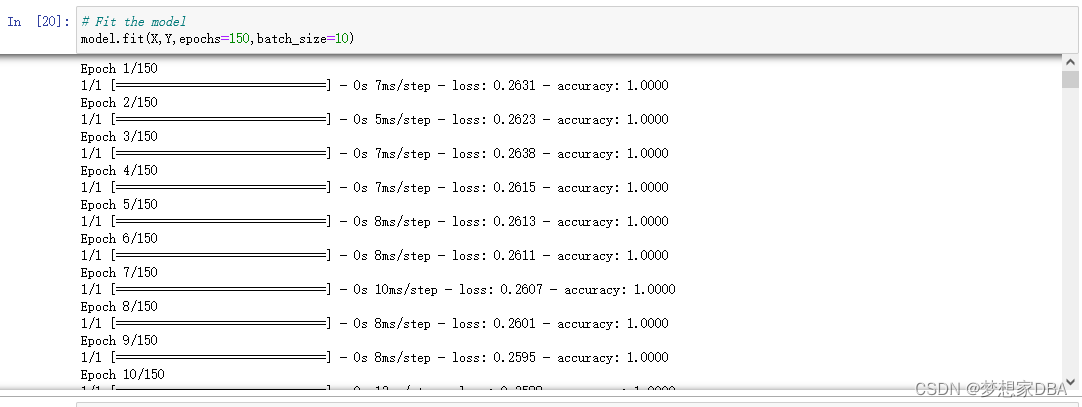
We can train or fit our model on our loaded data by calling the fit() function on the model.
The training process will run for a fixed number of iterations through the dataset called epochs, that we must specify using the nb_epoch argument.We can also set the number of instances that are evaluated before a weight update in the network is performed called the batch size and set using the batch size argument.
# Fit the model
model.fit(X,Y,epochs=150,batch_size=10)
This is where the work happens on your CPU or GPU.
7.7 Evaluate Model
We have trained our neural network on the entire dataset and we can evaluate the performance of the network on the same dataset. This will only give us an idea of how well we have modeled the dataset (e.g. train accuracy), but no idea of how well the algorithm might perform on new data. We have done this for simplicity, but ideally, you could separate your data into train and test datasets for the training and evaluation of your model. You can evaluate your model on your training dataset using the evaluation() function on your model and pass it the same input and output used to train the model. This will generate a prediction for each input and output pair and collect scores, including the average loss and any metrics you have configured, such as accuracy.
# evaluate the model
scores = model.evaluate(X,Y)
print("%s: %.2f%%" %(model.metrics_names[1],scores[1]*100))
?7.8 Tie It All Together
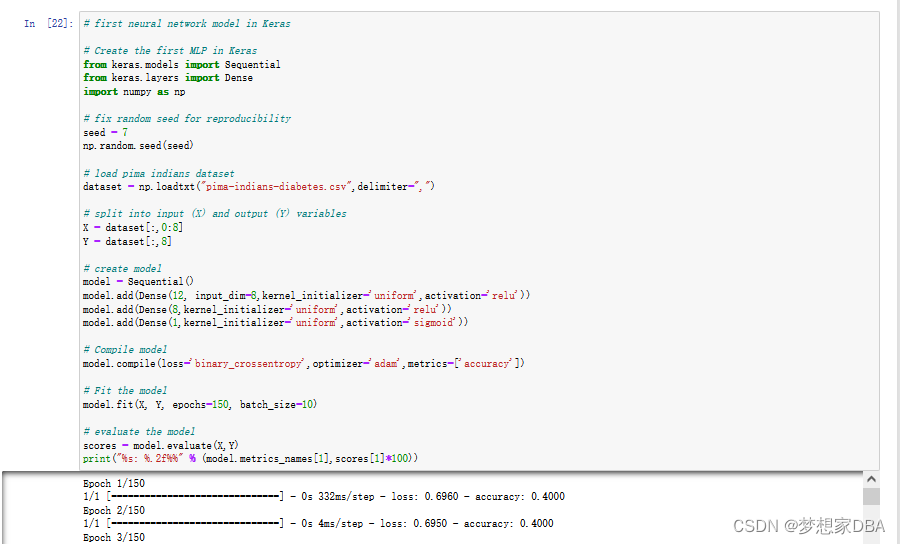
You have just seen how you can easily create your first neural network model in Keras. Let’s tie it all together into a complete code example.
# first neural network model in Keras

# Create the first MLP in Keras
from keras.models import Sequential
from keras.layers import Dense
import numpy as np

# fix random seed for reproducibility
seed = 7
np.random.seed(seed)

# load pima indians dataset
dataset = np.loadtxt("pima-indians-diabetes.csv",delimiter=",")

# split into input (X) and output (Y) variables
X = dataset[:,0:8]
Y = dataset[:,8]

# create model
model = Sequential()
model.add(Dense(12, input_dim=8,kernel_initializer='uniform',activation='relu'))
model.add(Dense(8,kernel_initializer='uniform',activation='relu'))
model.add(Dense(1,kernel_initializer='uniform',activation='sigmoid'))

# Compile model
model.compile(loss='binary_crossentropy',optimizer='adam',metrics=['accuracy'])

# Fit the model
model.fit(X, Y, epochs=150, batch_size=10)

# evaluate the model
scores = model.evaluate(X,Y)
print("%s: %.2f%%" % (model.metrics_names[1],scores[1]*100))
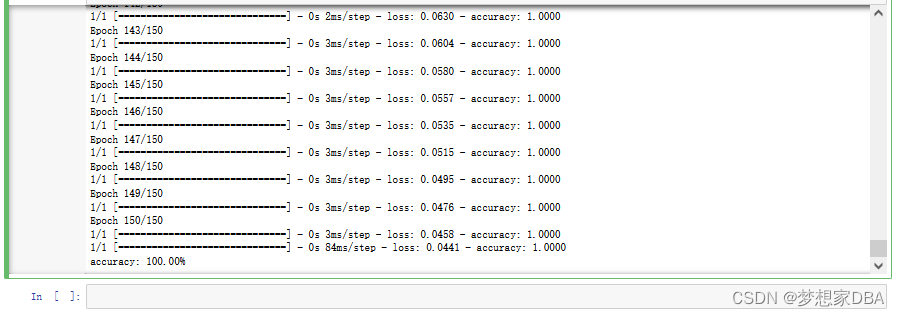
?Running this example, you should see a message for each of the 150 epochs printing the loss and accuracy for each, followed by the final evaluation of the trained model on the training dataset. It takes about 10 seconds to execute on my workstation running on the CPU with a Theano backend.
?
7.9 Summary
In this lesson you discovered how to create your first neural network model using the powerful Keras Python library for deep learning. Specifically you learned the five key steps in using Keras to create a neural network or deep learning model, step-by-step including:
- How to load data.
- How to define a neural network model in Keras.
- How to compile a Keras model using the efficient numerical backend
- How to train a model on data
- How to evaluate a model on data
7.9.1 Next
You now know how to develop a Multilayer Perceptron model in Keras. In the next section you will discover di?erent ways that you can evaluate your models and estimate their performance on unseen data.
