一. 画直线
函数原型:
void line(InputOutputArray img, Point pt1, Point pt2, const Scalar& color,
                     int thickness = 1, int lineType = LINE_8, int shift = 0);
函数功能:
画一条直线
参数:
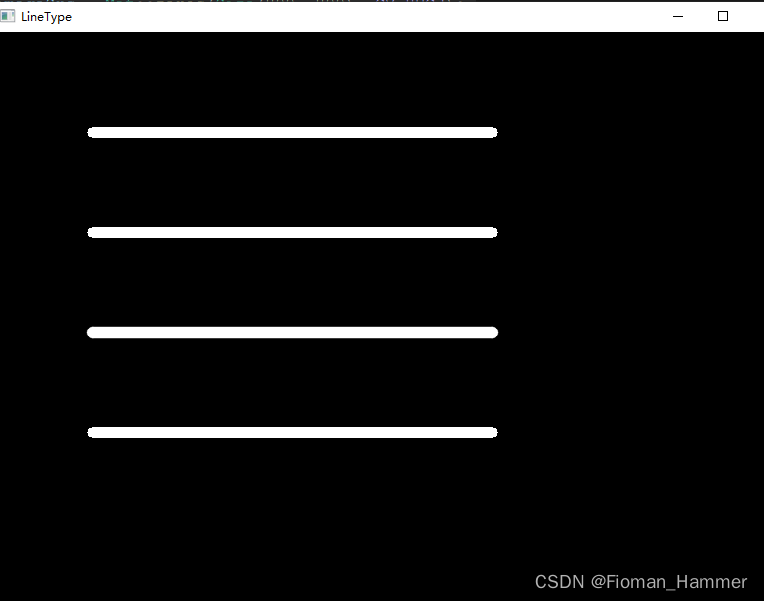
img:要画的原图像pt1:直线的起点pt2:直线的终点color:直线的颜色thickness:直线的粗细lineType:FILLED = -1, LINE_4 = 4 -> 4-connected line LINE-8 = 8 8-connected line, LINE_AA = 16,antialiased lineshift:坐标点的小数点位数
#include "MyOpencv.h"

int main()
{
	Mat imageSrc = Mat::zeros(Size(800, 800), CV_8UC3);
	imshow("Original", imageSrc);
	Point p1(100, 100);
	Point p2(500, 100);
	cv::line(imageSrc, p1, p2, Scalar(255, 255, 255), 10, cv::LINE_8, 0);

	p1.y = 200;
	p2.y = 200;
	cv::line(imageSrc, p1, p2, Scalar(255, 255, 255), 10, cv::LINE_4, 0);

	// AA这种方式,画的直线圆弧比较明显
	p1.y = 300;
	p2.y = 300;
	cv::line(imageSrc, p1, p2, Scalar(255, 255, 255), 10, cv::LINE_AA, 0);

	p1.y = 400;
	p2.y = 400;
	cv::line(imageSrc, p1, p2, Scalar(255, 255, 255), 10, cv::FILLED, 0);

	imshow("LineType", imageSrc);


	waitKey(0);

	return 0;
}
结果:
二. 画矩形
函数原型:
根据对角线的两个点去画矩形:
void rectangle(InputOutputArray img, Point pt1, Point pt2,
                          const Scalar& color, int thickness = 1,
                          int lineType = LINE_8, int shift = 0);
参数解释:
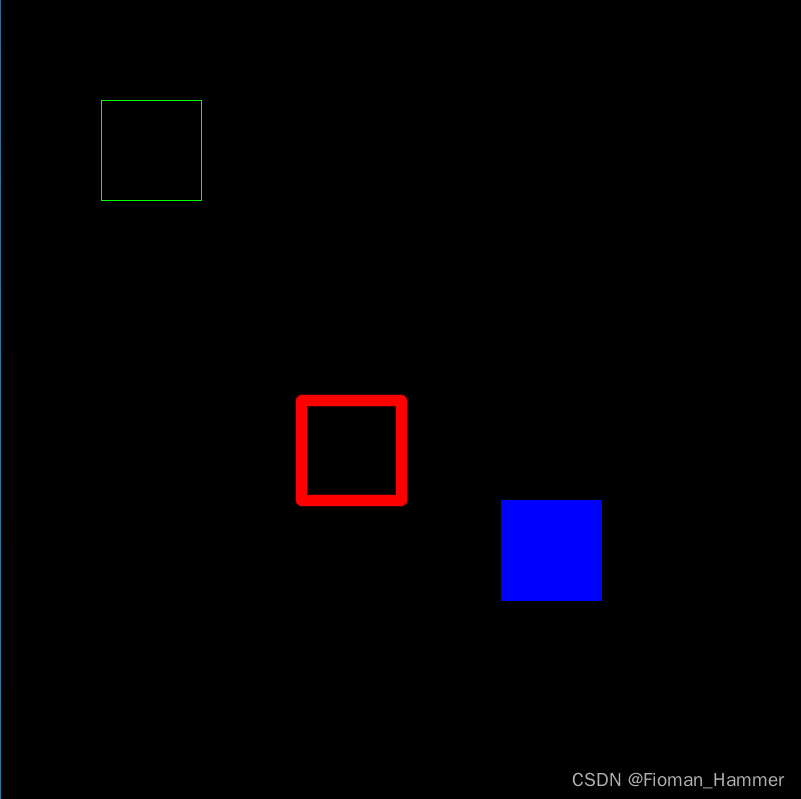
img:源图像pt1:矩形的一个顶点pt2:顶点1的对角顶点color:绘制矩形的颜色thickness:线条的粗细,-1表示填充lineType:和画直线的含义一样shift:坐标中小数的点的位数
#include "MyOpencv.h"


int main()
{
	Mat imageSrc = Mat::zeros(Size(800, 800), CV_8UC3);

	// 绘制矩形
	Point p1(100,100); // 左上角
	Point p2(200, 200); // 右下角
	cv::rectangle(imageSrc, p1, p2, Scalar(0, 255, 0), 1, LINE_8, 0);

	Point p3(400, 400); // 右上角
	Point p4(300, 500); // 左下角
	cv::rectangle(imageSrc, p3, p4, Scalar(0, 0, 255), 10, LINE_AA, 0);

	// 绘制填充矩形
	Point p5(500, 500);
	Point p6(600, 600);
	cv::rectangle(imageSrc, p5, p6, Scalar(255, 0, 0), -1, LINE_4, 0);


	imshow("Rectangle", imageSrc);
	waitKey(0);

	return 0;
}
结果:
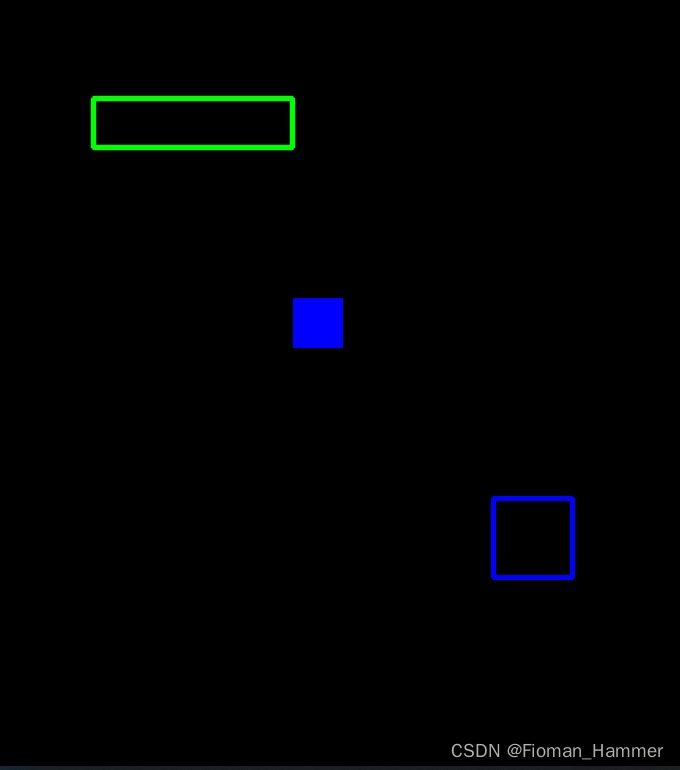
根据Rect去绘制矩形,Rect是一个矩形类,矩形的左上角,还有宽和高
函数原型:
void rectangle(InputOutputArray img, Rect rec,
                          const Scalar& color, int thickness = 1,
                          int lineType = LINE_8, int shift = 0);
参数解释:
rec: 矩形对象,包括矩形的左上角以及矩形的宽和高
其他参数: 和上面的参数含义一样
#include"MyOpencv.h"

int main(void)
{
	Mat imageSrc = Mat::zeros(Size(800, 800), CV_8UC3);

	// 绘制矩形
	cv::rectangle(imageSrc, Rect(100, 100, 200, 50), Scalar(0, 255, 0), 3, LINE_AA, 0);

	cv::rectangle(imageSrc, Rect(300, 300, 50, 50), Scalar(255, 0, 0), -1, LINE_8, 0);

	cv::rectangle(imageSrc, Rect(500, 500, 80, 80), Scalar(255, 0, 0), 3, LINE_4, 0);

	imshow("RectRectangle", imageSrc);
	waitKey(0);
}
结果:
三. 画圆形
函数圆形绘制(根据圆心和半径)
函数原型:
void circle(InputOutputArray img, Point center, int radius,
                       const Scalar& color, int thickness = 1,
                       int lineType = LINE_8, int shift = 0);
参数解释:
img:源图像center:圆心坐标radius:圆半径color:绘制颜色thickness:圆轮廓色彩,如果为-1表示绘制填充圆lineType:线条类型shift:保留小数点位数
#include"MyOpencv.h"

int main(void)
{
	Mat imageSrc = Mat::zeros(Size(800, 800), CV_8UC3);
	// 绘制圆
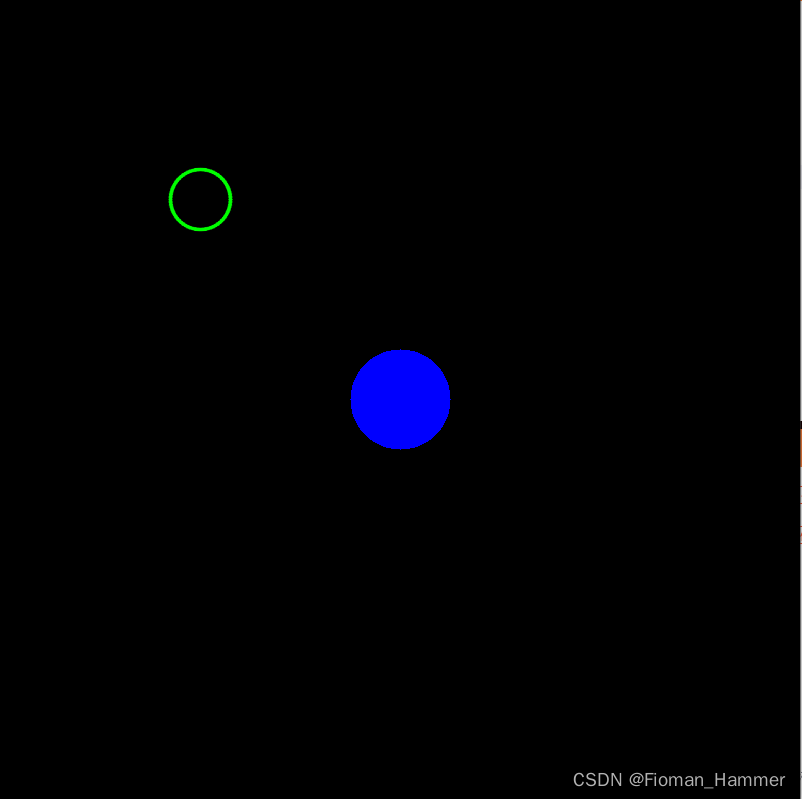
	circle(imageSrc, Point(200, 200), 30, Scalar(0, 255, 0), 2, LINE_AA, 0);
	// 绘制圆,填充圆
	circle(imageSrc, Point(400, 400), 50, Scalar(255, 0, 0), -1, LINE_8, 0);

	imshow("Circle", imageSrc);
	waitKey(0);
}
结果:
四. 绘制椭圆
根据椭圆中心,长短轴轴半径,还有角度去绘制椭圆
void ellipse(InputOutputArray img, Point center, Size axes,
                        double angle, double startAngle, double endAngle,
                        const Scalar& color, int thickness = 1,
                        int lineType = LINE_8, int shift = 0);
参数解释:
img:绘制的源图center:椭圆中心angle:椭圆旋转角度startAngle:椭圆弧的起始角度endAngle:椭圆弧的结束角度color:椭圆的颜色thickness:线条的粗细,-1表示绘制填充椭圆lineType:线条的类型shift:保留的小数点的位数
#include "MyOpencv.h"

int main(void)
{
	Mat imageSrc = Mat::zeros(Size(800, 800), CV_8UC3);

	// 0 到45度, 按照逆时针
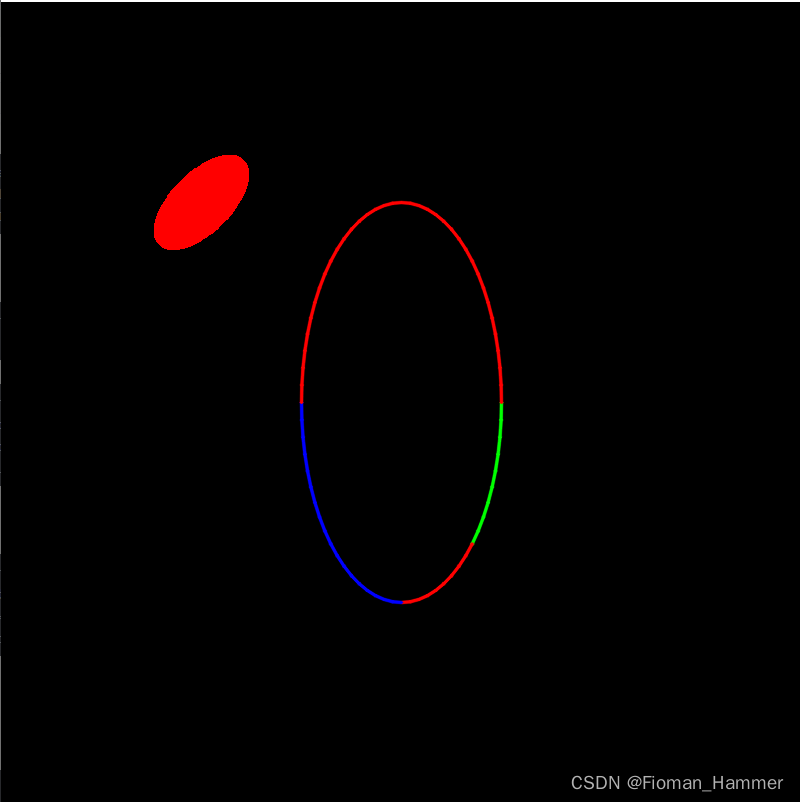
	cv::ellipse(imageSrc, Point(400, 400), Size(100, 200), 0, 0, 45,
	Scalar(0, 255, 0), 2, LINE_AA, 0);

	// 45度到90度,画成红色
	cv::ellipse(imageSrc, Point(400, 400), Size(100, 200), 0, 45, 90,
	Scalar(0, 0, 255), 2, LINE_AA, 0);


	// 90 度 到180度,画成蓝色
	cv::ellipse(imageSrc, Point(400, 400), Size(100, 200), 0, 90, 180,
	Scalar(255,0,0), 2, LINE_AA, 0);

	// 180 度 到 360度画成红色
	cv::ellipse(imageSrc, Point(400, 400), Size(100, 200), 0, 180, 360,
	Scalar(0, 0, 255), 2, LINE_AA, 0);


	// 画整个椭圆,填充的,同时倾斜45度,正值是顺时针倾斜
	cv::ellipse(imageSrc, Point(200, 200), Size(30, 60), 45, 0, 360,
	Scalar(0, 0, 255), -1, LINE_8, 0);

	imshow("Ellipse", imageSrc);
	waitKey(0);
}
结果:
RotatedRect方式绘制矩形
函数原型:
void ellipse(InputOutputArray img, const RotatedRect& box, const Scalar& color,
                        int thickness = 1, int lineType = LINE_8);
参数:
box:一个矩形类,有三个属性:angle,center,size.center表示矩形的综合岗耐心点,angle表示角度,size表示矩形的宽度和高度,注意size.width是主轴的存在.这里没有startAgnle和endAngle,表示画的是整个椭圆
#include "MyOpencv.h"

int main(void)
{
	Mat imageSrc = Mat::zeros(Size(800, 800), CV_8UC3);

	// 根据矩形绘制椭圆
	RotatedRect rect;
	rect.center = Point(200, 200);
	rect.size = Size(100, 50);
	rect.angle = 45;
	cout << "rect.width = " << rect.size.width << endl;
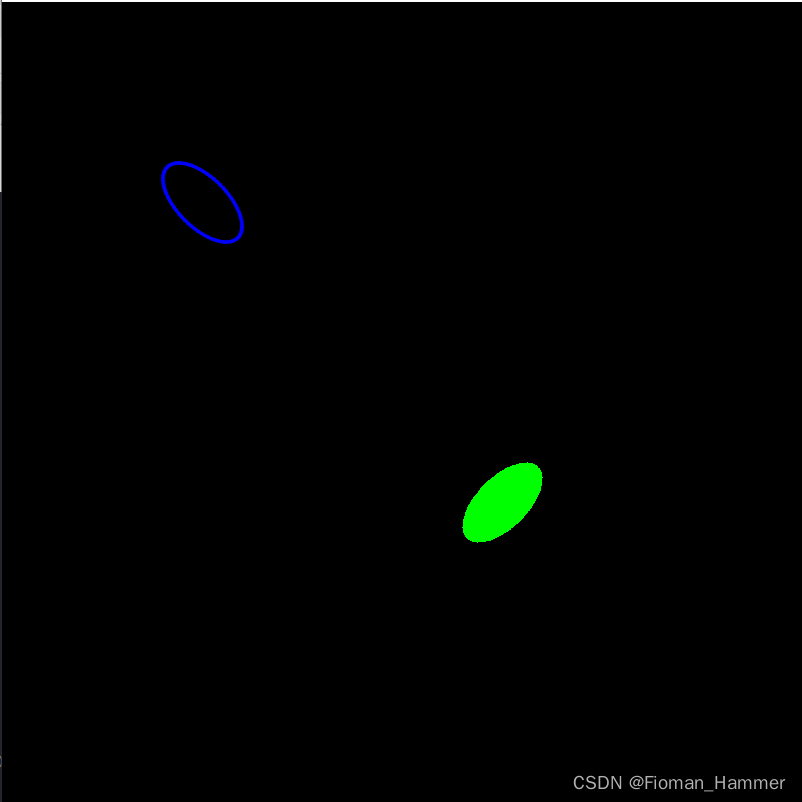
	cv::ellipse(imageSrc, rect, Scalar(255, 0, 0), 2, LINE_AA);

	rect.angle = 45;
	rect.center = Point(500, 500);
	rect.size = Size(50, 100);
	cout << "rect.width = " << rect.size.width << endl;
	cv::ellipse(imageSrc, rect, Scalar(0, 255, 0), -1, LINE_4);

	imshow("Ellipse", imageSrc);
	waitKey(0);
	return 0;
}
结果:
五. 绘制多边形
根据多边形的顶点顺序绘制
函数原型:
void polylines(InputOutputArray img, InputArrayOfArrays pts,
                            bool isClosed, const Scalar& color,
                            int thickness = 1, int lineType = LINE_8, int shift = 0 );
参数:
img:源图像pts:点位数组,一般是一个vector<Point>类型isClosed:是否闭合,也就是是否末尾和首部再画一条直线color:绘制颜色thickness:线条粗细,只能是正值,不能是-1lineType:线条类型shift:保留小数点后几位
#include "MyOpencv.h"
#include <vector>

int main(void)
{
	Mat imageSrc = Mat::zeros(Size(800, 800), CV_8UC3);
	vector<Point> pts;
	pts.push_back(Point(10, 10));
	pts.push_back(Point(50, 50));
	pts.push_back(Point(30, 80));
	pts.push_back(Point(10, 150));

	//cv::polylines(imageSrc, pts, false, Scalar(0, 255, 0), -1, LINE_8, 0);
	//不能是-1,画多边形的时候,填充有固定的方法
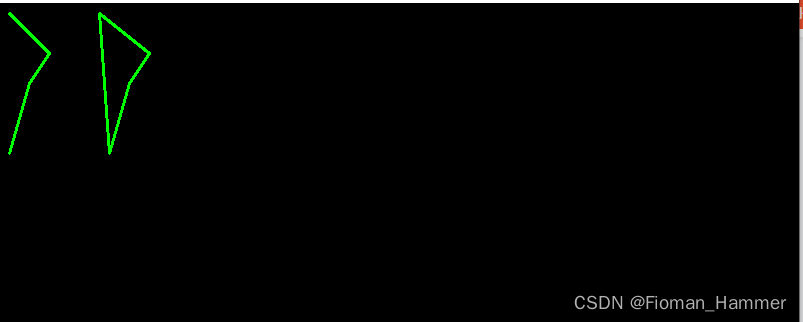
	cv::polylines(imageSrc, pts, false, Scalar(0, 255, 0), 2, LINE_8, 0);

	pts.clear();
	pts.push_back(Point(100, 10));
	pts.push_back(Point(150, 50));
	pts.push_back(Point(130, 80));
	pts.push_back(Point(110, 150));
	cv::polylines(imageSrc, pts, true, Scalar(0, 255, 0), 2, LINE_8, 0);

	imshow("PolyLines", imageSrc);
	waitKey(0);
	return 0;
}
结果:
根据多边形数组指针绘制:
void polylines(InputOutputArray img, const Point* const* pts, const int* npts,
                          int ncontours, bool isClosed, const Scalar& color,
                          int thickness = 1, int lineType = LINE_8, int shift = 0 );
参数说明:
img:绘制的源图像pts:指向多边形数组的指针,必须是const修饰的npts:是多边形顶点个数的数组名ncontours:绘制多边形的个数isColosed:是否闭合其他:同上
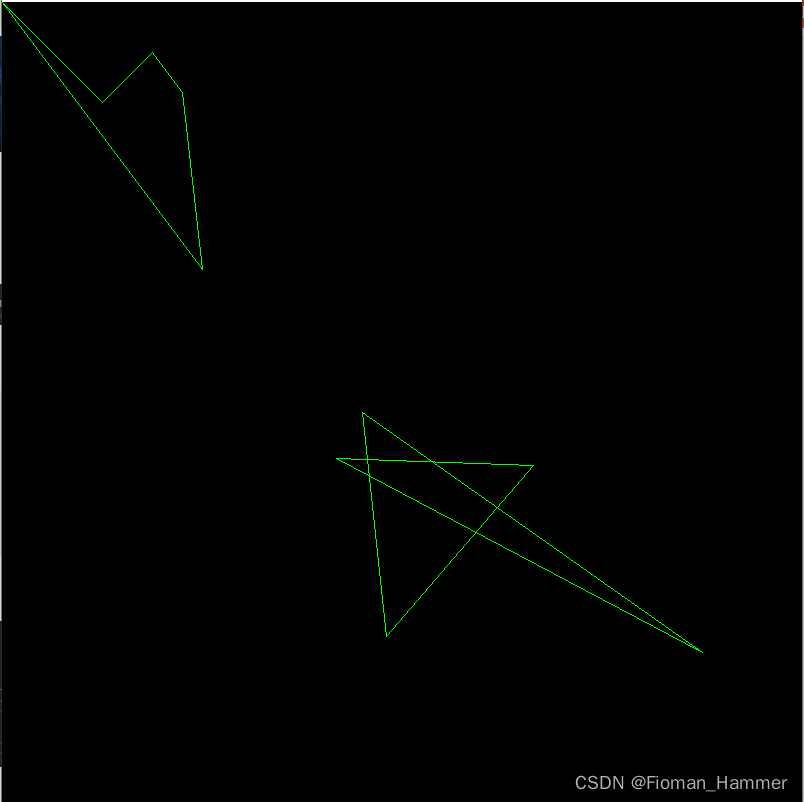
这个函数可以绘制多个多边形:
#include"MyOpencv.h"

int main(void)
{
	Mat imageSrc = Mat::zeros(Size(800, 800), CV_8UC3);
	Point p[2][5] =
	{
		{
			Point(100,100),Point(150,50),Point(180,90),Point(200,267)
		},
		{
			Point(360,410),Point(700,650),Point(334,456),Point(531,463),Point(384,634)
		}
	};
	// 这个指针数组存储每一个多边形的定点所在的一维数组的地址
	const Point *pp[] = { p[0],p[1] };
	int pointNumber[] = { 5,5 };
	int polyNumber = 2;

	cv::polylines(imageSrc, pp, pointNumber, polyNumber, true, Scalar(0, 255, 0), 1);
	imshow("PolyLines", imageSrc);
	waitKey(0);

	return 0;
}
结果:
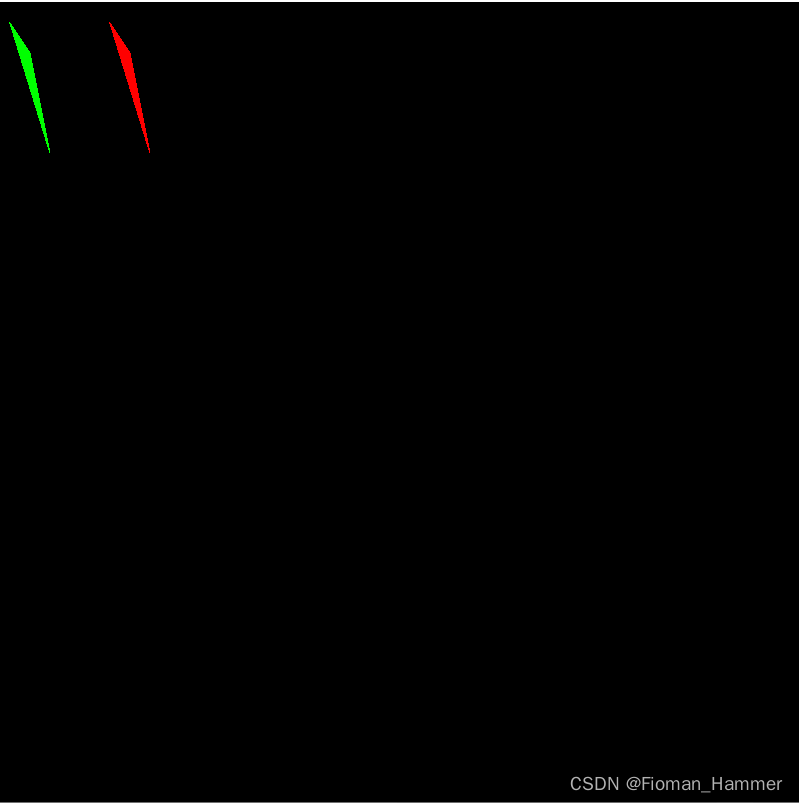
绘制填充多边形,不能简单的把thickness置为-1,需要使用另外的API
绘制填充多边形的函数原型:
void fillPoly(InputOutputArray img, InputArrayOfArrays pts,
                           const Scalar& color, int lineType = LINE_8, int shift = 0,
                           Point offset = Point() );
参数说明:
- 主要说下最后一个参数
offset:表示绘制的多边形,整体的偏移x轴和y轴offset的距离 - 其他的参数和
polylines一样,但是注意因为是绘制填充的多边形,所以没有thickness参数
#include "MyOpencv.h"
#include <vector>

int main(void)
{
	Mat imageSrc = Mat::zeros(Size(800, 800), CV_8UC3);

	vector<Point> pts;
	pts.push_back(Point(10, 20));
	pts.push_back(Point(30, 50));
	pts.push_back(Point(40, 100));
	pts.push_back(Point(50, 150));

	cv::fillPoly(imageSrc, pts, Scalar(0, 255, 0), LINE_4, 0, Point(0, 0));
	cv::fillPoly(imageSrc, pts, Scalar(0, 0, 255), LINE_4, 0, Point(100, 0));

	imshow("FillPolylines", imageSrc);
	waitKey(0);
	return 0;
}
结果:
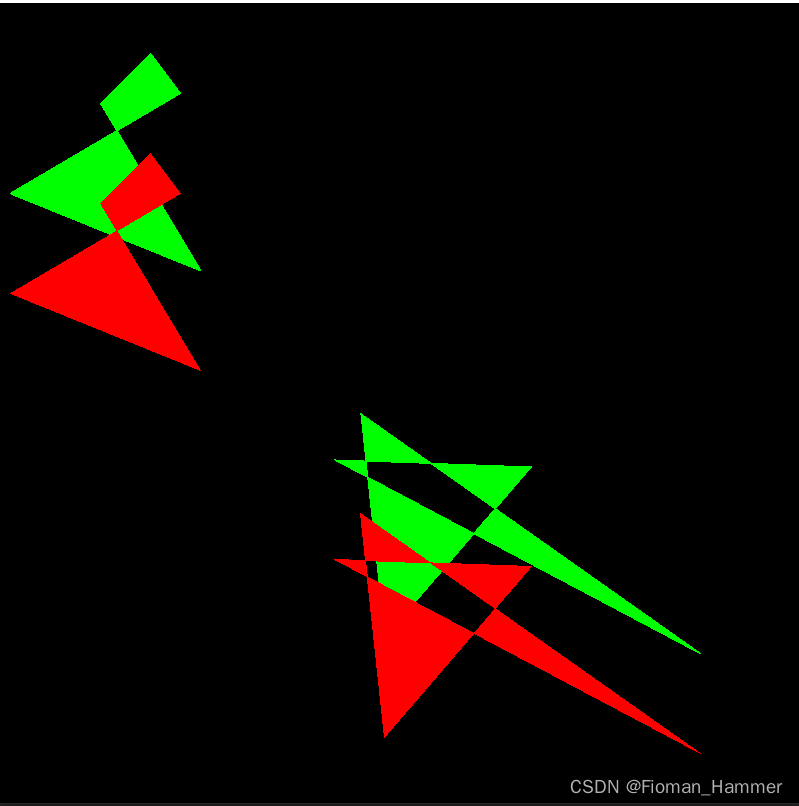
绘制多个填充的多边形:
函数原型:
void fillPoly(InputOutputArray img, const Point** pts,
                         const int* npts, int ncontours,
                         const Scalar& color, int lineType = LINE_8, int shift = 0,
                         Point offset = Point() );
参数说明:
同 polylines()
#include "MyOpencv.h"

int main(void)
{
	Mat imageSrc = Mat::zeros(Size(800, 800), CV_8UC3);
	Point p[2][5] =
	{
		{
			Point(100,100),
			Point(150,50),
			Point(180,90),
			Point(10,190),
			Point(200,267)
		},
		{
			Point(360,410),
			Point(700,650),
			Point(334,456),
			Point(531,463),
			Point(384,634)

		}
	};
	const Point *pp[] = {p[0],p[1]};
	int pointsNumber[] = {5,5};
	int polyNumber = 2;

	cv::fillPoly(imageSrc, pp, pointsNumber, polyNumber, Scalar(0, 255, 0),
	LINE_4, 0, Point(0, 0)); // 0偏移
	cv::fillPoly(imageSrc, pp, pointsNumber, polyNumber, Scalar(0, 0, 255),
	LINE_8, 0, Point(0, 100));// y轴偏移100

	imshow("FillPoly", imageSrc);
	waitKey(0);

	return 0;
}
结果:
六.绘制文字
函数原型:
void putText( InputOutputArray img, const String& text, Point org,
                         int fontFace, double fontScale, Scalar color,
                         int thickness = 1, int lineType = LINE_8,
                         bool bottomLeftOrigin = false );
参数解释:
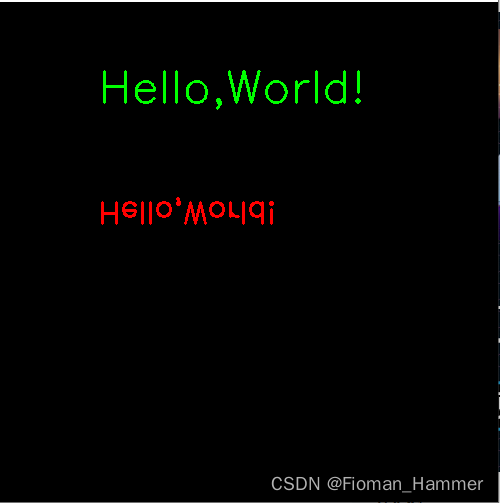
img:绘制的原图text:绘制的文本字符串,不支持中文org:文本框的位置,由最后一个参数决定.默认是false,左上角.也就是说文本框的左上角是这个坐标fontFace:字体类型fontScale:字体大小比例,值越大,字体越大color:字体颜色thickness:字体的线条粗细lineType:线条的类型bottomLeftOrigin:当为flase的时候是在左上角,当为true的时候在左下角.左下角绘制的时候,文字是倒着的.
#include "MyOpencv.h"

int main(void)
{
	Mat imageSrc = Mat::zeros(Size(500, 500), CV_8UC3);

	cv::putText(imageSrc, "Hello,World!", Point(100, 100), cv::FONT_HERSHEY_SIMPLEX, 1.5, Scalar(0,255,0), 2, LINE_4, false);

	cv::putText(imageSrc, "Hello,World!", Point(100, 200), cv::FONT_HERSHEY_SIMPLEX, 1,Scalar(0,0,255), 2, LINE_4, true);

	imshow("PutFontImage", imageSrc);

	waitKey(0);


	return 0;
}
结果:
