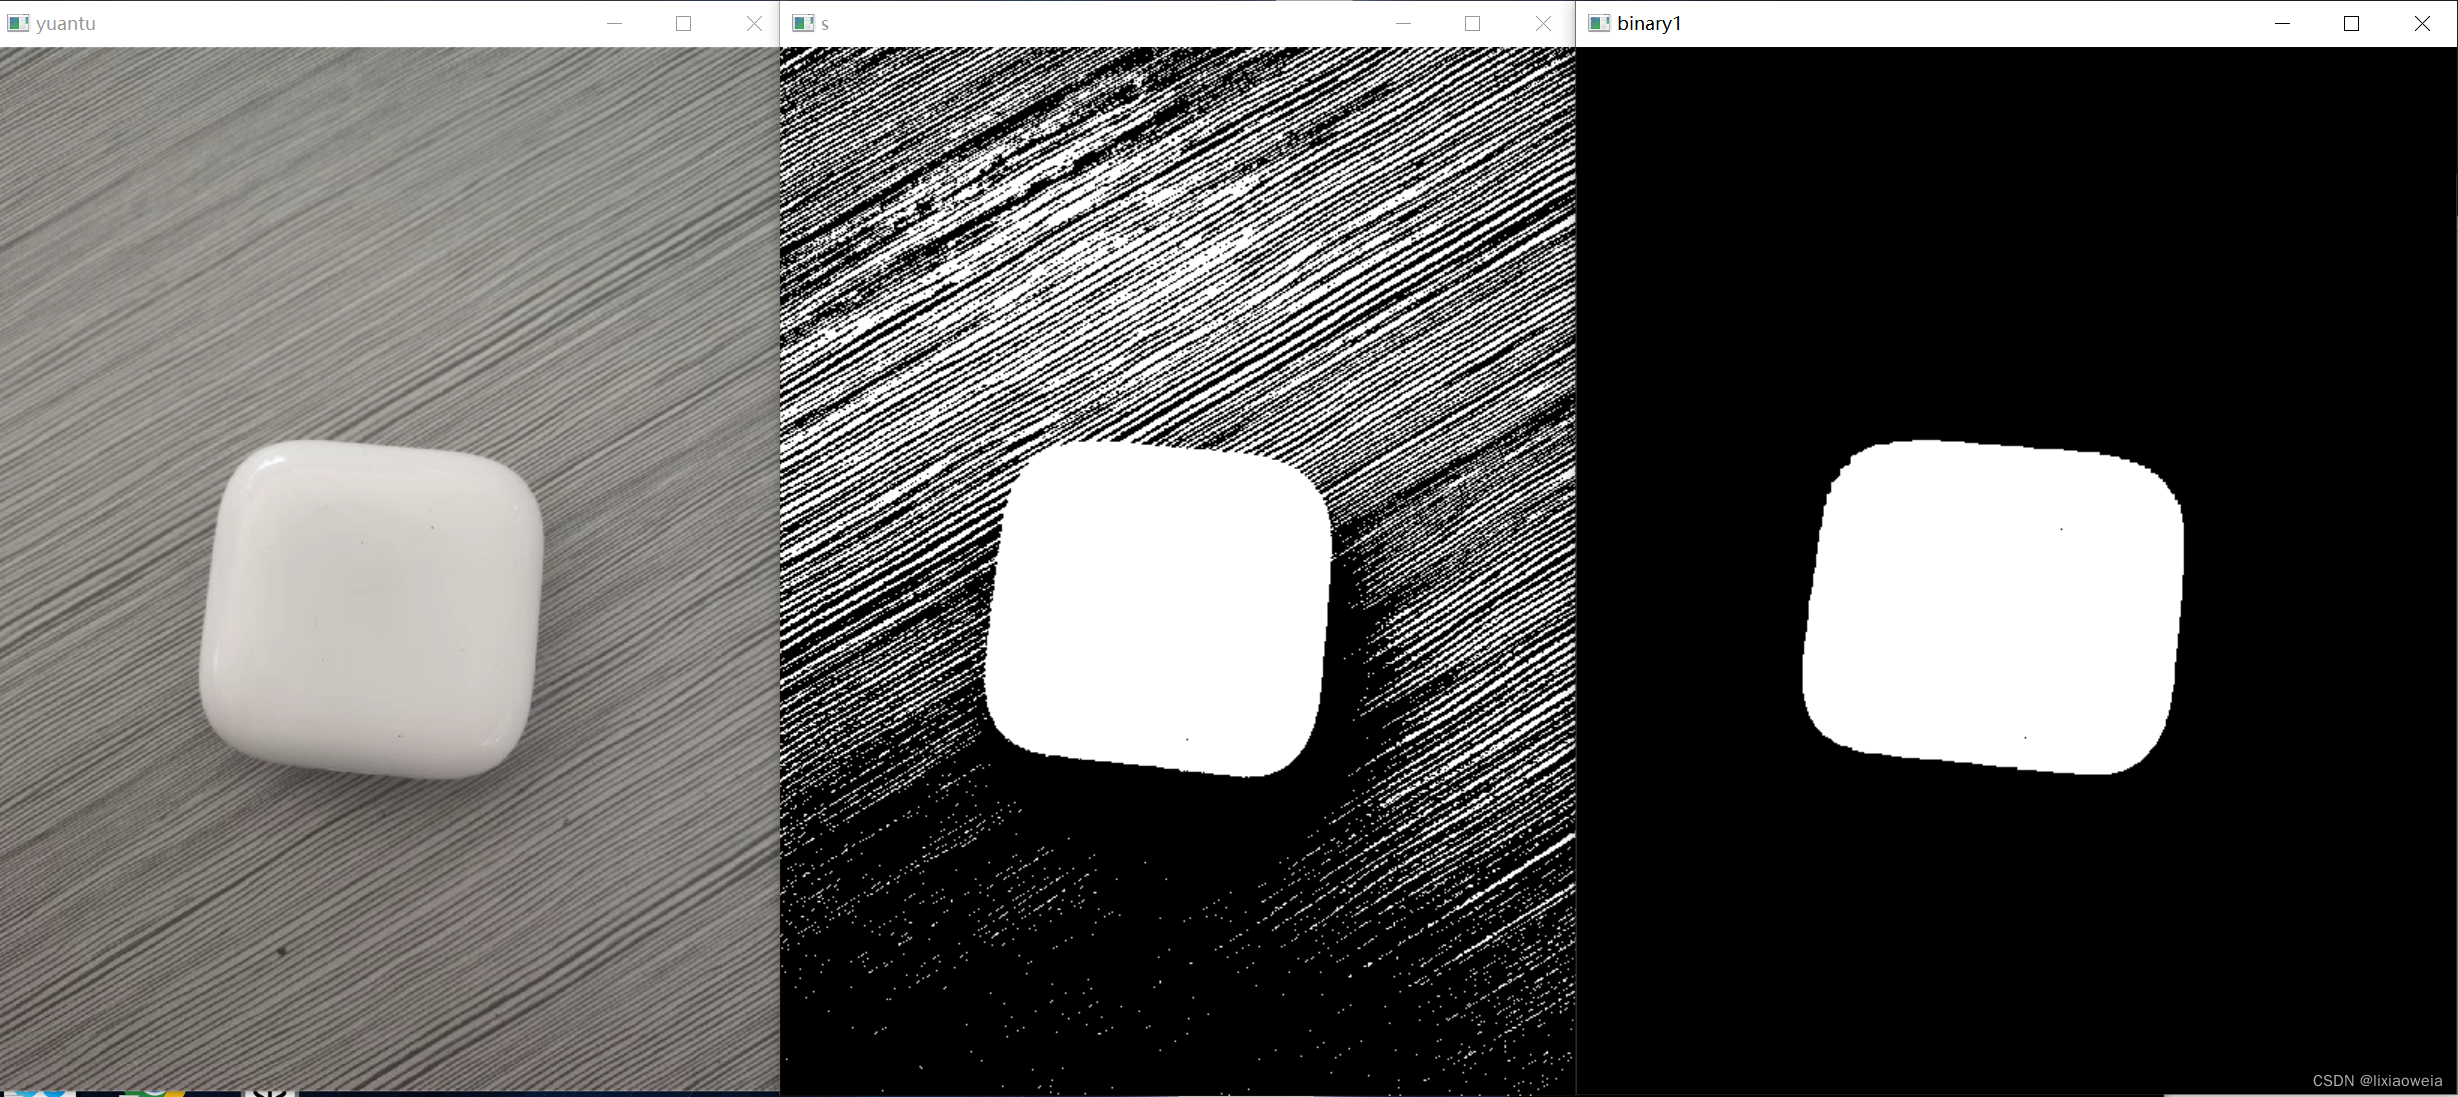
找图像分割的时候看到了GrabCut算法,但是大部分都是要人机交互用鼠标划分区域,想着先通过大轮廓把目标图像分割出来,排除背景干扰,然后对目标图像进一步细节处理。
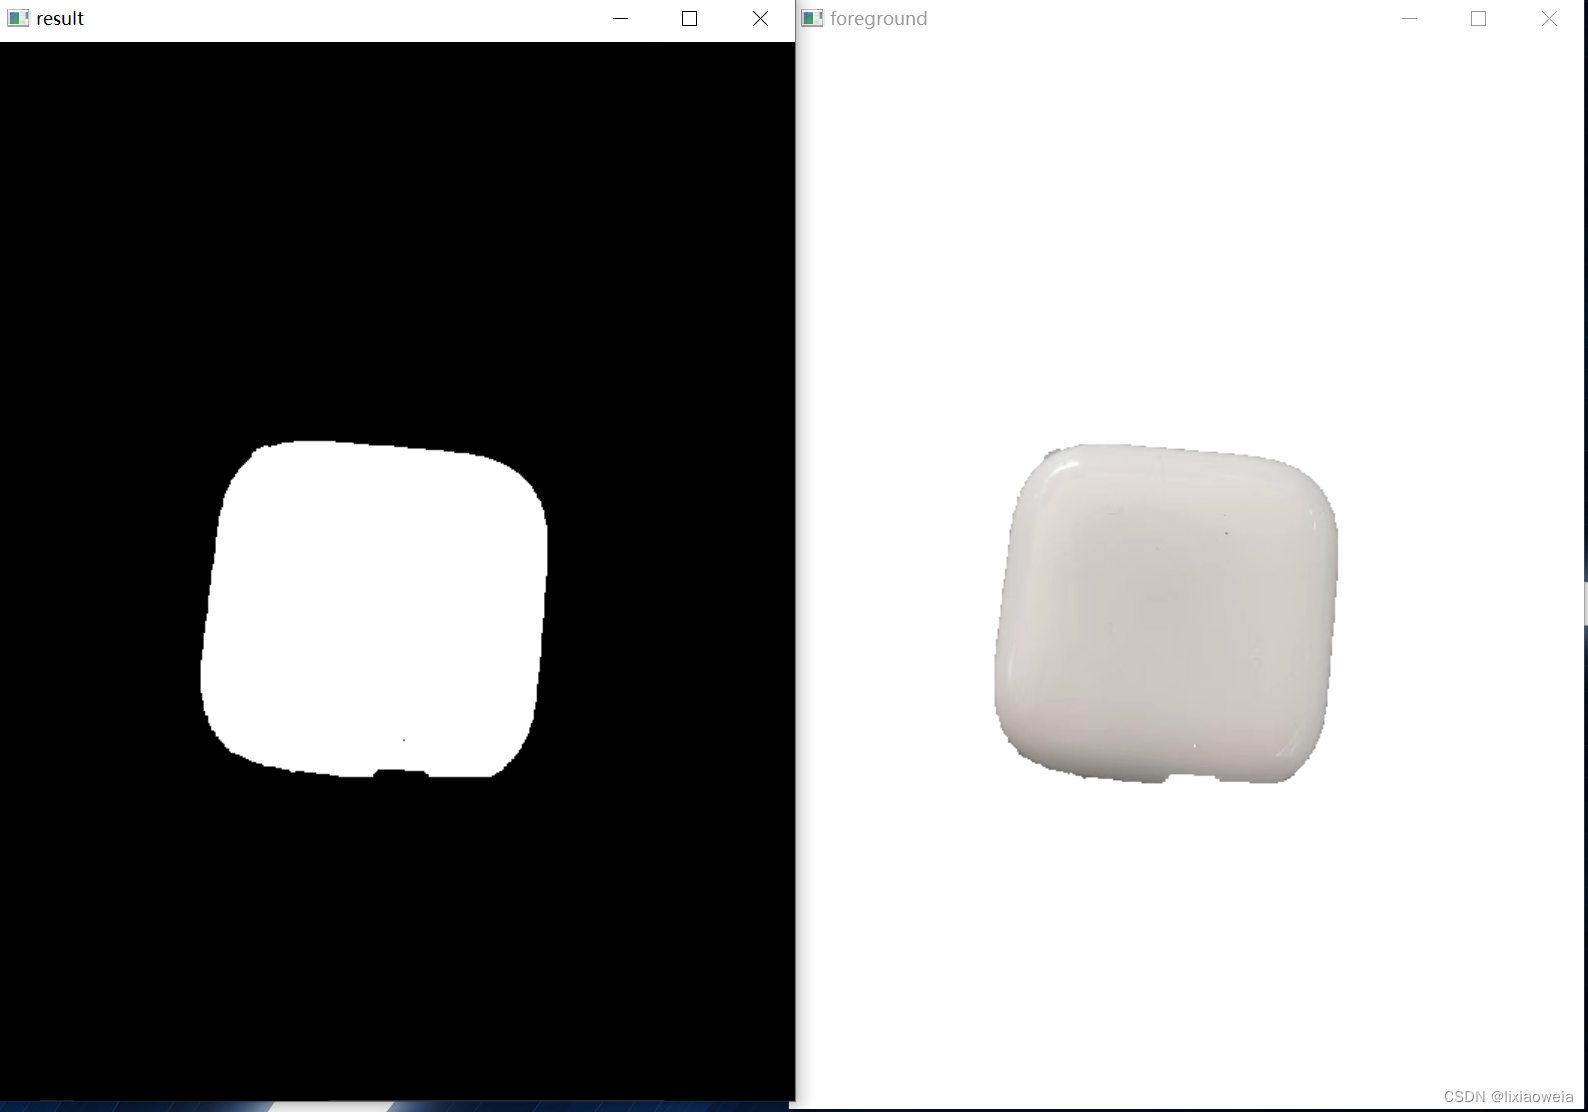
配置好opencv环境后,按照如下代码,先通过形态学进行预处理,然后找到最大轮廓的正外接矩形,把这个矩形当成GrabCut算法中需要的参数进行分割,最后结果还不错。
函数原型:
void grabCut( InputArray img, InputOutputArray mask, Rect rect,
                           InputOutputArray bgdModel, InputOutputArray fgdModel,
                           int iterCount, int mode = GC_EVAL );
img: 输入图像,必须是8位3通道图像,在处理过程中不会被修改
mask: 掩码图像,用来确定哪些区域是背景,前景,可能是背景,可能是前景等。mask既可以作为输入也可以作为输出。作为输入时,mode要选择GC_INIT_WITH_MASK (=1);
? ? ? ? ? ? GCD_BGD (=0), 背景; ? ? ? ? ? ? ? ? ? ? ? ?GCD_FGD (=1),前景;
? ? ? ? ? ? GCD_PR_BGD (=2),可能是背景; ? ? ? GCD_PR_FGD(=3),可能是前景。
? ? ? ? ? ? 如果没有手工标记GCD_BGD 或者GCD_FGD,那么结果只会有GCD_PR_BGD和GCD_PR_FGD
rect: 包含前景的矩形,格式为(x, y, w, h)
bdgModel,fgdModel: 算法内部使用的数组,只需要创建两个大小为(1,65),数据类型为np.float64的数组
iterCount: 算法迭代的次数
mode: 用来指示grabCut函数进行什么操作:
? ? ? ? ? ? cv.GC_INIT_WITH_RECT (=0),用矩形窗初始化GrabCut;
? ? ? ? ? ? cv.GC_INIT_WITH_MASK (=1),用掩码图像初始化GrabCut。
算法调用流程:
(1)读取一张图片,用矩形标记出前景部分。
(2)调用grabCut(),获得分割结果。
(3)由于grabCut函数返回的分割结果,包含四种值:确定属于背景像素、可能属于背景像素、确定属于前景像素、可能属于前景像素。所以,根据需要,从返回结果中提取需要值。
(4)根据需要从结果提取需要的值(矩阵)后,通过掩码,对图片进行分割。
关于GrabCut算法可以参考以下文章:
OpenCV3学习(7.3)——图像分割之三(GrabCut算法)
// test1.cpp : 此文件包含 "main" 函数。程序执行将在此处开始并结束。
//
#include <windows.h>
#include <iostream>
#include <opencv2/core/core.hpp>
#include <opencv2/highgui/highgui.hpp>
#include <opencv2/imgproc/imgproc.hpp>
#include <opencv2/core/utils/logger.hpp>
#include <thread>
#include <stdio.h>
#include <string.h>
using namespace std;
using namespace cv;
int main()
{

    Rect boundRect;


    //【1】载入原图并显示
    Mat img = imread("C:\\Users\\lixiaowei\\Desktop\\2.jpg", 1); // 读入图像


    namedWindow("yuantu", WINDOW_NORMAL);
    imshow("yuantu", img);

    Mat gray1, binary1;
    cvtColor(img, gray1, COLOR_BGR2GRAY);

    threshold(gray1, binary1, 20, 255,THRESH_OTSU);
    namedWindow("s", WINDOW_NORMAL);
    imshow("s", binary1);
    Mat kernel1 = getStructuringElement(MORPH_RECT, cv::Size(9, 9), cv::Point(-1, -1));//定义闭运算算子
    erode(binary1, binary1, kernel1, Point(-1, -1),5);
    dilate(binary1, binary1, kernel1, Point(-1, -1),5);

    namedWindow("binary1", WINDOW_NORMAL);
    imshow("binary1", binary1);

    std::vector<std::vector<cv::Point>> contoursDest2;
    std::vector<Vec4i> hierarchy2;
    findContours(binary1, contoursDest2, hierarchy2, RETR_TREE, CHAIN_APPROX_NONE);

    Mat m = Mat::zeros(binary1.size(), CV_8UC1); //最小外接矩形画布


    vector<double> g_dConArea(contoursDest2.size());
    for (int i = 0; i < contoursDest2.size(); i++)
    {
        //计算轮廓的面积
        g_dConArea[i] = contourArea(contoursDest2[i]);
    }
    //寻找面积最大的部分
    int max = 0;
    for (int i = 1; i < contoursDest2.size(); i++) {
        if (g_dConArea[i] > g_dConArea[max]) {
            max = i;
        }
    }

    //绘制轮廓
    drawContours(m, contoursDest2, max, Scalar(255), 1, 8, hierarchy2);
    boundRect = boundingRect(Mat(contoursDest2[max]));
    rectangle(m, Point(boundRect.x, boundRect.y), Point(boundRect.x + boundRect.width, boundRect.y + boundRect.height), Scalar(255), 8, 8);


    namedWindow("标注出矩形", WINDOW_NORMAL);
    imshow("标注出矩形",m );


    //【2】使用grabCut算法分割
    //循环执行3次,这个可以自己设置
    Mat result;
    Mat bgModel, fgModel;
    grabCut(img, result, boundRect, bgModel, fgModel, 1, GC_INIT_WITH_RECT);
    namedWindow("grab", WINDOW_NORMAL);
    imshow("grab", result);
    //threshold();//二值化就可以显示
    compare(result, GC_PR_FGD, result, CMP_EQ);
    //result=result&1; 两种方法
    namedWindow("result", WINDOW_NORMAL);
    imshow("result", result);

    //【3】显示分割前后的图像
    Mat foreground(img.size(), CV_8UC3, Scalar(255, 255, 255));
    img.copyTo(foreground, result);
    //img.copy(forground, result);
    namedWindow("foreground", WINDOW_NORMAL);
    imshow("foreground", foreground);
    waitKey(0);

}
最后贴上图片:


?
?