针对这个问题,我找遍了全网,都没有找到这个代码,都是在水平方向进行相应的拼接过程,自己也是看了一些代码,试图去修改一下,然后展示出来,但是修改的过程总是出现问题.
重点来了,其实这个问题特别的容易解决,现在既然只能够实现水平拼接,那么将采集到的图片进行一个旋转,之后进行水平拼接,再将其旋转回去不就可以了吗.------是不是有种一语道破梦中人的感觉!(浪费了那么长时间去改代码,不如换一种思路去解决问题)
首先是实现相应的图片旋转的过程,代码是如下所示:
#include <windows.h>
#include <opencv2\opencv.hpp>
#include <iostream>
using namespace std;
using namespace cv;

int main()
{
	Mat src = imread("C://Users//td//Desktop//相机图像大//7.jpg");
	Mat dst;
	Point center(src.cols / 2, src.rows / 2); //旋转中心
	double angle = -90.0;  //角度
	double scale = 1.0;  //缩放系数
	Mat rotMat = getRotationMatrix2D(center, angle, scale);
	warpAffine(src, dst, rotMat, src.size());
	imshow("src", src);

	Mat img_matchesOutput;
	resize(dst, img_matchesOutput, Size(1280, 720));
	imshow("MatchSIFT", img_matchesOutput);

	waitKey();
}
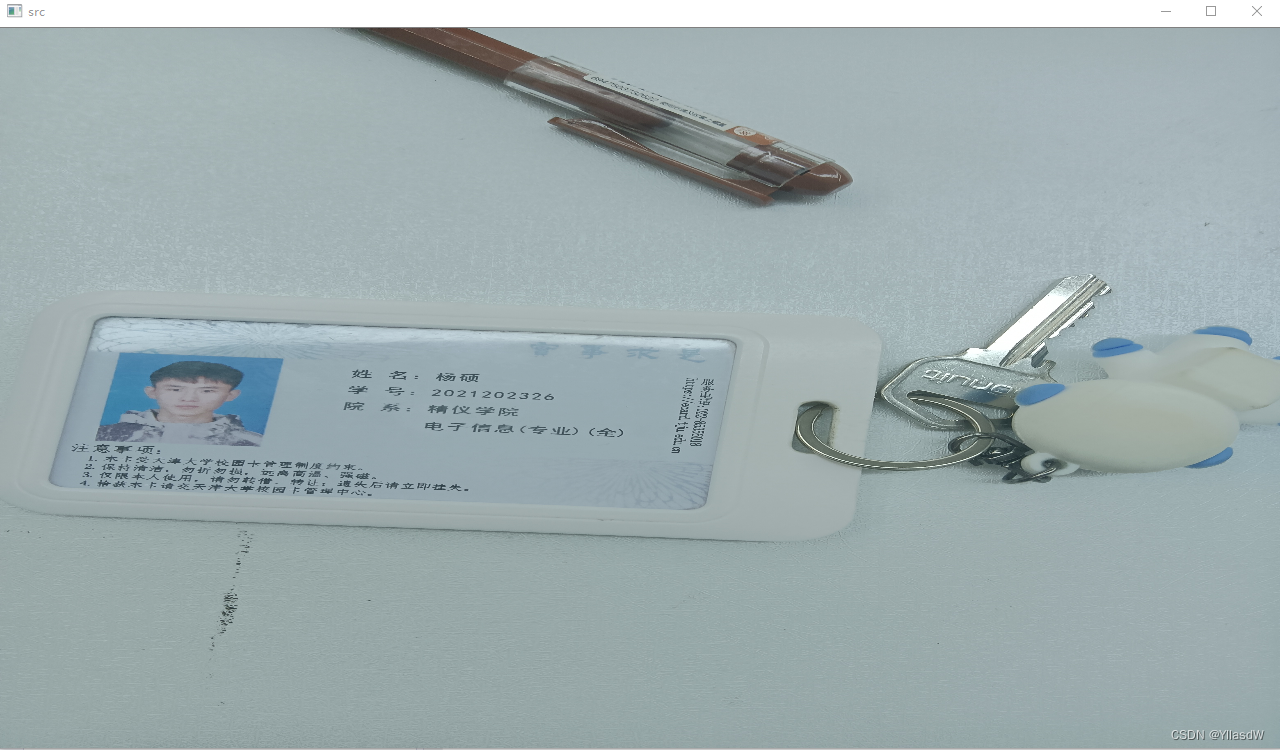
结果示意图:

上面进行一个图片旋转的过程会产生相应的黑色区域,使得进行匹配的过程会出现问题,所以上面的过程是存在一定的问题的。
#include <opencv2/opencv.hpp>
using namespace cv;

int main()
{
	Mat src = imread("C:\\Users\\td\\Desktop\\相机图像大/t1.jpg", 1);
	Mat srcCopy = Mat(src.rows, src.cols, src.depth());
	transpose(src, srcCopy);
	//flip(srcCopy, srcCopy, 1);  //rotate 270
	flip(srcCopy, srcCopy, 0);  //rotate 90

	namedWindow("source Image", WINDOW_AUTOSIZE);
	imshow("source Image", src);

	namedWindow("Display Image", WINDOW_AUTOSIZE);
	imshow("Display Image", srcCopy);
	waitKey(0);
	return 0;
}
这个过程是不存在黑色区域的,结果图如下:这里应当注意的是,这里的旋转方向是沿着逆时针进行旋转的,想要改变旋转方向需要改变相应的一个旋转参数。
旋转之前

旋转之后

后面是进行图片拼接的过程:图片拼接有好多方法,直接在网上进行一个调用就可以了。
方法一:opencv库里面自带的一个Stitcher,(要配置OpenCV环境)调用的代码如下所示:
#include <iostream>
#include <string>
#include <vector>
#include <opencv2/opencv.hpp>
#include <opencv2/core/core.hpp>
#include <opencv2/highgui.hpp>
#include <opencv2/stitching.hpp>
#include <opencv2/features2d/features2d.hpp>
#include <opencv2/xfeatures2d/nonfree.hpp>

int main()
{
	//step 1. load img
	std::vector<Mat> imgs;
	Mat img1 = imread("D:/image/img1.png", IMREAD_COLOR);
	Mat img2 = imread("D:/image/img2.png", IMREAD_COLOR);
	imgs.emplace_back(img1);
	imgs.emplace_back(img2);

	//进行拼接的函数 Stitcher
	Mat result;
	Stitcher stitcher = Stitcher::createDefault(false);
	Stitcher::Status status = stitcher.stitch(imgs, result);

	if (status != Stitcher::OK)
	{
		std::string error_msg = "Can't stitch images, error code = " +
        std::to_string(status);
		printff(error_msg);
	}
	else
	{
		imshow("result", result);//这里的图片如果要是过大是显示不全的,可以调用一个改变图片大小的函数
	}
	waitKey(0);
	return 0;
}
方法二:SIFT +?RANSAC(这里需要说明一下配置环境,因为SIFT角点检测方法在OpenCV 3.x版本就申请了专利,因此,建议使用Opencv 2.9.0版本)
#include <opencv2/nonfree/features2d.hpp>
#include <opencv2/imgproc/imgproc.hpp>
#include <opencv2/nonfree/nonfree.hpp>
#include <opencv2/opencv.hpp>
#include <cv.h>
#include <highgui.h>
#include <iostream>
#include <stdio.h>

using namespace cv;
using namespace std;

int main()
{
	initModule_nonfree();//初始化模块,使用SIFT或SURF时用到
	Ptr<FeatureDetector> detector = FeatureDetector::create( "SURF" );//创建SIFT特征检测器,可改成SURF/ORB
	Ptr<DescriptorExtractor> descriptor_extractor = DescriptorExtractor::create( "SURF" );//创建特征向量生成器,可改成SURF/ORB
	Ptr<DescriptorMatcher> descriptor_matcher = DescriptorMatcher::create( "BruteForce" );//创建特征匹配器
	if( detector.empty() || descriptor_extractor.empty() )
		cout<<"fail to create detector!";

	Mat src1 = imread("C:\\Users\\td\\Desktop\\相机图像大\\直杆拼接\\Pic_1.bmp");
	//Mat src1 = imread("C:\\Users\\td\\Desktop\\相机图像大/t1.jpg");
	Mat img1 = Mat(src1.rows, src1.cols, src1.depth());
	transpose(src1, img1);
	flip(img1, img1, 3);  //rotate 90

	Mat src2 = imread("C:\\Users\\td\\Desktop\\相机图像大\\直杆拼接\\Pic_2.bmp");
	//Mat src2 = imread("C:\\Users\\td\\Desktop\\相机图像大/t2.jpg");
	Mat img2 = Mat(src2.rows, src2.cols, src2.depth());
	transpose(src2, img2);
	flip(img2, img2, 3);  //rotate 90

	//特征点检测
	double t = getTickCount();//当前滴答数
	vector<KeyPoint> m_LeftKey,m_RightKey;
	detector->detect( img1, m_LeftKey );//检测img1中的SIFT特征点,存储到m_LeftKey中
	detector->detect( img2, m_RightKey );
	cout<<"图像1特征点个数:"<<m_LeftKey.size()<<endl;
	cout<<"图像2特征点个数:"<<m_RightKey.size()<<endl;

	//根据特征点计算特征描述子矩阵,即特征向量矩阵
	Mat descriptors1,descriptors2;
	descriptor_extractor->compute( img1, m_LeftKey, descriptors1 );
	descriptor_extractor->compute( img2, m_RightKey, descriptors2 );
	t = ((double)getTickCount() - t)/getTickFrequency();
	cout<<"SIFT算法用时:"<<t<<"秒"<<endl;

	cout<<"图像1特征描述矩阵大小:"<<descriptors1.size()
		<<",特征向量个数:"<<descriptors1.rows<<",维数:"<<descriptors1.cols<<endl;
	cout<<"图像2特征描述矩阵大小:"<<descriptors2.size()
		<<",特征向量个数:"<<descriptors2.rows<<",维数:"<<descriptors2.cols<<endl;

	//画出特征点
	Mat img_m_LeftKey,img_m_RightKey;
	drawKeypoints(img1,m_LeftKey,img_m_LeftKey,Scalar::all(-1),0);
	drawKeypoints(img2,m_RightKey,img_m_RightKey,Scalar::all(-1),0);
	//imshow("Src1",img_m_LeftKey);
	//imshow("Src2",img_m_RightKey);

	//特征匹配
	vector<DMatch> matches;//匹配结果
	descriptor_matcher->match( descriptors1, descriptors2, matches );//匹配两个图像的特征矩阵
	cout<<"Match个数:"<<matches.size()<<endl;

	//计算匹配结果中距离的最大和最小值
	//距离是指两个特征向量间的欧式距离,表明两个特征的差异,值越小表明两个特征点越接近
	double max_dist = 0;
	double min_dist = 100;
	for(int i=0; i<matches.size(); i++)
	{
		double dist = matches[i].distance;
		if(dist < min_dist) min_dist = dist;
		if(dist > max_dist) max_dist = dist;
	}
	cout<<"最大距离:"<<max_dist<<endl;
	cout<<"最小距离:"<<min_dist<<endl;

	//筛选出较好的匹配点
	vector<DMatch> goodMatches;
	for(int i=0; i<matches.size(); i++)
	{
		if(matches[i].distance < 0.2 * max_dist)
		{
			goodMatches.push_back(matches[i]);
		}
	}
	cout<<"goodMatch个数:"<<goodMatches.size()<<endl;

	//画出匹配结果
	Mat img_matches;
	//红色连接的是匹配的特征点对,绿色是未匹配的特征点
	drawMatches(img1,m_LeftKey,img2,m_RightKey,goodMatches,img_matches,
		Scalar::all(-1)/*CV_RGB(255,0,0)*/,CV_RGB(0,255,0),Mat(),2);

	Mat img_matchesOutput2;
	resize(img_matches, img_matchesOutput2, Size(1280, 720));
	imshow("MatchSIFT", img_matchesOutput2);

	IplImage result=img_matches;

	waitKey(0);

	//RANSAC匹配过程
	vector<DMatch> m_Matches=goodMatches;
	// 分配空间
	int ptCount = (int)m_Matches.size();
	Mat p1(ptCount, 2, CV_32F);
	Mat p2(ptCount, 2, CV_32F);

	// 把Keypoint转换为Mat
	Point2f pt;
	for (int i=0; i<ptCount; i++)
	{
		pt = m_LeftKey[m_Matches[i].queryIdx].pt;
		p1.at<float>(i, 0) = pt.x;
		p1.at<float>(i, 1) = pt.y;

		pt = m_RightKey[m_Matches[i].trainIdx].pt;
		p2.at<float>(i, 0) = pt.x;
		p2.at<float>(i, 1) = pt.y;
	}

	// 用RANSAC方法计算F
	Mat m_Fundamental;
	vector<uchar> m_RANSACStatus;       // 这个变量用于存储RANSAC后每个点的状态
	findFundamentalMat(p1, p2, m_RANSACStatus, FM_RANSAC);

	// 计算野点个数

	int OutlinerCount = 0;
	for (int i=0; i<ptCount; i++)
	{
		if (m_RANSACStatus[i] == 0)    // 状态为0表示野点
		{
			OutlinerCount++;
		}
	}
	int InlinerCount = ptCount - OutlinerCount;   // 计算内点
	cout<<"内点数为:"<<InlinerCount<<endl;


   // 这三个变量用于保存内点和匹配关系
   vector<Point2f> m_LeftInlier;
   vector<Point2f> m_RightInlier;
   vector<DMatch> m_InlierMatches;

	m_InlierMatches.resize(InlinerCount);
	m_LeftInlier.resize(InlinerCount);
	m_RightInlier.resize(InlinerCount);
	InlinerCount=0;
	float inlier_minRx=img1.cols;        //用于存储内点中右图最小横坐标,以便后续融合

	for (int i=0; i<ptCount; i++)
	{
		if (m_RANSACStatus[i] != 0)
		{
			m_LeftInlier[InlinerCount].x = p1.at<float>(i, 0);
			m_LeftInlier[InlinerCount].y = p1.at<float>(i, 1);
			m_RightInlier[InlinerCount].x = p2.at<float>(i, 0);
			m_RightInlier[InlinerCount].y = p2.at<float>(i, 1);
			m_InlierMatches[InlinerCount].queryIdx = InlinerCount;
			m_InlierMatches[InlinerCount].trainIdx = InlinerCount;

			if(m_RightInlier[InlinerCount].x<inlier_minRx) inlier_minRx=m_RightInlier[InlinerCount].x;   //存储内点中右图最小横坐标

			InlinerCount++;
		}
	}

	// 把内点转换为drawMatches可以使用的格式
	vector<KeyPoint> key1(InlinerCount);
	vector<KeyPoint> key2(InlinerCount);
	KeyPoint::convert(m_LeftInlier, key1);
	KeyPoint::convert(m_RightInlier, key2);

    // 显示计算F过后的内点匹配
	Mat OutImage;
	drawMatches(img1, key1, img2, key2, m_InlierMatches, OutImage);
	//cvNamedWindow( "Match features", 1);
	//cvShowImage("Match features", &IplImage(OutImage));
	waitKey(0);

	cvDestroyAllWindows();

	//矩阵H用以存储RANSAC得到的单应矩阵
	Mat H = findHomography( m_LeftInlier, m_RightInlier, RANSAC );

	//存储左图四角,及其变换到右图位置
	std::vector<Point2f> obj_corners(4);
	obj_corners[0] = Point(0,0); obj_corners[1] = Point( img1.cols, 0 );
	obj_corners[2] = Point( img1.cols, img1.rows ); obj_corners[3] = Point( 0, img1.rows );
	std::vector<Point2f> scene_corners(4);
	perspectiveTransform( obj_corners, scene_corners, H);

	//画出变换后图像位置
	Point2f offset( (float)img1.cols, 0);
	line( OutImage, scene_corners[0]+offset, scene_corners[1]+offset, Scalar( 0, 255, 0), 4 );
	line( OutImage, scene_corners[1]+offset, scene_corners[2]+offset, Scalar( 0, 255, 0), 4 );
	line( OutImage, scene_corners[2]+offset, scene_corners[3]+offset, Scalar( 0, 255, 0), 4 );
	line( OutImage, scene_corners[3]+offset, scene_corners[0]+offset, Scalar( 0, 255, 0), 4 );
	imshow( "Good Matches & Object detection", OutImage );
	Mat img_matchesOutput3;
	resize(OutImage, img_matchesOutput3, Size(1280, 720));
	imshow("Good Matches & Object detection", img_matchesOutput3);
	/*	while(1)
	{
		if(waitKey(100)==19) cvSaveImage("E:\\warp_position.jpg",  &IplImage(OutImage));
		if(waitKey(100)==27) break;
	}                                                              //按esc继续,ctl+s保存图像
	*/
	int drift = scene_corners[1].x;                                                        //储存偏移量

	//新建一个矩阵存储配准后四角的位置
	int width = int(max(abs(scene_corners[1].x), abs(scene_corners[2].x)));
	int height= img1.rows;                                                                  //或者:int height = int(max(abs(scene_corners[2].y), abs(scene_corners[3].y)));
	float origin_x=0,origin_y=0;
		if(scene_corners[0].x<0) {
			if (scene_corners[3].x<0) origin_x+=min(scene_corners[0].x,scene_corners[3].x);
		else origin_x+=scene_corners[0].x;}
		width-=int(origin_x);
	if(scene_corners[0].y<0) {
		if (scene_corners[1].y) origin_y+=min(scene_corners[0].y,scene_corners[1].y);
		else origin_y+=scene_corners[0].y;}
	//可选:height-=int(origin_y);
	Mat imageturn=Mat::zeros(width,height,img1.type());

	//获取新的变换矩阵,使图像完整显示
	for (int i=0;i<4;i++) {scene_corners[i].x -= origin_x; } 	//可选:scene_corners[i].y -= (float)origin_y; }
	Mat H1=getPerspectiveTransform(obj_corners, scene_corners);

	//进行图像变换,显示效果
	warpPerspective(img1,imageturn,H1,Size(width,height));


	Mat img_matchesOutput4;
	resize(imageturn, img_matchesOutput4, Size(1280, 720));
	imshow("image_Perspective", img_matchesOutput4);

	waitKey(0);


	//图像融合
	int width_ol=width-int(inlier_minRx-origin_x);
	int start_x=int(inlier_minRx-origin_x);
    cout<<"width: "<<width<<endl;
	cout<<"img1.width: "<<img1.cols<<endl;
	cout<<"start_x: "<<start_x<<endl;
	cout<<"width_ol: "<<width_ol<<endl;

	uchar* ptr=imageturn.data;
	double alpha=0, beta=1;
	for (int row=0;row<height;row++) {
		ptr=imageturn.data+row*imageturn.step+(start_x)*imageturn.elemSize();
		for(int col=0;col<width_ol;col++)
		{
			uchar* ptr_c1=ptr+imageturn.elemSize1();  uchar*  ptr_c2=ptr_c1+imageturn.elemSize1();
			uchar* ptr2=img2.data+row*img2.step+(col+int(inlier_minRx))*img2.elemSize();
			uchar* ptr2_c1=ptr2+img2.elemSize1();  uchar* ptr2_c2=ptr2_c1+img2.elemSize1();


			alpha=double(col)/double(width_ol); beta=1-alpha;

			if (*ptr==0&&*ptr_c1==0&&*ptr_c2==0) {
				*ptr=(*ptr2);
				*ptr_c1=(*ptr2_c1);
				*ptr_c2=(*ptr2_c2);
			}

			*ptr=(*ptr)*beta+(*ptr2)*alpha;
			*ptr_c1=(*ptr_c1)*beta+(*ptr2_c1)*alpha;
			*ptr_c2=(*ptr_c2)*beta+(*ptr2_c2)*alpha;

			ptr+=imageturn.elemSize();
		}	}

	//imshow("image_overlap", imageturn);
	//waitKey(0);

	Mat img_result=Mat::zeros(height,width+img2.cols-drift,img1.type());
	uchar* ptr_r=imageturn.data;

	for (int row=0;row<height;row++) {
		ptr_r=img_result.data+row*img_result.step;

		for(int col=0;col<imageturn.cols;col++)
		{
			uchar* ptr_rc1=ptr_r+imageturn.elemSize1();  uchar*  ptr_rc2=ptr_rc1+imageturn.elemSize1();

			uchar* ptr=imageturn.data+row*imageturn.step+col*imageturn.elemSize();
			uchar* ptr_c1=ptr+imageturn.elemSize1();  uchar*  ptr_c2=ptr_c1+imageturn.elemSize1();

			*ptr_r=*ptr;
			*ptr_rc1=*ptr_c1;
			*ptr_rc2=*ptr_c2;

			ptr_r+=img_result.elemSize();
		}

		ptr_r=img_result.data+row*img_result.step+imageturn.cols*img_result.elemSize();
		for(int col=imageturn.cols;col<img_result.cols;col++)
		{
			uchar* ptr_rc1=ptr_r+imageturn.elemSize1();  uchar*  ptr_rc2=ptr_rc1+imageturn.elemSize1();

			uchar* ptr2=img2.data+row*img2.step+(col-imageturn.cols+drift)*img2.elemSize();
			uchar* ptr2_c1=ptr2+img2.elemSize1();  uchar* ptr2_c2=ptr2_c1+img2.elemSize1();

			*ptr_r=*ptr2;
			*ptr_rc1=*ptr2_c1;
			*ptr_rc2=*ptr2_c2;

			ptr_r+=img_result.elemSize();
		}
	}
	Mat img_matchesOutput5;
	resize(img_result, img_matchesOutput5, Size(1280, 720));
	imshow("image_result", img_matchesOutput5);

	/*
		while(1)
	{
		if(waitKey(100)==19) cvSaveImage("E:\\final_result.jpg",  &IplImage(img_result));
		if(waitKey(100)==27) break;                     //按esc退出,ctl+s保存图像
	}
	*/
	return 0;
}
当然是还有其他的方法,SIFT毕竟检测速度并不是很快,其余的方法自行研究。