文章目录
1. 准备工作
需要几个文件:
- OpenCV + Contrib源码
- CMake工具
- Visual Studio IDE
1.1 OpenCV + Contrib源码下载
下载地址:https://github.com/opencv
-
OpenCV下载
下载最新的Release即可。
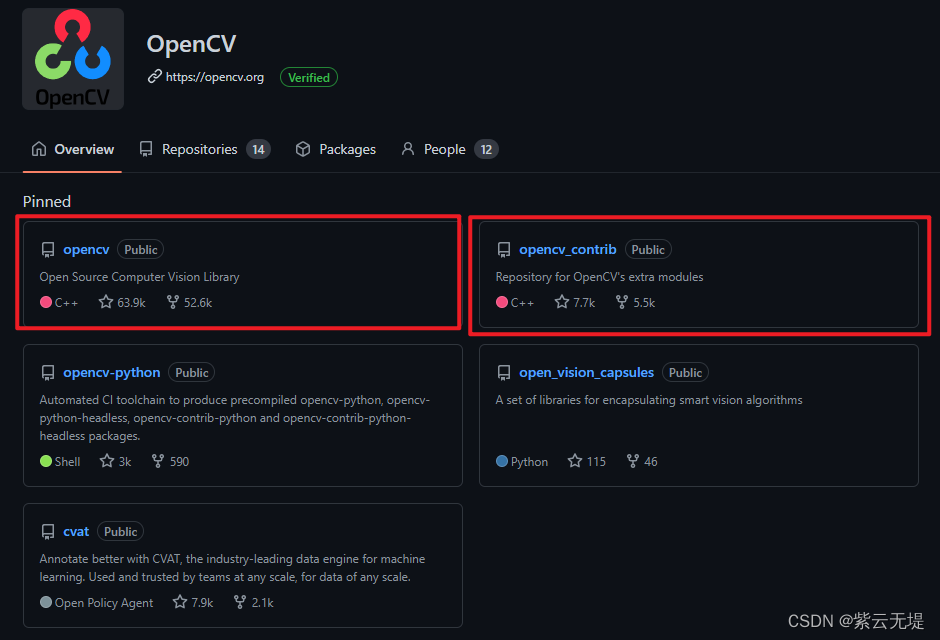

Window平台下载exe文件,双击解压出文件,有两个文件夹
++build文件夹是已经编译好的完整OpenCV文件
++sources是源代码
Android平台有时间再出一个教程 -
Contrib下载

下载之后解压即可。如果只用到OpenCV,或者还不知道Contrib是什么,可以不下载。
1.2 下载CMakeGUI
下载地址:https://cmake.org/
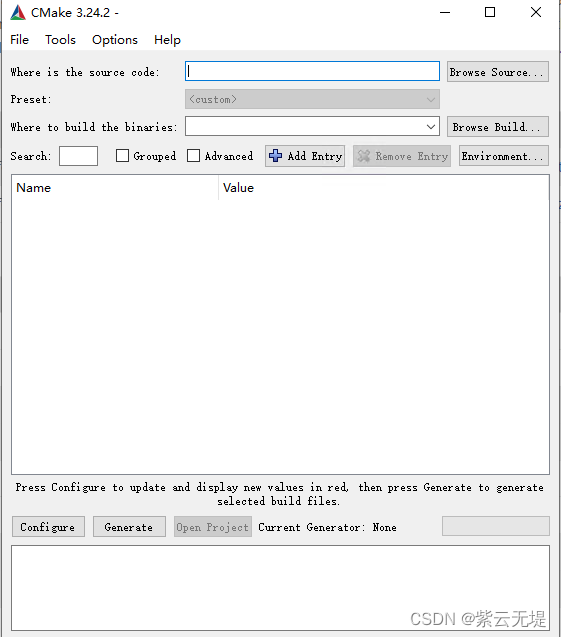
这是一个图形化界面的CMake工具,开箱即用,极大的简化了OpenCV的编译。

一路Next,再从Start里打开CMake,显示如下。
1.3 下载Visual Studio
下载地址:https://visualstudio.microsoft.com/zh-hans/downloads/
这个应该都有。
2. 编译OpenCV + Contrib源码
2.1 CMake生成Visual Studio项目
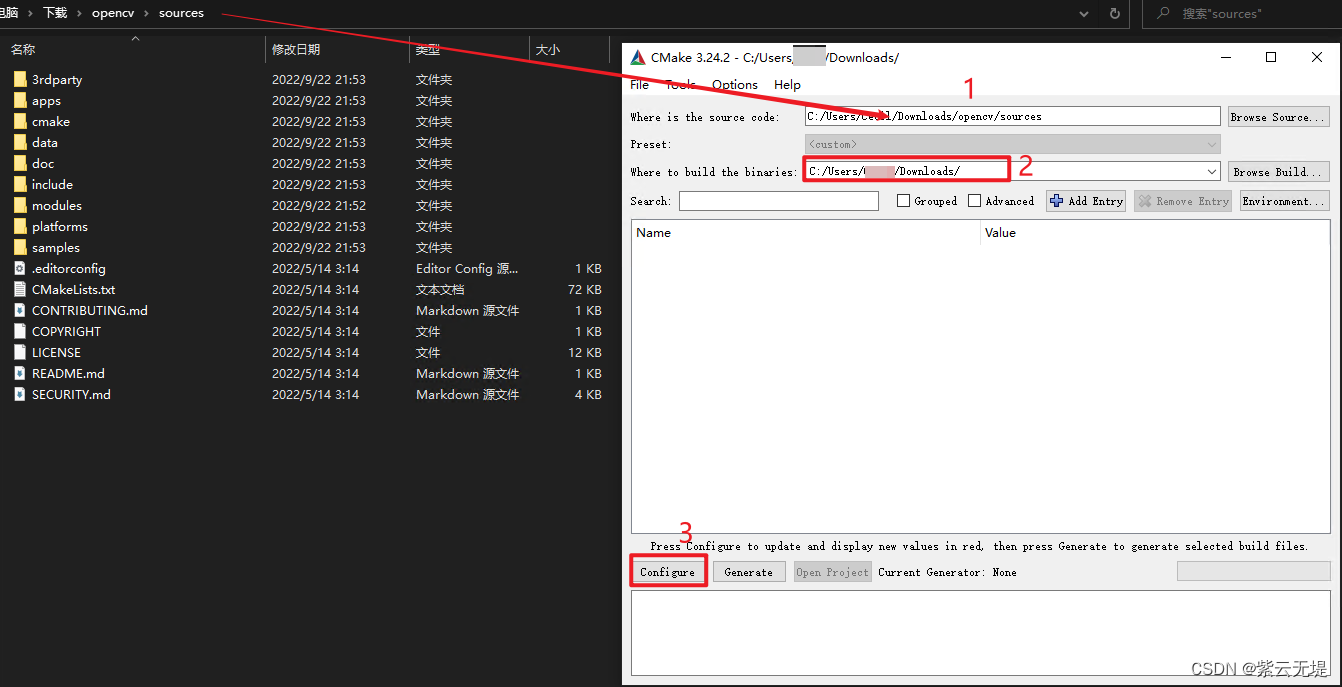
- 在CMake界面填上OpenCV的源码目录
- 填上在哪里生成VS项目
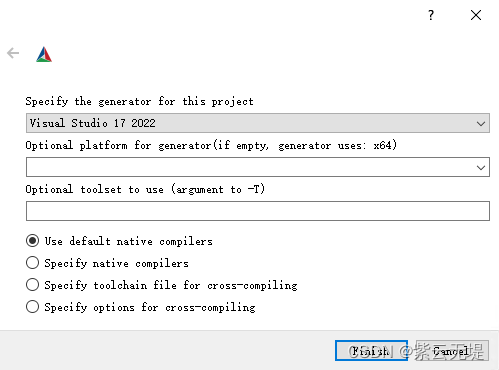
- 点击Configure按钮,选择VS编译器;也可以选自己熟悉的其他工具,比如MinGW等等。
-
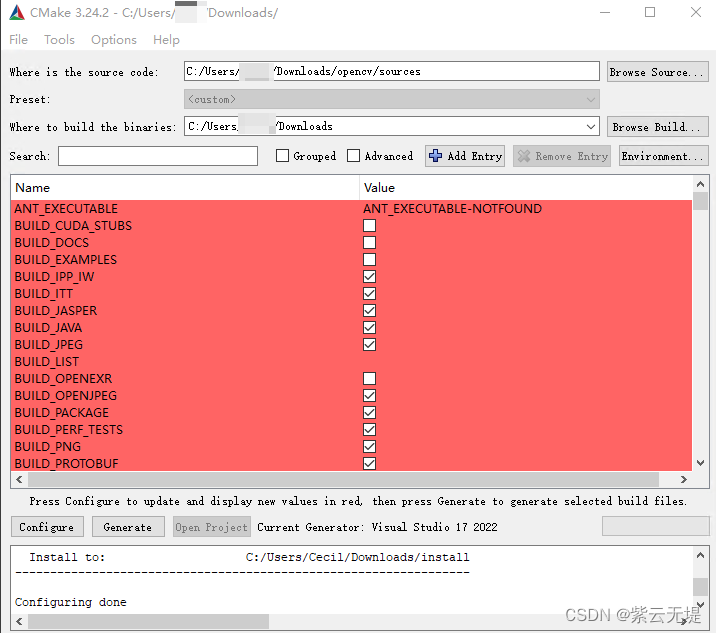
点击Finish稍等一会儿,会出现下面的界面;再点击一次Config即可;
-
勾选上BUILD_opencv_world

-
如果需要添加Contrib的模块,这时需要在OPENCV_EXTRA_MODULES_PATH填上Contrib_Module的路径之后,再点击Configure。
contrib路径到:opencv_contrib_4x\modules

注意: 如果遇到下面的错误,不要慌,查看错误信息,可以知道是因为contrib路径用的右斜杠“\”,全部改为左斜杠“/”即可。


-
选择需要的模块
这一步用来选择项目用到的库,如果没有特殊需求可以跳过这一步,默认全部编译。
OpenCV库说明:https://blog.csdn.net/weixin_44690935/article/details/108980228
OpenCV Contrib说明:https://zhuanlan.zhihu.com/p/352970245

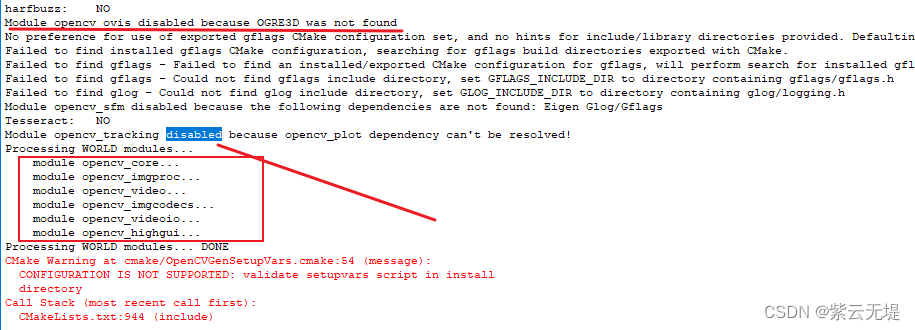
注意:如果某些库依赖了别的库,是编译不出来的。错误信息如下图所示
此时只需要将依赖的库勾上即可
-
最后点击Generate生成项目文件,然后Open Project

2.2 编译OpenCV文件
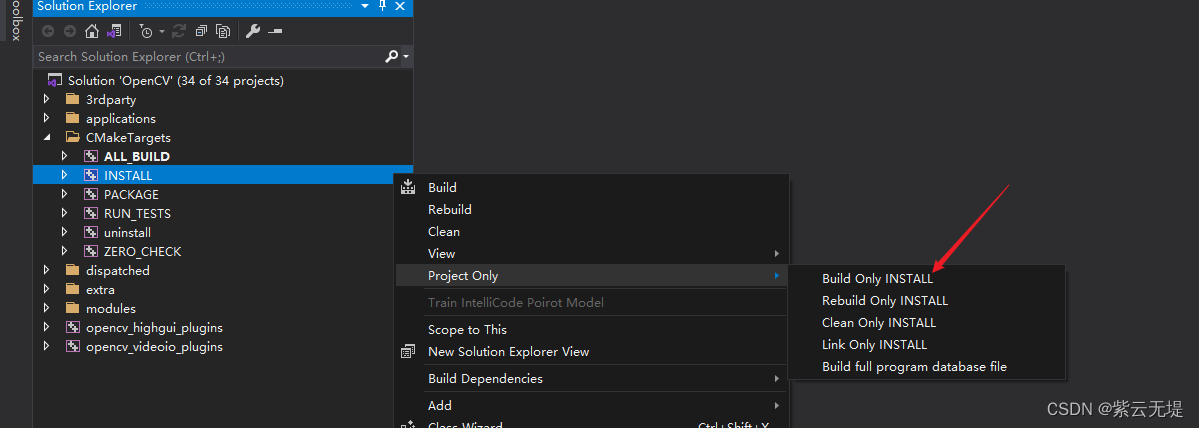
- 先Build Solution

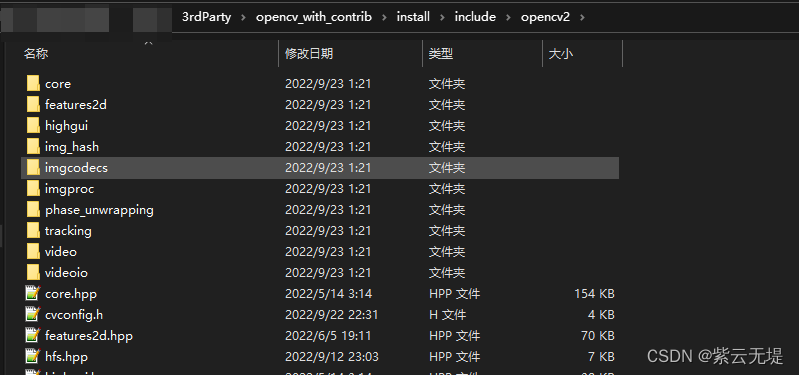
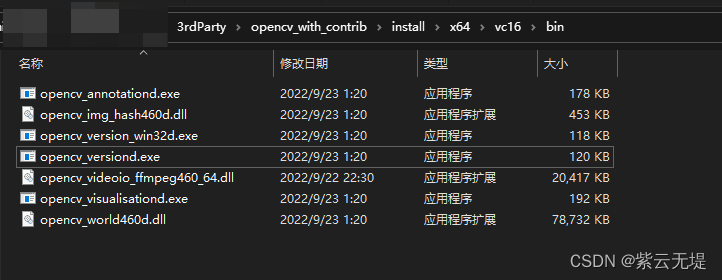
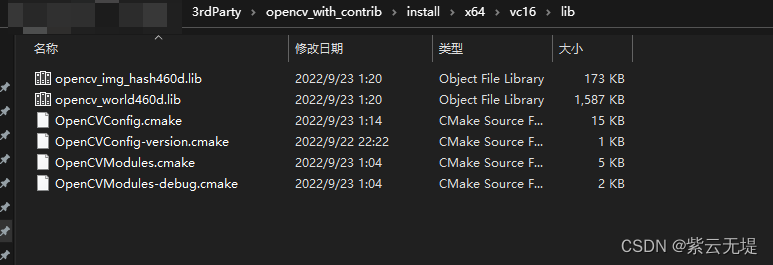
- 再install得到头文件,dll和lib库文件;这些文件都在install文件夹下
头文件
dll文件
lib文件
- 切换到Release模式编译出Release的库
注意:上面的步骤得到的是debug模式的文件,仅用于debug;使用release模式重复上述操作可以得到release的库。
分辨方法是debug编译出来的文件结尾有个“d”。

3. 集成到自己的项目
3.1 配置Visual Studio属性页
-
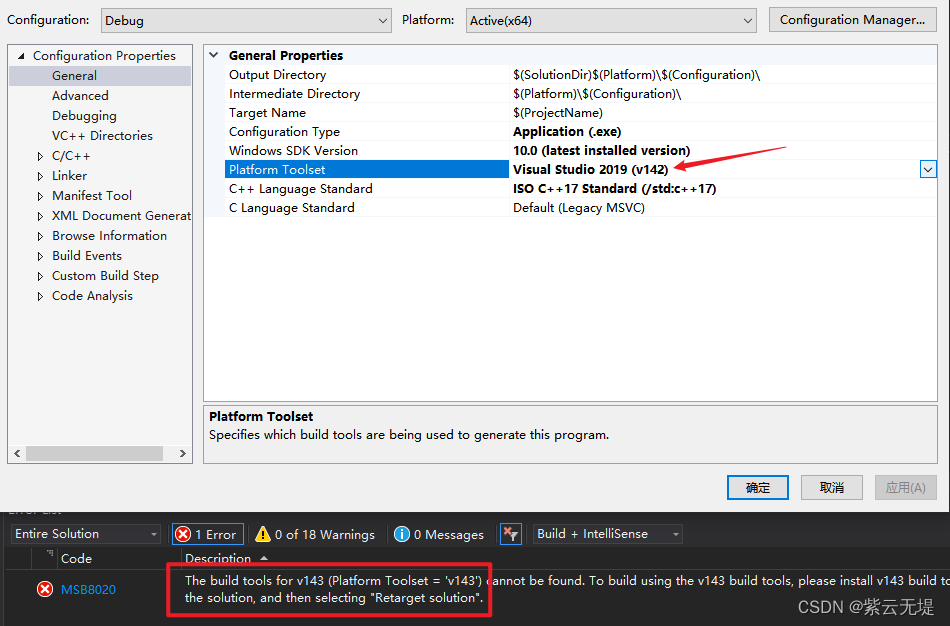
Platform Toolset
可能编译的库拿到别的电脑上用时,会提示平台不同,只需要选择已经安装的就行,不用升级;如果实在不行,比如用的是VS2010,就升级下。。
-
VC++ Directories
配置头文件和lib静态库

别忘了勾上这个

-
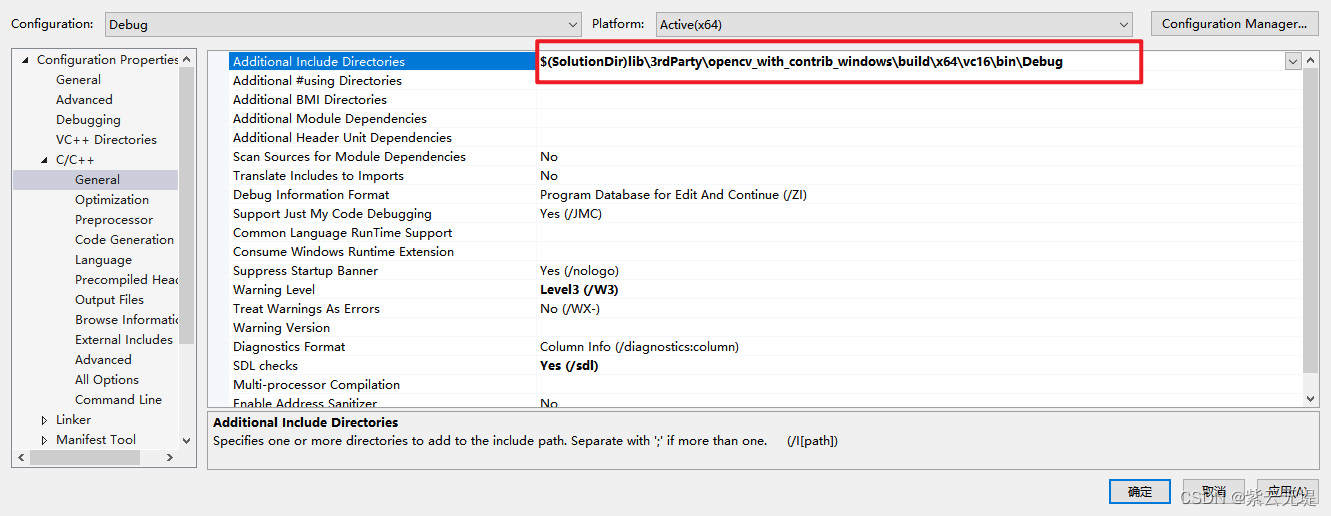
C/C++ -> General
配置dll动态链接库位置
-
Linker -> input
添加lib依赖,只需要输入lib名字,不需要路径。
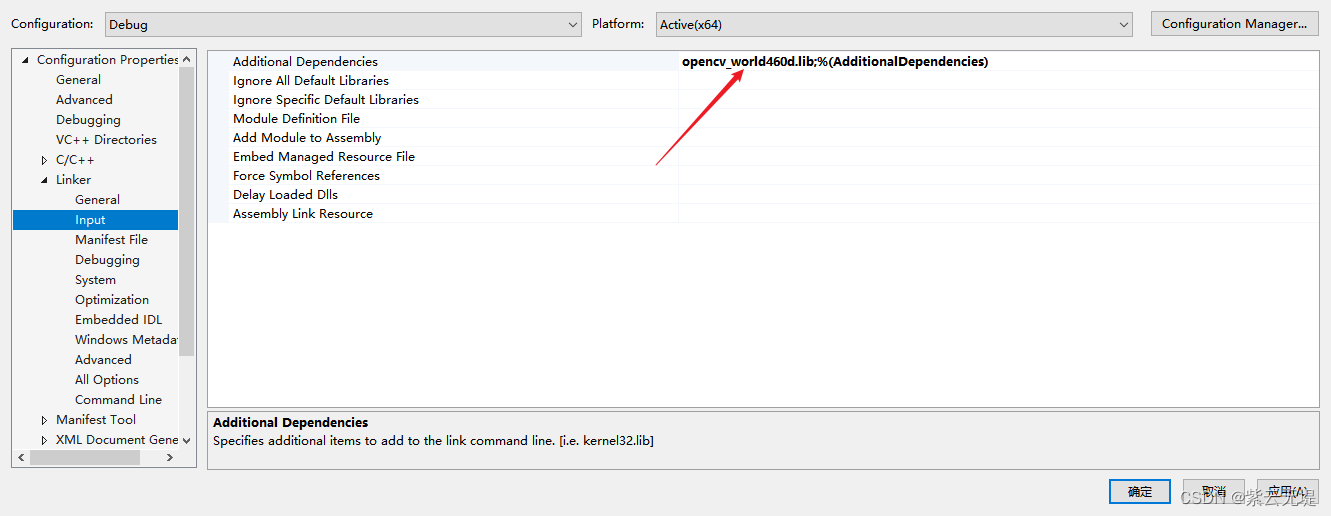
注意:当前只配置了Debug模式,切换到Release再重复一次,需要注意的是,不要把debug的OpenCV库设置给了Release.
3.2 include头文件
只需要include"opencv2/opencv.hpp"

3.3 拷贝dll文件到Debug或Release文件夹
因为编译出来的exe文件访问不到VS配置的dll路径,所以需要把dll文件拷贝到对应的文件夹下。

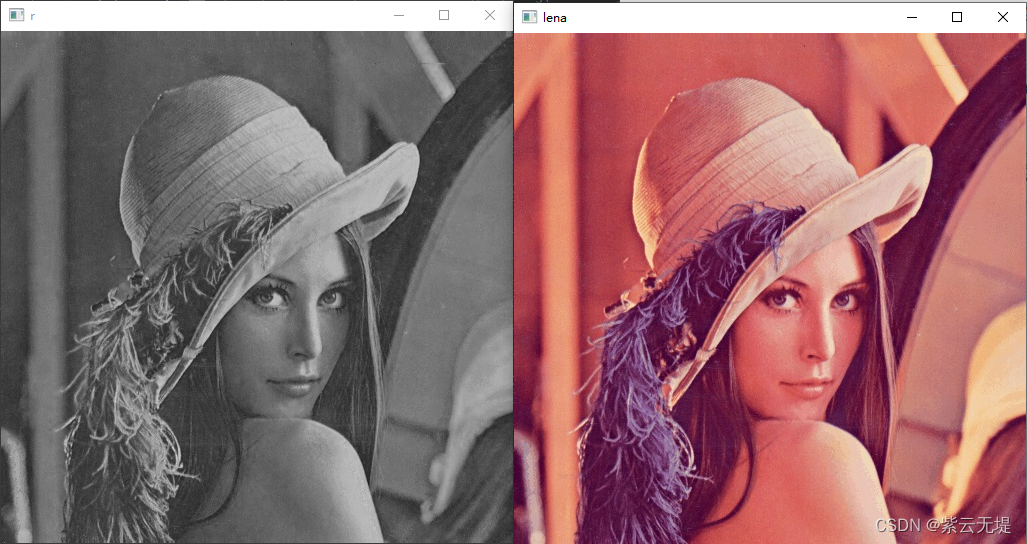
4. Lena结尾
