内容大纲:
本项目是在以太坊上开的一个宠物领养的DAPP,借助了truffle框架和ganache进行合约部署。同时实现web端与区块链的交互。
1.设置开发环境
2.使用 Truffle Box 创建一个 Truffle 项目
3.编写智能合约
4.编译和部署智能合约
5.测试智能合约
6.创建用户界面以与智能合约交互
7.在浏览器中与 dapp 交互
开发环境:
- Node.js v8+ LTS 和 npm(Node 自带)
- git
- ganache
- go开发环境
- chrome上的metamask钱包
- VS code
一、使用truffle box创建项目
1.安装truffle
npm install -g truffle
2.创建项目部署文件夹
mkdir pet-shop
cd pet-shop
3.下载pet-shop项目
truffle unbox pet-shop
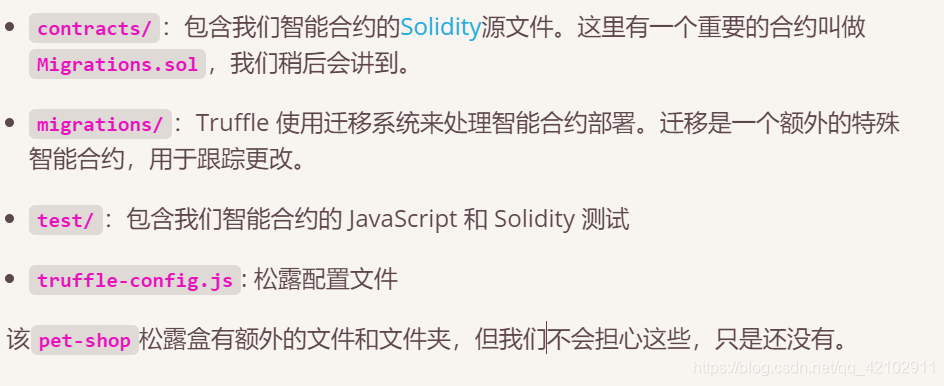
文件的目录结构

二、编写并部署智能合约
1. 编写智能合约
在contracts目录中,创建一个名称为Adoption.sol的新文件。写入以下代码。
pragma solidity ^0.5.16;
contract Adoption{
     address[16] public adopters;  // 保存领养者的地址

    // 领养宠物
  function adopt(uint petId) public returns (uint) {
    require(petId >= 0 && petId <= 15);  // 确保id在数组长度内

    adopters[petId] = msg.sender;        // 保存调用这地址
    return petId;
  }

  // 返回领养者
  function getAdopters() public view returns (address[16] memory) {
    return adopters;
  }
}
2.编译智能合约
1.进入终端,并切换目录到pet-shop目录的根目录下,执行编译命令
truffle compile
看到下边输出:=========================== > Compiling ./contracts/Adoption.sol > Compiling ./contracts/Migrations.sol > Artifacts written to /Users/cruzmolina/Code/truffle-projects/metacoin/build/contracts > Compiled successfully using: - solc: 0.5.0+commit.1d4f565a.Emscripten.clang ```
3.部署智能合约
1.我们可以看到在migrations目录中已有一个 JavaScript 文件:1_initial_migration.js. 这处理部署Migrations.sol合约以观察后续智能合约迁移,并确保我们将来不会双重迁移未更改的合约。
2.我们需要在migrations目录中创建一个名为2_deploy_contracts.js的新文件,写入以下内容:module.exports = function(deployer) { deployer.deploy(Adoption); };
在我们将合约迁移到区块链之前,我们需要运行一个区块链。在本教程中,我们将使用Ganache,这是一个用于以太坊开发的个人区块链,可用于部署合约、开发应用程序和运行测试。如果您还没有,请下载>Ganache并双击该图标以启动该应用程序。这将生成在端口 7545 上本地运行的区块链。
4.在终端执行部署命令
truffle migrate
输出结果:
1_initial_migration.js
  ======================

     Deploying 'Migrations'
     ----------------------
     > transaction hash:    0x3b558e9cdf1231d8ffb3445cb2f9fb01de9d0363e0b97a17f9517da318c2e5af
     > Blocks: 0            Seconds: 0
     > contract address:    0x5ccb4dc04600cffA8a67197d5b644ae71856aEE4
     > account:             0x8d9606F90B6CA5D856A9f0867a82a645e2DfFf37
     > balance:             99.99430184
     > gas used:            284908
     > gas price:           20 gwei
     > value sent:          0 ETH
     > total cost:          0.00569816 ETH


     > Saving migration to chain.
     > Saving artifacts
     -------------------------------------
     > Total cost:          0.00569816 ETH


  2_deploy_contracts.js
  =====================

     Deploying 'Adoption'
     .............................
     .............................
5. 我们可以看到在ganache中,区块链的状态已更改,区块链现在显示当前区块,之前45是 ,现在是49。此外,虽然第一个账户最初有 100 个以太币,但由于迁移的交易成本,它现在更低。
小结
我们现在已经编写了第一个智能合约并将其部署到本地运行的区块链。现在是时候与我们的智能合约进行交互以确保它执行我们想要的操作。
三、测试智能合约
1.编写测试合约
在test目录下新建一个TestAdoption.sol,将下边代码复制到该文件。
注:Assert.sol 及 DeployedAddresses.sol是Truffle 框架提供,在test目录下并不提供truffle目录。
pragma solidity ^0.5.0;

import "truffle/Assert.sol";   // 引入的断言
import "truffle/DeployedAddresses.sol";  // 用来获取被测试合约的地址
import "../contracts/Adoption.sol";      // 被测试合约

contract TestAdoption {
  Adoption adoption = Adoption(DeployedAddresses.Adoption());

  // 领养测试用例
  function testUserCanAdoptPet() public {
    uint returnedId = adoption.adopt(8);

    uint expected = 8;
    Assert.equal(returnedId, expected, "Adoption of pet ID 8 should be recorded.");
  }

  // 宠物所有者测试用例
  function testGetAdopterAddressByPetId() public {
    // 期望领养者的地址就是本合约地址,因为交易是由测试合约发起交易,
   //可能会出现的bug,我个人操作过程中遇到了:bug解决方案如下:
    //这是因为编译器版本是0.5.0,代码之前编写是按照0.4.17的规范来写的,
    // 这些新特性真的坑啊,幸好不是大问题,
    // 将 address expected = this;改为address expected = address(this);
    address expected = address(this);
    address adopter = adoption.adopters(8);
    Assert.equal(adopter, expected, "Owner of pet ID 8 should be recorded.");
  }

    // 测试所有领养者
  function testGetAdopterAddressByPetIdInArray() public {
  // 领养者的地址就是本合约地址
    address expected = address(this);
    address[16] memory adopters = adoption.getAdopters();
    Assert.equal(adopters[8], expected, "Owner of pet ID 8 should be recorded.");
  }
}
2.执行测试合约
truffle test
如果测试成功,则有以下输出:
Using network 'develop'.
Compiling ./contracts/Adoption.sol...
Compiling ./test/TestAdoption.sol...
Compiling truffle/Assert.sol...
Compiling truffle/DeployedAddresses.sol...
  TestAdoption
    ? testUserCanAdoptPet (62ms)
    ? testGetAdopterAddressByPetId (53ms)
    ? testGetAdopterAddressByPetIdInArray (73ms)
  3 passing (554ms)
四、编写与智能合约交互的web端
1.在Truffle Box的 pet-shop里,已经包含了应用的前端代码,代码在src/文件夹下。用vscode打开文件,进入app.js文件。
2.可以看到用来管理整个应用的App对象,init函数加载宠物信息,就初始化web3.web3是一个实现了与以太坊节点通信的库,我们利用web3来和合约进行交互。
1.初始化web3
编辑app.js修改initWeb3(): 删除注释,修改为:
  initWeb3: async function() {

    // Modern dapp browsers...
    if (window.ethereum) {
      App.web3Provider = window.ethereum;
      try {
        // Request account access
        await window.ethereum.enable();
      } catch (error) {
        // User denied account access...
        console.error("User denied account access")
      }
    }
    // Legacy dapp browsers...
    else if (window.web3) {
      App.web3Provider = window.web3.currentProvider;
    }
    // If no injected web3 instance is detected, fall back to Ganache
    else {
      App.web3Provider = new Web3.providers.HttpProvider('http://localhost:7545');
    }
    web3 = new Web3(App.web3Provider);

    return App.initContract();
  }
新的Dapp浏览器或MetaMask的新版本,注入了一个ethereum 对象到window象里, 应该优先使用ethereum来构造web3, 同时使用ethereum.enable()来请求用户授权访问链接账号。
2.实例化合约
使用truffle-contract会帮我们保存合约部署的信息,就不需要我们手动修改合约地址,修改initContract()代码如下:
initContract: function() {
  // 加载Adoption.json,保存了Adoption的ABI(接口说明)信息及部署后的网络(地址)信息,它在编译合约的时候生成ABI,在部署的时候追加网络信息
  $.getJSON('Adoption.json', function(data) {
    // 用Adoption.json数据创建一个可交互的TruffleContract合约实例。
    var AdoptionArtifact = data;
    App.contracts.Adoption = TruffleContract(AdoptionArtifact);

    // Set the provider for our contract
    App.contracts.Adoption.setProvider(App.web3Provider);

    // Use our contract to retrieve and mark the adopted pets
    return App.markAdopted();
  });
  return App.bindEvents();
}
3.处理领养
修改markAdopted()代码:
  markAdopted: function(adopters, account) {
    var adoptionInstance;

    App.contracts.Adoption.deployed().then(function(instance) {
      adoptionInstance = instance;

      // 调用合约的getAdopters(), 用call读取信息不用消耗gas
      return adoptionInstance.getAdopters.call();
    }).then(function(adopters) {
      for (i = 0; i < adopters.length; i++) {
        if (adopters[i] !== '0x0000000000000000000000000000000000000000') {
          $('.panel-pet').eq(i).find('button').text('Success').attr('disabled', true);
        }
      }
    }).catch(function(err) {
      console.log(err.message);
    });
  }
修改handleAdopt()代码:
  handleAdopt: function(event) {
    event.preventDefault();

    var petId = parseInt($(event.target).data('id'));

    var adoptionInstance;

    // 获取用户账号
    web3.eth.getAccounts(function(error, accounts) {
      if (error) {
        console.log(error);
      }

      var account = accounts[0];

      App.contracts.Adoption.deployed().then(function(instance) {
        adoptionInstance = instance;

        // 发送交易领养宠物
        return adoptionInstance.adopt(petId, {from: account});
      }).then(function(result) {
        return App.markAdopted();
      }).catch(function(err) {
        console.log(err.message);
      });
    });
  }
4.在浏览器中运行
(1)安装 MetaMask
这是一款可以以chrome插件运行的以太坊轻客户端,开发过程中使用MetaMask和我们的dapp进行交互是个很好的选择,安装完成后,浏览器工具条会显示一个小狐狸图标。
(2)在插件处打开,创建账户登录
(3)点击如图所示1处,自定义RPC
- 名称:Custom RPC
- RPC URL:http://127.0.0.1:7545
- 链ID:写本地区块链的链ID (1337)

5.安装和配置lite-server
接下来需要本地的web 服务器提供服务的访问, Truffle Box pet-shop里提供了一个lite-server可以直接使用,我们看看它是如何工作的。
bs-config.json中设定了lite-server的工作目录。
{
  "server": {
    "baseDir": ["./src", "./build/contracts"]
  }
}
- ./src 是网站文件目录
- ./build/contracts 是合约输出目录
以此同时,在package.json文件的scripts中添加了dev命令:
"scripts": {
  "dev": "lite-server",
  "test": "echo \"Error: no test specified\" && exit 1"
},
当运行npm run dev的时候,就会启动lite-server
6.启动服务
npm run dev
执行该命令后,将会启动web端项目,系统自动进入浏览器的宠物领养界面,

我们点击adopt按钮,系统将会调用metamask钱包,进行确认,之后本地区块链完成交易上链,则实现了宠物领养的过程。

