引言
在上文末尾,讲到了合约侧如何使用元交易,而对于前端和用户层面如何使用,还未有一个细致的讲解,这部分将是本文的目标。
前置知识
本文内容需要你掌握 remix 或 truffle 部署智能合约,对前端开发的基础知识(对 HTML、Javascript)有一定了解,了解 Web3.js,了解 Metamask 基本使用。如果你对这些内容还不熟,建议不要过于追求理解本文细节,先了解整体的内容,再自己深入研究你尤其不理解的部分。
部署合约
在一切开始前,当然是首先得部署智能合约,这包括 MinimalForwarder 合约与我们实现的 NFT 合约。
部署的方式有很多种,你可以采用 remix 进行部署,也可以使用一些框架,例如 truffle 来部署,在本文使用 truffle 作为示例。
由于 truffle 只会生成 contracts 目录下的合约的 artifacts,为了部署 MinimalForwarder 合约,我们需要简单的在 contracts 目录中写一个名为 MetaTx 的合约来继承 MinimalForwarder,来达到生成对应 artifacts 的目的。
// SPDX-License-Identifier: GPL3.0

pragma solidity ^0.8.0;

import "@openzeppelin/contracts/metatx/MinimalForwarder.sol";

/**
 * This file copy from openzeppelin, and make some changes.
 */

/**
 * @dev Simple minimal forwarder to be used together with an ERC2771 compatible contract. See {ERC2771Context}.
 */
contract MetaTx is MinimalForwarder {
    constructor() MinimalForwarder() {}
}
编译合约
truffle compile
使用以太坊测试网络 ropsten 启动 console,如果报错,请确认你的 truffle-config.js 配置正确
truffle console --network ropsten
部署 MetaTx 合约并查看地址
truffle(ropsten)> let metaTx = await MetaTx.new()
truffle(ropsten)> metaTx.address
'0xC24b78c1E6FA961B2C6AFD33a3c5b84B0EDC1f8A'
部署 NFT 合约并查看地址
truffle(ropsten)> let nft = await NFT.new('NFT Collection', 'NFTC', metaTx.address)
truffle(ropsten)> nft.address
'0x7E6cDc21d391895d159B3D8A52ACb647407EaAf6'
至此,合约已经准备完毕。
前端代码发起元交易
首先判断是否已经安装了 MetaMask 浏览器插件,这里默认你已经安装,省略了未安装的提示处理。
var ethereum
if (typeof window.ethereum !== 'undefined') {
	console.log('MetaMask is installed!');
	ethereum = window.ethereum
}
如果 MetaMask 已经安装,要与之交互的话,首先需要连接 MetaMask。
<button id="enableEthereumButton">Enable Ethereum</button>
这个按钮将用于启动与 MetaMask 交互。
const ethereumButton = window.document.getElementById("enableEthereumButton")

var accounts
ethereumButton.addEventListener('click', () => {
	//Will Start the metamask extension
	accounts = ethereum.request({
      method: 'eth_requestAccounts'
    }).then(() => {
      console.log('chainId: ', ethereum.chainId)
      if (ethereum.chainId != '0x3') {
        ethereum.request({
          method: 'wallet_switchEthereumChain',
          params: [{ chainId: '0x3' }],
        })
      }
    })
})
为连接 MetaMask 的按钮添加点击事件,调用 MetaMask 的 API eth_requestAccounts 申请用户授权连接到此网站。连接成功后,因为我们的智能合约被部署在 ropsten 网络,所以判断 chainId 是否为 3,如果不是,需要调用 wallet_switchEthereumChain 提示用户切换到 ropsten 网络。
接下来涉及到元交易的构造,我们先编写一个 button。
<div>
    <h3>Generage `SafeMint` Metatransaction</h3>
    <button type="button" id="genMintMetaTxButton">Generate SafeMint MetaTx</button>
</div>
<div>
    <h3>Sign Typed Data</h3>
    input:
    <div>
      <span>
        from<input id="metaTxFrom" value="0x" />
      </span>
    </div>
    <div>
      <span>
        to<input id="metaTxTo" value="0x" />
      </span>
    </div>
    <div>
      <span>
        value<input id="metaTxValue" value="0" />
      </span>
    </div>
    <div>
      <span>
        gas<input id="metaTxGas" value="0" />
      </span>
    </div>
    <div>
      <span>
        nonce<input id="metaTxNonce" value="0" />
      </span>
    </div>
    <div>
      <span>
        data<input id="metaTxData" value="0x" />
      </span>
    </div>
    output:
    <div>
      <span>
        signature<input id="metaTxSignature" value="" />
      </span>
    </div>
    <button type="button" id="signTypedDataButton">Sign Typed Data</button>
    <button type="button" id="executeMetaTxButton">Execute metaTx</button>
</div>
为该按钮添加构造元交易 ForwardRequest 参数的点击事件。
const genMintMetaTxButton = window.document.getElementById("genMintMetaTxButton")

genMintMetaTxButton.addEventListener('click', async () => {
	event.preventDefault()

    const req = await genMintNFTMetaTx(minimalForwarderAddr, nftAddr)
    window.document.getElementById('metaTxFrom').value = req.from
    window.document.getElementById('metaTxTo').value = req.to
    window.document.getElementById('metaTxValue').value = req.value
    window.document.getElementById('metaTxGas').value = req.gas
    window.document.getElementById('metaTxNonce').value = req.nonce
    window.document.getElementById('metaTxData').value = req.data
});
genMintNFTMetaTx 函数构造了 req 的具体内容,并根据其值刷新网页显示。
const genMintNFTMetaTx = async (minimalForwarderAddr, nftAddr) => {
    var web3 = new Web3(ethereum)
    const safeMintABI = [
      {
      "inputs": [],
      "name": "safeMint",
      "outputs": [],
      "stateMutability": "nonpayable",
      "type": "function"
      }
    ]

    var nftContract = new web3.eth.Contract(safeMintABI, nftAddr)
    const from = ethereum.selectedAddress
    const callData = nftContract.methods.safeMint().encodeABI()
    const gas = await nftContract.methods.safeMint().estimateGas({from: from})

    return {
      from: from,
      to: nftAddr,
      value: '0',
      gas: gas,
      nonce: await getMetaTxNonce(minimalForwarderAddr),
      data: callData,
    }
}

const getMetaTxNonce = async (minimalForwarderAddr) => {
    var web3 = new Web3(ethereum)

    var metaTxContract = new web3.eth.Contract(MetaTxABI, minimalForwarderAddr)
    return await metaTxContract.methods.getNonce(ethereum.selectedAddress).call()
}
safeMintABI 中定义了我们需要的最小 ABI,因为我们只需要 safeMint 方法。我们需要通过 encodeABI 方法将 safeMint 的参数编码为字节字符串,并通过 estimateGas 预估 gas 费。这是必要的,如果不调用 estimateGas 来预估合适的值,元交易可能将由于 gas 不足而执行失败。 req 中的 nonce 值来源于元交易合约,而不是以太坊中原生的 nonce 值,永远记住这是两个不同的东西,只是因为作用类似,所以才用了相同的名字。 req 的其余部分便按照普通的交易参数填写即可。
接下来看如何签名一个元交易
const signTypedButton = window.document.getElementById("signTypedDataButton")
signTypedButton.addEventListener('click', (event) => {
    event.preventDefault()
    req = getReqFromForm()
    signMetaTx(req)
})

const getReqFromForm = () => {
    return {
      from: window.document.getElementById('metaTxFrom').value,
      to: window.document.getElementById('metaTxTo').value,
      value: window.document.getElementById('metaTxValue').value,
      gas: window.document.getElementById('metaTxGas').value,
      nonce: window.document.getElementById('metaTxNonce').value,
      data: window.document.getElementById('metaTxData').value,
    }
}
这部分很简单,相信你能够看明白,重点在于 signMetaTx 的实现。
const signMetaTx = async function (req) => {
    const msgParams = JSON.stringify({
      domain: {
        chainId: ethereum.chainId,
        name: 'MinimalForwarder',
        verifyingContract: minimalForwarderAddr,
        version: '0.0.1',
      },

      // Defining the message signing data content.
      message: req,
      // Refers to the keys of the *types* object below.
      primaryType: 'ForwardRequest',
      types: {
        // TODO: Clarify if EIP712Domain refers to the domain the contract is hosted on
        EIP712Domain: [{
            name: 'name',
            type: 'string'
          },
          {
            name: 'version',
            type: 'string'
          },
          {
            name: 'chainId',
            type: 'uint256'
          },
          {
            name: 'verifyingContract',
            type: 'address'
          },
        ],
        // Refer to PrimaryType
        ForwardRequest: [{
            name: 'from',
            type: 'address'
          },
          {
            name: 'to',
            type: 'address'
          },
          {
            name: 'value',
            type: 'uint256'
          },
          {
            name: 'gas',
            type: 'uint256'
          },
          {
            name: 'nonce',
            type: 'uint256'
          },
          {
            name: 'data',
            type: 'bytes'
          },
        ],
      },
    })

    var from = ethereum.selectedAddress

    var params = [from, msgParams]
    var method = 'eth_signTypedData_v4'

    const signature = await ethereum
      .request({
        method,
        params,
        from,
      })
    window.document.getElementById('metaTxSignature').value = signature
    return signature
}
我们来拆分讲解一下,domain 中的字段是关于元交易合约的一些信息,便于用户能够清楚的知道当前连接的 chain 与使用的合约。types 中定义了整个参数中的一些字段的类型,primaryType 指定了 message 的内容的类型,这里 primaryType 为 ForwardRequest,也就是我们元交易的 req 内容。
MetaMask 支持使用 eth_signTypedData_v4 方法直接对上面的 JSON 字符串根据 EIP712 标准进行签名。
接下来让我们开始编写执行元交易的代码。
const executeMetaTxButton = window.document.getElementById("executeMetaTxButton")

executeMetaTxButton.addEventListener('click', async (event) => {
    event.preventDefault()
    const req = getReqFromForm()
    const signature = window.document.getElementById('metaTxSignature').value
    if (await verifyMetaTx(minimalForwarderAddr, req, signature) == false) {
      alert('meta transaction is invalid!!')
      return
    }

    await executeMetaTx(minimalForwarderAddr, req, signature)
})

const verifyMetaTx = async (minimalForwarderAddr, req, signature) => {
    var web3 = new Web3(ethereum)

    var metaTxContract = new web3.eth.Contract(MetaTxABI, minimalForwarderAddr)
    return await metaTxContract.methods.verify(req, signature).call()
}

const executeMetaTx = async (minimalForwarderAddr, req, signature) => {
    var web3 = new Web3(ethereum)

    var metaTxContract = new web3.eth.Contract(MetaTxABI, minimalForwarderAddr)
    return await metaTxContract.methods.execute(req, signature).send({from: ethereum.selectedAddress})
}
如果元交易本身就是无效的,会导致元交易执行失败,浪费中继器的 ETH,因此需要先调用 verify 验证元交易的合法性,合法才执行元交易。
仅仅是一个 html 文件是不够的,直接打开将无法正常使用。我们需要将其部署为网页服务,你可以采用 serve 命令或其他工具,也可以像我这样通过 node.js 编写一段代码来运行网页。
var http = require('http')
var fs = require('fs')

http.createServer(function (request, response) {
    fs.readFile('./index.html','utf-8',function(err, data) {
        if(err) throw err
        response.writeHead(200, {'Content-Type': 'text/html; charset=utf8'})
        response.write(data)
        response.end()
    })
}).listen(8888)

console.log('Server running at http://127.0.0.1:8888/')
然后通过 node index.js 运行网页,浏览器访问 http://127.0.0.1:8888/ 即可。
使用我们的网页
在开始前,你需要至少有一个 MetaMask 账户在 ropsten 网络中有足够的 ETH,该账户作为中继来替其他账户支付 gas 费。
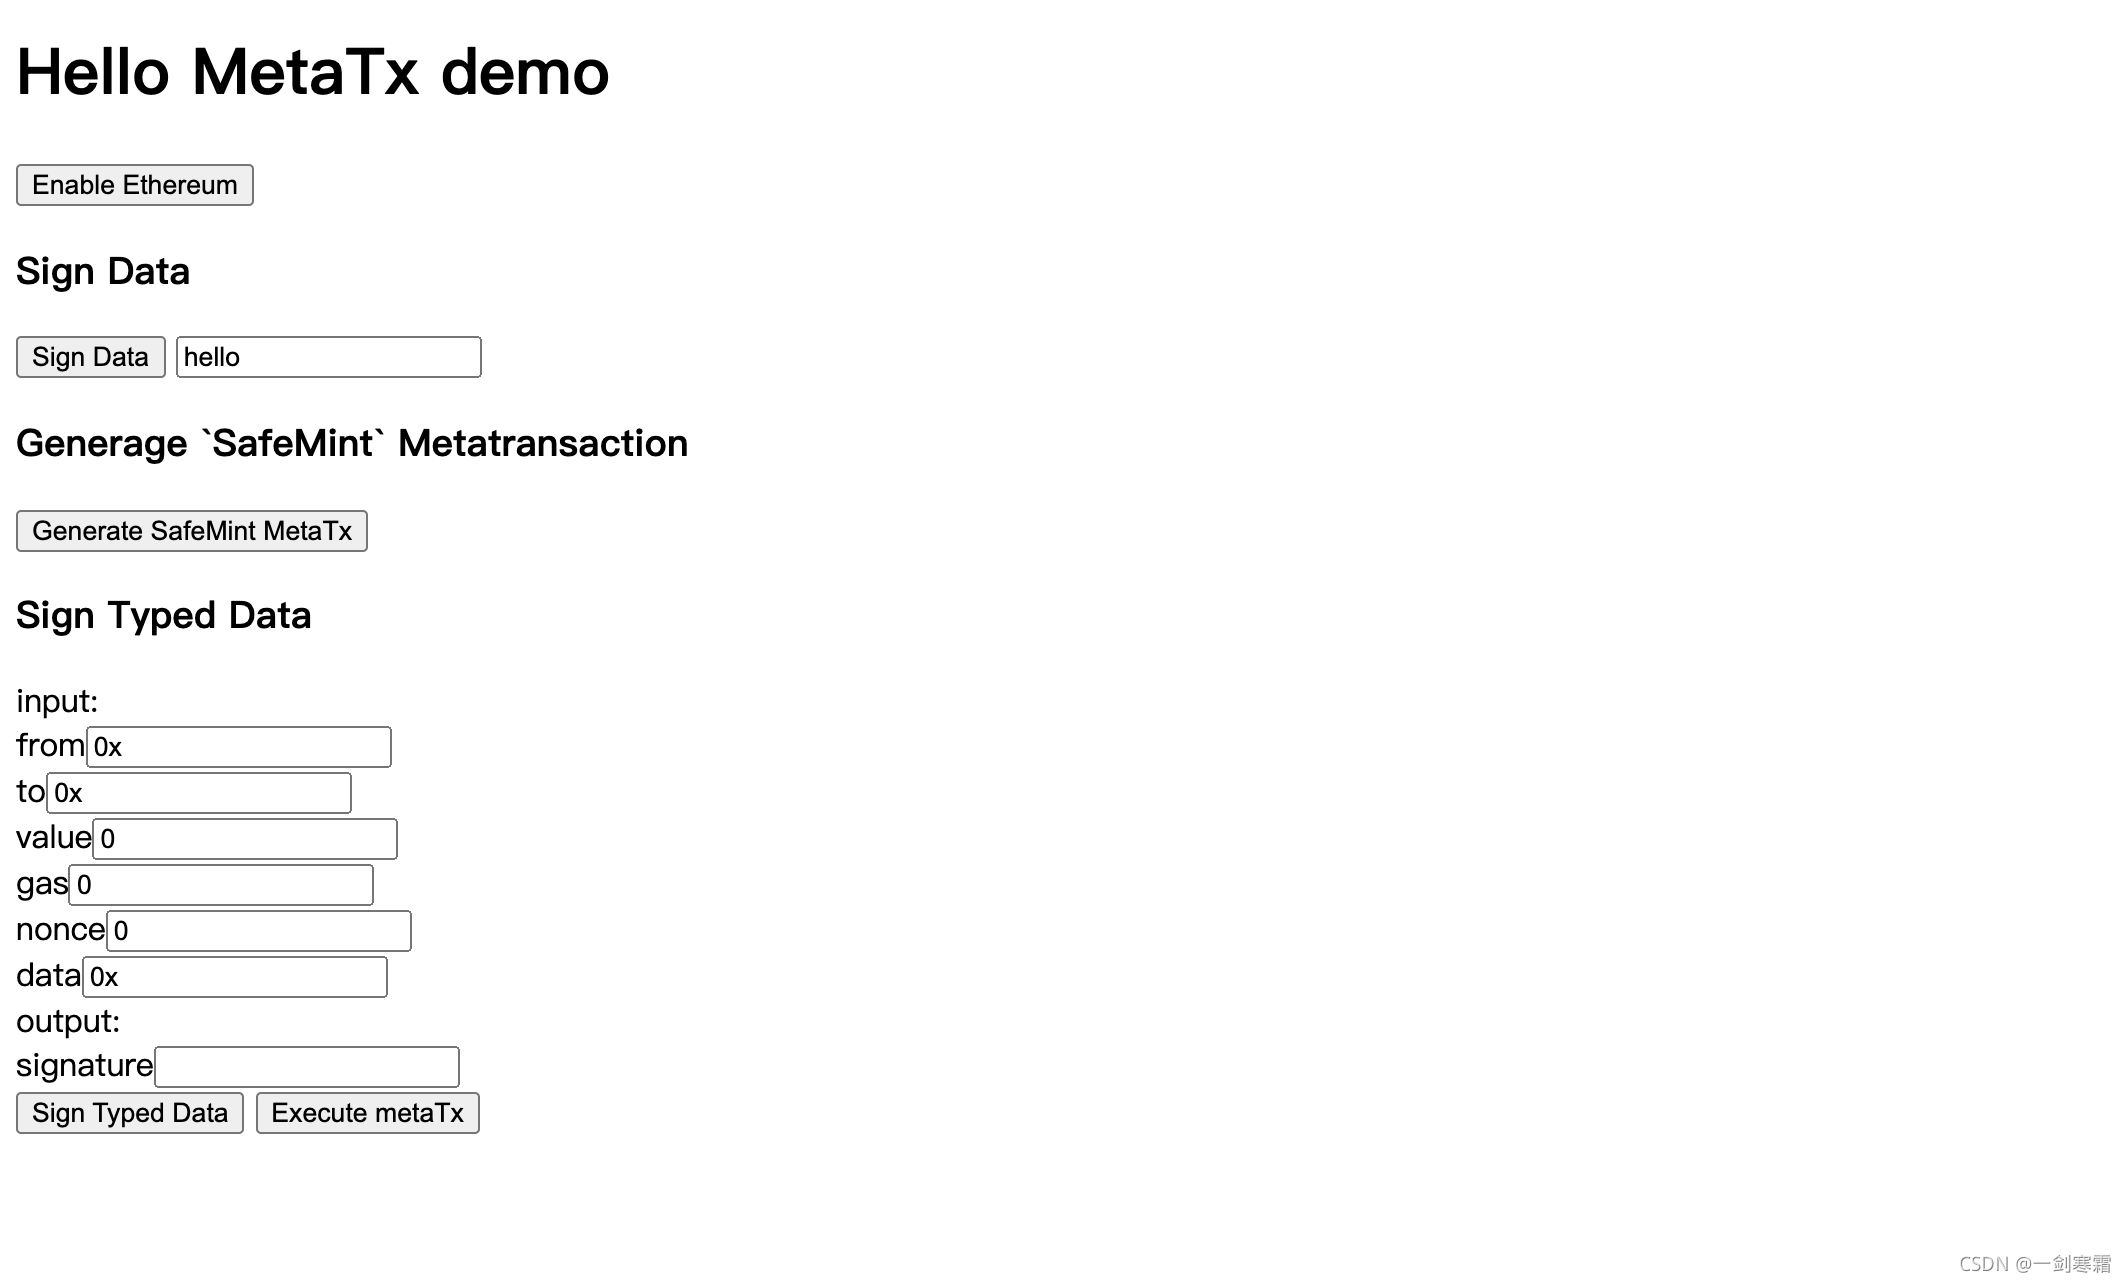
网站打开看起来是这样的:

或许不够好看,但那是 css 美化的事情,不再本文的讨论范畴中。首先我们故意将网络切换为非 ropsten 的其他测试网络,然后点击 Enable Ethereum 按钮连接 MetaMask,你将看到 MetaMask 请求你的确认。

然后要求你切换网络到 ropsten 。

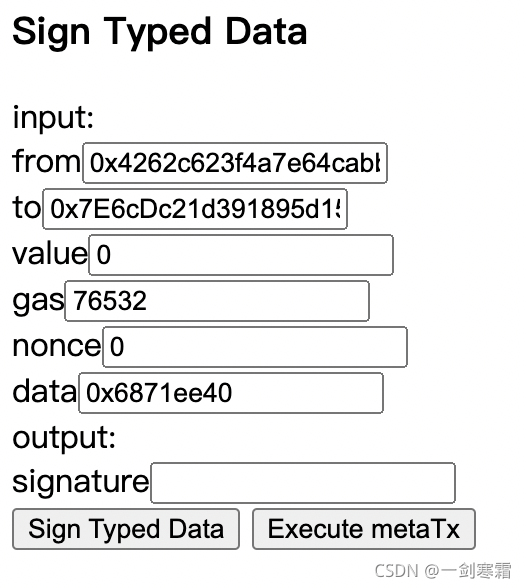
接下来点击 Generate SafeMint MetaTx 按钮构造元交易参数。

点击 Sign Typed Data 进行签名,并同意。

你可以看到通过 EIP712,使签名更容易让人读懂,从而避免一些安全性问题。
切换到有足够 ETH 的账户,我这里是 Test2,如果此前没有连接过,请一定要点 connect 连接。

点击 Execute MetaTx 按钮执行元交易。

等待交易执行成功,并在 explorer 中查看详情,在本次示例中,交易为 0x1b9e1e3d575bbec442b02eb6d7156dd711a19fd98f0b69fc7628410824257fb2。

打开交易详情页后,看到 Tokens Transferred 部分,一个 tokenId 为 2 的 NFT 转移到了 Test2 账户中。
Nice!至此,你已经彻底掌握了元交易的执行过程,对于 EIP712 等不太熟悉的部分,应该有能力自行探索了!