1、
安装geth:
sudo apt-get install software-properties-common
sudo add-apt-repository -y ppa:ethereum/ethereum
sudo add-apt-repository -y ppa:ethereum/ethereum-dev
sudo apt-get update
sudo apt-get install ethereum
//
geth --help
2、
创建是否成功检验:
geth version
创建成功返回结果:
Geth
Version: 1.9.25-stable
Git Commit: e7872729012a4871397307b12cc3f4772ffcbec6
Architecture: amd64
Protocol Versions: [65 64 63]
Go Version: go1.15.6
Operating System: linux
GOPATH=/home/cy/GOPATH
GOROOT=/usr/local/go
3、
检查是否有以太坊账户:
geth account list
返回结果:
INFO [01-21|17:15:02.833] Maximum peer count ETH=50 LES=0 total=50
INFO [01-21|17:15:02.833] Smartcard socket not found, disabling err=“stat /run/pcscd/pcscd.comm: no such file or directory” #这一行说明没有相应的以太坊账户钱包
INFO [01-21|17:15:02.834] Set global gas cap cap=25000000
#没有账户
4、
创建以太坊账户:
geth account new
输入个人以太坊的password:CHUNhui991029 #(本人)
成功后返回地址:0x462995c8122e7F52e0b0B12CC286030B3d4095c2 #(此为本人地址)
Your new key was generated
Public address of the key: 0x462995c8122e7F52e0b0B12CC286030B3d4095c2
Path of the secret key file: /home/cy/.ethereum/keystore/UTC–2021-01-21T09-23-19.255691698Z–462995c8122e7f52e0b0b12cc286030b3d4095c2
- You can share your public address with anyone. Others need it to interact with you.
- You must NEVER share the secret key with anyone! The key controls access to your funds!
- You must BACKUP your key file! Without the key, it’s impossible to access account funds!
- You must REMEMBER your password! Without the password, it’s impossible to decrypt the key!
注意:如果输入密码不符合规范,则按下ENTER键无反应,需重新设置,建议按下ctrl+c推出后,重新进入!!!
5、查看自己的账户:
geth account list
返回值:
INFO [01-21|17:27:58.337] Maximum peer count ETH=50 LES=0 total=50
INFO [01-21|17:27:58.337] Smartcard socket not found, disabling err=“stat /run/pcscd/pcscd.comm: no such file or directory”
INFO [01-21|17:27:58.338] Set global gas cap cap=25000000
Account #0: {462995c8122e7f52e0b0b12cc286030b3d4095c2} keystore:///home/cy/.ethereum/keystore/UTC–2021-01-21T09-23-19.255691698Z–462995c8122e7f52e0b0b12cc286030b3d4095c2
#此时已经存在相应的账户了
6、JavaScript控制台访问:
启动JavaScipt控制台:
geth console
可输入javaScript代码,但和日志文件交替显示,较为繁琐。(ctrl+d 退出)
为了防止日志文件的干扰:
geth console 2>>geth.log
输出结果:
To exit, press ctrl-d
5+5
10
7、创建私有链
新建文件创建block.json文件,存放创世块代码:
touch block.json
创建完后,在block.json文件中添加创世块代码
7.1 创建创世块:
{
“config”:
{
“chainId”: 15, #指定了独立的区块网络的ID,不同ID的网络节点无法链接
“homesteadBlock”: 0 #这是以太坊推出的第2个主要区块发行版本,当其值为0时有效
},
“difficulty”: “20”, #这里定义了挖矿的难易程度,值越小就越容易挖矿
“gasLimit”: “2100000”, #定义了挖每个区块时所需要消耗资源的上限
“alloc”: { #为了测试挖矿而临时分配的账户
“7df9a875a174b3bc565e6424a0050ebc1b2d1d82”: {
“balance”: “300000” #表示余额,单位:Wei
},
“f41c74c9ae680c1aa78f42e5647a62f353b7bdde”: {
“balance”: “400000”
}
}
}
7.2 初始化区块链:
geth init block.json --datadir test
#目的:在与block.json同一目录下,创建一个名为test的文件夹,用来存放于区块链相关的数据,在test文件下会有2个文件:geth和keystore.
#其中geth目录保存了同步区块链以及相关的数据;keystore目录保存了账户文件,在刚创建私有链后,由于没有用户,所以内部文件为空
8、启动以太坊客户端
geth --datadir test console (2>>geth.log) #()内的代码可删去也可保留,但在挖矿过程中,为了能够看到挖矿过程建议删去
#这里的datadir命令行参数表示geth会使用test目录保存相关的文件
9、将账户与矿工绑定
miner.setEtherbase(“0x7df9a875a174b3bc565e6424a0050ebc1b2d1d82”) #miner为JavaScript的一个矿工对象
#在挖矿之前需要绑定挖矿对象
返回:
true
10、挖矿之前查询余额
eth.getBalance(“0x7df9a875a174b3bc565e6424a0050ebc1b2d1d82”) #调用getBalance函数
返回:
300000
eth.getBalance(“0xf41c74c9ae680c1aa78f42e5647a62f353b7bdde”)
返回:
400000
#查询两个账户中的余额
11、执行JavaScript代码开始挖矿 #在挖矿时需要开启日志,才能看到挖矿过程
miner.start() #开始挖矿
返回结果:
INFO [01-21|19:41:26.795] 🔨 mined potential block number=187 hash=“9ea26a…1617c6”
miner.stop() #停止挖矿
eth.blockNumber #eth为JavaScript平台的内建对象
11.1查看执行后代码的账户中的余额
eth.getBalance(“0x7df9a875a174b3bc565e6424a0050ebc1b2d1d82”)
结果:
1.3900000000000003e+21
eth.getBalance(“0xf41c74c9ae680c1aa78f42e5647a62f353b7bdde”)
结果:
400000
12、remix ide 安装方法:(逐行输入以下代码)
方法1:(本人未尝试成功)
git clone https://github.com/ethereum/remix-ide.git #完成克隆
cd remix-ide #到remix-ide文件夹下
sudo apt install npm #安装npm
npm install remix-ide -g #安装remix-ide
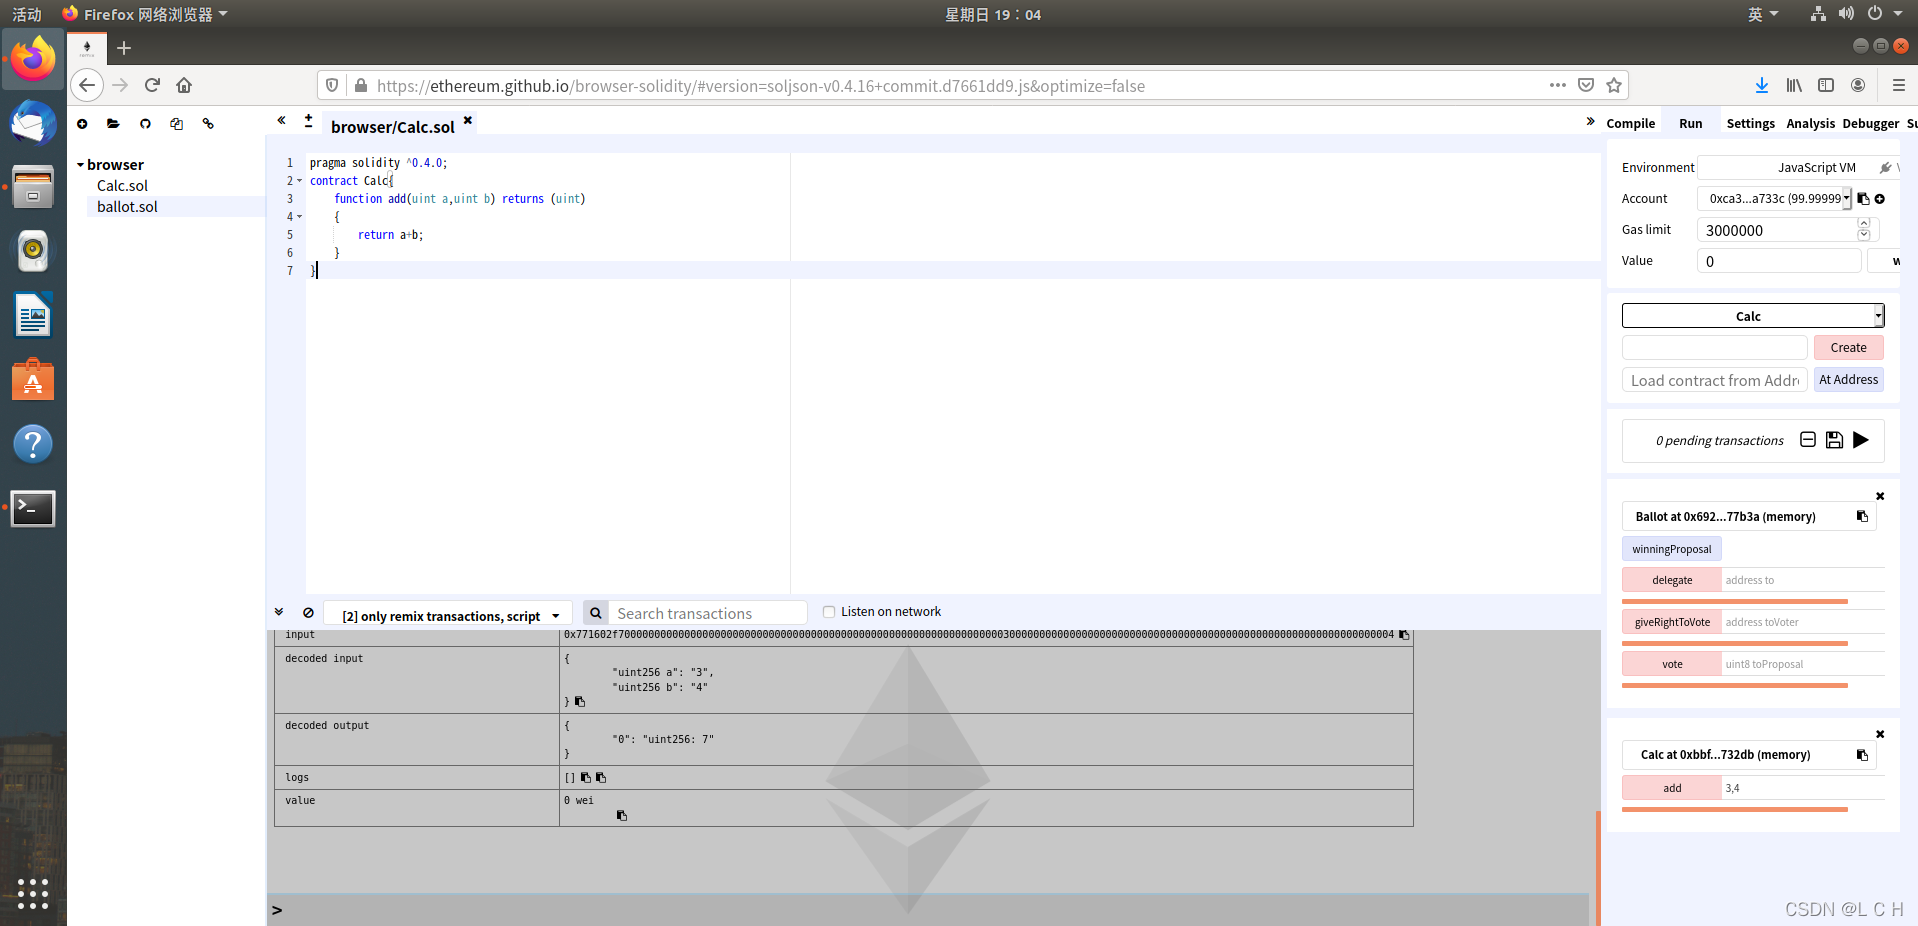
方法二:
输入网址:(亲测有效)但这只是用来智能合约测试的,未将智能合约应用于以太网网络中
https://ethereum.github.io/browser-solidity/#version=soljson-v0.4.16+commit.d7661dd9.js&optimize=false
13、编写测试智能合约
git clone https://github.com/ethereum/browser-solidity #完成克隆
cd browser-solidity #到browser-solidity文件夹下
参考博客:
https://blog.csdn.net/zhengyinling/article/details/106901358

