通用配置:
pom.xml增加配置
<dependency>
     <groupId>org.springframework.kafka</groupId>
     <artifactId>spring-kafka</artifactId>
</dependency>
application.properties增加kafka配置
spring.kafka.bootstrap-servers=ip:9092一、生产者
a.增加kafka话题配置?
package com.test.demo.kafka;

import org.apache.kafka.clients.admin.NewTopic;
import org.springframework.context.annotation.Bean;
import org.springframework.context.annotation.Configuration;


@Configuration
public class KafkaInitialConfiguration {
    // 创建一个名为testtopic的Topic并设置分区数为3,分区副本数为1
    // 因为我使用的是单台kafka,所以分区副本只能为1
    @Bean
    public NewTopic initialTopic() {
        return new NewTopic("topic1",3, (short) 1 );
    }
}
b.发送消息的服务
package com.test.demo.kafka;

import org.springframework.beans.factory.annotation.Autowired;
import org.springframework.kafka.core.KafkaTemplate;
import org.springframework.stereotype.Component;


@Component
public class Pro {

    @Autowired
    private KafkaTemplate<String, Object> kafkaTemplate;

    // 发送消息
    public void sendMessage1(String normalMessage) {
        kafkaTemplate.send("topic1", normalMessage);
    }
}
c.线程池配置(不使用多线程跳过此步)
package com.test.demo.kafka;

import org.springframework.context.annotation.Bean;
import org.springframework.context.annotation.Configuration;
import org.springframework.scheduling.annotation.EnableAsync;
import org.springframework.scheduling.concurrent.ThreadPoolTaskExecutor;

import java.util.concurrent.Executor;
import java.util.concurrent.ThreadPoolExecutor;


@Configuration
@EnableAsync
public class AsyncConfiguration {
    @Bean("doSomethingExecutor")
    public Executor doSomethingExecutor() {
        ThreadPoolTaskExecutor executor = new ThreadPoolTaskExecutor();
        // 核心线程数:线程池创建时候初始化的线程数
        executor.setCorePoolSize(100);
        // 最大线程数:线程池最大的线程数,只有在缓冲队列满了之后才会申请超过核心线程数的线程
        executor.setMaxPoolSize(500);
        // 缓冲队列:用来缓冲执行任务的队列
        executor.setQueueCapacity(500);
        // 允许线程的空闲时间60秒:当超过了核心线程之外的线程在空闲时间到达之后会被销毁
        executor.setKeepAliveSeconds(60);
        // 线程池名的前缀:设置好了之后可以方便我们定位处理任务所在的线程池
        executor.setThreadNamePrefix("do-something-");
        // 缓冲队列满了之后的拒绝策略:由调用线程处理(一般是主线程)
        executor.setRejectedExecutionHandler(new ThreadPoolExecutor.DiscardPolicy());
        executor.initialize();
        return executor;
    }
}
d.单线程执行方法(不使用多线程跳过此步)
package com.test.demo.kafka;

import org.springframework.scheduling.annotation.Async;
import org.springframework.stereotype.Component;


@Component
public class ProThread{

    final Pro pro;

    public ProThread(Pro pro) {
        this.pro = pro;
    }

    @Async("doSomethingExecutor")
    public void run(int i) {
        String name = Thread.currentThread().getName();
        System.out.println(System.currentTimeMillis()+name+"执行异步任务: "+i);
        pro.sendMessage1(i+"");
    }
}
e.测试controller
package com.test.demo.ctr;

import com.test.demo.kafka.ProThread;
import org.springframework.beans.factory.annotation.Autowired;
import org.springframework.web.bind.annotation.GetMapping;
import org.springframework.web.bind.annotation.PathVariable;
import org.springframework.web.bind.annotation.RequestMapping;
import org.springframework.web.bind.annotation.RestController;


@RestController
@RequestMapping("/test")
public class TestCtr {

    //不使用多线程,此类更换为Pro
    @Autowired
    ProThread pro;

    @GetMapping("/send/{message}")
    public String sendMessage(@PathVariable("message")String message)throws Exception{
        for (int i = 0; i < 1000; i++) {
            pro.run(i);
        }
        return "成功";
    }
}
二、消费者
配置消息监听
package com.test.demo.kafka;

import org.apache.kafka.clients.consumer.ConsumerRecord;
import org.springframework.beans.factory.annotation.Autowired;
import org.springframework.kafka.annotation.KafkaListener;
import org.springframework.kafka.core.KafkaTemplate;
import org.springframework.kafka.support.KafkaHeaders;
import org.springframework.messaging.handler.annotation.Header;
import org.springframework.stereotype.Component;

import java.util.Optional;


@Component
public class Cus {

    @Autowired
    KafkaTemplate<String,Object> kafkaTemplate;

    @KafkaListener(topics = "topic1",groupId = "test")
    public void topic_test1(ConsumerRecord<?, ?> record, @Header(KafkaHeaders.RECEIVED_TOPIC) String topic) {
        Optional message = Optional.ofNullable(record.value());
        if (message.isPresent()) {
            Object msg = message.get();
            System.out.println(System.currentTimeMillis()+"topic1 消费了: Topic:" + topic + ",Message:" + msg);
        }
    }
}
三、测试
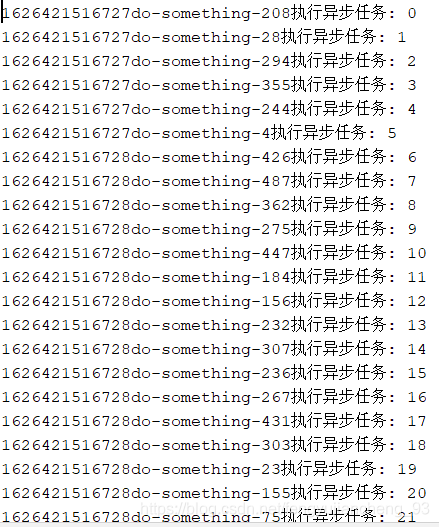
测试结果:

四、记录一下kafka部署
a.使用下载命令下载kafka包
wget https://mirrors.tuna.tsinghua.edu.cn/apache/kafka/2.8.0/kafka_2.13-2.8.0.tgzb.解压包
tar -zxcf kafka_2.13-2.8.0.tgzc.修改config/server.properties下的zookeep-ip和服务器ip
############################# Socket Server Settings #############################

# The address the socket server listens on. It will get the value returned from
# java.net.InetAddress.getCanonicalHostName() if not configured.
#   FORMAT:
#     listeners = listener_name://host_name:port
#   EXAMPLE:
#     listeners = PLAINTEXT://your.host.name:9092
listeners=PLAINTEXT://ip:9092

############################# Zookeeper #############################

# Zookeeper connection string (see zookeeper docs for details).
# This is a comma separated host:port pairs, each corresponding to a zk
# server. e.g. "127.0.0.1:3000,127.0.0.1:3001,127.0.0.1:3002".
# You can also append an optional chroot string to the urls to specify the
# root directory for all kafka znodes.
zookeeper.connect=zookeep-ip:2181
d.启动
bin/kafka-server-start.sh config/server.properties

#后台运行在 命令 后加“&”
e.测试
#创建话题 test
bin/kafka-topics.sh --create --bootstrap-server ip:9092 --replication-factor 1 --partitions 1 --topic test

#查询话题列表,检查是否创建成功
bin/kafka-topics.sh --list --bootstrap-server ip:9092

#发送消息
bin/kafka-console-producer.sh --bootstrap-server ip:9092 --topic test
>消息内容


#消费者测试命令
bin/kafka-console-consumer.sh --bootstrap-server ip --topic test --from-beginning