架构师第——服务调用链追踪-sleuth,消息中间件Stream
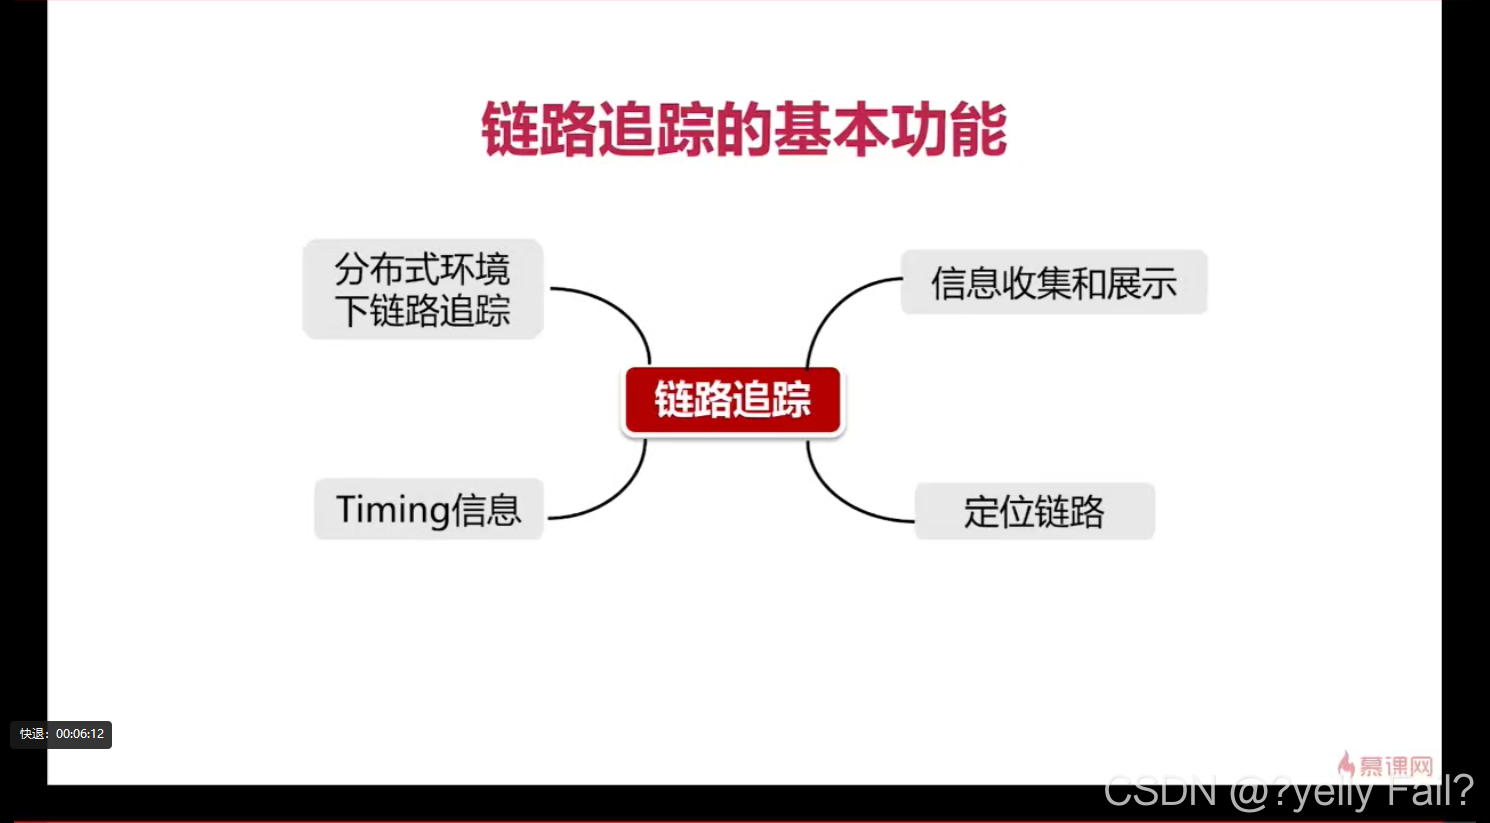
调用链在微服务中的应用

Sleuth与Zipkin小Demo
Sleuth-TraceA模块
启动类
package com.imooc.springcloud;

import lombok.extern.slf4j.Slf4j;
import org.springframework.beans.factory.annotation.Autowired;
import org.springframework.boot.SpringApplication;
import org.springframework.boot.WebApplicationType;
import org.springframework.boot.autoconfigure.SpringBootApplication;
import org.springframework.boot.builder.SpringApplicationBuilder;
import org.springframework.cloud.client.discovery.EnableDiscoveryClient;
import org.springframework.cloud.client.loadbalancer.LoadBalanced;
import org.springframework.context.annotation.Bean;
import org.springframework.web.bind.annotation.GetMapping;
import org.springframework.web.bind.annotation.RestController;
import org.springframework.web.client.RestTemplate;

/**
 * Created by 半仙.
 */
@EnableDiscoveryClient
@SpringBootApplication
@RestController
@Slf4j
public class SleuthTraceAMain {

    @LoadBalanced
    @Bean
    public RestTemplate lb() {
        return new RestTemplate();
    }

    @Autowired
    private RestTemplate restTemplate;


    @GetMapping(value = "/traceA")
    public String traceA() {
        log.info("-------Trace A");
        return restTemplate.getForEntity("http://sleuth-traceB/traceB", String.class)
                .getBody();
    }


    public static void main(String[] args) {
        SpringApplication.run(SleuthTraceAMain.class);
    }

}
application.properties
spring.application.name=sleuth-traceA
server.port=62000

eureka.client.serviceUrl.defaultZone=http://localhost:20000/eureka/

logging.file=${spring.application.name}.log

# zipkin的地址
spring.zipkin.base-url=http://localhost:62100
spring.sleuth.sampler.probability=1

info.app.name=sleuth-traceA
info.app.description=test

management.security.enabled=false
management.endpoints.web.exposure.include=*
management.endpoint.health.show-details=always
sleuth-TraceB模块
启动类
package com.imooc.springcloud;

import lombok.extern.slf4j.Slf4j;
import org.springframework.beans.factory.annotation.Autowired;
import org.springframework.boot.SpringApplication;
import org.springframework.boot.autoconfigure.SpringBootApplication;
import org.springframework.cloud.client.discovery.EnableDiscoveryClient;
import org.springframework.cloud.client.loadbalancer.LoadBalanced;
import org.springframework.context.annotation.Bean;
import org.springframework.web.bind.annotation.GetMapping;
import org.springframework.web.bind.annotation.RestController;
import org.springframework.web.client.RestTemplate;

/**
 * Created by 半仙.
 */
@EnableDiscoveryClient
@SpringBootApplication
@RestController
@Slf4j
public class SleuthTraceBMain {

    @LoadBalanced
    @Bean
    public RestTemplate lb() {
        return new RestTemplate();
    }

    @Autowired
    private RestTemplate restTemplate;


    @GetMapping(value = "/traceB")
    public String traceB() {
        log.info("-------Trace B");
        return "traceB";
    }


    public static void main(String[] args) {
        SpringApplication.run(SleuthTraceBMain.class);
    }

}
application.properties
spring.application.name=sleuth-traceB
server.port=62001

eureka.client.serviceUrl.defaultZone=http://localhost:20000/eureka/

logging.file=${spring.application.name}.log


# zipkin的地址
spring.zipkin.base-url=http://localhost:62100

info.app.name=sleuth-traceB
info.app.description=test

spring.sleuth.sampler.probability=1

management.security.enabled=false
management.endpoints.web.exposure.include=*
management.endpoint.health.show-details=always
修改我们的日志格式
<?xml version="1.0" encoding="UTF-8"?>
<!--该日志将日志级别不同的log信息保存到不同的文件中 -->
<configuration>
    <include resource="org/springframework/boot/logging/logback/defaults.xml" />

    <springProperty scope="context" name="springAppName"
                    source="spring.application.name" />

    <!-- 日志输出位置 -->
    <property name="LOG_FILE" value="${BUILD_FOLDER:-build}/${springAppName}" />

    <!-- 日志格式 -->
    <property name="CONSOLE_LOG_PATTERN"
              value="%clr(%d{HH:mm:ss.SSS}){faint} %clr(${LOG_LEVEL_PATTERN:-%5p}) %clr(${PID:- }){magenta} %clr(---){faint} %clr([%15.15t]){faint} %m%n${LOG_EXCEPTION_CONVERSION_WORD:-%wEx}}" />

    <!-- 控制台输出 -->
    <appender name="console" class="ch.qos.logback.core.ConsoleAppender">
        <filter class="ch.qos.logback.classic.filter.ThresholdFilter">
            <level>INFO</level>
        </filter>
        <!-- 日志输出编码 -->
        <encoder>
            <pattern>${CONSOLE_LOG_PATTERN}</pattern>
            <charset>utf8</charset>
        </encoder>
    </appender>

    <!-- Logstash -->
    <!-- 为logstash输出的JSON格式的Appender -->
    <appender name="logstash"
              class="net.logstash.logback.appender.LogstashTcpSocketAppender">
        <destination>127.0.0.1:5044</destination>
        <!-- 日志输出编码 -->
        <encoder
                class="net.logstash.logback.encoder.LoggingEventCompositeJsonEncoder">
            <providers>
                <timestamp>
                    <timeZone>UTC</timeZone>
                </timestamp>
                <pattern>
                    <pattern>
                        {
                        "severity": "%level",
                        "service": "${springAppName:-}",
                        "trace": "%X{X-B3-TraceId:-}",
                        "span": "%X{X-B3-SpanId:-}",
                        "exportable": "%X{X-Span-Export:-}",
                        "pid": "${PID:-}",
                        "thread": "%thread",
                        "class": "%logger{40}",
                        "rest": "%message"
                        }
                    </pattern>
                </pattern>
            </providers>
        </encoder>
    </appender>

    <!-- 日志输出级别 -->
    <root level="INFO">
        <appender-ref ref="console" />
        <appender-ref ref="logstash" />
    </root>

</configuration>
需要导入依赖
<!-- Logstash for ELK-->
        <dependency>
            <groupId>net.logstash.logback</groupId>
            <artifactId>logstash-logback-encoder</artifactId>
            <version>5.2</version>
        </dependency>
zipkin-servermokuai
启动列
package com.imooc.springcloud;

import org.springframework.boot.WebApplicationType;
import org.springframework.boot.autoconfigure.SpringBootApplication;
import org.springframework.boot.builder.SpringApplicationBuilder;
import zipkin.server.internal.EnableZipkinServer;

@SpringBootApplication
@EnableZipkinServer
public class ZipkinApplication {

    public static void main(String[] args) {
        new SpringApplicationBuilder(ZipkinApplication.class)
                            .web(WebApplicationType.SERVLET)
                            .run(args);
    }
}
application.properties
spring.application.name=zipkin-server
server.port=62100

spring.main.allow-bean-definition-overriding=true

management.metrics.web.server.auto-time-requests=false
导入依赖
<dependencies>
        <dependency>
            <groupId>io.zipkin.java</groupId>
            <artifactId>zipkin-server</artifactId>
            <version>2.8.4</version>
        </dependency>

        <dependency>
            <groupId>io.zipkin.java</groupId>
            <artifactId>zipkin-autoconfigure-ui</artifactId>
            <version>2.8.4</version>
        </dependency>
    </dependencies>
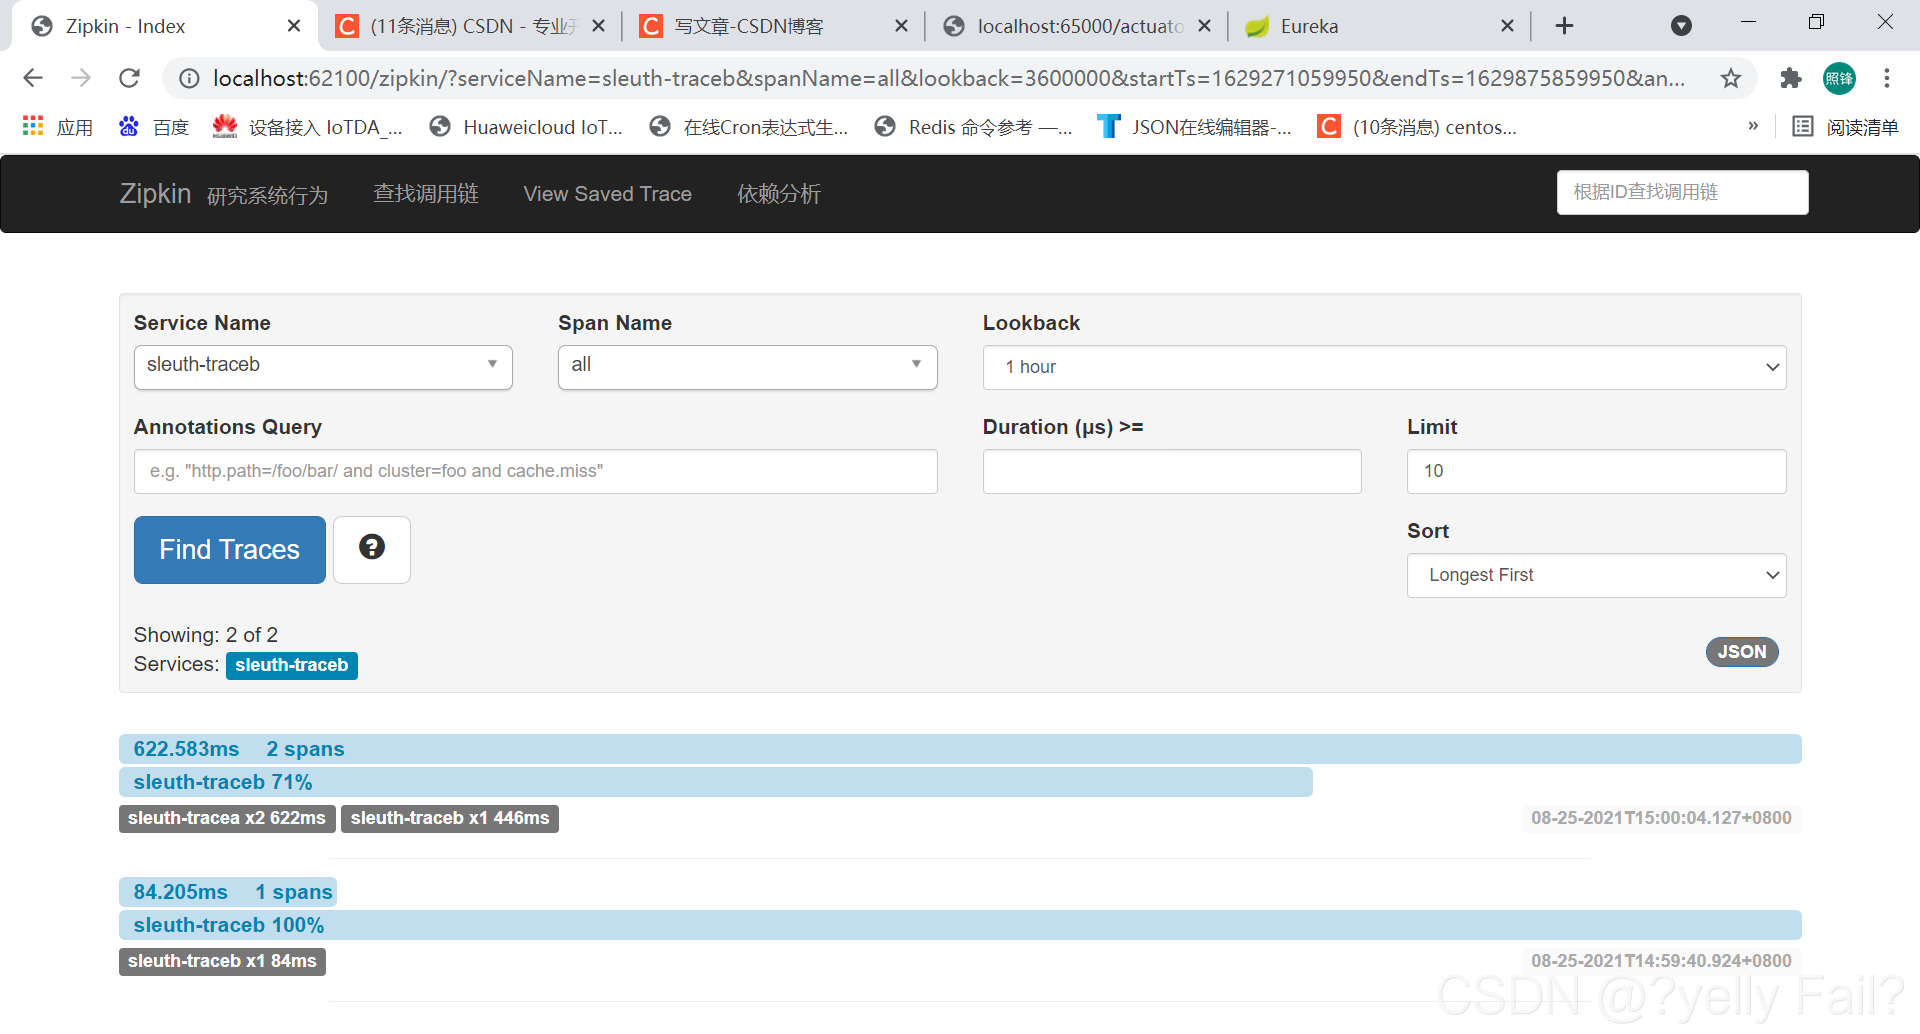
启动Eureka注册中心以及上面三个模块,访问localhost:62100(62100是Zipkin的ip端口)。

Sleuth集成ELK
简单回顾


学习完docker后补充…
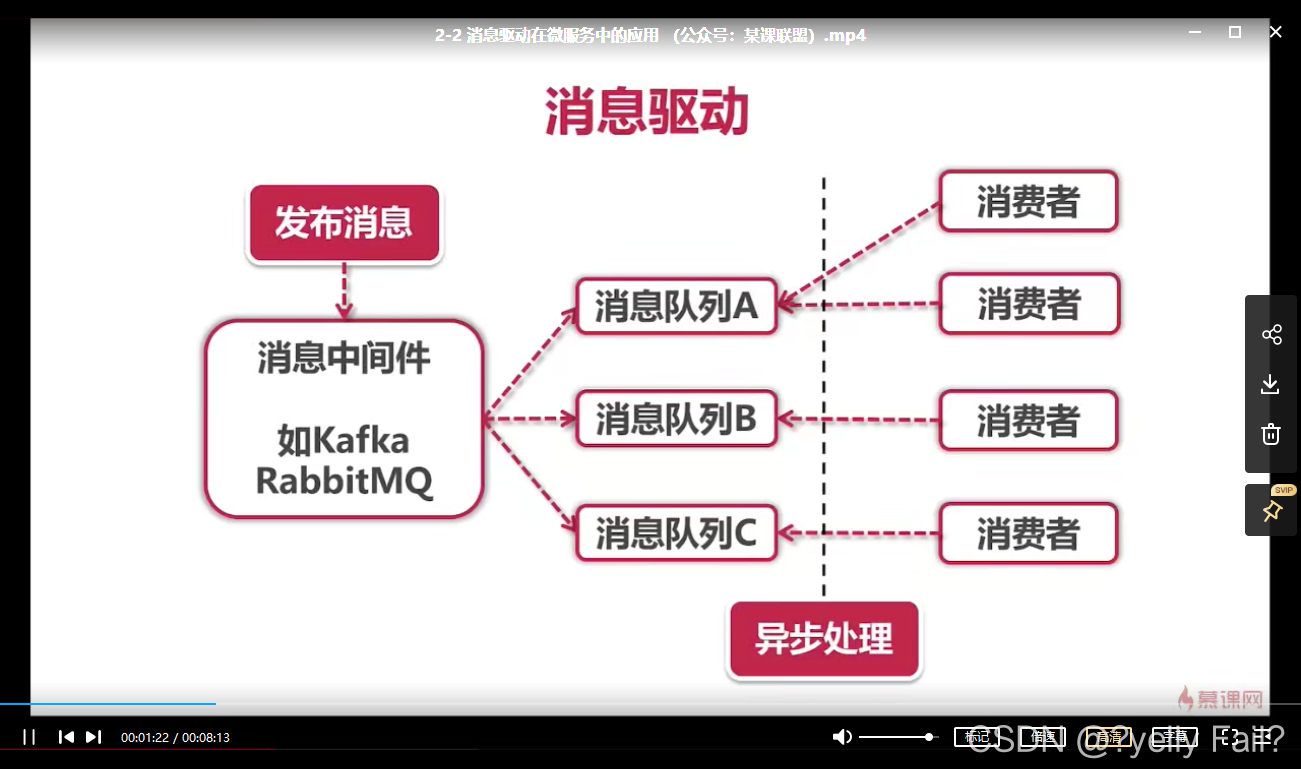
消息中间件Stream


Stream消息广播
创建stream-sample模块
application.properties
spring.application.name=stream-sample
server.port=63001

#RabbitMQ连接字符串
spring.rabbitmq.host=192.168.31.214
spring.rabbitmq.port=5672
spring.rabbitmq.username=admin
spring.rabbitmq.password=admin123

#绑定Channel到broadcast
spring.cloud.stream.bindings.myTopic-consumer.destination=broadcast
spring.cloud.stream.bindings.myTopic-producer.destination=broadcast


management.security.enabled=false
management.endpoints.web.exposure.include=*
management.endpoint.health.show-details=always
MyTopic接口
package topic;

import org.springframework.cloud.stream.annotation.Input;
import org.springframework.cloud.stream.annotation.Output;
import org.springframework.messaging.MessageChannel;
import org.springframework.messaging.SubscribableChannel;

public interface MyTopic {

    String INPUT = "myTopic-consumer";

    String OUTPUT = "myTopic-producer";

    @Input(INPUT)
    SubscribableChannel input();

    //TODO 暴雷
    @Output(OUTPUT)
    MessageChannel output();
}
StreamConsumer Stream消费者
package com.imooc.springcloud.biz;

import lombok.extern.slf4j.Slf4j;
import org.springframework.cloud.stream.annotation.EnableBinding;
import org.springframework.cloud.stream.annotation.StreamListener;
import org.springframework.cloud.stream.messaging.Sink;
import topic.MyTopic;

@Slf4j
@EnableBinding(value = {
        Sink.class,
        MyTopic.class
        //MyTopic.class
}
)
public class StreamConsumer {

    @StreamListener(Sink.INPUT)
    private void consume(Object payload){
        log.info("message consumed successfully,payload={}",payload);
    }

    @StreamListener(MyTopic.INPUT)
    private void consumeMyMessage(Object payload){
        log.info("My message consumed successfully,payload={}",payload);
    }

}
供外部调用 Controller
package com.imooc.springcloud.biz;

import lombok.extern.slf4j.Slf4j;
import org.springframework.beans.factory.annotation.Autowired;
import org.springframework.messaging.support.MessageBuilder;
import org.springframework.web.bind.annotation.PostMapping;
import org.springframework.web.bind.annotation.RequestParam;
import org.springframework.web.bind.annotation.RestController;
import topic.MyTopic;

@RestController
@Slf4j
public class Controller {

    @Autowired
    private MyTopic producer;

    @PostMapping("/send")
    public void sendMessage(@RequestParam("body") String body)
    {
        producer.output().send(MessageBuilder.withPayload(body).build());
    }
}
启动两次项目,端口分别为60000和60001,利用Postman发送post请求http://localhost:60000/send,body是hello,
发现两个端口的消费者全部消费到信息。
在rabbitmq可以看到我们创建的名为braodcast的交换机

queue中也有代表两个消费者的队列

消费者组和消费分区Demo。
消费者组就是以一个组为单位去消费一个队列的信息,他与我们上一个广播不同的是,同一个消费者组中的机器,在消费消息时是采用轮询的机制去消费的,而不会都消费。消费分区则是我们给某台机器设置一个key,对应的只有消费者的index和生产者的key相同的才能消费,当我们的消费者同一个index有多台机器时,则采用轮询的机制,相当于是一个消费者组。
下面的Demo是结合消费这组和消费分区的示例
application.properties
spring.application.name=stream-sample
server.port=63002

#RabbitMQ连接字符串
spring.rabbitmq.host=192.168.31.214
spring.rabbitmq.port=5672
spring.rabbitmq.username=admin
spring.rabbitmq.password=admin123

#绑定Channel到broadcast
spring.cloud.stream.bindings.myTopic-consumer.destination=broadcast
spring.cloud.stream.bindings.myTopic-producer.destination=broadcast

#消息分组示例
spring.cloud.stream.bindings.group-consumer.destination=group-topic
spring.cloud.stream.bindings.group-producer.destination=group-topic
spring.cloud.stream.bindings.group-consumer.group=Group-A

##消费分区
##打开消费者的消费分区功能
spring.cloud.stream.bindings.group-consumer.consumer.partitioned=true
##两个消息分区
spring.cloud.stream.bindings.group-producer.producer.partition-count=2
##sqEL (ey Resolver)
#只有索引参数为1的结点(消费者),才能消费信息
spring.cloud.stream.bindings.group-producer.producer.partition-key-expression=1
#当前消费者实例总数
#消费者实例总数
spring.cloud.stream.instance-count=2
#最大值instanCount-1,当前实例的索引号
spring.cloud.stream.instance-index=1


management.security.enabled=false
management.endpoints.web.exposure.include=*
management.endpoint.health.show-details=always
GroupTopic
package topic;

import org.springframework.cloud.stream.annotation.Input;
import org.springframework.cloud.stream.annotation.Output;
import org.springframework.messaging.MessageChannel;
import org.springframework.messaging.SubscribableChannel;

public interface GroupTopic {

    String INPUT = "group-consumer";

    String OUTPUT = "group-producer";

    @Input(INPUT)
    SubscribableChannel input();

    //TODO 暴雷
    @Output(OUTPUT)
    MessageChannel output();
}
StreamConsumer
package com.imooc.springcloud.biz;

import lombok.extern.slf4j.Slf4j;
import org.springframework.cloud.stream.annotation.EnableBinding;
import org.springframework.cloud.stream.annotation.StreamListener;
import org.springframework.cloud.stream.messaging.Sink;
import topic.GroupTopic;
import topic.MyTopic;

@Slf4j
@EnableBinding(value = {
        Sink.class,
        MyTopic.class,
        GroupTopic.class
}
)
public class StreamConsumer {

    @StreamListener(MyTopic.INPUT)
    private void consume(Object payload){
        log.info("message consumed successfully,payload={}",payload);
    }

    @StreamListener(GroupTopic.INPUT)
    private void consumeGroupMessage(Object payload){
        log.info("Group message consumed successfully,payload={}",payload);
    }

}
Controller
package com.imooc.springcloud.biz;

import lombok.extern.slf4j.Slf4j;
import org.springframework.beans.factory.annotation.Autowired;
import org.springframework.messaging.support.MessageBuilder;
import org.springframework.web.bind.annotation.PostMapping;
import org.springframework.web.bind.annotation.RequestParam;
import org.springframework.web.bind.annotation.RestController;
import topic.GroupTopic;
import topic.MyTopic;

@RestController
@Slf4j
public class Controller {

    @Autowired
    private GroupTopic groupTopic;

    @PostMapping("/sendToGroup")
    public void sendMessageToGroup(@RequestParam("body") String body)
    {
        groupTopic.output().send(MessageBuilder.withPayload(body).build());
    }
}
这里我们启动三个端口60003,60002,60003,对应的消费分区的index分别是0,1,1,生产者的key都是1。利用postaman发送请求,60002和60003轮询消费消息,60001不消费消息。若不使用消费分区,则将消费分区配置信息注释掉,则启动两个消费者,他们都属于一个名为Group-A的消费者组,消费指定Topic的消息,并且轮询消费。
延迟消息
在rabbitmq安装延迟消息插件,下载地址:https://github.com/rabbitmq/rabbitmq-delayed-message-exchange/releases/download/v3.8.0/rabbitmq_delayed_message_exchange-3.8.0.ez
application.properties
spring.application.name=stream-sample
server.port=63000

#RabbitMQ连接字符串
spring.rabbitmq.host=192.168.31.214
spring.rabbitmq.port=5672
spring.rabbitmq.username=admin
spring.rabbitmq.password=admin123

##延迟消息配置
spring.cloud.stream.bindings.delayed-consumer.destination=delayed-topic
spring.cloud.stream.bindings.delayed-producer.destination=delayed-topic
spring.cloud.stream.rabbit.bindings.delayed-producer.producer.delayed-exchange=true

management.security.enabled=false
management.endpoints.web.exposure.include=*
management.endpoint.health.show-details=always
DelayedTopic
package topic;

import org.springframework.cloud.stream.annotation.Input;
import org.springframework.cloud.stream.annotation.Output;
import org.springframework.messaging.MessageChannel;
import org.springframework.messaging.SubscribableChannel;

public interface DelayedTopic {

    String INPUT = "delayed-consumer";

    String OUTPUT = "delayed-producer";

    @Input(INPUT)
    SubscribableChannel input();

    //TODO 暴雷
    @Output(OUTPUT)
    MessageChannel output();

}

Controller

```java
package com.imooc.springcloud.biz;

import lombok.extern.slf4j.Slf4j;
import org.springframework.beans.factory.annotation.Autowired;
import org.springframework.messaging.support.MessageBuilder;
import org.springframework.web.bind.annotation.PostMapping;
import org.springframework.web.bind.annotation.RequestParam;
import org.springframework.web.bind.annotation.RestController;
import topic.DelayedTopic;
import topic.GroupTopic;
import topic.MyTopic;

@RestController
@Slf4j
public class Controller {

    @Autowired
    private DelayedTopic delayedTopic;


    @PostMapping("/sendDM")
    public void sendDelayMessageToGroup(@RequestParam("body") String body,@RequestParam("seconds") Integer seconds)
    {
        MessageBean msg = new MessageBean();
        msg.setPayload(body);
        log.info("reday to send delayed message");
        delayedTopic.output().send(MessageBuilder.withPayload(msg)
                .setHeader("x-delay",1000 * seconds)
                .build());

    }

}

启动项目Exchange中添加了一个延迟类型的delayed-Tpoic,配置成功,我们在发送延迟消息时,需要往header中添加x-delay属性,为延迟的秒数。
Stream实现异常重试
application.properties
spring.application.name=stream-sample
server.port=63000

#RabbitMQ连接字符串
spring.rabbitmq.host=192.168.31.214
spring.rabbitmq.port=5672
spring.rabbitmq.username=admin
spring.rabbitmq.password=admin123
spring.rabbitmq.listener.simple.acknowledge-mode=manual

##异常消息(单机版重试)
spring.cloud.stream.bindings.error-consumer.destination=error-out-topic
spring.cloud.stream.bindings.error-producer.destination=error-out-topic
#重试次数(本机重试)
#次数=1相当于不重试
spring.cloud.stream.bindings.error-consumer.consumer.max-attempts=2
Controlelr
package com.imooc.springcloud.biz;

import lombok.extern.slf4j.Slf4j;
import org.springframework.beans.factory.annotation.Autowired;
import org.springframework.messaging.support.MessageBuilder;
import org.springframework.web.bind.annotation.PostMapping;
import org.springframework.web.bind.annotation.RequestParam;
import org.springframework.web.bind.annotation.RestController;
import topic.DelayedTopic;
import topic.ErrorTopic;
import topic.GroupTopic;
import topic.MyTopic;

@RestController
@Slf4j
public class Controller {

    @Autowired
    private ErrorTopic errorTopic;

    //异常重试(单机版)
    @PostMapping("sendError")
    public void sendErrorMessage(@RequestParam("body") String body)
    {
        MessageBean msg = new MessageBean();
        msg.setPayload(body);
        errorTopic.output().send(MessageBuilder.withPayload(msg).build());
    }

}

EorrorTpoic
```java
package topic;

import org.springframework.cloud.stream.annotation.Input;
import org.springframework.cloud.stream.annotation.Output;
import org.springframework.messaging.MessageChannel;
import org.springframework.messaging.SubscribableChannel;

public interface DelayedTopic {

    String INPUT = "delayed-consumer";

    String OUTPUT = "delayed-producer";

    @Input(INPUT)
    SubscribableChannel input();

    //TODO 暴雷
    @Output(OUTPUT)
    MessageChannel output();


}
StreamConsumer
package com.imooc.springcloud.biz;

import lombok.extern.slf4j.Slf4j;
import org.springframework.cloud.stream.annotation.EnableBinding;
import org.springframework.cloud.stream.annotation.StreamListener;
import org.springframework.cloud.stream.messaging.Sink;
import topic.DelayedTopic;
import topic.ErrorTopic;
import topic.GroupTopic;
import topic.MyTopic;

import java.util.concurrent.atomic.AtomicInteger;

@Slf4j
@EnableBinding(value = {
        Sink.class,
        MyTopic.class,
        GroupTopic.class,
        DelayedTopic.class,
        ErrorTopic.class
}
)
public class StreamConsumer {

    private AtomicInteger count = new AtomicInteger(1);

    @StreamListener(ErrorTopic.INPUT)
    private void consumeErrorGroupMessage(MessageBean bean){
        log.info("Are you ok?");

        if(count.incrementAndGet() % 3 == 0){
            log.info("fine,thank you,And you?");
            count.set(0);
        }else {
            log.info("What's your problem?");
            throw new RuntimeException("I'm not OK");
        }
    }

}
异常重试的作用,当我们消费者消费信息的过程中出现异常,会自动重试,如果重试过程中没有出现错误,则不会抛出异常,如果超过重试次数之后还是有异常,则会抛出异常。弊端是只会在当前服务器上重试。并不会将消息重新加载到队列中。
Stream实现requeue异常重试
application.properties
spring.application.name=stream-sample
server.port=63003

# RabbitMQ连接字符串
spring.rabbitmq.host=localhost
spring.rabbitmq.port=5672
spring.rabbitmq.username=guest
spring.rabbitmq.password=guest

##异常消息(requeue重试)
spring.cloud.stream.bindings.requeue-consumer.destination=requeue-topic
spring.cloud.stream.bindings.requeue-producer.destination=requeue-topic
spring.cloud.stream.bindings.requeue-consumer.consumer.max-attempts=1
spring.cloud.stream.bindings.requeue-consumer.group=requeue-Group

#仅对当前requeue-consumer,开启requeue
spring.cloud.stream.rabbit.bindings.requeue-consumer.consumer.requeueRejected=true

#默认全局开启requeue
#spring.rabbitmq.listener.default-requeue-rejected=true
RequeueTopic
package topic;

import org.springframework.cloud.stream.annotation.Input;
import org.springframework.cloud.stream.annotation.Output;
import org.springframework.messaging.MessageChannel;
import org.springframework.messaging.SubscribableChannel;

public interface RequeueTopic {

    String INPUT = "requeue-consumer";

    String OUTPUT = "requeue-producer";

    @Input(INPUT)
    SubscribableChannel input();

    //TODO 暴雷
    @Output(OUTPUT)
    MessageChannel output();
}
Controller
package com.imooc.springcloud.biz;

import lombok.extern.slf4j.Slf4j;
import org.springframework.beans.factory.annotation.Autowired;
import org.springframework.messaging.support.MessageBuilder;
import org.springframework.web.bind.annotation.PostMapping;
import org.springframework.web.bind.annotation.RequestParam;
import org.springframework.web.bind.annotation.RestController;
import topic.*;

@RestController
@Slf4j
public class Controller {

    @Autowired
    private RequeueTopic requeueTopic;

    //异常重试(联机板 - 重新入列)
    @PostMapping("requeue")
    public void sendErrorMessageToMQ(@RequestParam("body") String body)
    {
        MessageBean msg = new MessageBean();
        msg.setPayload(body);
        requeueTopic.output().send(MessageBuilder.withPayload(msg).build());
    }


}
StreamConsumer
package com.imooc.springcloud.biz;

import lombok.extern.slf4j.Slf4j;
import org.springframework.cloud.stream.annotation.EnableBinding;
import org.springframework.cloud.stream.annotation.StreamListener;
import org.springframework.cloud.stream.messaging.Sink;
import topic.*;

import java.util.concurrent.atomic.AtomicInteger;

@Slf4j
@EnableBinding(value = {
        Sink.class,
        RequeueTopic.class
}
)
public class StreamConsumer {

    @StreamListener(RequeueTopic.INPUT)
    private void consumeErrorGroupMessageToMQ(MessageBean bean){
        log.info("Are you ok?");
        try{
            Thread.sleep(3000);
        }catch (Exception e){}

        throw new RuntimeException("I'm not ok!");
    }

}
Requeue重试与单机版重试不同的是,Requeue重试会将消费失败的消息重新放回到消息队列中,然后同一消费者组中的其他消费者服务器进行轮询消费。
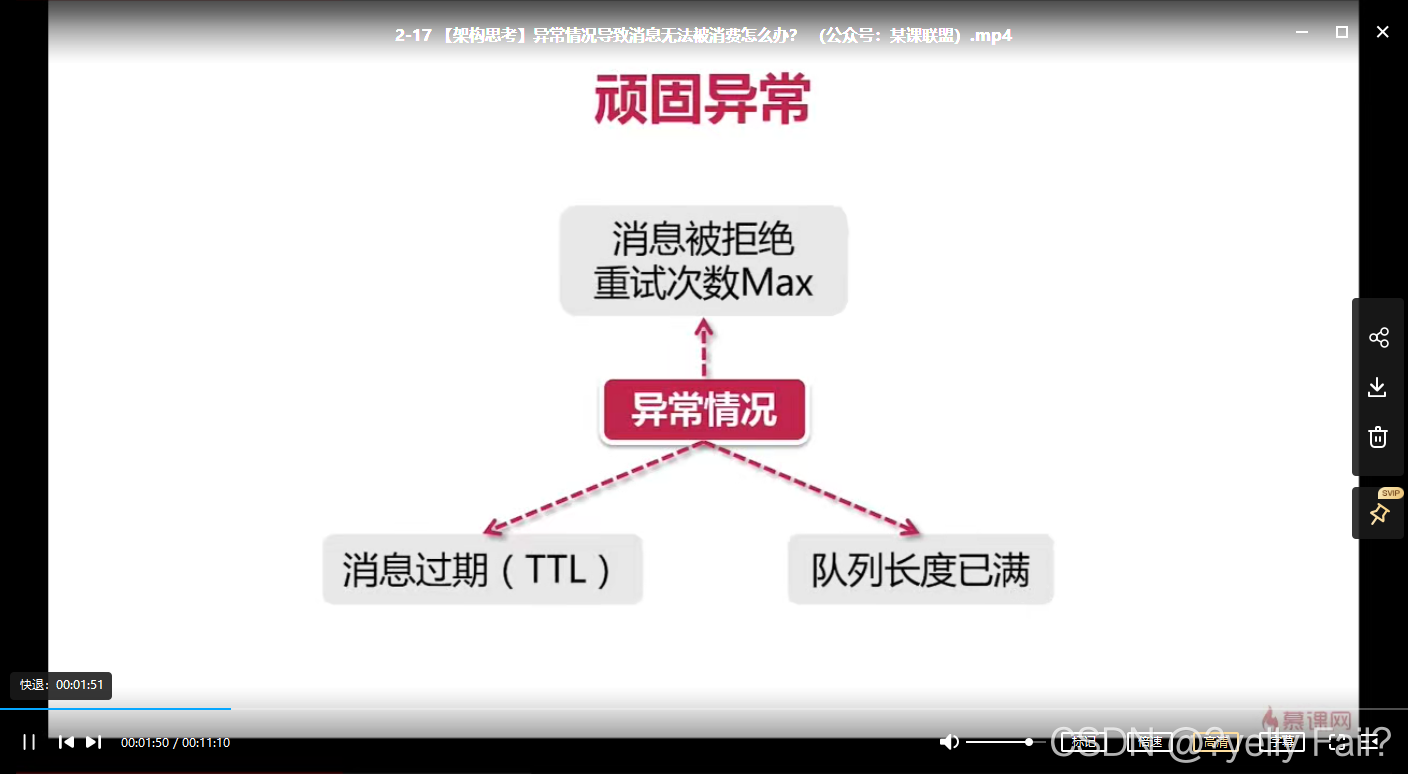
异常情况导致消息无法消费


Stream死信队列处理异常
applicatioon.properties
spring.application.name=stream-sample
server.port=63001

#RabbitMQ连接字符串
spring.rabbitmq.host=192.168.31.214
spring.rabbitmq.port=5672
spring.rabbitmq.username=admin
spring.rabbitmq.password=admin123
spring.rabbitmq.listener.simple.acknowledge-mode=manual

# 死信队列配置
spring.cloud.stream.bindings.dlq-consumer.destination=dlq-topic
spring.cloud.stream.bindings.dlq-producer.destination=dlq-topic
spring.cloud.stream.bindings.dlq-consumer.consumer.max-attempts=2
spring.cloud.stream.bindings.dlq-consumer.group=dlq-Group
#开启死信队列topic.dlq
spring.cloud.stream.rabbit.bindings.dlq-consumer.consumer.auto-bind-dlq=true
DlqTopic
package topic;

import org.springframework.cloud.stream.annotation.Input;
import org.springframework.cloud.stream.annotation.Output;
import org.springframework.messaging.MessageChannel;
import org.springframework.messaging.SubscribableChannel;

public interface RequeueTopic {

    String INPUT = "requeue-consumer";

    String OUTPUT = "requeue-producer";

    @Input(INPUT)
    SubscribableChannel input();

    //TODO 暴雷
    @Output(OUTPUT)
    MessageChannel output();


}
StreamConsumer
package com.imooc.springcloud.biz;

import lombok.extern.slf4j.Slf4j;
import org.springframework.cloud.stream.annotation.EnableBinding;
import org.springframework.cloud.stream.annotation.StreamListener;
import org.springframework.cloud.stream.messaging.Sink;
import topic.*;

import java.util.concurrent.atomic.AtomicInteger;

@Slf4j
@EnableBinding(value = {
        DlqTopic.class
}
)
public class StreamConsumer {

    @StreamListener(DlqTopic.INPUT)
    private void consumeDlqGroupMessage(MessageBean bean){
        log.info("Dlq - Are you ok?");
        if(count.incrementAndGet() % 3 == 0){
            log.info("Dlq - fine,thank you,And you?");
        }else {
            log.info("Dlq - What's your problem?");
            throw new RuntimeException("Dlq - I'm not OK");
        }
    }

}
Controller
package com.imooc.springcloud.biz;

import lombok.extern.slf4j.Slf4j;
import org.springframework.beans.factory.annotation.Autowired;
import org.springframework.messaging.support.MessageBuilder;
import org.springframework.web.bind.annotation.PostMapping;
import org.springframework.web.bind.annotation.RequestParam;
import org.springframework.web.bind.annotation.RestController;
import topic.*;

@RestController
@Slf4j
public class Controller {

    @Autowired
    private DlqTopic dlqTopic;

    //死信队列测试
    @PostMapping("dlq")
    public void sendErrorMessageToDlq(@RequestParam("body") String body)
    {
        MessageBean msg = new MessageBean();
        msg.setPayload(body);
        dlqTopic.output().send(MessageBuilder.withPayload(msg).build());
    }

}
我们利用postman发送请求,发送的第二次,控制台抛出异常。对应的死信队列会增加一条消息。

利用插件将死信队列里的消息重新转发给我们指定的消息队列,消息重新消费。消费成功后,死信队列里的消息就会移除。

自定义异常处理逻辑
application.properties
spring.application.name=stream-sample
server.port=63001

#RabbitMQ连接字符串
spring.rabbitmq.host=192.168.31.214
spring.rabbitmq.port=5672
spring.rabbitmq.username=admin
spring.rabbitmq.password=admin123
spring.rabbitmq.listener.simple.acknowledge-mode=manual

# Fallback配置
spring.cloud.stream.bindings.fallback-consumer.destination=fallback-topic
spring.cloud.stream.bindings.fallback-producer.destination=fallback-topic
spring.cloud.stream.bindings.fallback-consumer.consumer.max-attempts=2
spring.cloud.stream.bindings.fallback-consumer.group=fallback-group
#input channel -> fallback-topic.fallback-group.errors
FallbackTopic
package topic;

import org.springframework.cloud.stream.annotation.Input;
import org.springframework.cloud.stream.annotation.Output;
import org.springframework.messaging.MessageChannel;
import org.springframework.messaging.SubscribableChannel;

public interface FallBackTopic {

    String INPUT = "fallback-consumer";

    String OUTPUT = "fallback-producer";

    @Input(INPUT)
    SubscribableChannel input();

    //TODO 暴雷
    @Output(OUTPUT)
    MessageChannel output();


}
StreamConsumer
package com.imooc.springcloud.biz;

import lombok.extern.slf4j.Slf4j;
import org.springframework.cloud.stream.annotation.EnableBinding;
import org.springframework.cloud.stream.annotation.StreamListener;
import org.springframework.cloud.stream.messaging.Sink;
import org.springframework.integration.annotation.ServiceActivator;
import org.springframework.messaging.Message;
import org.springframework.messaging.handler.annotation.Header;
import topic.*;

import java.util.concurrent.atomic.AtomicInteger;

@Slf4j
@EnableBinding(value = {
        FallBackTopic.class
}
)
public class StreamConsumer {


    //Fallback + 升版
    @StreamListener(FallBackTopic.INPUT)
    private void goodbyeBadGuy(MessageBean bean, @Header("version") String version){
        log.info("Fallback - Are you ok?");
        if("1.0".equalsIgnoreCase(version)){
            log.info("Fallback - fine,thank you,And you?");
        }else if ("2.0".equalsIgnoreCase(version)){
            log.info("unsuport version");
            throw new RuntimeException("I'm not OK");
        }else {
            log.info("Fallback - version={}",version);
        }
    }
	 //inputChannel = "队列名.消费者组.errors"
    @ServiceActivator(inputChannel = "fallback-topic.fallback-group.errors")
    public void fallback(Message<?> message)
    {
        log.info("fallback entered");
    }

}
Controller
package com.imooc.springcloud.biz;

import lombok.extern.slf4j.Slf4j;
import org.springframework.beans.factory.annotation.Autowired;
import org.springframework.messaging.handler.annotation.Header;
import org.springframework.messaging.support.MessageBuilder;
import org.springframework.web.bind.annotation.PostMapping;
import org.springframework.web.bind.annotation.RequestParam;
import org.springframework.web.bind.annotation.RestController;
import topic.*;

@RestController
@Slf4j
public class Controller {

    @Autowired
    private FallBackTopic fallBackTopic;

    //fallback + 升版
    @PostMapping("fallback")
    public void sendErrorMessageToFallback(@RequestParam("body") String body,
                                           @RequestParam(value = "version",defaultValue = "1.0") String version)
    {
        MessageBean msg = new MessageBean();
        msg.setPayload(body);
        //place order
        //placeOrderV1
        //placeOrderV2

        //queue 1
        //queue 2


        fallBackTopic.output().send(MessageBuilder.withPayload(msg)
                        .setHeader("version",version)
                        .build());
    }


}
利用postman发送请求

我们的消费消息时经过重试过后还是失败,这时并不会抛出异常而是跳转到我们的降级函数。
