python:pyqt5+mysql=学生信息管理系统(图文并茂,超详细)——登录,注册及找回密码篇
前言
在我的前一篇博客中我使用了Tinker作为基础,但是Tinker的缺点就是太枯燥,在美化方面不是很容易进行,因此这次我想分享一下使用pyqt5制作的学生管理系统。
当然这其实也是我的一个课时作业,在上次的基础上,我们不再使用表格,而是运用大家使用更多的储存数据的方式——mysql数据库,通过调用数据库中的数据来实现我们的增删改查,且带有登录界面的管理系统。
接下来我将与大家分享一下我的学生信息管理系统
一、pyqt5是什么?
在这个博客中讲的十分明白了。不太懂的同学可以去学习了解一下:
链接: pyqt5的介绍及简单用法.
于我而言,pyqt5相比Tinker有着明显的优势,就是它在美化这方面是做的很好的,特别是在添加背景图片方面,我认为pyqt5是更加方便的,反正我是在使用Tinker时添加背景图片时遇到了很多的困难,不知道有无大佬指点一下。
当然pyqt5这个库时需要大家自行下载的,下载方法,我就不做过多讲述了,大家可以百度,方法也不是很难(推荐大家使用镜像网下载,能节省大家蛮多时间的)。
二、代码方面
1.引入库及效果展示
在分享之前我们需要做的最重要的一个准备工作就是下载所需要的库: qtawesome,tkinter,os,time,threading,sys,PyQt5,webbrowser,pymysql等,将这些库下载后,我们就可以开始我们的项目了。首先先给大家看看整体的效果:

注册及找回密码:


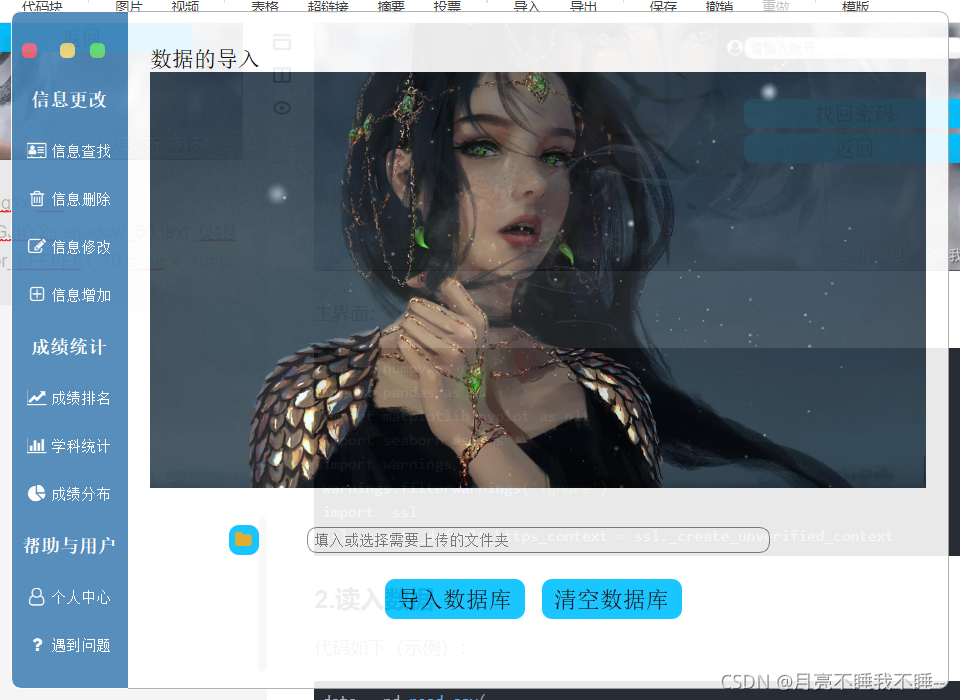
部分主界面:


看着这些界面再看看我之前用Tinker制作的窗口,这不是天差地别吗?啊哈哈哈,所以在我看来pyqt5的优势是更大的。
2.首先介绍一下登录,注册及密码的找回界面吧
欢迎界面
在点击运行整个程序的时候我也制作了欢迎界面,方法与我的上一篇博客大致一样,在这里我还是将代码贴出来吧,原理代码注释应该能看懂。
#欢迎界面
def showWelcome():
    sw = root1.winfo_screenwidth()  # 获取屏幕宽度
    sh = root1.winfo_screenheight()  # 获取屏幕高度r
    root1.overrideredirect(True)  # 去除窗口边框
    root1.attributes("-alpha", 1)  # 窗口透明度(1为不透明,0为全透明)
    x = (sw - 800) / 2
    y = (sh - 450) / 2
    root1.geometry("800x450+%d+%d" % (x, y))  # 将窗口置于屏幕中央
    if os.path.exists(r'./9.gif'):  # 搜索图片文件(只能是gif格式)
        bm = PhotoImage(file=r'./9.gif')
        lb_welcomelogo = Label(root1, image=bm)  # 将图片放置于窗口
        lb_welcomelogo.bm = bm
        lb_welcomelogo.place(x=-2, y=-2, )  # 设置图片位置

def closeWelcome():
    for i in range(2):
        time.sleep(1)  # 屏幕停留时间
    root1.destroy()
登录
效果与上一篇博客也是一样的,停留一定时间自动关闭,然后出现登录界面。

在登录界面中可以看到并没有窗口的扩大,缩小,关闭等按钮,也没有了窗口的边框。因为我通过如下代码对窗口进行了美化(代码写的非常的乱,请大佬们轻喷,我已经尽力了):
#登录界面
class Login(QWidget):
    def __init__(self, mode=0, *args, **kwargs):
        super().__init__(*args, **kwargs)

        self.mode = mode
        self.setWindowTitle('登录界面')
        self.resize(800, 450)
        self.setFixedSize(self.width(), self.height())
        self.setWindowFlags(Qt.WindowCloseButtonHint)
        self.setWindowOpacity(0.9)  # 设置窗口透明度
        self.setWindowFlag(QtCore.Qt.FramelessWindowHint)  # 隐藏边框
        palette = QPalette()
        palette.setBrush(QPalette.Background, QBrush(QPixmap("./1.png")))
        self.setPalette(palette)
        ###### 设置界面控件
        self.verticalLayout = QGridLayout(self)
        self.H = QLabel(" ")
        self.verticalLayout.addWidget(self.H, 0, 0, 9, 0)
        self.h = QPushButton("找回密码->>")
        self.verticalLayout.addWidget(self.h, 7, 5)
        self.h.setStyleSheet('''
                   QPushButton{border:none;color:black;}
                   QPushButton:hover{color:white}
                    ''')
        self.a = QPushButton(qtawesome.icon('fa.user-circle', color='white'),":")
        self.verticalLayout.addWidget(self.a, 2, 3, 1 ,2)
        self.a.setStyleSheet('''
                           QPushButton{border:none;color:black;}
                           QPushButton:hover{color:white}
                            ''')
        self.lineEdit_account = QLineEdit()
        self.lineEdit_account.setPlaceholderText("请输入账号")
        self.verticalLayout.addWidget(self.lineEdit_account, 2, 4, 1,3)
        self.lineEdit_account.setStyleSheet(
            '''QLineEdit{
                        border:1px solid gray;
                        width:200px;
                        border-radius:10px;
                        padding:2px 4px;
                }''')

        self.left_close = QtWidgets.QPushButton("")  # 关闭按钮
        self.left_visit = QtWidgets.QPushButton("")  # 空白按钮
        self.left_mini = QtWidgets.QPushButton("")  # 最小化按钮
        self.verticalLayout.addWidget(self.left_mini, 0, 6, 1, 1)
        self.verticalLayout.addWidget(self.left_close, 0, 8, 1, 1)
        self.verticalLayout.addWidget(self.left_visit, 0, 7, 1, 1)
        self.left_close.setFixedSize(15, 15)  # 设置关闭按钮的大小
        self.left_visit.setFixedSize(15, 15)  # 设置最大化按钮大小
        self.left_mini.setFixedSize(15, 15)  # 设置最小化按钮大小
        self.left_close.setStyleSheet(
            '''QPushButton{background:#F76677;border-radius:5px;}QPushButton:hover{background:red;}''')
        self.left_visit.setStyleSheet(
            '''QPushButton{background:#F7D674;border-radius:5px;}QPushButton:hover{background:yellow;}''')
        self.left_mini.setStyleSheet(
            '''QPushButton{background:#6DDF6D;border-radius:5px;}QPushButton:hover{background:green;}''')
        self.a1 = QPushButton(qtawesome.icon('fa.lock', color='white'), ":")
        self.verticalLayout.addWidget(self.a1, 3, 3, 1, 2)
        self.a1.setStyleSheet('''
                                   QPushButton{border:none;color:black;}
                                   QPushButton:hover{color:white}
                                    ''')
        self.lineEdit_password = QLineEdit()
        self.lineEdit_password.setPlaceholderText("请输入密码")
        self.verticalLayout.addWidget(self.lineEdit_password, 3, 4, 1, 3)
        self.lineEdit_password.setStyleSheet(
            '''QLineEdit{
                        border:1px solid gray;
                        width:200px;
                        border-radius:10px;
                        padding:2px 4px;
                }''')
        self.lineEdit_password.setEchoMode(QLineEdit.Password)

        self.checkBox_remeberpassword = QCheckBox()
        self.checkBox_remeberpassword.setText("记住密码")
        self.verticalLayout.addWidget(self.checkBox_remeberpassword, 4, 4, 1, 3)
        self.checkBox_remeberpassword.setStyleSheet(
            "QCheckBox { color : white; }; QCheckBox::indicator { color:black; }");

        self.checkBox_autologin = QtWidgets.QCheckBox()
        self.checkBox_autologin.setText("自动登录")
        self.verticalLayout.addWidget(self.checkBox_autologin, 4, 5, 1, 3)
        self.checkBox_autologin.setStyleSheet(
            "QCheckBox { color : white; }; QCheckBox::indicator { color:black; }");
        self.pushButton_enter = QPushButton()
        self.pushButton_enter.setText("登录")
        self.verticalLayout.addWidget(self.pushButton_enter, 5, 4, 1, 3)
        self.pushButton_enter.setStyleSheet(
            "QPushButton{color:highlight}"
            "QPushButton:hover{color:white}"
            "QPushButton{background-color:rgb(0,191,255)}"
            "QPushButton{border:2px}"
            "QPushButton{border-radius:10px}"
            "QPushButton{padding:5px 6px}"
            "QPushButton{font-size:14pt}")

        self.pushButton_quit1 = QPushButton()
        self.pushButton_quit1.setText("注册")
        self.verticalLayout.addWidget(self.pushButton_quit1, 6, 4, 1, 3)
        self.pushButton_quit1.setStyleSheet(
            "QPushButton{color:highlight}"
            "QPushButton:hover{color:white}"
            "QPushButton{background-color:rgb(0,191,255)}"
            "QPushButton{border:2px}"
            "QPushButton{border-radius:10px}"
            "QPushButton{padding:5px 6px}"
            "QPushButton{font-size:14pt}")
        ###### 绑定按钮事件
        self.pushButton_enter.clicked.connect(self.on_pushButton_enter_clicked)
        self.left_close.clicked.connect(self.QCoreApplication)
        self.pushButton_quit1.clicked.connect(self.on_pushButton_enter_clicked1)
        self.left_mini.clicked.connect(self.mini)
        self.h.clicked.connect(self.h1)

        ####初始化登录信息
        self.init_login_info()

        ####自动登录
        self.timer = QTimer(self)
        self.timer.timeout.connect(self.goto_autologin)
        self.timer.setSingleShot(True)
        self.timer.start(1000)

    # 自动登录
    def goto_autologin(self):
        if self.checkBox_autologin.isChecked() == True and self.mode == 0:
            self.on_pushButton_enter_clicked()

    def on_pushButton_enter_clicked(self):
        # 账号判断
        account_dict = {}
        f = open("1.txt", 'r+')
        for line in f:
            (keys, value) = line.strip().split()
            account_dict[keys] = value
        account1 = self.lineEdit_account.text()
        password1 = self.lineEdit_password.text()
        account_keys = list(account_dict.keys())
        f1 = "2.txt"
        with open(f1, "w") as file:  # 只需要将之前的”w"改为“a"即可,代表追加内
            file.write(account1)
        if account1 != "" and password1 != "":

            if account1 not in account_keys:
                reply1 = QMessageBox.information(self, '登录出错', '用户不存在', QMessageBox.Yes | QMessageBox.No,
                                                 QMessageBox.Yes)
            elif password1 == account_dict[account1]:
                ####### 保存登录信息
                self.save_login_info()
                # 通过验证,关闭对话框并返回1
                self.close()
                demo.show()
            else:
                QMessageBox.information(self, '登录出错', '密码错误', QMessageBox.Yes | QMessageBox.No, QMessageBox.Yes)
        else:
            QMessageBox.information(self, '错误', '输入不能为空!', QMessageBox.Yes | QMessageBox.No, QMessageBox.Yes)

    def on_pushButton_enter_clicked1(self):
        w2.show()

    def QCoreApplication(self):
        login.close()

    def mini(self):
        login.showMinimized()

    def h1(self):
        w1.show()

    # 保存登录信息
    def save_login_info(self):
        settings = QSettings("config.ini", QSettings.IniFormat)  # 方法1:使用配置文件
        # settings = QSettings("mysoft","myapp")                        #方法2:使用注册表
        settings.setValue("account", self.lineEdit_account.text())
        settings.setValue("password", self.lineEdit_password.text())
        settings.setValue("remeberpassword", self.checkBox_remeberpassword.isChecked())
        settings.setValue("autologin", self.checkBox_autologin.isChecked())

    # 初始化登录信息
    def init_login_info(self):
        settings = QSettings("config.ini", QSettings.IniFormat)  # 方法1:使用配置文件
        the_account = settings.value("account")
        the_password = settings.value("password")
        the_remeberpassword = settings.value("remeberpassword")
        the_autologin = settings.value("autologin")
        ########
        self.lineEdit_account.setText(the_account)
        if the_remeberpassword == "true" or the_remeberpassword == True:
            self.checkBox_remeberpassword.setChecked(True)
            self.lineEdit_password.setText(the_password)

        if the_autologin == "true" or the_autologin == True:
            self.checkBox_autologin.setChecked(True)
可以从文中的注释看到,我将窗口框去掉,因此扩大,缩小,关闭按钮也随之消失。取而代之的是右上角的三个小点,这三个小点其实是通过QPushButton按钮的方式进行设置的,对其样式进行设置,从而形成了现在的模样。
然后再对每个按钮绑定clicked.connect的事件,从而实现原来窗口的缩小和关闭功能。
不足与缺点:虽然这样设置的窗口样式确实比之前的好看很多,但是也存在一定的问题:
- 这样设置后的窗口是无法移动的且不能进行扩大操作(当时写这个项目的时候我也再网上搜索过类似的方法,给我的启发就是通过鼠标点击事件去移动窗口,但是这大大增加了我的工作量,因此我放弃了这种方式)。
- 利用按钮点击事件的方式去关闭该窗口时,我发现虽然窗口确实不见了,但是后台程序却还在,这在之后我们连接数据库的时候造成了巨大的困难,使得程序不能完全关闭,从而断开数据库连接,导致数据库连接过多而崩溃。
由于之后的学习关系,我没有再深入的去寻找这些问题的解决方法,希望能看到这里的大佬提供一些解决方法。
再之后就是登录按钮,输入框的设置了,这些通过QLineEdit,QPushButton进行设置的,具体可以看代码,注释还是比较详细的。
这里我仿照了qq的登录方式去网上查找了一些关于自动登录和保存密码的方式,通过QCheckBox进行复选框的设置。由于时间久远,我已经忘记出处了(侵删)。相关的做法在代码中已经展示了。
在这里我并没有将账号和密码存入到数据库中,因为那个时候的自己并没有想到,啊哈哈哈哈哈哈,因此我通过了一个txt文件来储存。然后通过一系列的if语句去判断账号的正确与否。其他的都是一些样式的美化之类的。
对了,在我登录界面上的ICO图标,我是在 The Icons图标库.中找的,其实现在你也可以去阿里矢量网.上去找,上面的图标更多更好看。
注册

注册界面的样式与登录界面是差不多的,只是输入框以及内层的判断条件不同。
首先我们会匹配输入的账号名称,在我们存放的txt文件中循环遍历是否存在输入的账号名称,如果存在就报错。其次我们增加了再次输入密码的功能,通过比较两次输入密码是否相同即可实现。大致过程如下:
    def on_pushButton_enter_clicked1(self):
        account_dict = {}
        f = open("1.txt", 'r+')
        for line in f:
            (keys, value) = line.strip().split()
            account_dict[keys] = value
        account1 = self.lineEdit_account.text()
        password1 = self.lineEdit_password.text()
        password2 = self.lineEdit_password1.text()
        if account1 != "" and password1 != "" and password2 != "":
            if password2 != password1:
                QMessageBox.information(self, '错误', '密码输入错误,请重新确认', QMessageBox.Yes | QMessageBox.No, QMessageBox.Yes)
            else:
                account_keys = list(account_dict.keys())
                if account1 not in account_keys:
                    f = "1.txt"
                    with open(f, "a") as file:  # 只需要将之前的”w"改为“a"即可,代表追加内
                        file.write(account1 + " " + password1 + "\n")
                    QMessageBox.information(self, '注册成功', '注册成功!', QMessageBox.Yes | QMessageBox.No, QMessageBox.Yes)
                else:
                    QMessageBox.information(self, '注册失败', '账号已存在!', QMessageBox.Yes | QMessageBox.No, QMessageBox.Yes)
        else:
            QMessageBox.information(self, '注册失败', '输入不能为空!', QMessageBox.Yes | QMessageBox.No, QMessageBox.Yes)
代码和注释比较详细。
找回密码

找回密码的界面的样式与之前的也是差不多的,通过获取输入的账号,然后在我们保存账号信息的txt中去循环遍历找到符合的账号密码,然后显示出来,代码如下:
    def on_pushButton_enter_clicked1(self):
        account_dict = {}
        f = open("1.txt", 'r+')
        for line in f:
            (keys, value) = line.strip().split()
            account_dict[keys] = value
        account1 = self.lineEdit_account.text()
        if account1 == "" :
            QMessageBox.information(self, '注册失败', '输入不能为空!', QMessageBox.Yes | QMessageBox.No, QMessageBox.Yes)
        else:
                account_keys = list(account_dict.keys())
                if account1 not in account_keys:
                    QMessageBox.information(self, '错误', '不存在该账号', QMessageBox.Yes | QMessageBox.No, QMessageBox.Yes)
                else:
                    QMessageBox.information(self, '密码找回成功', '你的密码为:'+account_dict[account1] , QMessageBox.Yes | QMessageBox.No, QMessageBox.Yes)
总结
由于时间的关系,这个项目这次没有一下子写完,先写了登录,注册及密码找回的部分,关注我后续有时间我会尽快更新,将整个项目都分享给大家,。希望我们能够共同努力,早日秃头,啊哈哈哈哈!
最后完整的代码我也上传到我的github上了,自取:
链接: 学生信息管理系统2.0.
由于我是初学者,所以整个代码都写在了一个py文件里,所以看着会十分费劲,而且代码内容可能存在重复,多余,繁琐,望理解,但是对于我来说我能够完整的做完整个项目,我已经十分开心了,请大佬轻喷。当然也希望你们能喜欢我的分享。