通过renren-generator?逆向工程生成 gulimall-coupon、gulimall-member、gulimall-order、gulimall-product、gulimall-ware
以gulimall-ware为例
renren-generator
resources->appilication.yml
server:
  port: 80

# mysql
spring:
  datasource:
    type: com.alibaba.druid.pool.DruidDataSource
    #MySQL配置
    driverClassName: com.mysql.cj.jdbc.Driver
    #修改url中的数据库名称
    url: jdbc:mysql://192.168.176.128:3306/gulimall_wms?useUnicode=true&characterEncoding=UTF-8&useSSL=false&serverTimezone=Asia/Shanghai
    username: root
    password: root
    #oracle配置
    #    driverClassName: oracle.jdbc.OracleDriver
    #    url: jdbc:oracle:thin:@47.100.206.162:1521:xe
    #    username: renren
    #    password: 123456
    #SQLServer配置
    #    driverClassName: com.microsoft.sqlserver.jdbc.SQLServerDriver
    #    url: jdbc:sqlserver://192.168.10.10:1433;DatabaseName=renren_fast
    #    username: sa
    #    password: 123456
    #PostgreSQL配置
  #    driverClassName: org.postgresql.Driver
  #    url: jdbc:postgresql://192.168.10.10:5432/renren_fast
  #    username: postgres
  #    password: 123456


  jackson:
    time-zone: GMT+8
    date-format: yyyy-MM-dd HH:mm:ss
  resources:
    static-locations: classpath:/static/,classpath:/views/

#mongodb:
#  host: localhost
#  port: 27017
#  auth: false #是否使用密码验证
#  username: tincery
#  password: renren
#  source: 123456
#  database: test

mybatis-plus:
  mapperLocations: classpath:mapper/**/*.xml


pagehelper:
  reasonable: true
  supportMethodsArguments: true
  params: count=countSql


#指定数据库,可选值有【mysql、oracle、sqlserver、postgresql、mongodb】
renren:
  database: mysql
generator.properties
#修改路径
mainPath=com.atguigu
#修改包名
package=com.atguigu.gulimall
#修改模块名
moduleName=ware

author=luwei
#Email
email=347255277@qq.com

#修改表单前缀
tablePrefix=wms_


tinyint=Integer
smallint=Integer
mediumint=Integer
int=Integer
integer=Integer
bigint=Long
float=Float
double=Double
decimal=BigDecimal
bit=Boolean

char=String
varchar=String
tinytext=String
text=String
mediumtext=String
longtext=String


date=Date
datetime=Date
timestamp=Date

NUMBER=Integer
INT=Integer
INTEGER=Integer
BINARY_INTEGER=Integer
LONG=String
FLOAT=Float
BINARY_FLOAT=Float
DOUBLE=Double
BINARY_DOUBLE=Double
DECIMAL=BigDecimal
CHAR=String
VARCHAR=String
VARCHAR2=String
NVARCHAR=String
NVARCHAR2=String
CLOB=String
BLOB=String
DATE=Date
DATETIME=Date
TIMESTAMP=Date
TIMESTAMP(6)=Date

int8=Long
int4=Integer
int2=Integer
numeric=BigDecimal

nvarchar=String
修改好上述2个文件的配置后,启动renren-generator。
打开localhost:80

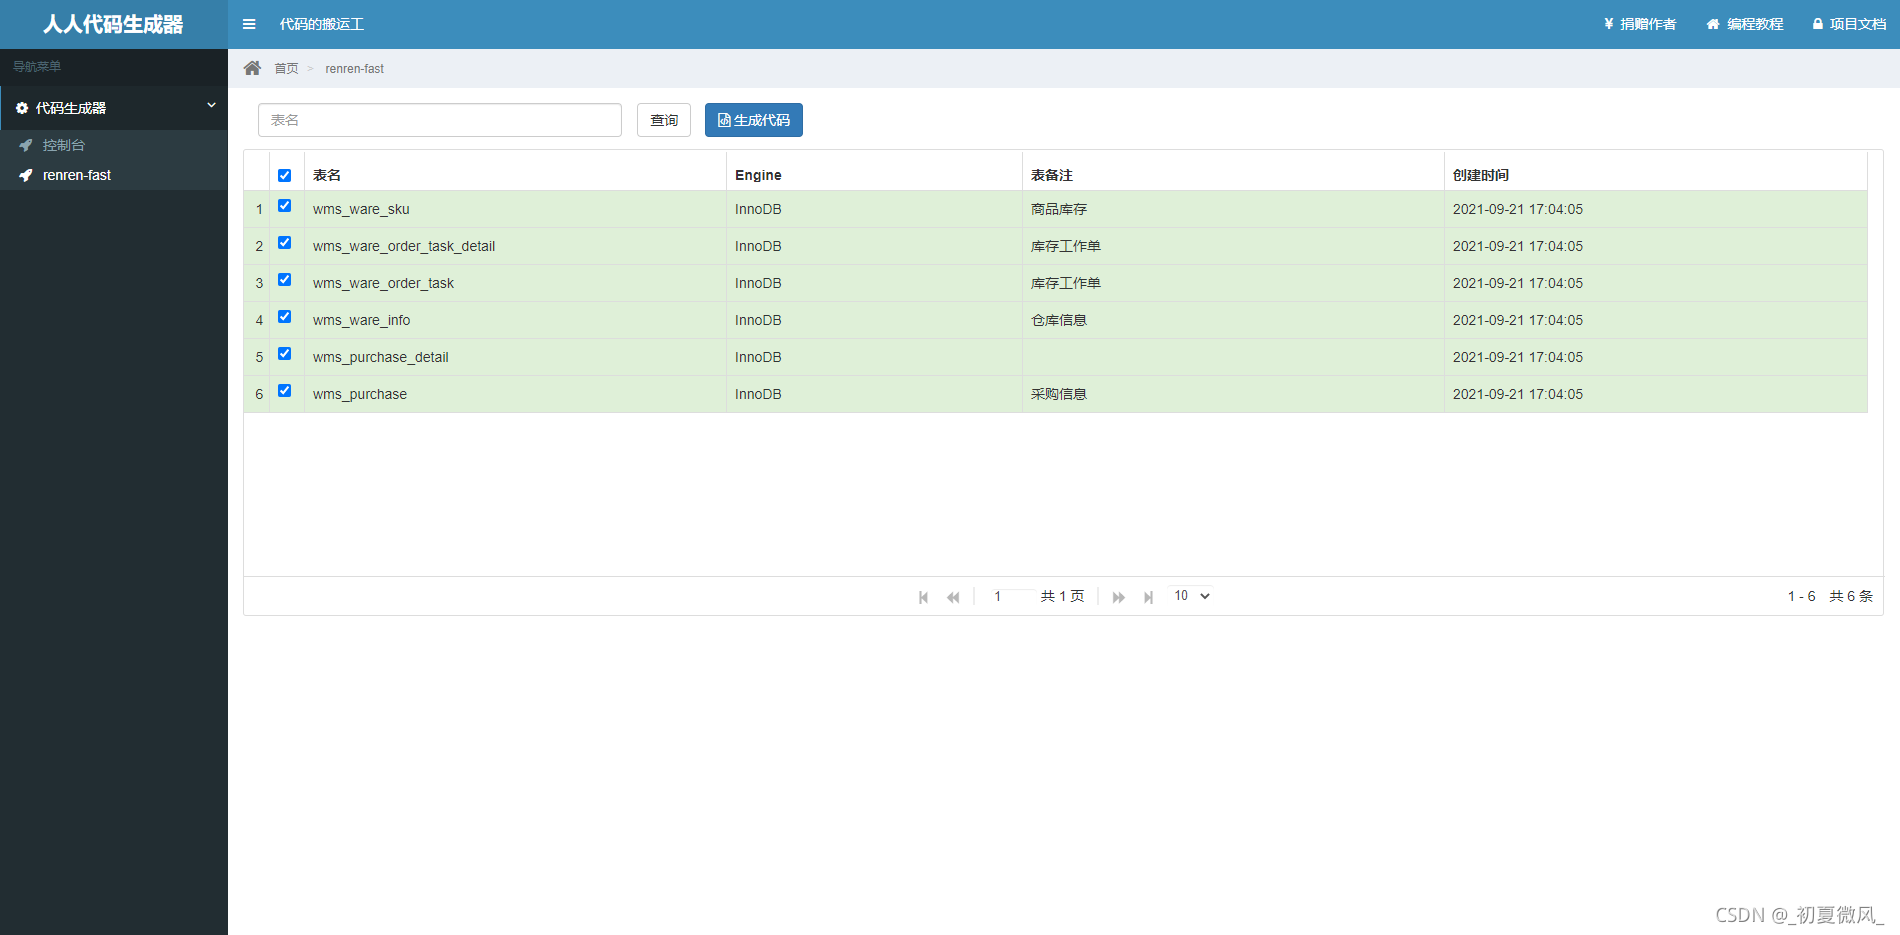
框选所有的表,点击生成代码
将main文件夹复制到相应的模块中
/**
 * 整合mybatis plus
 * 1.导入依赖
 * 2.配置
 *  1) 配置数据源
 *      1.导入数据库驱动
 *      2.在application.yml里配置相关信息
 *  2) 配置mybatis-plus
 *      1.使用@MapperScan
 *      2.告诉mybatis-plus,sql映射文件位置
 */
在模块的resources中添加application.yml配置文件
Spring:
  datasource:
    username: root
    password: root
    url: jdbc:mysql://192.168.176.128:3306/gulimall_wms
    driver-class-name: com.mysql.cj.jdbc.Driver
  cloud:
    nacos:
      discovery:
        server-addr: 127.0.0.1:8848
  application:
    name: gulimall-ware
mybatis-plus:
  mapper-locations: classpath:/mapper/**/*.xml
  global-config:
    db-config:
      id-type: auto
server:
  port: 11000
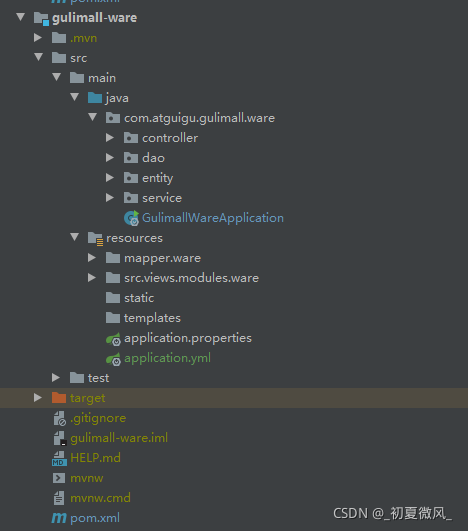
生成后文件结构如下图:

package com.atguigu.gulimall.ware;

import org.mybatis.spring.annotation.MapperScan;
import org.springframework.boot.SpringApplication;
import org.springframework.boot.autoconfigure.SpringBootApplication;
import org.springframework.cloud.client.discovery.EnableDiscoveryClient;

@SpringBootApplication
@EnableDiscoveryClient
@MapperScan("com.atguigu.gulimall.ware.dao")
public class GulimallWareApplication {

    public static void main(String[] args) {
        SpringApplication.run(GulimallWareApplication.class, args);
    }

}