hadoop配置eclipse的开发环境
一.前言
由于大三学习需要,而且网上的教程都有点模糊,导致我走了不少弯路,因此我写下这篇博客,本文仅供参考,如果有不足之处,还望指出。
二.安装eclipse
1.下载eclipse jee neon版
这里附上下载链接,当然你也可以前往官网自行下载:
http://www.eclipse.org/downloads/download.php?file=/technology/epp/downloads/release/neon/1a/eclipse-jee-neon-1a-linux-gtk-x86_64.tar.gz
2.解压并安装eclipse
命令行解压命令,我这里选择的是解压到home目录下面:
tar -zxvf eclipse-jee-neon-1a-linux-gtk-x86_64.tar.gz -C /home
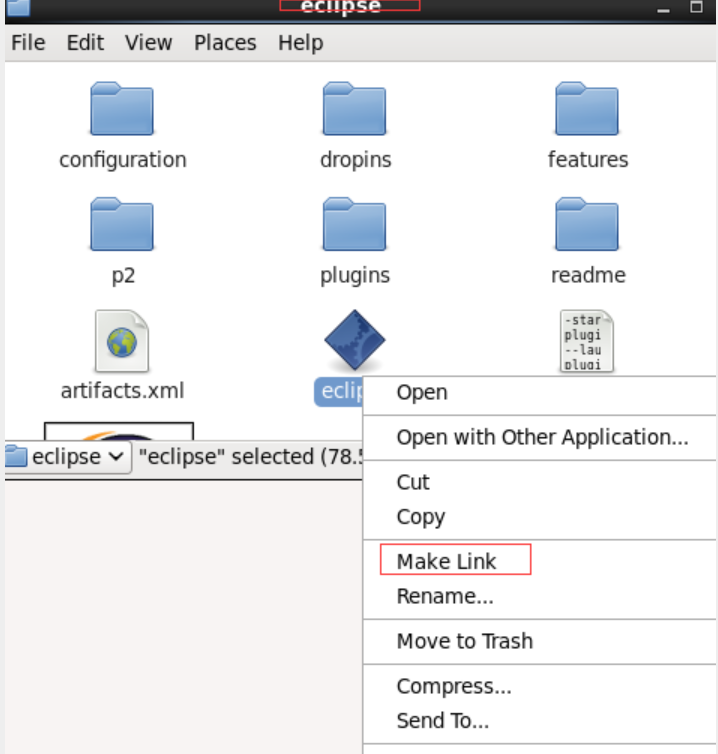
解压完成后可以根据需要在桌面创造快捷方式。方法如下:
我这里的eclipse文件在home目录下,所以打开home目录下的eclipse文件夹,选中eclipse,make link,创建完的快捷方式可以移动到桌面上。
3.下载与eclipse的jar包
-
下载的jar包要求Linux系统一致、hadoop版本一致、需与eclipse匹配,这里我安装的eclipse是2.6.0版本的,下载完后把jar包移动到eclipse的plugins目录下,我们直接用命令行操作:
cp hadoop-eclipse-plugin-2.6.0.jar /home/eclipse/plugins -
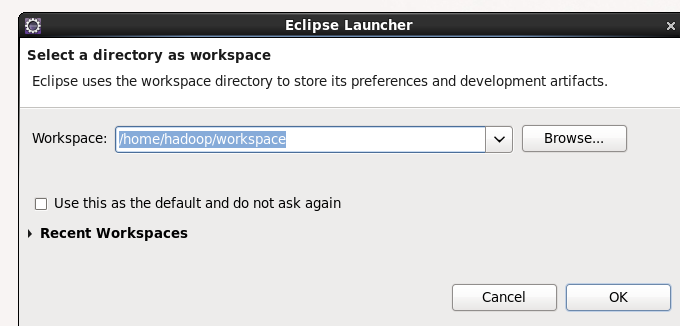
现在可以打开eclipse了,我打开eclipse,弹出一个启动的选项,我们直接点击ok.
-
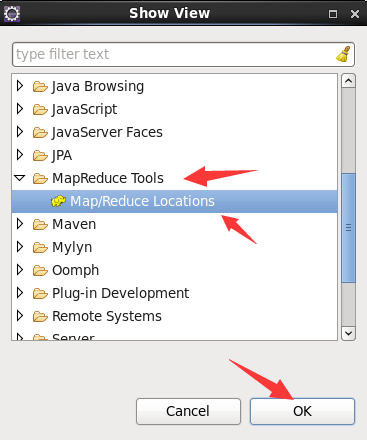
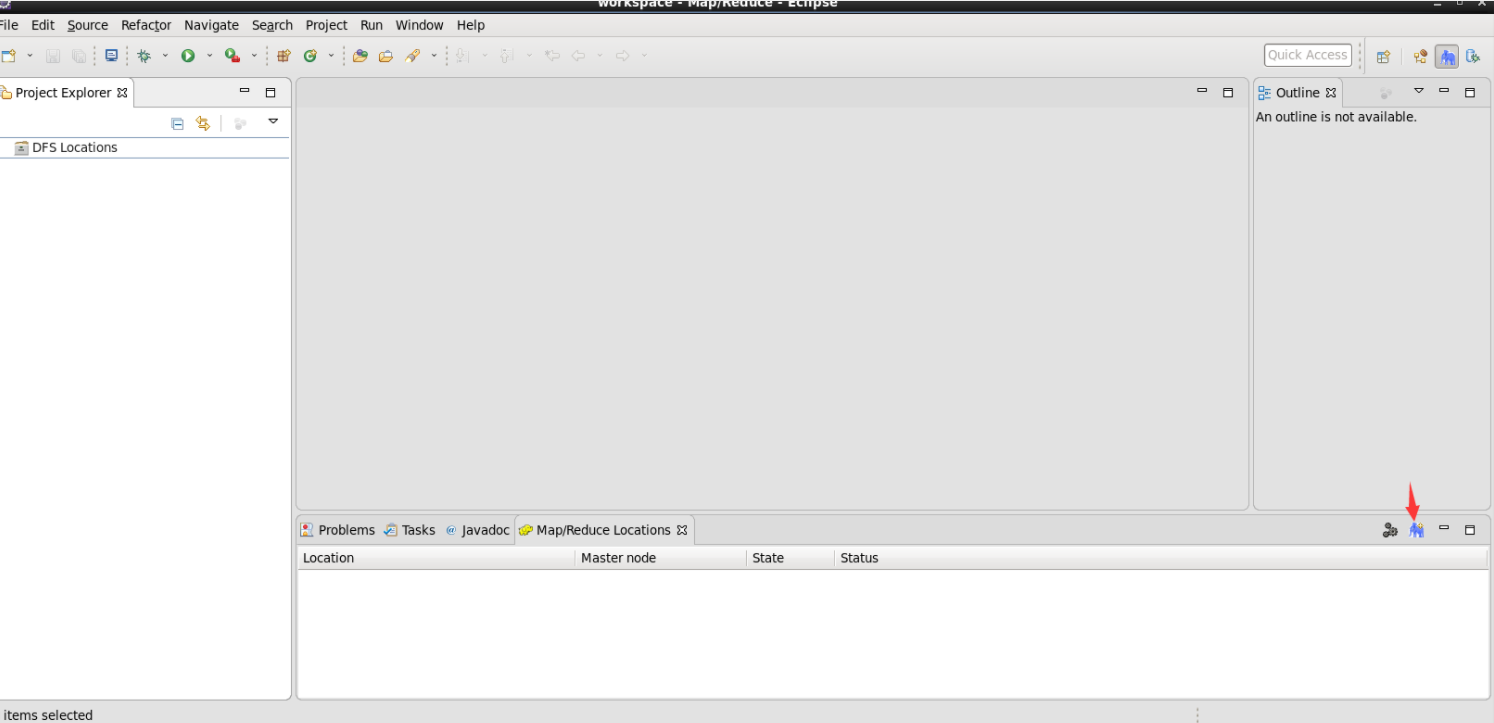
在eclipse图形界面中点击左上角菜单上Windows 工具栏―>选择show view―>others,如图:
-
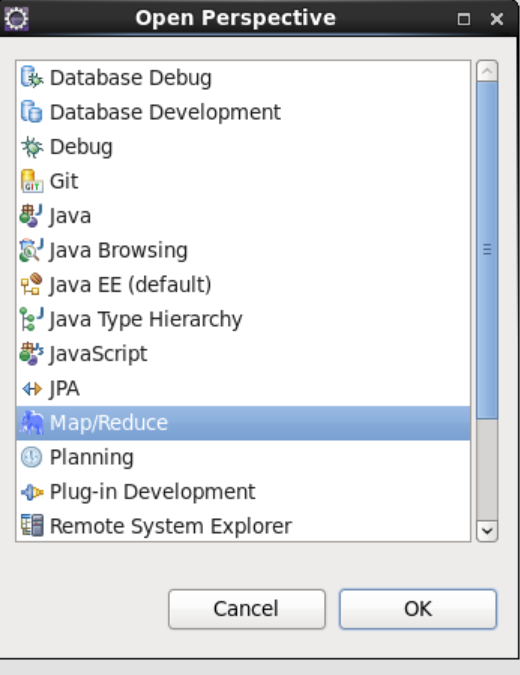
(1)点击Window ----->Perspective----->open Perspective 选择Map/Reduce
-
完成以上操作后我们可以得到以下界面:我们点击右下角的大象,new hadoop location.
-
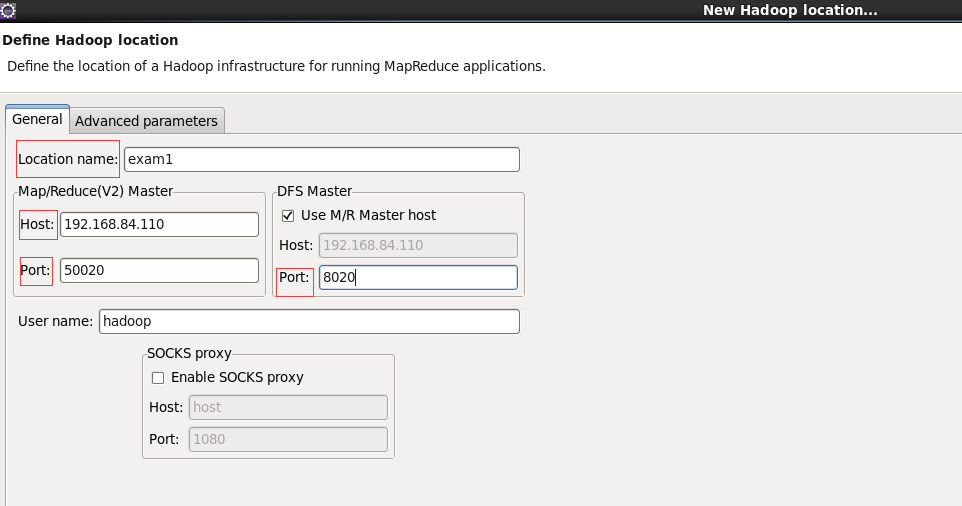
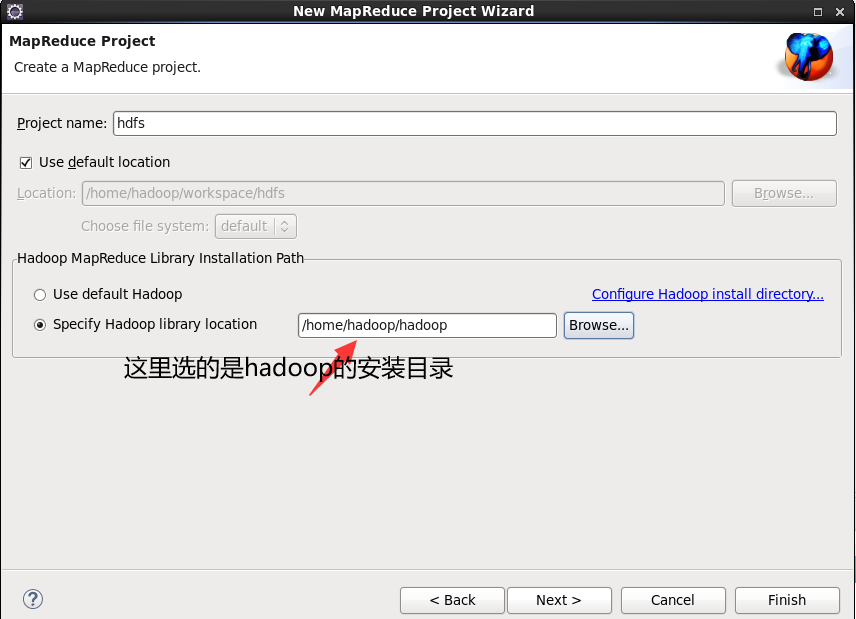
接下来的步骤就比较重要了,我在这踩了一点坑,归根结底还是有些教程写的比较模糊,并没有说明以下的配置的意思,我在这里大概的整理了下,location name:填写一个名字,我这里填写exam1 host:主节点的IP地址, 左边的port 默认 , 右边的port 填写core-site.xml文件里面的hdfs端口号,我这里设置的8020
-
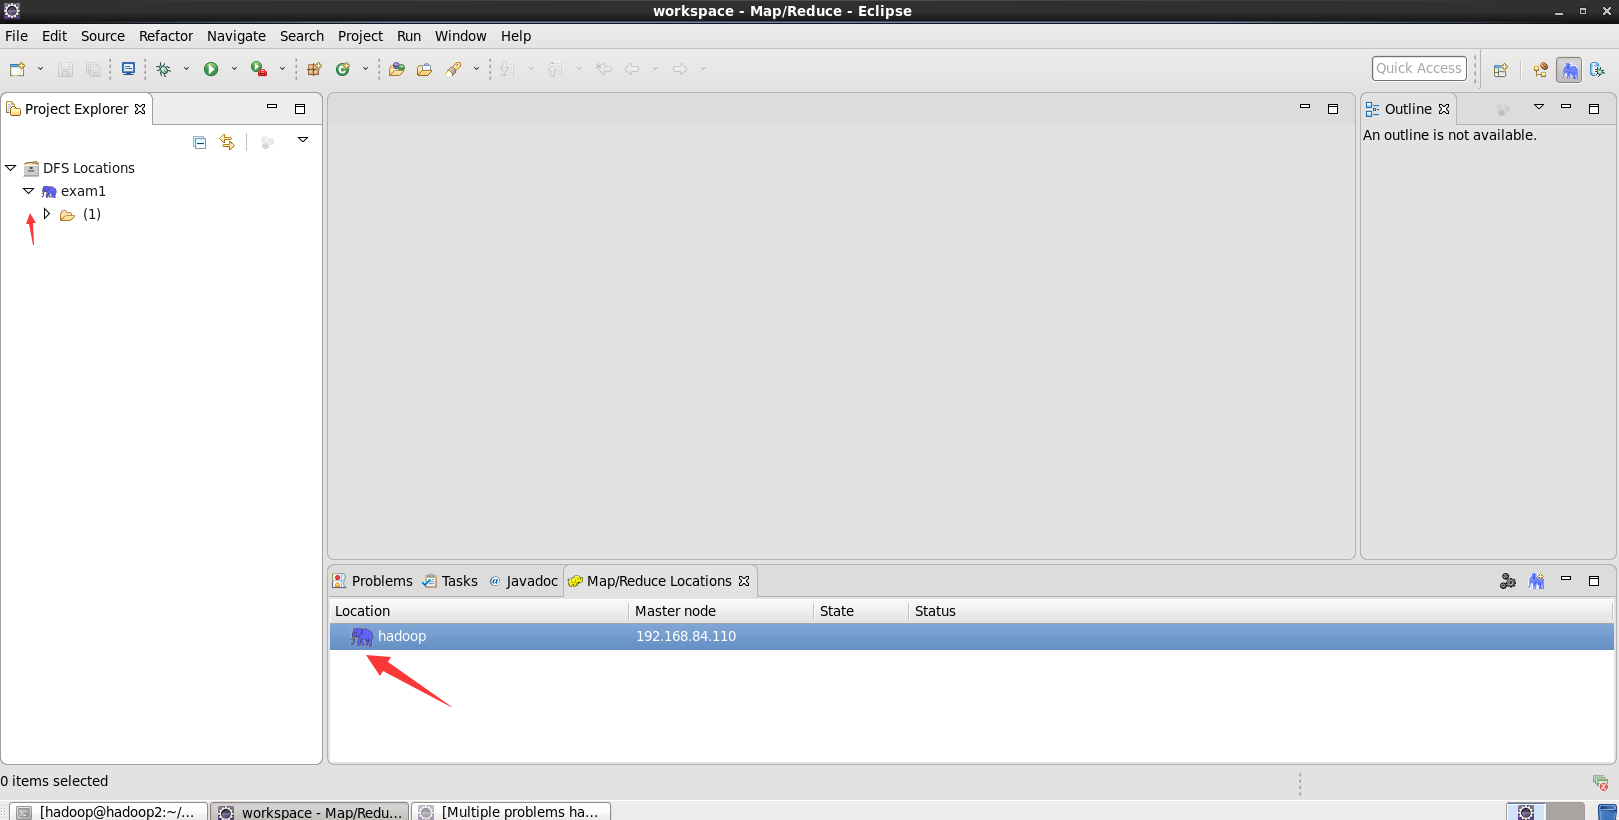
创建完成后我们看到以下界面,折叠的部分依次点开就可以了:
-
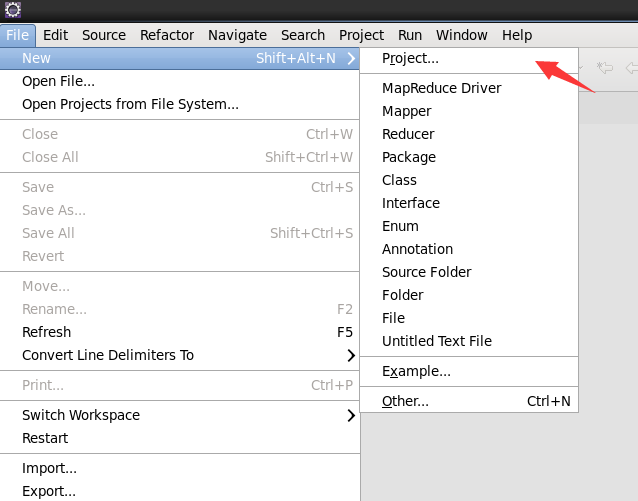
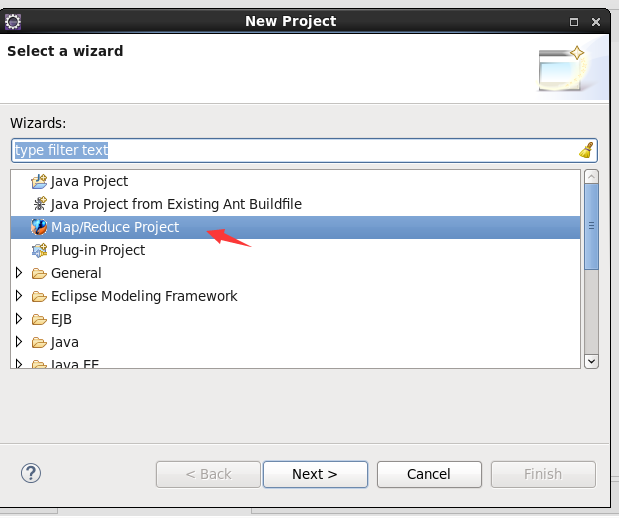
然后创建项目,map/reduce项目
-
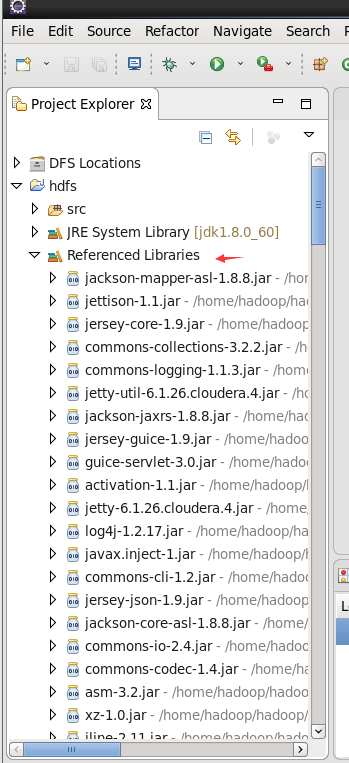
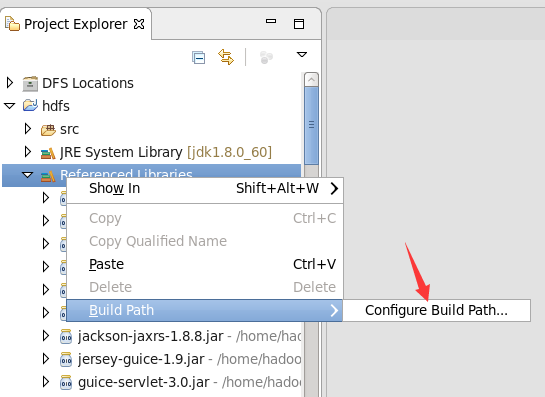
我们可以看到这里相应的包也导入了进来,但是我们还有一些hdfs的包还没导入进来,我们接着导入hdfs操作的包,操作如下:
-
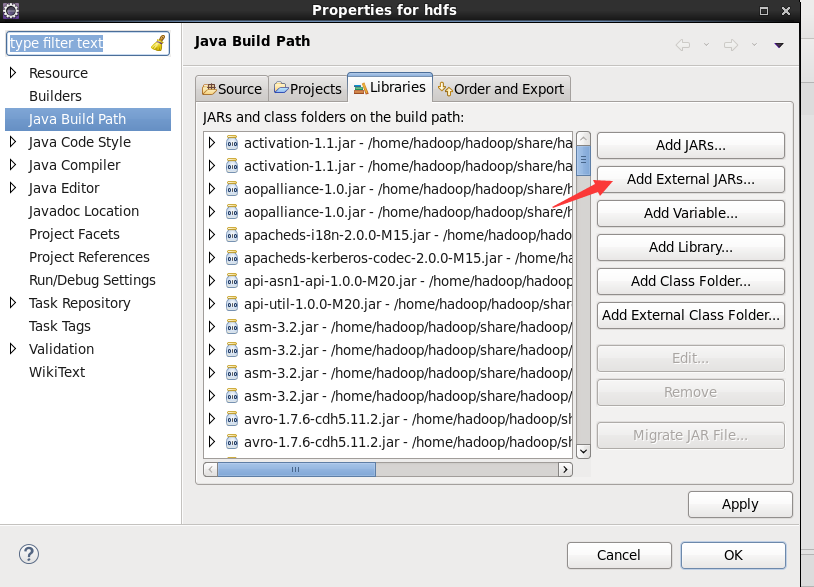
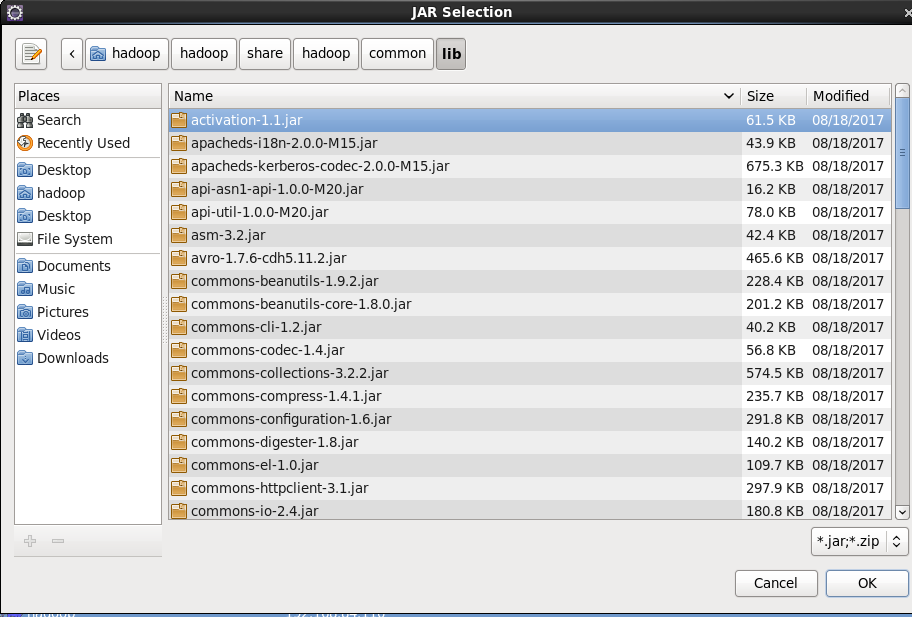
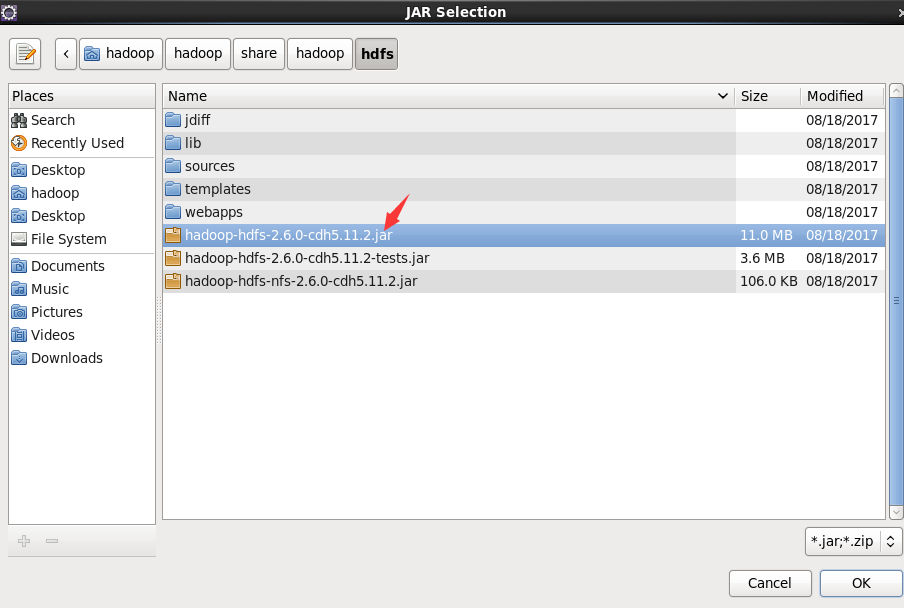
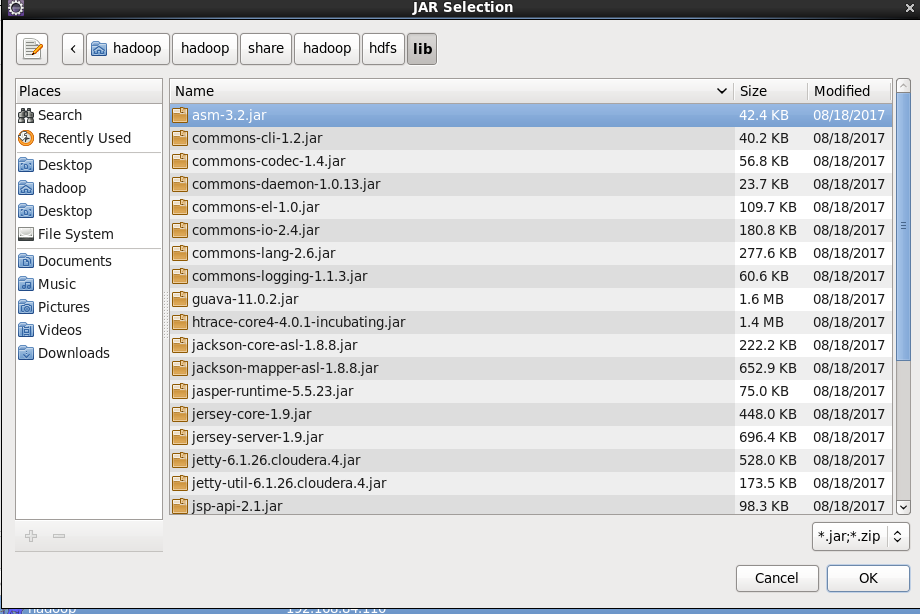
我们点击到如下目录进行导入包,/home/hadoop/hadoop/share/hadoop/common,导入第一个包;/home/hadoop/hadoop/share/hadoop/common/lib导入所有包 ; /home/hadoop/hadoop/share/hadoop/hdfs的一个包,如图中所示。/home/hadoop/hadoop/share/hadoop/hdfs/lib的所有包。导入完所有的包后记得apply。

三.eclipse的操作与实验
1.读单词
配置操作中的输入输出,达到测试的目录
1)下面,我给你这样一段代码:注意,我这里的包是hdfs,类名是HdfsDemo,这段代码的功能如下:对单词计数,最后显示出来。
package hdfs;

import java.io.IOException;
import java.util.*;
import org.apache.hadoop.fs.Path;
import org.apache.hadoop.conf.*;
import org.apache.hadoop.io.*;
import org.apache.hadoop.mapred.*;
import org.apache.hadoop.util.*;

public class HdfsDemo {
	public static class Map extends MapReduceBase implements Mapper<LongWritable, Text, Text, IntWritable> {

		private final static IntWritable one = new IntWritable(1);
		private Text word = new Text();
		public void map(LongWritable key, Text value, OutputCollector<Text, IntWritable> output, Reporter reporter)
				throws IOException {
			String line = value.toString();
			StringTokenizer tokenizer = new StringTokenizer(line);
			while (tokenizer.hasMoreTokens()) {
				word.set(tokenizer.nextToken());
				output.collect(word, one);
			}
		}
	}

	public static class Reduce extends MapReduceBase implements Reducer<Text, IntWritable, Text, IntWritable> {
		public void reduce(Text key, Iterator<IntWritable> values, OutputCollector<Text, IntWritable> output,
				Reporter reporter) throws IOException {
			int sum = 0;
			while (values.hasNext()) {
				sum += values.next().get();
			}
			output.collect(key, new IntWritable(sum));
		}
	}

	public static void main(String[] args) throws Exception {

		JobConf conf = new JobConf(HdfsDemo.class);
		conf.setJobName("wordcount");

		conf.setOutputKeyClass(Text.class);
		conf.setOutputValueClass(IntWritable.class);

		conf.setMapperClass(Map.class);
		conf.setReducerClass(Reduce.class);

		conf.setInputFormat(TextInputFormat.class);
		conf.setOutputFormat(TextOutputFormat.class);

		FileInputFormat.setInputPaths(conf, new Path(args[0]));
		FileOutputFormat.setOutputPath(conf, new Path(args[1]));

		JobClient.runJob(conf);
	}
}
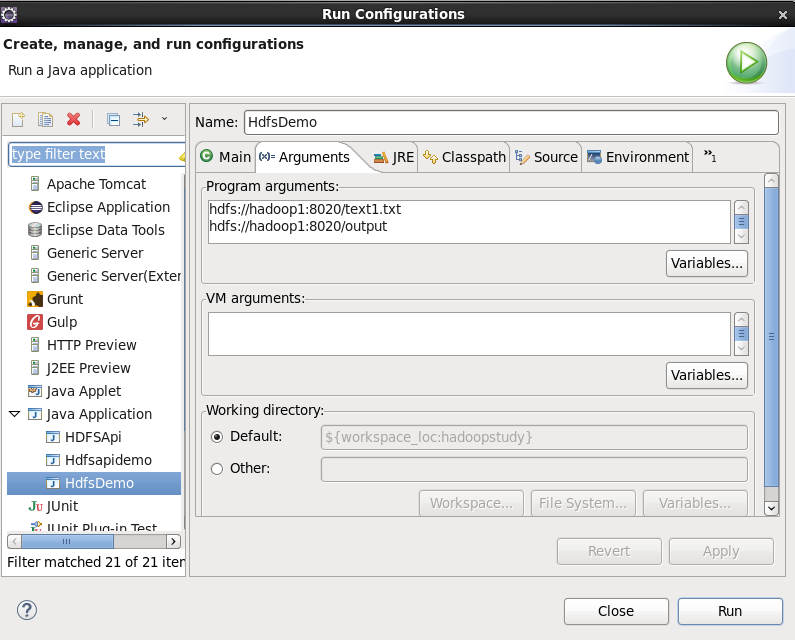
2)我们可以在运行的时候选择run configurations , 然后配置输入的文件是哪个,输出的文件必须是那个目录没有的,也就是说是一个由我们自己定义的新目录,不然会报错。
[外链图片转存失败,源站可能有防盗链机制,建议将图片保存下来直接上传(img-sCKjTaen-1633000770421)(C:/Users/二月/AppData/Roaming/Typora/typora-user-images/image-20210930190916705.png)]
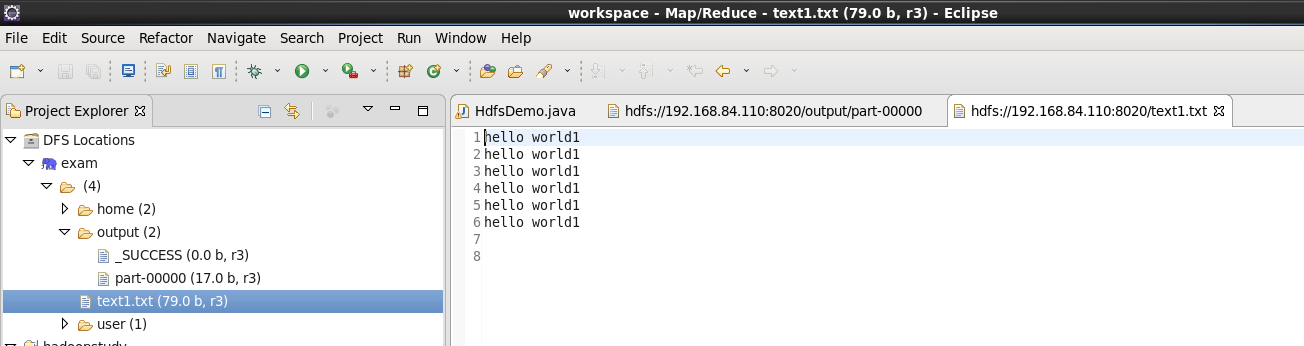
3)这里我的text1.txt文件位与hdfs文件系统的根目录,内容如下:
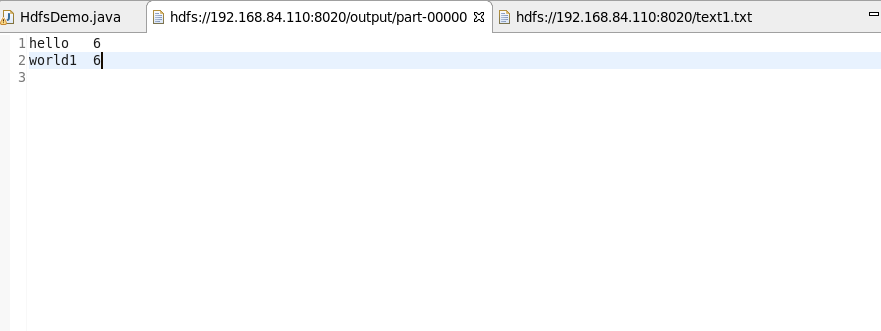
4)运行后刷新整个exam,我们可以看到根目录出现了一个output目录,里面有两个文件,点击part开头文件,我们可以看到:
好的,eclipse配置完成。
四.结尾
以上就是我们的eclipse的配置过程,如果有不明白的地方,都可以在评论区留言。
接下来的一篇博客将介绍hdfs的java Api 操作,以及我会以我的实验作业作为例子进行总结。