为了了解微服务,简单使用微服务架构方式完成一个小小的记账项目模拟。
实现前后端分离,前端进链接,后端传JSON数据,达到这样的效果,使服务与服务之间分离。
项目构建
1.创建SpringCloud父工程
配置好pom文件
 <groupId>com.wly</groupId>
    <artifactId>manage-springcloud</artifactId>
    <version>1.0-SNAPSHOT</version>
    <modules>
        <module>manage-service</module>
        <module>manage-eureka</module>
        <module>manage-config</module>
        <module>manage-gateway</module>
        <module>manage-view</module>
    </modules>
    <packaging>pom</packaging>

    <parent>
        <artifactId>spring-boot-starter-parent</artifactId>
        <groupId>org.springframework.boot</groupId>
        <version>2.1.5.RELEASE</version>
        <relativePath/>
    </parent>

    <properties>
        <java.version>1.8</java.version>
        <spring-cloud.version>Greenwich.SR1</spring-cloud.version>
        <mapper.starter.version>2.1.5</mapper.starter.version>
        <mysql.version>8.0.25</mysql.version>
    </properties>

    <dependencyManagement>
        <dependencies>
            <!-- springCloud -->
            <dependency>
                <groupId>org.springframework.cloud</groupId>
                <artifactId>spring-cloud-dependencies</artifactId>
                <version>${spring-cloud.version}</version>
                <type>pom</type>
                <scope>import</scope>
            </dependency>
            <!-- 通用Mapper启动器 -->
            <dependency>
                <groupId>tk.mybatis</groupId>
                <artifactId>mapper-spring-boot-starter</artifactId>
                <version>${mapper.starter.version}</version>
            </dependency>
            <!-- mysql驱动 -->
            <dependency>
                <groupId>mysql</groupId>
                <artifactId>mysql-connector-java</artifactId>
                <version>${mysql.version}</version>
            </dependency>
        </dependencies>
    </dependencyManagement>

    <dependencies>
        <dependency>
            <groupId>org.projectlombok</groupId>
            <artifactId>lombok</artifactId>
        </dependency>
    </dependencies>

    <build>
        <plugins>
            <plugin>
                <groupId>org.springframework.boot</groupId>
                <artifactId>spring-boot-maven-plugin</artifactId>
            </plugin>
        </plugins>
    </build>
注意在packging中要声明pom,表示这是父工程
2.搭建eureka注册中心
我们在父工程中创建新的module名为manage-eureka
并引入eureka注册中心服务的依赖
<dependencies>
        <dependency>
            <groupId>org.springframework.cloud</groupId>
            <artifactId>spring-cloud-starter-netflix-eureka-server</artifactId>
        </dependency>
    </dependencies>
然后生成启动类和配置文件
启动类上要添加启动eureka服务的注解? @EnableEurekaServer
配置文件如下:
配置文件中声明了注册中心本身服务的端口号,自身的服务名(id),服务地址以及相关的其他配置。
server:
  port: 10085

#该注解表示本应用的名称
spring:
  application:
    name: eureka-server

eureka:
  client:
    service-url:
      defaultZone: http://127.0.0.1:10085/eureka
    #不注册自己
    register-with-eureka: false
    #不拉取服务
    fetch-registry: false
  server:
    #每10000毫秒(10秒)去检查是否有超时的服务并剔除,默认60     eviction——驱逐
    eviction-interval-timer-in-ms: 10000
    #该配置表示eureka自我保护模式是否开启
    enable-self-preservation: false
3.创建网关服务——Gateway
<!--eureka注册依赖-->
        <dependency>
            <groupId>org.springframework.cloud</groupId>
            <artifactId>spring-cloud-starter-netflix-eureka-client</artifactId>
        </dependency>
        <!--gateway网关依赖-->
        <dependency>
            <groupId>org.springframework.cloud</groupId>
            <artifactId>spring-cloud-starter-gateway</artifactId>
        </dependency>
启动类要注解声明被服务发现——
@EnableDiscoveryClient
配置文件中声明端口号、服务id、线路断言和目标路径、跨域、负载均衡、熔断等。
这里网关的端口号为8086,固定的能够路由到记账服务的路径要求为 /api/bill/**。
server:
  port: 8086
spring:
  application:
    name: manage-gateway
  cloud:
    gateway:
      routes:
        - id: manage-service-route
          uri: lb://manage-service
          predicates:
            - Path=/api/bill/**
          filters:
            #去除一个路径后调取服务
            - StripPrefix=1
        - id: manage-view-route
          uri: lb://manage-view
          predicates:
            - Path=/index
      #跨域访问
      globalcors:
        cors-configurations:
          '[/**]':
            #        *表示全部
            allowedOrigins:
              - "*"
            allowedMethods:
              - GET

eureka:
  client:
    service-url:
      defaultZone: http://127.0.0.1:10085/eureka
  instance:
    prefer-ip-address: true


#熔断
hystrix:
  command:
    default:
      execution:
        isolation:
          thread:
            timeoutInMilliseconds: 6000 #服务降级超时时间,默认1S

#负载均衡
ribbon:
  ConnectTimeout: 1000 # 连接超时时长
  ReadTimeout: 2000 # 数据通信超时时长
  MaxAutoRetries: 0 # 当前服务器的重试次数
  MaxAutoRetriesNextServer: 0 # 重试多少次服务
4.创建配置中心
需要的依赖:
<dependencies>
        <dependency>
            <groupId>org.springframework.cloud</groupId>
            <artifactId>spring-cloud-starter-netflix-eureka-client</artifactId>
        </dependency>
        <!--配置中心-->
        <dependency>
            <groupId>org.springframework.cloud</groupId>
            <artifactId>spring-cloud-config-server</artifactId>  <!--配置中心本身用config-server,其他服务用starter-config-->
        </dependency>
        <!--bus-->
        <dependency>
            <groupId>org.springframework.cloud</groupId>
            <artifactId>spring-cloud-bus</artifactId>
        </dependency>
        <!--rabbit-->
        <dependency>
            <groupId>org.springframework.cloud</groupId>
            <artifactId>spring-cloud-stream-binder-rabbit</artifactId>
        </dependency>
    </dependencies>
启动类上添加 @EnableConfigServer表示开启配置中心服务
配置文件:
server:
  port: 10086
spring:
  application:
    name: manage-config
  cloud:
    config:
      server:
        git:
          uri: https://gitee.com/My1310835162/manage-config.git
  rabbitmq:
    host: localhost
    port: 5672
    username: guest
    password: guest
eureka:
  client:
    service-url:
      defaultZone: http://127.0.0.1:10085/eureka
#暴露出触发消息总栈的地址,此地址在仓库配置发生变动之后,可手动发送post形式的请求到:http://127.0.0.1:{本服务端口号}/actuator/{暴露的地址}
                                                               #此处为:http://127.0.0.1:10086/actuator/bus-refresh
management:
  endpoints:
    web:
      exposure:
        include: bus-refresh
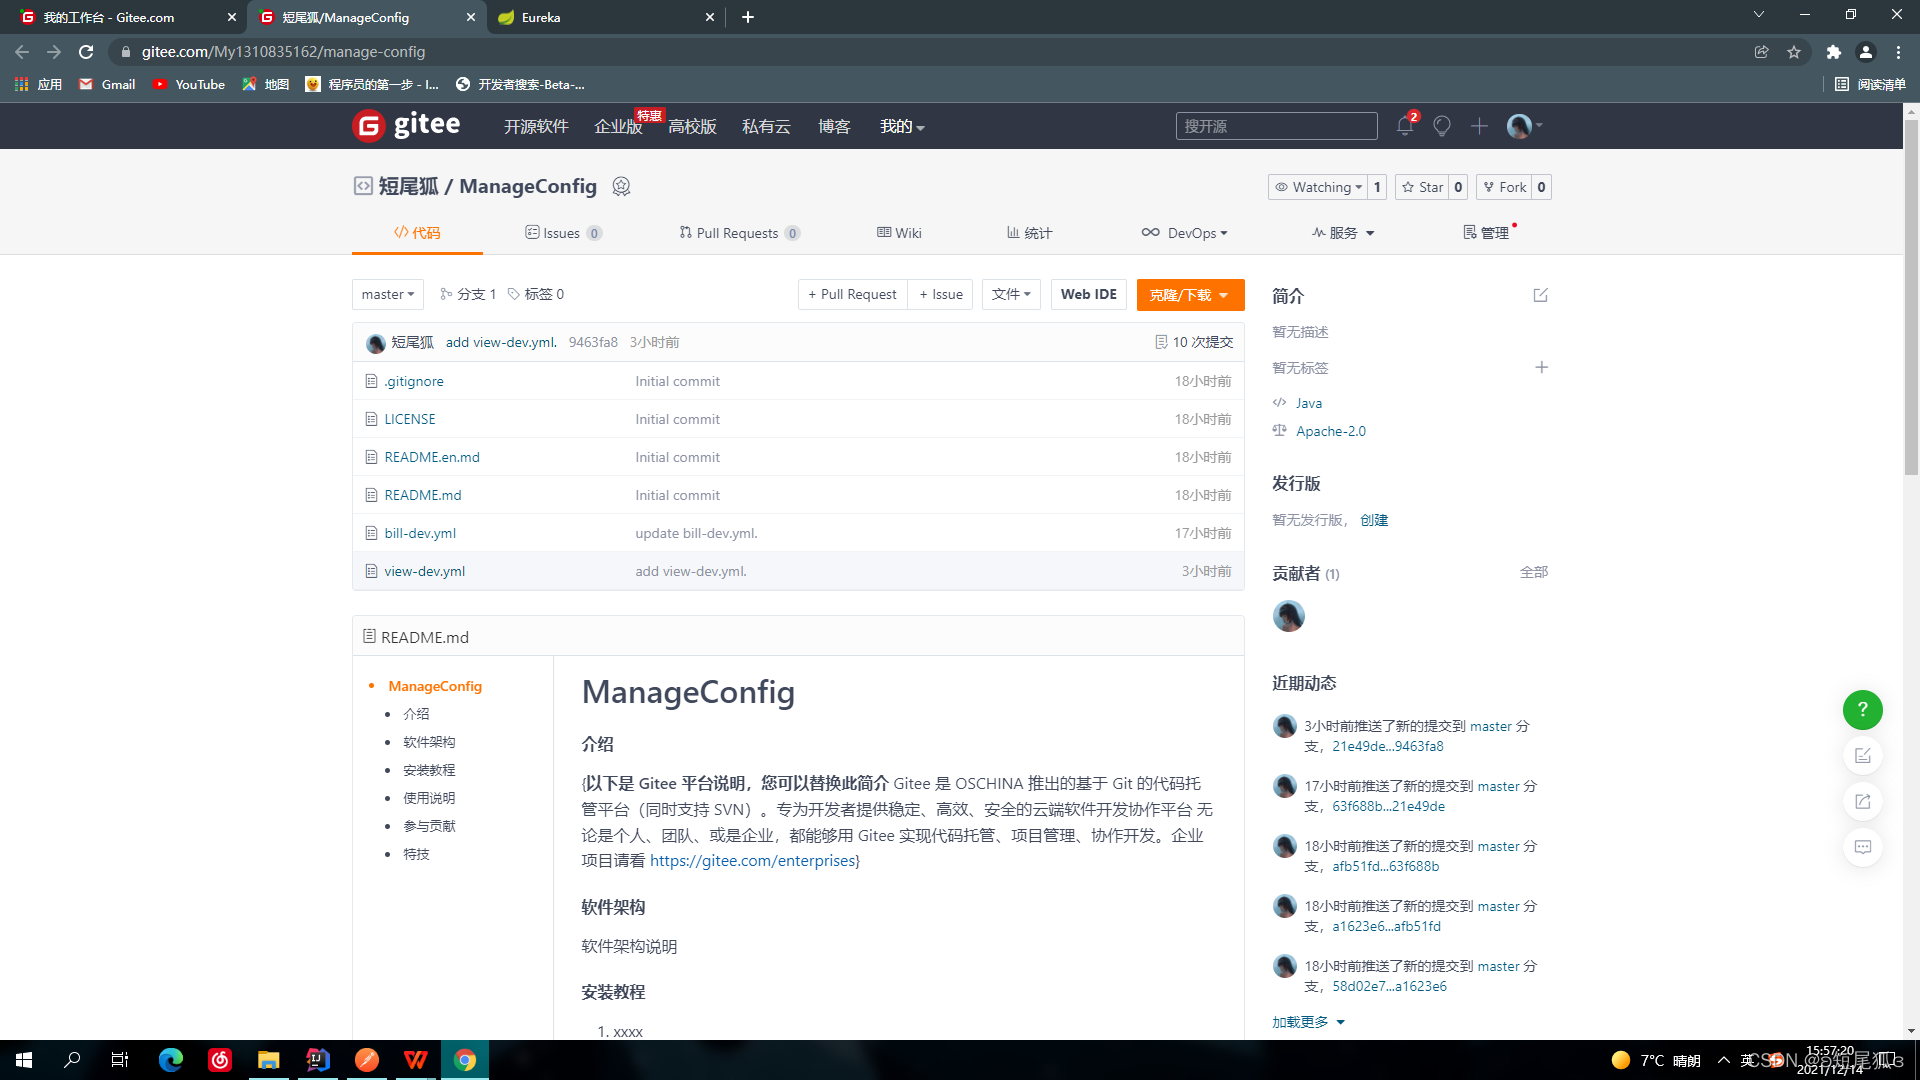
uri的值为存放配置文件的git仓库地址
我的是这样:

?
5.记账后台服务
这里要注意,服务类要使用配置中心的话引入的依赖为????????spring-cloud-starter-config
config配置中心服务本身使用的是????????spring-cloud-config-server
不要添加错了。
配置文件使用bootstrap.yml
spring:
  cloud:
    config:
      name: bill
      profile: dev
      discovery:
        service-id: manage-config
        #启用配置中心
        enabled: true
      label: master

  #rabbit默认配置
  rabbitmq:
    host: localhost
    port: 5672
    username: guest
    password: guest

#注册到微服务注册中心
eureka:
  client:
    service-url:
      defaultZone: http://127.0.0.1:10085/eureka
?
spring.cloud.config中配置好要引用的配置文件的名、域、分支以及要使用的配置中心服务的注册id。
rabbit是消息队列设置,实现不重启微服务的情况下可以做到更新配置文件。
当然,前提是在配置中心中配置了相关参数,以及需要在服务controller中注明?????@RefreshScope
表示监控和刷新。
由于本博客重点是记录微服务的运行逻辑,具体的服务逻辑这里不做展示。
此时,我们依次启动注册中心 > 网关服务 > 配置中心 > 记账服务后台 进行测试。
这里使用便捷的api接口测试应用——Postman进行测试,数据成功返回,代表注册中心、网关、配置中心、服务本身都正常运行。

?
之后,前端利用ajax可以到指定的网关路径,然后网关路由到服务接口进行执行,将执行结束的json数据返回到网关再返回给前端页面进行使用。
如下:

?
?微服务架构使各个环节的开发耦合性更低,提高开发效率,这里作为初学者简单熟悉了一下微服务的基础架构,将来还会深入了解,并在此基础上重构项目。
以此记录。