机器三台:
node1    192.168.199.201
node2    192.168.199.202
node3    192.168.199.203
PS:上面的机器名和后边要配置的集群节点名字没有任何关系,纯属巧合
首先在 192.168.199.201上操作,作为第一个节点
一、配置一下系统文件(root)
cat >> /etc/security/limits.conf <<EOF
* soft nofile 65536
* hard nofile 65536
* soft nproc 65536
* hard nproc 65536
EOF
echo "vm.max_map_count = 655360" >>/etc/sysctl.conf
sysctl -p
PS:ES8自带jjdk所以不用配置
二、ES需要普通用户启动(root)
useradd esuser
passwd esuser
三、安装ES8.0,并配置
3.1 下载安装(root)
cd  /usr/local/src/
wget https://artifacts.elastic.co/downloads/elasticsearch/elasticsearch-8.0.1-linux-x86_64.tar.gz
tar zxvf elasticsearch-8.0.1-linux-x86_64.tar.gz
chown -R esuser:esuser /usr/local/src/elasticsearch-8.0.1
3.2 新建数据和日志文件(root)
mkdir -p /es/{data,log}
chown -Rf esuser:esuser /es
3.3 修改主配置文件,PS:除了下面的不宜多配置(esuser)
su esuser
cd /usr/local/src/elasticsearch-8.0.1/config
cat >> elasticsearch.yml <<EOF
cluster.name: test-es
node.name: node1
path.data: /es/data
path.logs: /es/log/
network.host: 192.168.199.201
http.port: 9200
EOF
四、 启动(esuser)
cd /usr/local/src/elasticsearch-8.0.1/bin
./elasticsearch
PS:第一次不建议使用 -d(代表后台启动),因为如果没搞过会错过下面的信息
4.1 初次启动成功,会输出的下面的信息:
? Elasticsearch security features have been automatically configured!
翻译:Elasticsearch安全功能已自动配置!
? Authentication is enabled and cluster connections are encrypted.
翻译:身份验证已启用,群集连接已加密
4.1.1 重要:原始密码和如何重置密码
??  Password for the elastic user (reset with `bin/elasticsearch-reset-password -u elastic`):
  9M+Y=dogrtQ0HCWKL6dX
翻译:
生成用户:elastic,密码:9M+Y=dogrtQ0HCWKL6dX,
重置使用:bin/elasticsearch-reset-password -u elastic
??  HTTP CA certificate SHA-256 fingerprint: 0070e57eda1abdd6639adfb87429b8d62dd2f64a4a6e77d0063692a3985b533c
翻译:
HTTP CA证书SHA-256的值为:0070xxxxx533c
4.1.2 重要:如何让Kibana加入集群
??  Configure Kibana to use this cluster:
? Run Kibana and click the configuration link in the terminal when Kibana starts.
? Copy the following enrollment token and paste it into Kibana in your browser (valid for the next 30 minutes):
eyJ2ZXIiOiI4LjAuMSIsImFkciI6WyIxOTIuMTY4LjE5OS4yMDE6OTIwMCJdLCJmZ3IiOiIwMDcwZTU3ZWRhMWFiZGQ2NjM5YWRmYjg3NDI5YjhkNjJkZDJmNjRhNGE2ZTc3ZDAwNjM2OTJhMzk4NWI1MzNjIiwia2V5IjoiWmMzTFUzOEJuajFiQnY0U1NlbTA6ZTFwQkh4N1lTWWV5WGJpczh4c3o1dyJ9
翻译:
配置Kibana以使用此群集:
?运行Kibana并在Kibana启动时单击终端中的配置链接。
?复制以下注册令牌并将其粘贴到浏览器中的Kibana中(在接下来的30分钟内有效)
PS:如果token失效
./elasticsearch-create-enrollment-token -s kibana -- url "https://192.168.199.201:9200"
4.1.3 重要:如何加入让新的node节点假如集群
?? Configure other nodes to join this cluster:
? Copy the following enrollment token and start new Elasticsearch nodes with `bin/elasticsearch --enrollment-token <token>` (valid for the next 30 minutes):
 eyJ2ZXIiOiI4LjAuMSIsImFkciI6WyIxOTIuMTY4LjE5OS4yMDE6OTIwMCJdLCJmZ3IiOiIwMDcwZTU3ZWRhMWFiZGQ2NjM5YWRmYjg3NDI5YjhkNjJkZDJmNjRhNGE2ZTc3ZDAwNjM2OTJhMzk4NWI1MzNjIiwia2V5IjoiWnMzTFUzOEJuajFiQnY0U1Nlbmc6MjA1cERCeUdURTY5TnBicm83ekNzUSJ9

  If you're running in Docker, copy the enrollment token and run:
  `docker run -e "ENROLLMENT_TOKEN=<token>" docker.elastic.co/elasticsearch/elasticsearch:8.0.1`
翻译:
配置其他节点以加入此群集:
?复制以下注册令牌并使用“bin/elasticsearch --enrollment-token <token>”启动新的Elasticsearch节点(在接下来的30分钟内有效)
docker的话:
docker run -e "ENROLLMENT_TOKEN=<token>" docker.elastic.co/elasticsearch/elasticsearch:8.0.1
PS:如果token过期
[esuser@node1 bin]$ ./elasticsearch-create-enrollment-token -s node
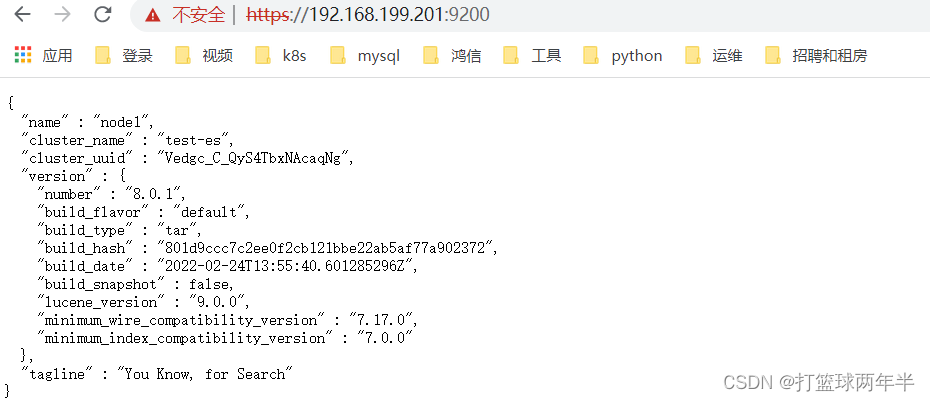
4.1.4 验证,浏览器输入esip:9200

五、把192.168.199.202&192.168.199.203节点加入到集群中
5.1 在这两台机器上操作步骤一-----三
PS:修改3.3的node.name和network.host
5.2 加入集群(esuser)
# 在201上生成token
cd /usr/local/src/elasticsearch-8.0.1/bin
./elasticsearch-create-enrollment-token -s node
# 在202和203上执行
cd /usr/local/src/elasticsearch-8.0.1/bin
 ./elasticsearch --enrollment-token token的值
5.3 验证
PS:初次加入用户账号密码和201的一样
