一、数据准备
1.1 Hive中建表
create table t1(
id int,
name string
);

create table t2(
id int,
name string
);
1.2 加载数据
insert into table t1 values(1,'zs'),(2,'ls'),(3,'ww');
二、环境准备
2.1 环境变量
这是重点,因为flink读写hive需要hadoop依赖,不加会报错,往环境变量中添加下面这条语句,不用改,直接添加
export HADOOP_CLASSPATH=`hadoop classpath`
使环境变量生效
source /etc/profile
2.2 查看各组件版本
查看flink的版本信息
flink -v
查看hadoop版本
hadoop version
查看hive版本
hive
二、编写程序
2.1 依赖
需要更改你的版本信息
   <properties>
        <hive.version>3.1.2</hive.version>
        <hadoop.version>3.3.1</hadoop.version>
        <flink.version>1.12.1</flink.version>
        <scala.binary.version>2.12</scala.binary.version>
        <scala.version>2.12.7</scala.version>
    </properties>
    <dependencies>
        <!-- Flink Dependency -->
        <dependency>
            <groupId>org.apache.flink</groupId>
            <artifactId>flink-connector-hive_${scala.binary.version}</artifactId>
            <version>${flink.version}</version>
            <scope>provided</scope>
        </dependency>

        <dependency>
            <groupId>org.apache.flink</groupId>
            <artifactId>flink-table-api-java-bridge_${scala.binary.version}</artifactId>
            <version>${flink.version}</version>
            <scope>provided</scope>
        </dependency>

        <dependency>
            <groupId>org.apache.flink</groupId>
            <artifactId>flink-table-api-java</artifactId>
            <version>${flink.version}</version>
        </dependency>

        <!-- Hive Dependency -->
        <dependency>
            <groupId>org.apache.hive</groupId>
            <artifactId>hive-exec</artifactId>
            <version>${hive.version}</version>
            <scope>provided</scope>
        </dependency>
    </dependencies>
2.2 hive-site.xml
-- 描述
	flink读写hive需要依靠hive-site.xml文件,直接访问元数据服务,并且需要开启元数据服务

-- 元数据服务开启方式
	(1) 命令行上开启,输入命令
		hive --service metastore &
	(2) hive-site.xml中添加配置,添加配置之后不用开启服务,程序会自动开启,把下列语句添加到hive-site.xml中
    <property>
        <name>hive.metastore.uris</name>
        <value>thrift://hadoop101:9083</value>
    </property>
这里需要根据你的地址进行相应的修改,端口固定
2.3 代码
		//TODO 1 设置执行环境
        EnvironmentSettings settings = EnvironmentSettings
                .newInstance()
                .useBlinkPlanner()
                .inStreamingMode() // 有流和批inBatchMode() 任选
                .build();

        //TODO 2 表执行环境
        TableEnvironment tableEnv = TableEnvironment.create(settings);

        //TODO 3 定义Hive配置
        String name = "myHive"; // HiveCatalog 名称 唯一表示 随便起
        String defaultDatabase = "test"; // 默认数据库名称,连接之后默认的数据库
        String hiveConfDir = "Conf/";  //hive-site.xml存放的位置,本地写本地,集群写集群的路径

        //TODO 4 注册
        HiveCatalog hiveCatalog = new HiveCatalog(name, defaultDatabase, hiveConfDir);
        tableEnv.registerCatalog(name,hiveCatalog);

        //TODO 5 操作
        tableEnv.useCatalog(name); // 使用这个catalog
        tableEnv.useDatabase("test");// 要操作的数据库

        //TODO 6 查询
        Table table = tableEnv.sqlQuery("select id,name from t1");// 动态表
        TableResult result = table.execute(); // 执行查询,获取结果
        result.print();// 打印结果
        tableEnv.executeSql("insert into t2 select id,name from t1"); // 执行插入
四、打包测试
4.1 本地
本地测试,需要hadoop依赖,我太懒,没弄,需要测试,可以下载Hadoop的相关依赖,放到pom文件中
4.2 集群
如果你是纯净版的flink,需要将以下三个jar包放入到【flink主目录/lib】目录下,flink程序启动需要这三个依赖
flink-sql-connector-hive-xxx.jar
flink-connector-hive_xxxx.jar
hive-exec-xxx.jar
我用的本地启动的集群
start-cluster.sh //启动flink集群
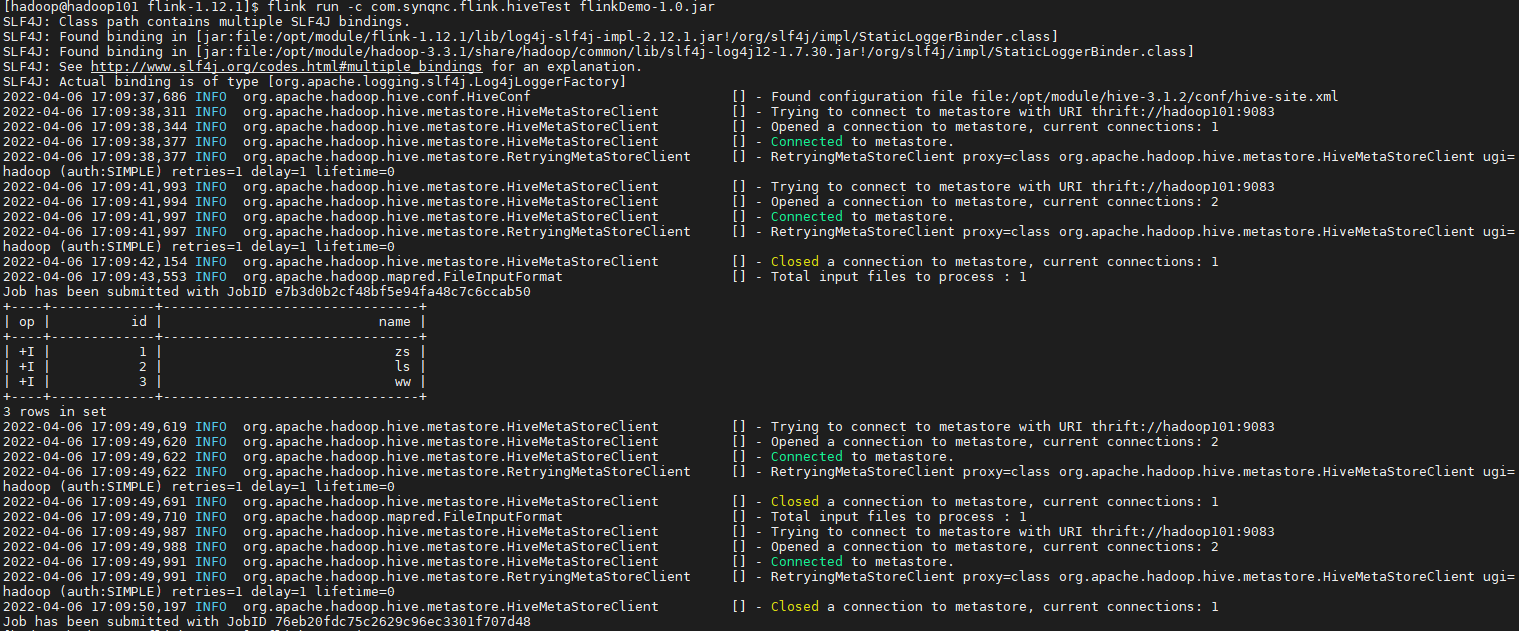
flink run -c com.synqnc.flink.hiveTest jar包路径
效果展示
