操作全以 root 用户权限
清理 mariadb
# 查询存在的
$rpm -qa | grep mariadb
mariadb-libs-5.5.68-1.el7.x86_64

# 卸载。-e: 清除 (卸载) 软件包。--nodeps: 不验证软件包依赖
rpm -e --nodeps mariadb-libs-5.5.68-1.el7.x86_64
清理 MySQL
如果需要卸载旧的 MySQL,可以使用下方的步骤,注意备份数据。
$ rpm -qa | grep mysql
mysql-community-common-5.7.38-1.el7.x86_64
mysql-community-client-5.7.38-1.el7.x86_64
mysql-community-libs-5.7.38-1.el7.x86_64
mysql-community-server-5.7.38-1.el7.x86_64

# 先停止
$ systemctl stop mysqld

# 卸载
$ rpm -e --nodeps mysql-community-libs-5.7.38-1.el7.x86_64 mysql-community-server-5.7.38-1.el7.x86_64 mysql-community-common-5.7.38-1.el7.x86_64 mysql-community-client-5.7.38-1.el7.x86_64

# 清理目录
$ rm -rf /var/lib/mysql /var/log/mysqld.log
安装 MySQL
安装 yml 源
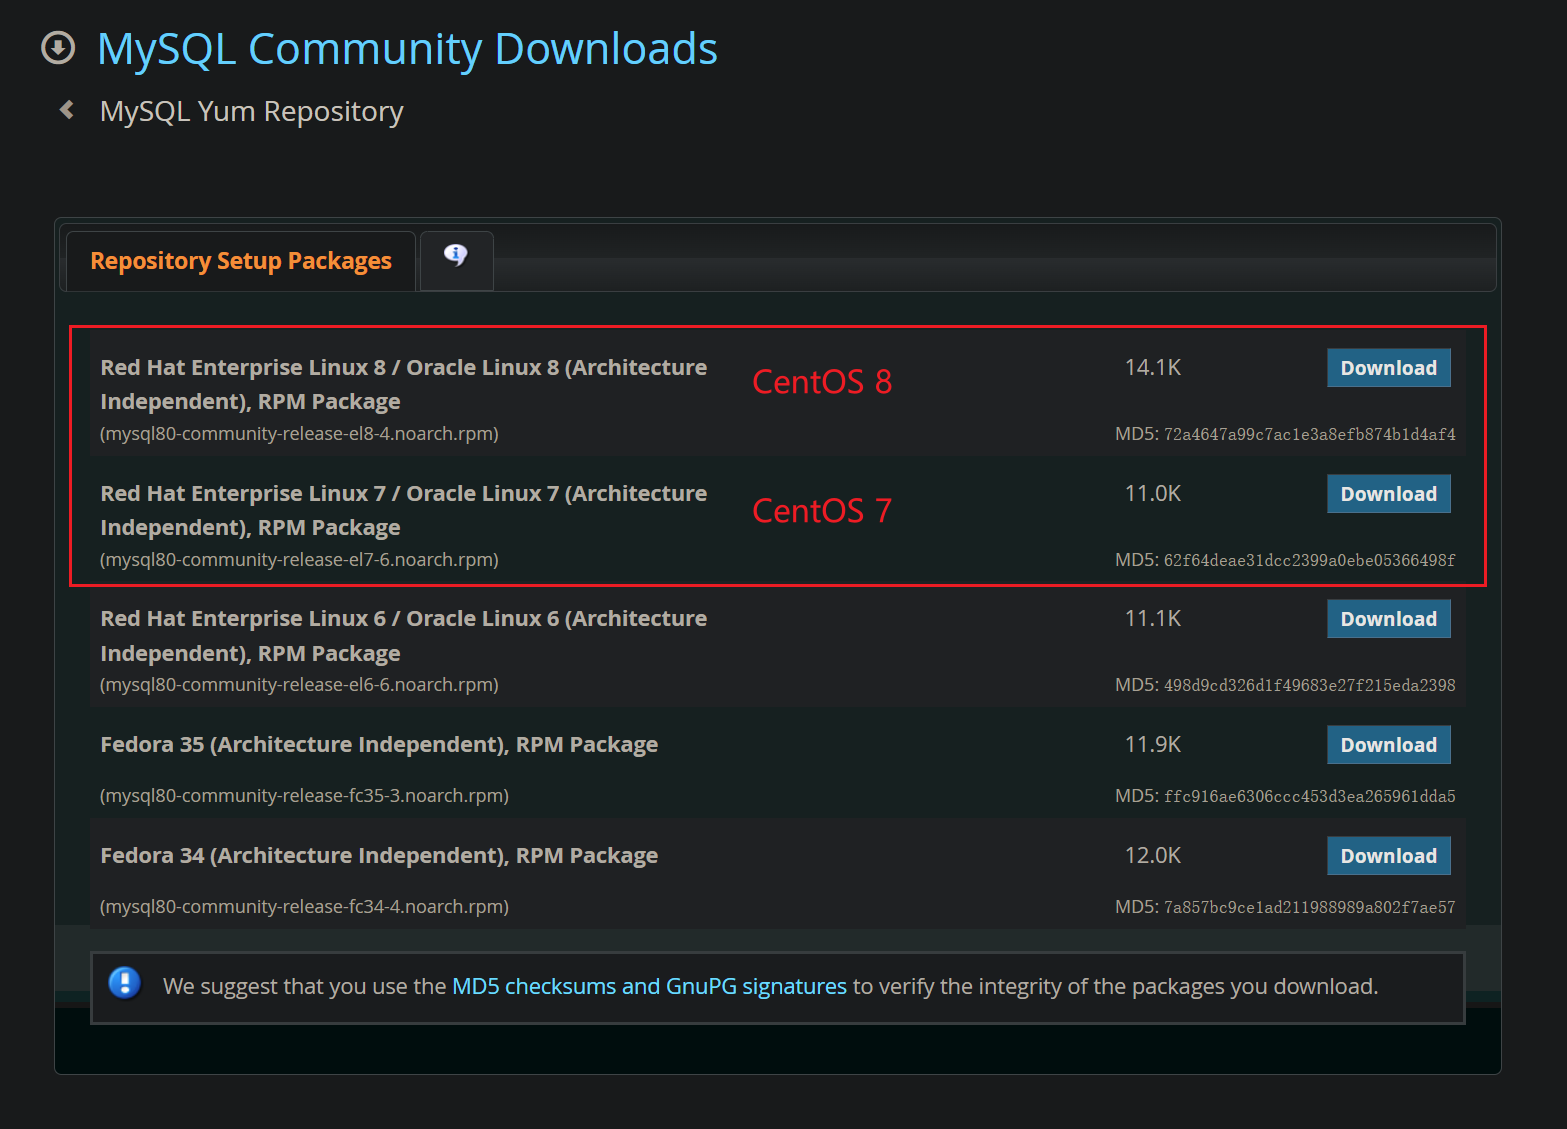
访问官方 yum 仓库下载地址

# 下载 yum 仓库
$ wget https://dev.mysql.com/get/mysql80-community-release-el7-6.noarch.rpm

# 安装 yum 仓库
# -U: 升级软件包
# -v: 提供更多的详细信息输出
# -h: 软件包安装的时候列出哈希标记 (和 -v 一起使用效果更好)
$ rpm -Uvh mysql80-community-release-el7-6.noarch.rpm
警告:mysql80-community-release-el7-6.noarch.rpm: 头V4 RSA/SHA256 Signature, 密钥 ID 3a79bd29: NOKEY
准备中...                          ################################# [100%]
正在升级/安装...
   1:mysql80-community-release-el7-6  ################################# [100%]
经过以上步骤,MySQL 官方的 yum 仓库已经安装完毕。
检查 yum 源是否安装成功
# 安装成功会有以下三个文件
$ ll /etc/yum.repos.d/mysql-community*
-rw-r--r--. 1 root root 1147 4月   8 18:00 /etc/yum.repos.d/mysql-community-debuginfo.repo
-rw-r--r--. 1 root root 2062 4月   8 18:00 /etc/yum.repos.d/mysql-community.repo
-rw-r--r--. 1 root root 2132 4月   8 18:00 /etc/yum.repos.d/mysql-community-source.repo

# 检查是否有 MySQL 安装包
$ yum repolist all | grep "mysql*"
mysql-cluster-7.5-community/x86_64           MySQL Cluster 7.5 Comm 禁用
mysql-cluster-7.5-community-source           MySQL Cluster 7.5 Comm 禁用
mysql-cluster-7.6-community/x86_64           MySQL Cluster 7.6 Comm 禁用
mysql-cluster-7.6-community-source           MySQL Cluster 7.6 Comm 禁用
mysql-cluster-8.0-community/x86_64           MySQL Cluster 8.0 Comm 禁用
mysql-cluster-8.0-community-debuginfo/x86_64 MySQL Cluster 8.0 Comm 禁用
mysql-cluster-8.0-community-source           MySQL Cluster 8.0 Comm 禁用
mysql-connectors-community/x86_64            MySQL Connectors Commu 启用:    192
mysql-connectors-community-debuginfo/x86_64  MySQL Connectors Commu 禁用
mysql-connectors-community-source            MySQL Connectors Commu 禁用
mysql-tools-community/x86_64                 MySQL Tools Community  启用:     90
mysql-tools-community-debuginfo/x86_64       MySQL Tools Community  禁用
mysql-tools-community-source                 MySQL Tools Community  禁用
mysql-tools-preview/x86_64                   MySQL Tools Preview    禁用
mysql-tools-preview-source                   MySQL Tools Preview -  禁用
mysql57-community/x86_64                     MySQL 5.7 Community Se 禁用
mysql57-community-source                     MySQL 5.7 Community Se 禁用
mysql80-community/x86_64                     MySQL 8.0 Community Se 启用:    343
mysql80-community-debuginfo/x86_64           MySQL 8.0 Community Se 禁用
mysql80-community-source                     MySQL 8.0 Community Se 禁用
选择 MySQL 版本
通过上面检查 MySQL 安装包发现启用的安装包是 mysql80-community/x86_64,这里需要安装的是 5.7,所以需要更换一下。
# 安装 yml 配置管理工具
$ yum -y install yum-utils
# 禁用 8.0 的安装
$ yum-config-manager --disable mysql80-community
# 启用 5.7 的安装
$ yum-config-manager --enable mysql57-community
以上也可以通过编辑文件
/etc/yum.repos.d/mysql-community.repo中[mysql57-community]和[mysql80-community]下对应的enabled来完成。
安装
$ yum -y install mysql-community-server
......
获取 GPG 密钥失败:[Errno 14] curl#37 - "Couldn't open file /etc/pki/rpm-gpg/RPM-GPG-KEY-mysql-2022"
如果是 CentOS 8 可能会碰到以下问题:
No match for argument: mysql-community-server
Error: Unable to find a match: mysql-community-server
只需要先执行 yum module disable mysql 即可。
回到上边的 获取 GPG 密钥失败 的问题,只需要把 /etc/yum.repos.d/mysql-community.repo -> [mysql57-community] -> gpgcheck 改成 0 之后重新安装即可。
# 启动
$ sudo systemctl start mysqld
# 查看状态
$ sudo systemctl status mysqld
● mysqld.service - MySQL Server
   Loaded: loaded (/usr/lib/systemd/system/mysqld.service; enabled; vendor preset: disabled)
   Active: active (running) since 六 2022-05-14 09:38:05 CST; 2s ago
     Docs: man:mysqld(8)
           http://dev.mysql.com/doc/refman/en/using-systemd.html
  Process: 2003 ExecStart=/usr/sbin/mysqld --daemonize --pid-file=/var/run/mysqld/mysqld.pid $MYSQLD_OPTS (code=exited, status=0/SUCCESS)
  Process: 1954 ExecStartPre=/usr/bin/mysqld_pre_systemd (code=exited, status=0/SUCCESS)
 Main PID: 2006 (mysqld)
   CGroup: /system.slice/mysqld.service
           └─2006 /usr/sbin/mysqld --daemonize --pid-file=/var/run/mysqld/mysqld.pid

5月 14 09:38:02 base systemd[1]: Starting MySQL Server...
5月 14 09:38:05 base systemd[1]: Started MySQL Server.
至此算是安装、启动完毕,但是密码却不知道。。。
重置密码
查看初始密码:
$ sudo grep 'temporary password' /var/log/mysqld.log
# 最后一部分为初始密码
2022-05-14T01:38:02.665267Z 1 [Note] A temporary password is generated for root@localhost: Xf0Busg+i0ai
登录:
$ mysql -uroot -p
Enter password:
Welcome to the MySQL monitor.  Commands end with ; or \g.
Your MySQL connection id is 3
Server version: 5.7.38

Copyright (c) 2000, 2022, Oracle and/or its affiliates.

Oracle is a registered trademark of Oracle Corporation and/or its
affiliates. Other names may be trademarks of their respective
owners.

Type 'help;' or '\h' for help. Type '\c' to clear the current input statement.

# 重置密码为: myz-rgr!gvu5zbk@WRN
mysql> ALTER USER 'root'@'localhost' IDENTIFIED BY 'myz-rgr!gvu5zbk@WRN';
Query OK, 0 rows affected (0.00 sec)

# 设置可以远程连接账户
mysql> CREATE USER 'root'@'%' IDENTIFIED BY 'myz-rgr!gvu5zbk@WRN';
Query OK, 0 rows affected (0.00 sec)
# 授予所有权限
mysql> GRANT ALL PRIVILEGES ON *.* TO 'root'@'%' WITH GRANT OPTION;
Query OK, 0 rows affected (0.00 sec)
远程连接记得开放防火墙端口:
$ firewall-cmd --zone=public --add-port=3306/tcp --permanent
$ firewall-cmd --reload
