目录
安装flume:http://t.csdn.cn/J1Pnn
1.Flume要想将数据输出到HDFS,必须持有Hadoop相关jar包
安装flume:http://t.csdn.cn/J1Pnn
一、采集目录中的新文件到HDFS中
文档对应说明: Flume 1.7.0 User Guide — Apache Flume
?采集需求:使用flume监听整个目录的文件
1.Flume要想将数据输出到HDFS,必须持有Hadoop相关jar包
将commons-configuration-1.6.jar、hadoop-auth-2.7.3.jar、hadoop-common-2.7.3.jar、hadoop-hdfs-2.7.3.jar、commons-io-2.4.jar、htrace-core-3.1.0-incubating.jar拷贝到/opt/module/flume/lib文件夹下。
1.上面jar包的地址
[root@hadoop01 hadoop]# pwd
/opt/module/hadoop-2.7.3/share/hadoop    #上面jar包的地址
2.commons-configuration-1.6.jar,commons-io-2.4.jar,htrace-core-3.1.0-incubating.jar,hadoop-auth-2.7.3.jar
[root@hadoop01 lib]# pwd
/opt/module/hadoop-2.7.3/share/hadoop/tools/lib
[root@hadoop01 lib]# cp commons-configuration-1.6.jar /opt/module/flume/lib/
[root@hadoop01 lib]# cp commons-io-2.4.jar /opt/module/flume/lib/
[root@hadoop01 lib]# cp htrace-core-3.1.0-incubating.jar /opt/module/flume/lib/
[root@hadoop01 lib]# cp hadoop-auth-2.7.3.jar /opt/module/flume/lib/
3.hadoop-common-2.7.3.jar
[root@hadoop01 common]# pwd
/opt/module/hadoop-2.7.3/share/hadoop/common
[root@hadoop01 common]# cp hadoop-common-2.7.3.jar /opt/module/flume/lib/
4.hadoop-hdfs-2.7.3.jar
[root@hadoop01 hdfs]# pwd
/opt/module/hadoop-2.7.3/share/hadoop/hdfs
[root@hadoop01 hdfs]# cp hadoop-hdfs-2.7.3.jar /opt/module/flume/lib/
2.创建flume-file-hdfs.conf文件
1.创建文件
[root@hadoop01 flume]# touch dir-hdfs.conf2.编辑文件?
[root@hadoop01 flume]# vim dir-hdfs.conf

#定义三大组件的名称
ag1.sources = source1
ag1.sinks = sink1
ag1.channels = channel1

# 配置source组件
ag1.sources.source1.type = spooldir
ag1.sources.source1.spoolDir = /root/log/
ag1.sources.source1.fileSuffix=.FINISHED
#ag1.sources.source1.deserializer.maxLineLength=5120

# 配置sink组件
ag1.sinks.sink1.type = hdfs
ag1.sinks.sink1.hdfs.path =hdfs://hadoop01:9000/access_log/%y-%m-%d/%H-%M
ag1.sinks.sink1.hdfs.filePrefix = app_log
ag1.sinks.sink1.hdfs.fileSuffix = .log
ag1.sinks.sink1.hdfs.batchSize= 100
ag1.sinks.sink1.hdfs.fileType = DataStream
ag1.sinks.sink1.hdfs.writeFormat =Text

## roll:滚动切换:控制写文件的切换规则
## 按文件体积(字节)来切
ag1.sinks.sink1.hdfs.rollSize = 512000
## 按event条数切
ag1.sinks.sink1.hdfs.rollCount = 1000000
## 按时间间隔切换文件
ag1.sinks.sink1.hdfs.rollInterval = 60

## 控制生成目录的规则
ag1.sinks.sink1.hdfs.round = true
ag1.sinks.sink1.hdfs.roundValue = 10
ag1.sinks.sink1.hdfs.roundUnit = minute

ag1.sinks.sink1.hdfs.useLocalTimeStamp = true

# channel组件配置
ag1.channels.channel1.type = memory
## event条数
ag1.channels.channel1.capacity = 500000
##flume事务控制所需要的缓存容量600条event
ag1.channels.channel1.transactionCapacity = 600

# 绑定source、channel和sink之间的连接
ag1.sources.source1.channels = channel1
ag1.sinks.sink1.channel = channel1
3.启动Flume采集命令(测试阶段下使用)
[root@hadoop01 flume]# bin/flume-ng agent -c conf -f dir-hdfs.conf -n ag1 -Dflume.root.logger=INFO,console重要说明: 在使用Spooling Directory Source时
1)??? 不要在监控目录中创建并持续修改文件
2)??? 采集完成的文件会以.FINISHED结尾
3)??? 被监控文件夹每600毫秒扫描一次文件变动
二、采集文件新增内容到HDFS中
采集需求:比如业务系统使用log4j生成日志,日志内容不断添加,需要把追加的日志实时采集到hdfs存储.
1.需求分析
根据需求首先定义以下3大要素:
采集源: 即是source--监控文件内容的更新: exec 'tail -F file'
下沉目标: 即是sink --HDFS文件系统 : hdfs sink
source与sink的传递通道-- channel, 可用file channel 也可以用内存channel.
2.实现
[root@hadoop01 ~]# cd /root/log/
[root@hadoop01 log]# touch access.log
[root@hadoop01 flume]# touch file-hdfs.conf
[root@hadoop01 flume]# vim file-hdfs.conf

#定义三大组件的名称
ag1.sources = source1
ag1.sinks = sink1
ag1.channels = channel1

# 配置source组件
ag1.sources.source1.type = exec
ag1.sources.source1.command = tail -F /root/log/access.log

# 配置sink组件
ag1.sinks.sink1.type = hdfs
ag1.sinks.sink1.hdfs.path =hdfs://hadoop01:9000/access_log/%y-%m-%d
ag1.sinks.sink1.hdfs.filePrefix = app_log
ag1.sinks.sink1.hdfs.fileSuffix = .log
ag1.sinks.sink1.hdfs.batchSize= 100
ag1.sinks.sink1.hdfs.fileType = DataStream
ag1.sinks.sink1.hdfs.writeFormat =Text

## roll:滚动切换:控制写文件的切换规则
## 按文件体积(字节)来切
ag1.sinks.sink1.hdfs.rollSize = 512000
## 按event条数切
ag1.sinks.sink1.hdfs.rollCount = 1000000
## 按时间间隔切换文件
ag1.sinks.sink1.hdfs.rollInterval = 60

## 控制生成目录的规则
ag1.sinks.sink1.hdfs.round = true
ag1.sinks.sink1.hdfs.roundValue = 10
ag1.sinks.sink1.hdfs.roundUnit = minute
ag1.sinks.sink1.hdfs.useLocalTimeStamp = true

# channel组件配置
ag1.channels.channel1.type = memory
## event条数
ag1.channels.channel1.capacity = 500000
##flume事务控制所需要的缓存容量600条event
ag1.channels.channel1.transactionCapacity = 600

# 绑定source、channel和sink之间的连接
ag1.sources.source1.channels = channel1
ag1.sinks.sink1.channel = channel1
3.写入数据测试

 ??
??
?三、多级agent串联
1.配置hadoop02监听服务端
1.配置文件avro-hdfs.conf
[root@hadoop02 flume]# vim avro-hdfs.conf

#定义三大组件的名称
ag1.sources = source1
ag1.sinks = sink1
ag1.channels = channel1

# 配置source组件,该source的avro组件是一个接收者的服务
ag1.sources.source1.type = avro
ag1.sources.source1.bind = hadoop02
ag1.sources.source1.port = 4141

# 配置sink组件
ag1.sinks.sink1.type = hdfs
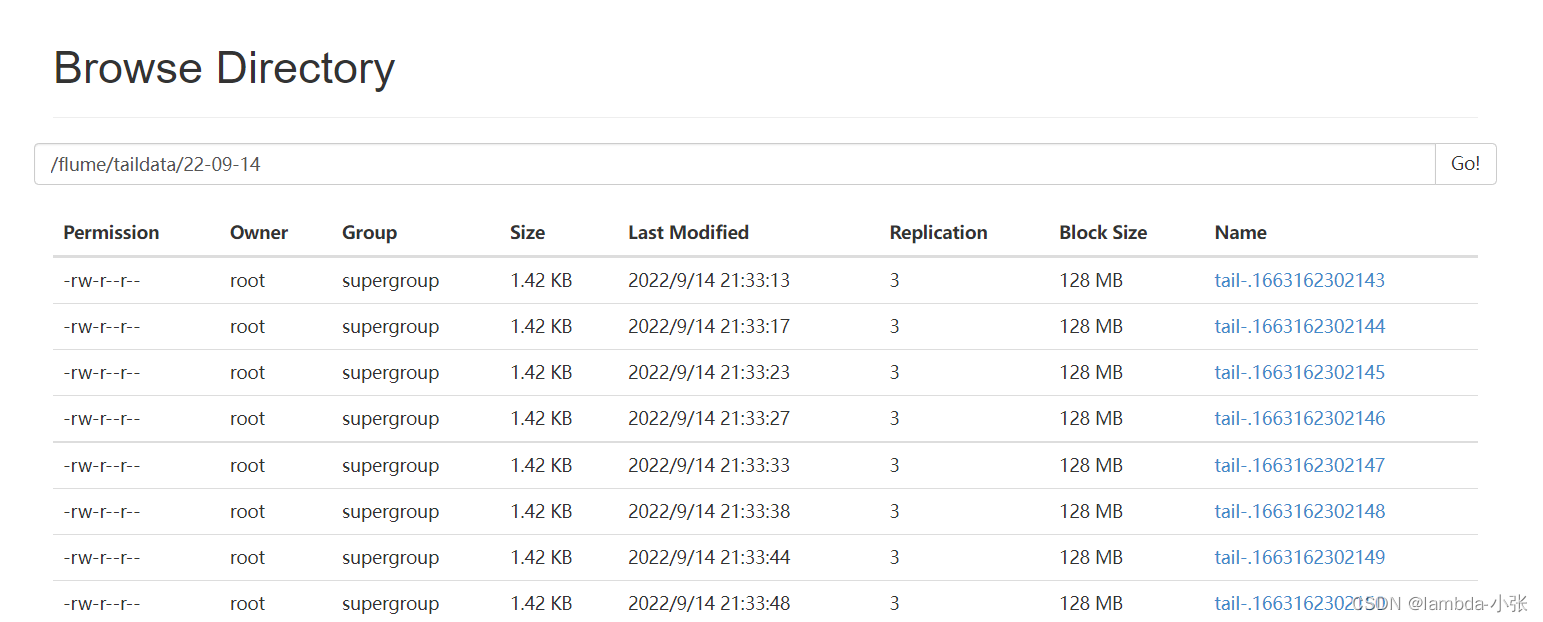
ag1.sinks.sink1.hdfs.path =hdfs://hadoop01:9000/flume/taildata/%y-%m-%d/
ag1.sinks.sink1.hdfs.filePrefix = tail-
ag1.sinks.sink1.hdfs.round = true
ag1.sinks.sink1.hdfs.roundValue = 24
ag1.sinks.sink1.hdfs.roundUnit = hour
ag1.sinks.sink1.hdfs.rollInterval = 0
ag1.sinks.sink1.hdfs.rollSize = 0
ag1.sinks.sink1.hdfs.rollCount = 50
ag1.sinks.sink1.hdfs.batchSize = 10
ag1.sinks.sink1.hdfs.useLocalTimeStamp = true
#生成的文件类型,默认是Sequencefile,可用DataStream,则为普通文本
ag1.sinks.sink1.hdfs.fileType = DataStream

# channel组件配置
ag1.channels.channel1.type = memory
## event条数
ag1.channels.channel1.capacity = 1000
##flume事务控制所需要的缓存容量100条event
ag1.channels.channel1.transactionCapacity = 100

# 绑定source、channel和sink之间的连接
ag1.sources.source1.channels = channel1
ag1.sinks.sink1.channel = channel1
2.启动
[root@hadoop02 flume]# bin/flume-ng agent -c conf -f avro-hdfs.conf -n ag1 -Dflume.root.logger=INFO,console 3.查看是否启动监听
[root@hadoop02 ~]# netstat -nltp4.查看flume进程详情
[root@hadoop02 ~]# jps -m2.在其它节点配置监听客户端
1.配置文件tail-avro.conf
[root@hadoop01 flume]# vim tail-avro.conf

#定义三大组件的名称
ag1.sources = source1
ag1.sinks = sink1
ag1.channels = channel1

# 配置source组件
ag1.sources.source1.type = exec
ag1.sources.source1.command = tail -F /root/log/access.log

# 配置sink组件
ag1.sinks.sink1.type = avro
ag1.sinks.sink1.hostname = hadoop02
ag1.sinks.sink1.port = 4141
ag1.sinks.sink1.batch-size = 2

# channel组件配置
ag1.channels.channel1.type = memory
## event条数
ag1.channels.channel1.capacity = 1000
##flume事务控制所需要的缓存容量100条event
ag1.channels.channel1.transactionCapacity = 100

# 绑定source、channel和sink之间的连接
ag1.sources.source1.channels = channel1
ag1.sinks.sink1.channel = channel1
2.启动进行测试
[root@hadoop01 flume]# bin/flume-ng agent -c conf -f tail-avro.conf -n ag1 -Dflume.root.logger=INFO,console3.发送数据测试
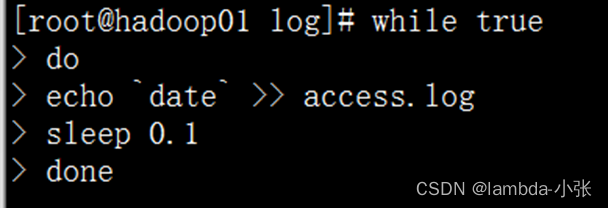
[root@hadoop01 flume]# while true; do echo `date` >> access.log; sleep 0.1; done4.查看数据
