本篇将使用Linux集群,如果没有的可以看我的集群安装文档,见博客。
首先是Redis,我们用它二次提升首页的效率,将栏目这个基本不发生变化的数据放在Redis中。第一步我们要配置Redis的Spring文件
<?xml version="1.0" encoding="UTF-8"?>
<beans xmlns="http://www.springframework.org/schema/beans"
	xmlns:xsi="http://www.w3.org/2001/XMLSchema-instance" xmlns:util="http://www.springframework.org/schema/util"
	xmlns:jee="http://www.springframework.org/schema/jee" xmlns:lang="http://www.springframework.org/schema/lang"
	xmlns:jms="http://www.springframework.org/schema/jms" xmlns:aop="http://www.springframework.org/schema/aop"
	xmlns:tx="http://www.springframework.org/schema/tx" xmlns:context="http://www.springframework.org/schema/context"
	xmlns:jdbc="http://www.springframework.org/schema/jdbc" xmlns:cache="http://www.springframework.org/schema/cache"
	xmlns:mvc="http://www.springframework.org/schema/mvc" xmlns:oxm="http://www.springframework.org/schema/oxm"
	xmlns:task="http://www.springframework.org/schema/task" xmlns:tool="http://www.springframework.org/schema/tool"

	xsi:schemaLocation="
        http://www.springframework.org/schema/beans http://www.springframework.org/schema/beans/spring-beans.xsd
        http://www.springframework.org/schema/util http://www.springframework.org/schema/util/spring-util.xsd
        http://www.springframework.org/schema/jee http://www.springframework.org/schema/jee/spring-jee.xsd
        http://www.springframework.org/schema/lang http://www.springframework.org/schema/lang/spring-lang.xsd
        http://www.springframework.org/schema/jms
        http://www.springframework.org/schema/aop http://www.springframework.org/schema/aop/spring-aop.xsd
        http://www.springframework.org/schema/tx http://www.springframework.org/schema/tx/spring-tx.xsd
        http://www.springframework.org/schema/context http://www.springframework.org/schema/context/spring-context.xsd
        http://www.springframework.org/schema/jdbc http://www.springframework.org/schema/jdbc/spring-jdbc.xsd
        http://www.springframework.org/schema/cache http://www.springframework.org/schema/cache/spring-cache.xsd
        http://www.springframework.org/schema/mvc http://www.springframework.org/schema/mvc/spring-mvc.xsd
        http://www.springframework.org/schema/oxm http://www.springframework.org/schema/oxm/spring-oxm.xsd
        http://www.springframework.org/schema/task http://www.springframework.org/schema/task/spring-task.xsd
        http://www.springframework.org/schema/tool http://www.springframework.org/schema/tool/spring-tool.xsd
        http://www.springframework.org/schema/websocket">

          <!-- 声明三种备用的序列化方式,如果不指定redis的序列化方式,redis会默认使用jdk的序列化方式 -->
          <bean id="jdkSerializationRedisSerializer" class="org.springframework.data.redis.serializer.JdkSerializationRedisSerializer"></bean>
          <!-- string的序列化方式 -->
          <bean id="stringRedisSerializer" class="org.springframework.data.redis.serializer.StringRedisSerializer"></bean>
          <!-- jackson序列化方式 -->
          <bean id="jackson2JsonRedisSerializer" class="org.springframework.data.redis.serializer.Jackson2JsonRedisSerializer">
          	<constructor-arg value="java.lang.Object"></constructor-arg>
          </bean>


        <!-- 操作redis的CRUD 的核心类是:RedisTemplate -->
        <bean id="redisTemplate" class="org.springframework.data.redis.core.RedisTemplate">
        	<!-- 需要知道要去连接哪里的redis服务 -->
        	<!-- 声明一个连接工厂,这个工厂里,就可以指定redis的ip和端口号 -->
        	<property name="connectionFactory" ref="connectionFactory"></property>
        	<!-- 指定list,string,set,zset的key和value的序列化方式 -->
        	<property name="keySerializer" ref="stringRedisSerializer"></property>
        	<property name="valueSerializer" ref="jdkSerializationRedisSerializer"></property>
        	<!-- 指定hash类型的key于vlue的序列化方式 -->
        	<property name="hashKeySerializer" ref="stringRedisSerializer"></property>
        	<property name="hashValueSerializer" ref="jdkSerializationRedisSerializer"></property>
        </bean>


        <!--声明一个连接工厂:为了指定redis所在服务器的ip和redis的端口号 -->
        <bean id="connectionFactory" class="org.springframework.data.redis.connection.jedis.JedisConnectionFactory">
        	<!-- 声明一个IP地址 -->
        	<property name="hostName" value="192.168.88.188"></property>
        	<!-- 指定一个端口号 -->
        	<property name="port" value="6379"></property>
        </bean>

</beans>
随后在spring配置文件中加载它
<!-- redis配置文件 -->
<import resource="redis.xml"/>
最后我们更改首页Controller修改修改它的业务逻辑,使得所以栏目和最新五条文章的查询先从Redis中查询
@Autowired
private RedisTemplate redisTemplate;

/**
 *
 * @Title: index
 * @Description: 进入首页
 * @return
 * @return: String
 */
@RequestMapping("index.do")
public String index(Model model,Article article,@RequestParam(defaultValue="1")Integer pageNum) {
	//封装查询条件
	model.addAttribute("article", article);

	//使用线程
	Thread t1;
	Thread t2;
	Thread t3;
	Thread t4;
	//查询所有的栏目,该线程为必须品
	t1=new Thread(new Runnable() {
		@Override
		public void run() {
			//查询所有的栏目:使用redis优化
			List<Channel> channels = (List<Channel>) redisTemplate.opsForValue().get("channels");
			if(channels==null){
				//如果redis数据库中没有那么在重mysql中查询并放入redis
				channels = channelService.selects();
				redisTemplate.opsForValue().set("channels", channels);

				//你也可以这样写  意为五分钟后数据失效
				//redisTemplate.opsForValue().set("channels", channels ,5 , TimeUnit.MINUTES);
			}
			model.addAttribute("channels", channels);
		}
	});

	// 判断栏目ID 不为空 也就是说当前不是查询热点那么就要查询其下分类
	t2=new Thread(new Runnable() {

		@Override
		public void run() {
			//线程2这里也可以用redis优化,减去不停切换栏目对后台的压力
			if(article.getChannelId()!=null){
				List<Category> categorys = channelService.selectsByChannelId(article.getChannelId());
				model.addAttribute("categorys", categorys);
			}else{
				//如果栏目id是空的那么就代表这查询的是热点,并为为热点查询广告
				List<Slide> slides = slideService.getAll();
				model.addAttribute("slides", slides);
				//限制查询热点文章
				article.setHot(1);
			}
		}
	});

	//前两个线程决定查什么文章,第三个线程正式查文章
	t3=new Thread(new Runnable() {

		@Override
		public void run() {
			try {
				t2.join();
			} catch (InterruptedException e) {
				e.printStackTrace();
			}
			//无论是什么情况控制查询文章不是被逻辑删除的
			article.setDeleted(0);
			//不能查询非审核之后的文章
			article.setStatus(1);
			//查询符合条件的所有文章
			List<Article> selectArticle = articleService.selectArticle(article, pageNum, 6);
			PageInfo info=new PageInfo<>(selectArticle);
			model.addAttribute("info", info);
		}

	});

	//为首页查询五条最新的文章
	t4=new Thread(new Runnable() {

		@Override
		public void run() {
			//	封装该查询条件
			List<Article> newArticles=(List<Article>) redisTemplate.opsForValue().get("newArticles");
			if(newArticles==null){
				Article latest = new Article();
				latest.setDeleted(0);
				//不能查询非审核之后的文章
				latest.setStatus(1);
				//如果redis数据库中没有那么在重mysql中查询并放入redis
				newArticles = articleService.selectArticle(latest, 1, 5);
				redisTemplate.opsForValue().set("newArticles", newArticles);
			}
			PageInfo lastArticles=new PageInfo<>(newArticles);
			model.addAttribute("lastArticles", lastArticles);
		}
	});

	//启动线程并保证线程顺序
	t1.start();
	t2.start();
	t3.start();
	t4.start();
	try {
		t1.join();
		t3.join();
		t4.join();
	} catch (InterruptedException e) {
		e.printStackTrace();
	}

	return "index/index";
}
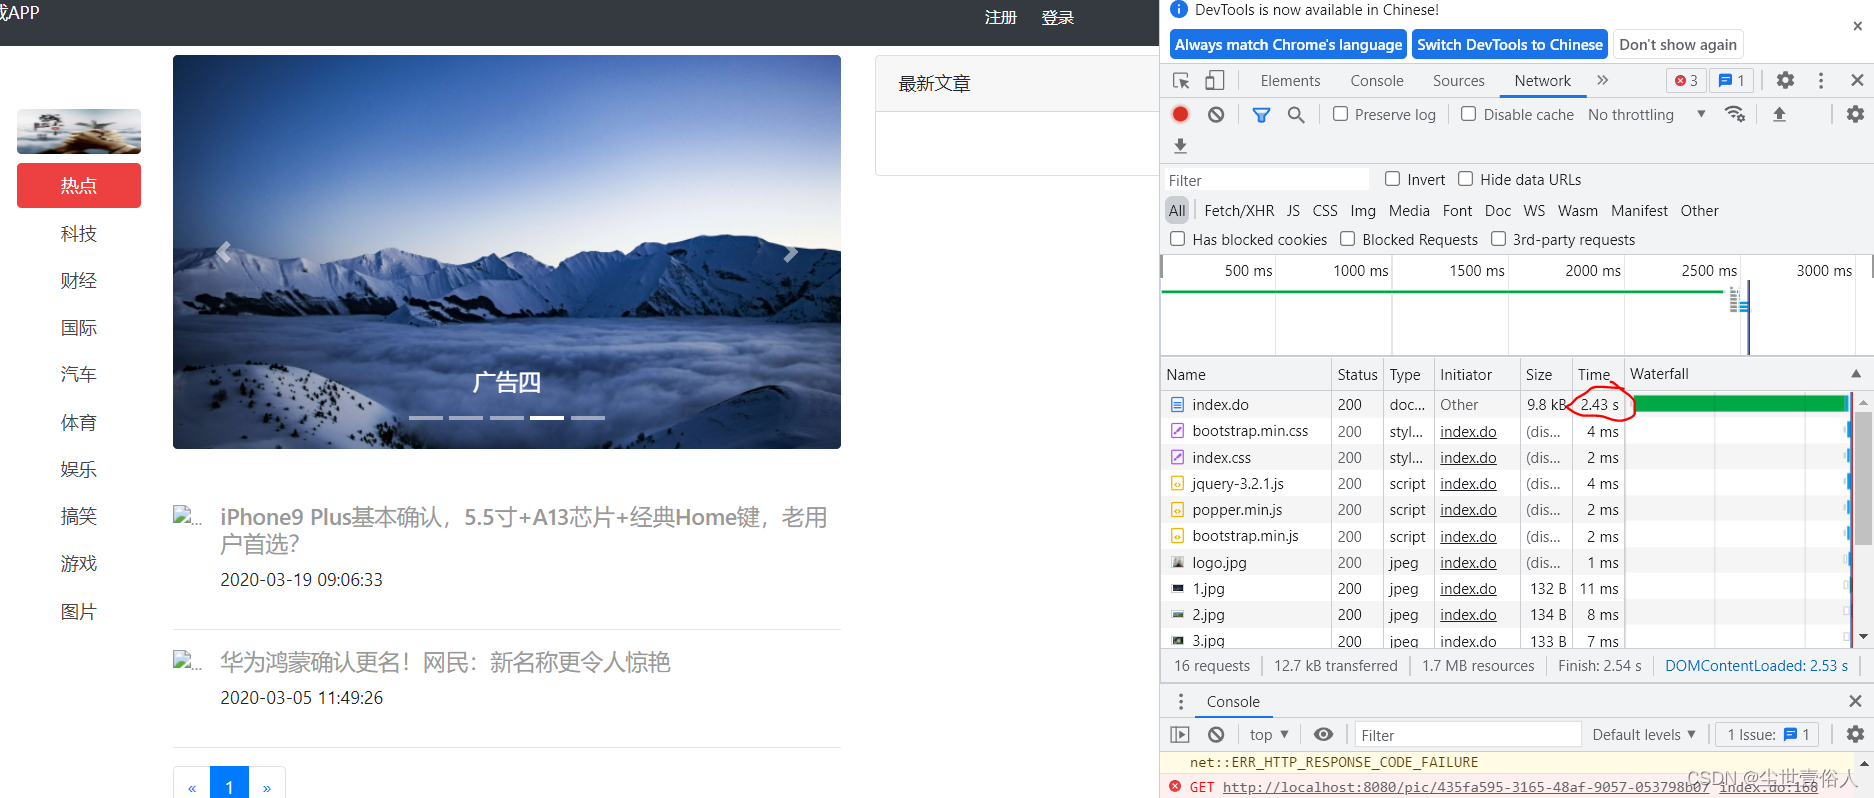
运行项目看效果,首先第一次查询用了2秒多,这很正常后台首次查询需要对redis做数据存储
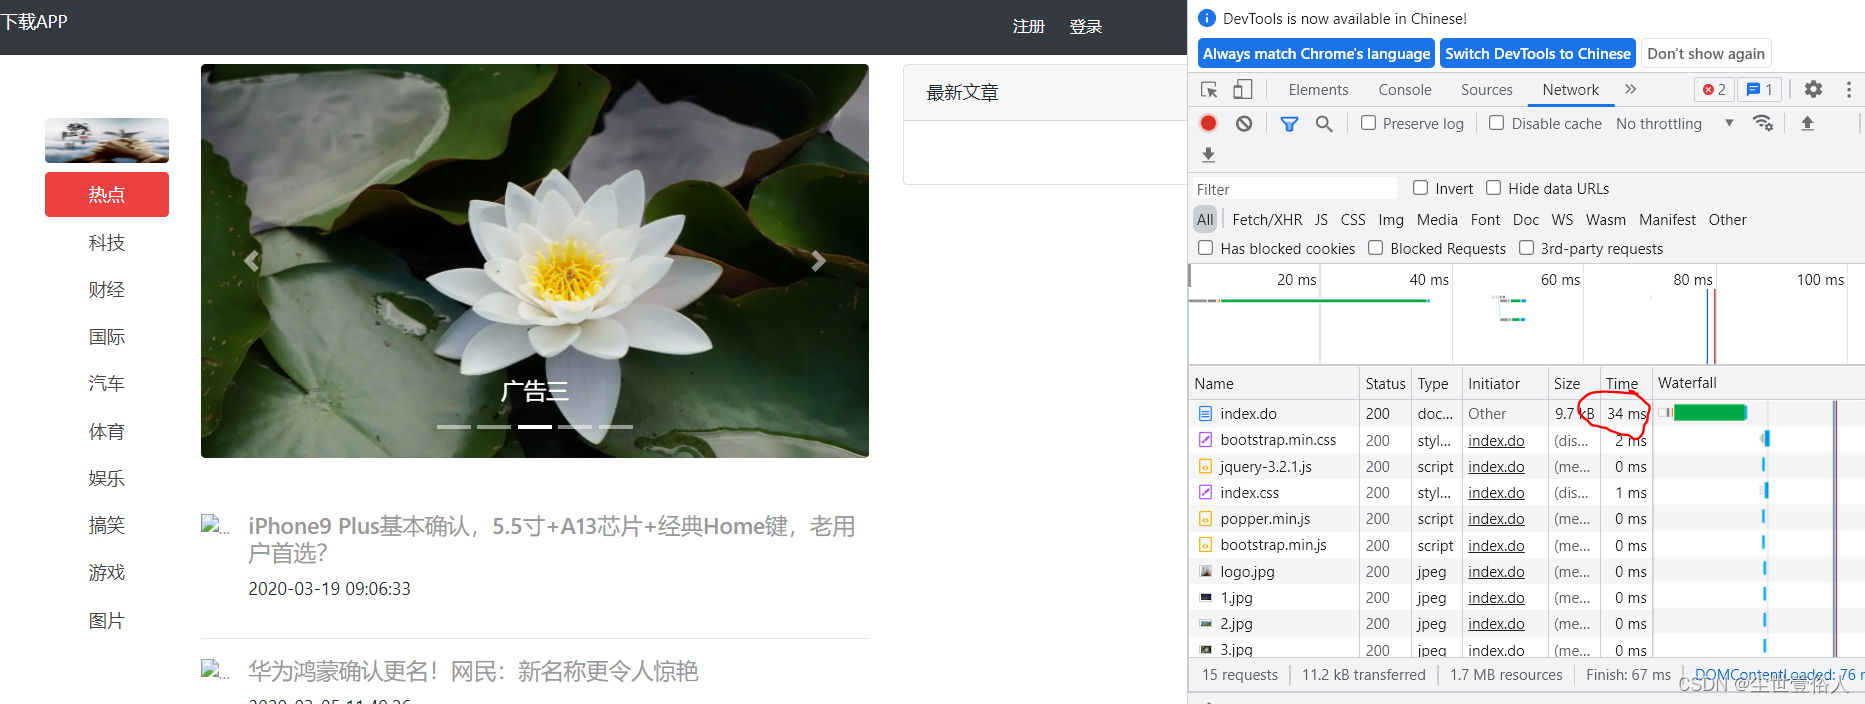
第二次恢复毫秒
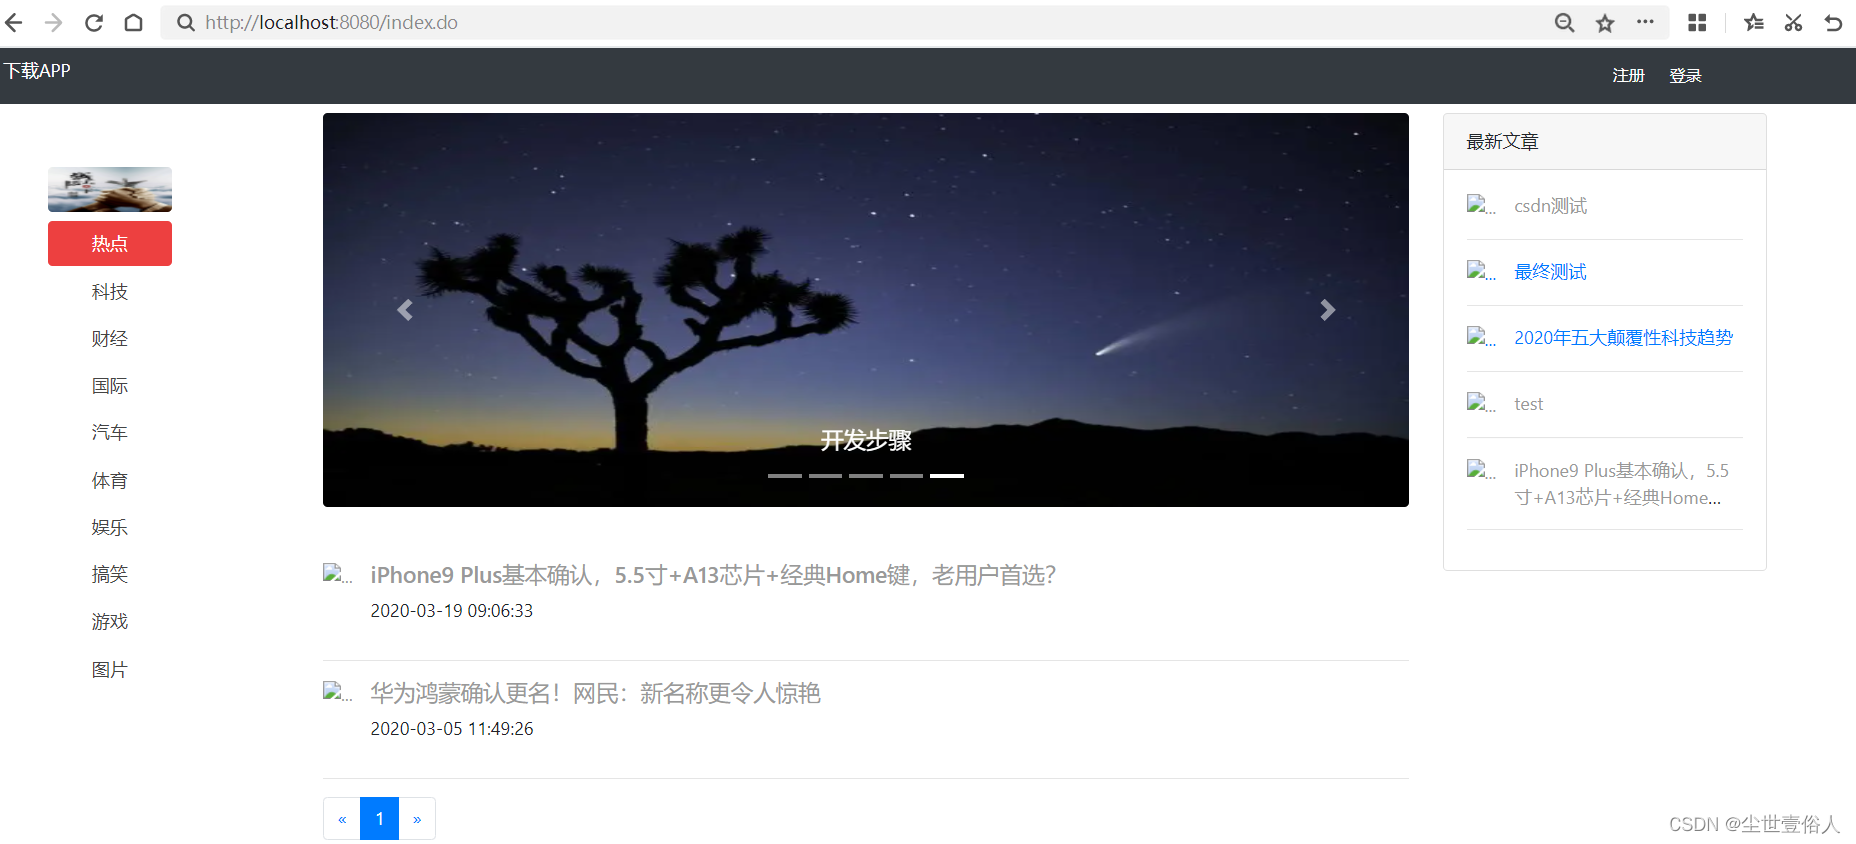
但是这里又出现一个bug,最新文章没了,通过排查发现是子栏目Bean没有实现系列化接口,导致封装五条最新文章的时候子类目异常,改过来后页面展示正常
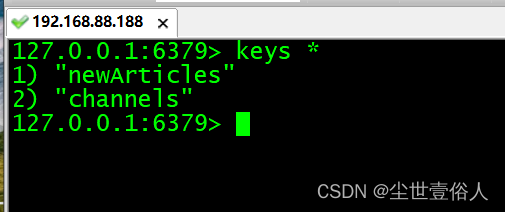
去服务器后台查看redis,你会发现有运行是推送的key
至此Redis如何进行SSM整合就说完了,为了进行下一步开发你需要把redis相关暂时注释掉
下面我们整合kafka,使用它统计文章的被点击量。首先我们需要整合kafka的ssm配置。我们先说kafka的生产者producer
<?xml version="1.0" encoding="UTF-8"?>
<beans xmlns="http://www.springframework.org/schema/beans"
	xmlns:context="http://www.springframework.org/schema/context"
	xmlns:xsi="http://www.w3.org/2001/XMLSchema-instance"
	xsi:schemaLocation="http://www.springframework.org/schema/beans
	    http://www.springframework.org/schema/beans/spring-beans.xsd
	    http://www.springframework.org/schema/context
	    http://www.springframework.org/schema/context/spring-context.xsd">

	<!--参数配置 -->
	<bean id="producerProperties" class="java.util.HashMap">
		<constructor-arg>
			<map>
				<!-- kafka服务地址,可能是集群 value="localhost:9092,localhost:9093,localhost:9094"-->
				<entry key="bootstrap.servers" value="192.168.88.186:9092,192.168.88.187:9092,192.168.88.188:9092" />

				<!-- 有可能导致broker接收到重复的消息-->
				<entry key="retries" value="0" />
				<!-- 每次批量发送消息的数量 -->
				<entry key="batch.size" value="1638" />
				<!-- 默认0ms,在异步IO线程被触发后(任何一个topic,partition满都可以触发) -->
				<entry key="linger.ms" value="1" />

				<!--producer可以用来缓存数据的内存大小。如果数据产生速度大于向broker发送的速度,producer会阻塞或者抛出异常 -->
				<entry key="buffer.memory" value="33554432 " />

				<entry key="key.serializer"
					value="org.apache.kafka.common.serialization.StringSerializer" />

				<entry key="value.serializer"
					value="org.apache.kafka.common.serialization.StringSerializer" />
			</map>
		</constructor-arg>
	</bean>

	<!-- 创建kafkatemplate需要使用的producerfactory bean -->
	<bean id="producerFactory" class="org.springframework.kafka.core.DefaultKafkaProducerFactory">
		<!-- 通过构造的方式,指定 了一个生产者的配置集合 -->
		<constructor-arg>
			<ref bean="producerProperties" />
		</constructor-arg>
	</bean>

	<!-- 创建kafkatemplate bean,使用的时候,只需要注入这个bean,即可使用template的send消息方法 -->
	<bean id="kafkaTemplate" class="org.springframework.kafka.core.KafkaTemplate">
	<!-- 生产者的工厂,这里是声明了ip地址,端口号,和一些其他的基础配置 -->
		<constructor-arg ref="producerFactory" />
		<!--设置对应topic 如果服务节点里没有这个主题,就会自动创建-->
		<property name="defaultTopic" value="wy" />
	</bean>
</beans>
随后在spring中加载这个配置
<!-- kafka:生产者 -->
<import resource="producer.xml"/>
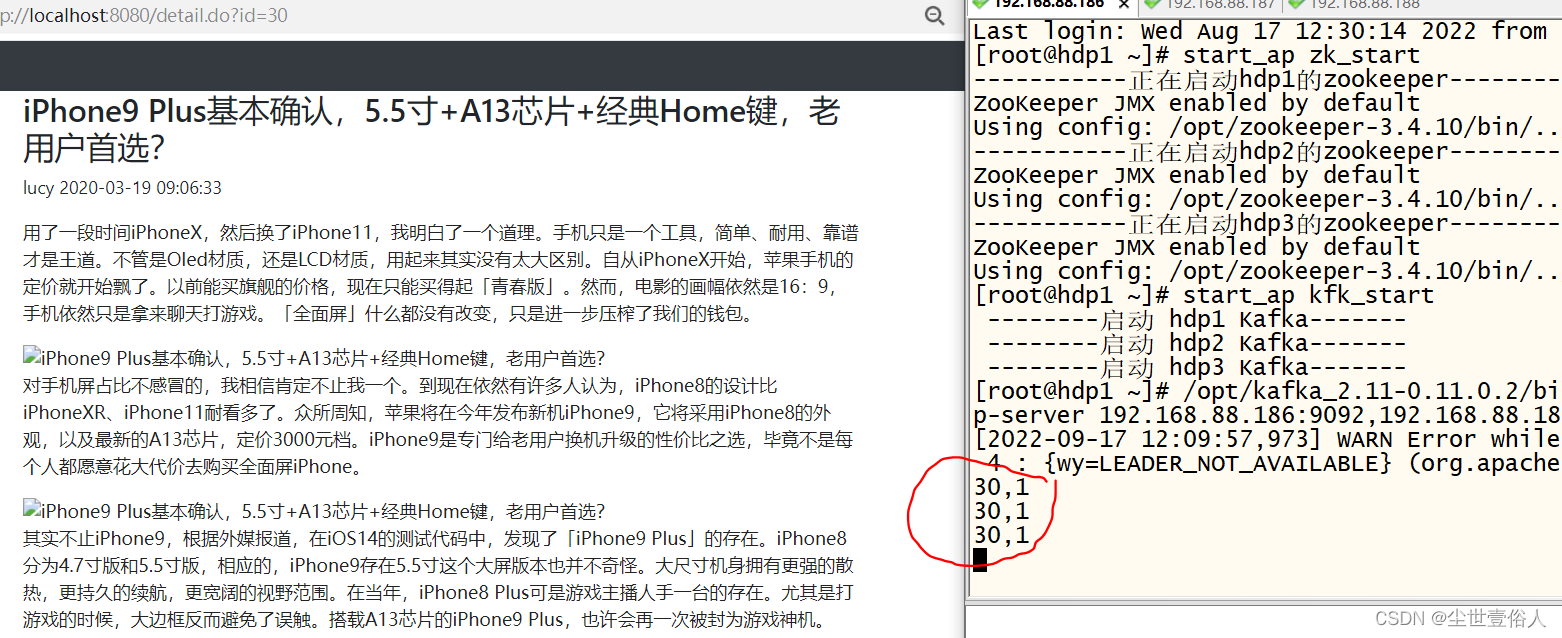
在首页Controller中注入生产者的Bean,且在详情中编写代码,使得每次被点击都向kafka集群发送一条记录,当然我们这里不做计算,通常点击量也不是后端人员干的,是大数据开发人员用Spark等手段处理好结果会提供回数据库
@Autowired
private KafkaTemplate kafkaTemplate;

/**
 *
 * @Title: detail
 * @Description: 文章详情
 * @param id
 * @return
 * @return: String
 */
@RequestMapping("detail.do")
public String detail(Model model, Integer id, HttpSession session, @RequestParam(defaultValue="1")Integer page) {
	//查询文章
	Article article = articleService.select(id);
	model.addAttribute("article", article);

	//查询文章是否被当前用户收藏
	// 前提:如果用户已经登录则查询是否收藏
	User user=(User) session.getAttribute("user");
	if (null != user) {
		int isCollect = collectService.selectCount(article.getTitle(), user.getId());
		model.addAttribute("isCollect", isCollect);
	}

	//查询评论
	PageInfo<Comment> info = commentService.selects(id, page, 5);
	model.addAttribute("info", info);

	//发出信息 :文章id,1
	kafkaTemplate.send("wy",id+","+1);

	return "index/article";
}
集群后台准备好一个消费者,然后运行项目点击首页的文章,看结果
随后返回头我们说消费者,SSM里使用消费者一般很少,而且用也不会和web业务模块在同一项目下,总之SSM整合kafka消费者的需求很少但我们要知道怎么用。首先准备消费者的SSM配置文件
<?xml version="1.0" encoding="UTF-8"?>
<beans xmlns="http://www.springframework.org/schema/beans"
	xmlns:context="http://www.springframework.org/schema/context"
	xmlns:xsi="http://www.w3.org/2001/XMLSchema-instance"
	xsi:schemaLocation="http://www.springframework.org/schema/beans
	    http://www.springframework.org/schema/beans/spring-beans.xsd
	    http://www.springframework.org/schema/context
	    http://www.springframework.org/schema/context/spring-context.xsd">

	<bean id="consumerProperties" class="java.util.HashMap">
		<constructor-arg>
			<map>
				<!--Kafka服务地址 -->
				<entry key="bootstrap.servers" value="192.168.88.186:9092,192.168.88.187:9092,192.168.88.188:9092" />
				<!--Consumer的组ID,相同group.id的consumer属于同一个组。一个组中的不同成员,相同的消息只能有一个人收到 -->
				<entry key="group.id" value="wy" />
				<!--如果此值设置为true,consumer会周期性的把当前消费的offset值保存到zookeeper。当consumer失败重启之后将会使用此值作为新开始消费的值。 -->
				<entry key="enable.auto.commit" value="true" />
				<!--网络请求的socket超时时间。实际超时时间由max.fetch.wait + socket.timeout.ms 确定 -->
				<entry key="session.timeout.ms" value="15000 " />

				<entry key="key.deserializer"
					value="org.apache.kafka.common.serialization.StringDeserializer" />

				<entry key="value.deserializer"
					value="org.apache.kafka.common.serialization.StringDeserializer" />
			</map>
		</constructor-arg>
	</bean>


	<!-- 创建consumerFactory bean -->
	<bean id="consumerFactory"
		class="org.springframework.kafka.core.DefaultKafkaConsumerFactory">
		<constructor-arg>
			<ref bean="consumerProperties" />
		</constructor-arg>
	</bean>

	<!-- 核心类,等价于template -->
	<bean id="messageListenerContainer"
		class="org.springframework.kafka.listener.KafkaMessageListenerContainer"
		init-method="doStart">
		<!-- 指定消费者工厂 -->
		<constructor-arg ref="consumerFactory" />
		<!-- 接收的相关配置 -->
		<constructor-arg ref="containerProperties" />
	</bean>

	<!-- 记得修改主题 -->
	<bean id="containerProperties" class="org.springframework.kafka.listener.ContainerProperties">
		<!-- 构造函数 就是 主题的参数值 -->
		<!-- kafka消费者监听的主题 -->
		<constructor-arg value="wy" />
		<!-- 指定监听 -->
		<property name="messageListener" ref="messageListernerConsumerService" />
	</bean>

	<!--指定具体监听类的bean 这个类需要我们手工写                  指定一个类的全限定类名,让这个类来监听消息.-->
	<bean id="messageListernerConsumerService" class="com.wy.kafka.MesLis" />

</beans>
随后关键的一点注意,和生产者一样我们需要在spring的配置里加载配置,但是记住!!!如果有生产者一定要把相关代码暂时注释,尽量不要两者共存一个项目中,不然很可能其中一个会失效!!!!
<!-- kafka:消费者配置文件 -->
<import resource="consumer.xml"/>
最后我们要书写消费者类,也就是配置中指向的监听类
package com.wy.kafka;

import org.apache.kafka.clients.consumer.ConsumerRecord;

import org.springframework.beans.factory.annotation.Autowired;
import org.springframework.kafka.listener.MessageListener;

import com.alibaba.fastjson.JSON;
import com.wy.bean.Article;
import com.wy.dao.ArticleMapper;

/**
 *@描述
 * SSM整合消费者用的类 实现MessageListener<String, String>接口 泛型一般都是String
 *
 *@参数
 *@返回值
 *@创建人 wangyang
 *@创建时间 2022/9/17
 *@修改人和其它信息
 */
public class MesLis implements MessageListener<String, String>{

	@Override
	public void onMessage(ConsumerRecord<String, String> data) {
		String d = data.value();
		System.out.println("接收到的数据为"+d);

	}

}
随后运行项目,在服务器端想topic发送消息,查看结果

不要有中文,SSM官方现在对框架维护很少,中文字符集不对这个问题需要自己解决一下
最后我们来说SSM如何整合ES,同样的步骤,ES后续步骤有些多,先准备SSM整合ES的配置文件
<?xml version="1.0" encoding="UTF-8"?>
<beans xmlns="http://www.springframework.org/schema/beans"
	xmlns:xsi="http://www.w3.org/2001/XMLSchema-instance"
	xmlns:elasticsearch="http://www.springframework.org/schema/data/elasticsearch"
	xmlns:context="http://www.springframework.org/schema/context"
	xsi:schemaLocation="http://www.springframework.org/schema/beans http://www.springframework.org/schema/beans/spring-beans.xsd
                            http://www.springframework.org/schema/data/elasticsearch http://www.springframework.org/schema/data/elasticsearch/spring-elasticsearch.xsd
                            http://www.springframework.org/schema/context http://www.springframework.org/schema/context/spring-context.xsd">

    <!-- 扫描Dao包,自动创建实例(指定一个es仓库的包扫描位置) -->
    <!--我们 主要是用spring-data的方式来操作es的增删改查 -->
    <!-- 这个包下就是我们声明的es的仓库接口 -->
	<elasticsearch:repositories base-package="com.wy.es" />
	<!-- es提供了2个端口号:9200和9300
		9200:对浏览器暴露的端口号
		9300:是对java编程需要操作es所暴露的端口号
	 -->
	 <!-- 指定es的ip地址和端口号 -->
	<elasticsearch:transport-client id="client" cluster-nodes="192.168.88.188:9300" /> <!-- spring data elasticSearcheDao 必须继承 ElasticsearchTemplate -->

	<!-- 声明一个对象,叫ElasticsearchTemplate 就是负责es的CRUD的操作-->
	<bean id="elasticsearchTemplate"
		class="org.springframework.data.elasticsearch.core.ElasticsearchTemplate">
		<constructor-arg name="client" ref="client"></constructor-arg>
	</bean>

</beans>
随后spring中引入该配置,并且创建配置中的ES接口包
<!-- es数据库 -->
<import resource="es.xml"/>
创建<elasticsearch:repositories base-package="com.wy.es" />指向的包
在这个包下我们需要准备ES数据接口
package com.wy.es;

import java.util.List;

import org.springframework.data.elasticsearch.repository.ElasticsearchRepository;

import com.wy.bean.Article;

/**
 * 所有ES仓库接口必须继承ElasticSearchRepository,之后就自动具备了简单的CRUD的方法
 * 第一个泛型是文档操作的实例Bean  第二个是这个Bean的主键类型
 */
public interface ArticleElasticsearch extends ElasticsearchRepository<Article, Integer>{
	//按标题与内容查询
	List<Article> findByTitleOrContent(String title,String content);
}
我们要对实体Bean类中用ES提供的文档注解标记与ES对应的关系
//指定type库名(库名必须用纯小写的名字,不允许有特殊字符,否则就报错),indexName指定表名也叫索引名
@Document(indexName="test_user",type="user")
//用来指定ID
@Id
//指定name的值是否索引,2.是否存储3.name的值的分词方式  4.搜索的关键字分词的方式  5指定该字段的值以什么样的数据类型来存储
@Field(index=true,store=true,analyzer="ik_smart",searchAnalyzer="ik_smart",type=FieldType.text)
标记结果如下
package com.wy.bean;

import java.io.Serializable;
import java.util.Date;

import org.springframework.data.annotation.Id;
import org.springframework.data.elasticsearch.annotations.Document;
import org.springframework.data.elasticsearch.annotations.Field;
import org.springframework.data.elasticsearch.annotations.FieldType;

/**
 *
 * @ClassName: Article
 * @Description: 文章内容表
 * @author: charles
 * @date: 2020年3月3日 上午11:25:22
 */
@Document(indexName="articles",type="article")
public class Article implements Serializable {

	/**
	 * @fieldName: serialVersionUID
	 * @fieldType: long
	 * @Description: TODO
	 */
	private static final long serialVersionUID = 1L;
	@Id
	private Integer id;//主键
	@Field(index=true,store=true,analyzer="ik_max_word",searchAnalyzer="ik_max_word",type=FieldType.text)
	private String title;//文章标题
	private String summary;//文章摘要
	@Field(index=true,store=true,analyzer="ik_max_word",searchAnalyzer="ik_max_word",type=FieldType.text)
	private String content;//文章内容
	private String picture;//文章的标题图片

	private Integer channelId;//所属栏目ID
	private Integer categoryId;//所属分类ID
	private Integer userId;//文章发布人ID

	private Integer hits;//  点击量
	private Integer hot;//是否热门文章   1:热门     , 0 :一般文章
	private Integer status;//文章审核状态     0:待审        1:审核通过     -1: 审核未通过
	private Integer deleted;// 删除状态 0:正常,1:逻辑删除
	private Date created;// 文章发布时间
	private  Date  updated;// 文章修改时间

	private String contentType ;//文章内容类型  0:html  1:json
	private Channel channel;
	private Category category;
	private User user;


	private String keywords;//文章关键词
	private String original;//文章来源


	public String getKeywords() {
		return keywords;
	}
	public void setKeywords(String keywords) {
		this.keywords = keywords;
	}
	public String getOriginal() {
		return original;
	}
	public void setOriginal(String original) {
		this.original = original;
	}

	public Integer getId() {
		return id;
	}
	public void setId(Integer id) {
		this.id = id;
	}
	public String getTitle() {
		return title;
	}
	public void setTitle(String title) {
		this.title = title;
	}
	public String getSummary() {
		return summary;
	}
	public void setSummary(String summary) {
		this.summary = summary;
	}
	public String getContent() {
		return content;
	}
	public void setContent(String content) {
		this.content = content;
	}
	public String getPicture() {
		return picture;
	}
	public void setPicture(String picture) {
		this.picture = picture;
	}
	public Integer getChannelId() {
		return channelId;
	}
	public void setChannelId(Integer channelId) {
		this.channelId = channelId;
	}
	public Integer getCategoryId() {
		return categoryId;
	}
	public void setCategoryId(Integer categoryId) {
		this.categoryId = categoryId;
	}
	public Integer getUserId() {
		return userId;
	}
	public void setUserId(Integer userId) {
		this.userId = userId;
	}
	public Integer getHits() {
		return hits;
	}
	public void setHits(Integer hits) {
		this.hits = hits;
	}
	public Integer getHot() {
		return hot;
	}
	public void setHot(Integer hot) {
		this.hot = hot;
	}
	public Integer getStatus() {
		return status;
	}
	public void setStatus(Integer status) {
		this.status = status;
	}
	public Integer getDeleted() {
		return deleted;
	}
	public void setDeleted(Integer deleted) {
		this.deleted = deleted;
	}
	public Date getCreated() {
		return created;
	}
	public void setCreated(Date created) {
		this.created = created;
	}
	public Date getUpdated() {
		return updated;
	}
	public void setUpdated(Date updated) {
		this.updated = updated;
	}
	public Channel getChannel() {
		return channel;
	}
	public void setChannel(Channel channel) {
		this.channel = channel;
	}
	public Category getCategory() {
		return category;
	}
	public void setCategory(Category category) {
		this.category = category;
	}
	public User getUser() {
		return user;
	}
	public void setUser(User user) {
		this.user = user;
	}
	public String getContentType() {
		return contentType;
	}
	public void setContentType(String contentType) {
		this.contentType = contentType;
	}
	@Override
	public String toString() {
		return "Article [id=" + id + ", title=" + title + ", summary=" + summary + ", content=" + content + ", picture="
				+ picture + ", channelId=" + channelId + ", categoryId=" + categoryId + ", userId=" + userId + ", hits="
				+ hits + ", hot=" + hot + ", status=" + status + ", deleted=" + deleted + ", created=" + created
				+ ", updated=" + updated + ", contentType=" + contentType + ", channel=" + channel + ", category="
				+ category + ", user=" + user + ", keywords=" + keywords + ", original=" + original + "]";
	}


}
此时我们使用测试类和我们自己的ES接口向ES初始化数据
import com.wy.bean.Article;
import com.wy.es.ArticleElasticsearch;
import com.wy.service.ArticleService;
import org.junit.Test;
import org.junit.runner.RunWith;
import org.springframework.beans.factory.annotation.Autowired;
import org.springframework.test.context.ContextConfiguration;
import org.springframework.test.context.junit4.SpringJUnit4ClassRunner;

import java.util.List;

/**
 * 测试类用来推送ES数据
 * @创建人 wangyang
 * @创建时间 2022/9/17
 * @描述
 */
//这个必须加入
@RunWith(SpringJUnit4ClassRunner.class)
@ContextConfiguration(locations = { "classpath:spring.xml" })
public class ESTest {

    @Autowired
    private ArticleElasticsearch articleElasticsearch;

    @Autowired
    private ArticleService articleService;

    @Test
    public void pushESData(){
        List<Article> articles = articleService.selectArticle(new Article(), 1, 30);
        for (Article a : articles){
            articleElasticsearch.save(a);
        }
    }

}
测试类运行结束后,才head上就可以看到数据
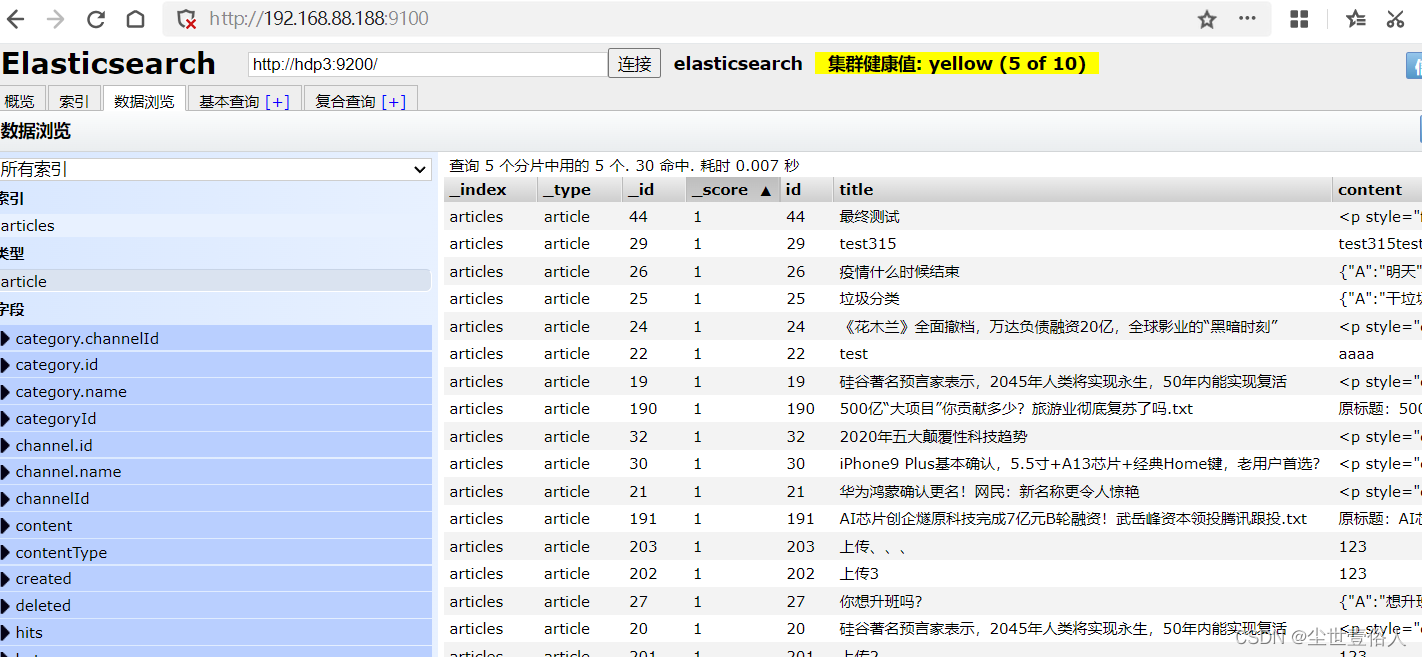
到此ES整合的配置流程已经完成了,而本篇知识点不去做普通的整合,我们玩一个比较高端的ES高亮,既可以学习高亮又能知道ES整合怎么用,美滋滋
想要实现ES高亮,需要自己写一个工具类,这个工具类我已经给大家写完了,直接复制就行,提前说明我写的这个工具类不是公用的,只是用作本次CMS系统,如果有其他用处就需要你自己看着改
/**
 * @Title: ESUtils.java
 * @Description: TODO
 * @author: chj
 * @date: 2019年7月24日 上午10:14:13
 */
package com.wy.utils;

import java.lang.reflect.Field;
import java.util.ArrayList;
import java.util.Date;
import java.util.List;

import org.elasticsearch.action.search.SearchResponse;
import org.elasticsearch.index.query.QueryBuilder;
import org.elasticsearch.index.query.QueryBuilders;
import org.elasticsearch.search.SearchHit;
import org.elasticsearch.search.SearchHits;
import org.elasticsearch.search.fetch.subphase.highlight.HighlightBuilder;
import org.elasticsearch.search.fetch.subphase.highlight.HighlightField;
import org.springframework.data.domain.PageRequest;
import org.springframework.data.domain.Pageable;
import org.springframework.data.domain.Sort;
import org.springframework.data.elasticsearch.core.ElasticsearchTemplate;
import org.springframework.data.elasticsearch.core.SearchResultMapper;
import org.springframework.data.elasticsearch.core.aggregation.AggregatedPage;
import org.springframework.data.elasticsearch.core.aggregation.impl.AggregatedPageImpl;
import org.springframework.data.elasticsearch.core.query.GetQuery;
import org.springframework.data.elasticsearch.core.query.IndexQuery;
import org.springframework.data.elasticsearch.core.query.IndexQueryBuilder;
import org.springframework.data.elasticsearch.core.query.NativeSearchQueryBuilder;
import org.springframework.data.elasticsearch.core.query.SearchQuery;

import com.github.pagehelper.PageInfo;


/**
 * @ClassName: ESUtils
 * @Description: TODO
 * @author:
 * @date: 2019年7月24日 上午10:14:13
 */
public class HLUtils {


	/**
	 * 保存及更新方法
	 *
	 * @param elasticsearchTemplate
	 * @param id
	 * @param object
	 */
	public static void saveObject(ElasticsearchTemplate elasticsearchTemplate, String id, Object object) {
		// 创建所以对象
		IndexQuery query = new IndexQueryBuilder().withId(id).withObject(object).build();
		// 建立索引
		elasticsearchTemplate.index(query);
	}

	/**
	 * 批量删除
	 *
	 * @param elasticsearchTemplate
	 * @param clazz
	 * @param ids
	 */
	public static void deleteObject(ElasticsearchTemplate elasticsearchTemplate, Class<?> clazz, Integer ids[]) {
		for (Integer id : ids) {
			// 建立索引
			elasticsearchTemplate.delete(clazz, id + "");
		}
	}

	/**
	 *
	 * @Title: selectById
	 * @Description: 根据id在es服务启中查询对象
	 * @param elasticsearchTemplate
	 * @param clazz
	 * @param id
	 * @return
	 * @return: Object
	 */
	public static Object selectById(ElasticsearchTemplate elasticsearchTemplate, Class<?> clazz, Integer id) {
		GetQuery query = new GetQuery();
		query.setId(id + "");
		return elasticsearchTemplate.queryForObject(query, clazz);
	}

	// 查询操作
	public static PageInfo<?> findByHighLight(ElasticsearchTemplate elasticsearchTemplate, Class<?> clazz, Integer page,
			Integer rows, String fieldNames[],String sortField, String value) {
		AggregatedPage<?> pageInfo = null;
		PageInfo<?> pi = new PageInfo<>();
		// 创建Pageable对象														主键的实体类属性名
		final Pageable pageable = PageRequest.of(page - 1, rows, Sort.by(Sort.Direction.ASC, sortField));
		//查询对象
		SearchQuery query = null;
		//查询条件高亮的构建对象
		QueryBuilder queryBuilder = null;

		if (value != null && !"".equals(value)) {
			// 高亮拼接的前缀与后缀
			String preTags = "<font color=\"red\">";
			String postTags = "</font>";

			// 定义创建高亮的构建集合对象
			HighlightBuilder.Field highlightFields[] = new HighlightBuilder.Field[fieldNames.length];

			for (int i = 0; i < fieldNames.length; i++) {
				// 这个代码有问题
				highlightFields[i] = new HighlightBuilder.Field(fieldNames[i]).preTags(preTags).postTags(postTags);
			}

			// 创建queryBuilder对象
			queryBuilder = QueryBuilders.multiMatchQuery(value, fieldNames);
			query = new NativeSearchQueryBuilder().withQuery(queryBuilder).withHighlightFields(highlightFields)
					.withPageable(pageable).build();
			//elasticsearchTemplate.queryForPage(query, clazz,)

			pageInfo = elasticsearchTemplate.queryForPage(query, clazz, new SearchResultMapper() {

				public <T> AggregatedPage<T> mapResults(SearchResponse response, Class<T> clazz, Pageable pageable1) {

					List<T> content = new ArrayList<T>();
					long total = 0l;

					try {
						// 查询结果
						SearchHits hits = response.getHits();
						if (hits != null) {
							//获取总记录数
							total = hits.getTotalHits();
							// 获取结果数组
							SearchHit[] searchHits = hits.getHits();
							// 判断结果
							if (searchHits != null && searchHits.length > 0) {
								// 遍历结果
								for (int i = 0; i < searchHits.length; i++) {
									// 对象值
									T entity = clazz.newInstance();

									// 获取具体的结果
									SearchHit searchHit = searchHits[i];

									// 获取对象的所有的字段
									Field[] fields = clazz.getDeclaredFields();

									// 遍历字段对象
									for (int k = 0; k < fields.length; k++) {
										// 获取字段对象
										Field field = fields[k];
										// 暴力反射
										field.setAccessible(true);
										// 字段名称
										String fieldName = field.getName();
										if (!fieldName.equals("serialVersionUID")&&!fieldName.equals("user")&&!fieldName.equals("channel")&&!fieldName.equals("category")&&!fieldName.equals("articleType")&&!fieldName.equals("imgList")) {
											HighlightField highlightField = searchHit.getHighlightFields()
													.get(fieldName);
											if (highlightField != null) {
												// 高亮 处理 拿到 被<font color='red'> </font>结束所包围的内容部分
												String value = highlightField.getFragments()[0].toString();
												// 注意一下他是否是 string类型
												field.set(entity, value);
											} else {
												//获取某个字段对应的 value值
												Object value = searchHit.getSourceAsMap().get(fieldName);
												// 获取字段的类型
												Class<?> type = field.getType();
												if (type == Date.class) {
													// bug
													if(value!=null) {
														field.set(entity, new Date(Long.valueOf(value + "")));
													}
												} else {
													field.set(entity, value);
												}
											}
										}
									}

									content.add(entity);
								}
							}
						}
					} catch (Exception e) {
						e.printStackTrace();
					}

					return new AggregatedPageImpl<T>(content, pageable, total);
				}
			});

		} else {
			// 没有查询条件的的时候,获取es中的全部数据 分页获取
			query = new NativeSearchQueryBuilder().withPageable(pageable).build();
			pageInfo = elasticsearchTemplate.queryForPage(query, clazz);
		}
		int totalCount = (int) pageInfo.getTotalElements();
		int pages = totalCount%rows==0?totalCount/rows:totalCount/rows+1;
		pi.setTotal(pageInfo.getTotalElements());
		pi.setPageNum(page);
		pi.setPageSize(rows);
		pi.setPrePage(page-1);
		pi.setLastPage(page+1);
		pi.setPages(pages);
		List content = pageInfo.getContent();
		pi.setList(content);

		return pi;
	}

}
下面我们来使用这个工具类,首先在首页上放一个查询框,用来做高亮的搜索,我们放在展示五条最新消息的上面
<form action="/es.do" method="get">
	<div class="input-group mb-3">
		<input type="text" name="key" value="${key}" class="form-control"
			   placeholder="请输入要搜索的内容" aria-label="Recipient's username"
			   aria-describedby="button-addon2">
		<div class="input-group-append">
			<button class="btn btn-outline-secondary" id="button-addon2">搜索</button>
		</div>
	</div>
</form>
前端首页有了搜索框,那后端就要有它的接收Controller
@RequestMapping("es.do")
public String es(Model model,String key,@RequestParam(defaultValue="1")Integer pageNum){
	//高亮查询
	//注意该方法查询参数依次为:框架自带的ElasticsearchTemplate对象、文档Bean的class对象、当前页、每页显示多少条数据、数组包裹高亮搜索那些字段注意写在后面的优先高亮倒着来的,这是我工具类的一个小问题,不影响使用、文档bean的主键字段、高亮的具体值
	PageInfo<?> info = HLUtils.findByHighLight(elasticsearchTemplate, Article.class, pageNum, 5, new String[]{"title"}, "id", key);
	model.addAttribute("info", info);
	model.addAttribute("key", key);
	return "index/index";
}
现在我们就可以运行项目看效果
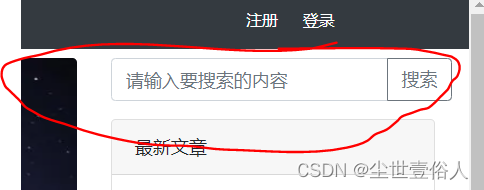

通过效果来看高亮成功,但是其他的数据没了,这是因为其他数据没有查询,大家可以自己扩展把高亮的查询和原先的查询融合一下
自此CMSDemo2.0版本完成
本项目目前以上传github :https://github.com/wangyang159/cmsdemo