android ѧϰ�ռ� smartLayout �ײ�ѡ�
����Ŀ¼
ǰ��
���������Ŀʱ,�õ���ԭʼ�ĵײ�ѡ��Ĵ���,�ֳ��ֳ�,������һ���ȽϽ�ʡ����Ŀؼ�,�ٴη���һ�¡�
һ��ʹ�ò���
���·�Ϊ���²���:
1.������Ӧ����
2.��дsmartLayout�õ��IJ�����ʽ�ļ�
3.��д��Ƭ�ļ�
4.��дactivity��ҳ�� ȷ������Դ --> ���������� --> smartLayoutװ��������
��������:
1.��������
//�ײ�ѡ� �������
implementation 'com.ogaclejapan.smarttablayout:library:1.6.1@aar'
implementation 'com.ogaclejapan.smarttablayout:utils-v4:1.6.1@aar'
implementation 'androidx.legacy:legacy-support-v4:1.0.0'
2����дsmartLayout�õ��IJ�����ʽ�ļ� smart_item_style.xml
<?xml version="1.0" encoding="utf-8"?>
<androidx.constraintlayout.widget.ConstraintLayout
xmlns:android="http://schemas.android.com/apk/res/android"
xmlns:app="http://schemas.android.com/apk/res-auto"
android:layout_width="match_parent"
android:layout_height="match_parent">
<ImageView
android:id="@+id/imageView"
android:layout_width="30dp"
android:layout_height="30dp"
app:layout_constraintEnd_toEndOf="parent"
app:layout_constraintStart_toStartOf="parent"
app:layout_constraintTop_toTopOf="parent"
app:srcCompat="@drawable/tab_ic_home" />
<TextView
android:id="@+id/textView2"
android:layout_width="wrap_content"
android:layout_height="wrap_content"
android:text="�̵�"
android:textColor="#6D6D6D"
android:textSize="15sp"
app:layout_constraintEnd_toEndOf="parent"
app:layout_constraintStart_toStartOf="parent"
app:layout_constraintTop_toBottomOf="@+id/imageView" />
</androidx.constraintlayout.widget.ConstraintLayout>

���ⲻҪ����дһ�� ���ʱ�л��˵�ʱ������ʾ��xml�ļ�
��Ҫ����ͼƬ�ļ�,һ���ǵ��ʱ��ͼƬ��ʽ ��һ���Ǿ�̬ʱ��ͼƬ��ʽ
<?xml version="1.0" encoding="utf-8"?>
<selector xmlns:android="http://schemas.android.com/apk/res/android">
    <item android:drawable="@drawable/ic_home_normal" android:state_selected="true" />
    <item android:drawable="@drawable/ic_home_selected" android:state_selected="false" />
</selector>
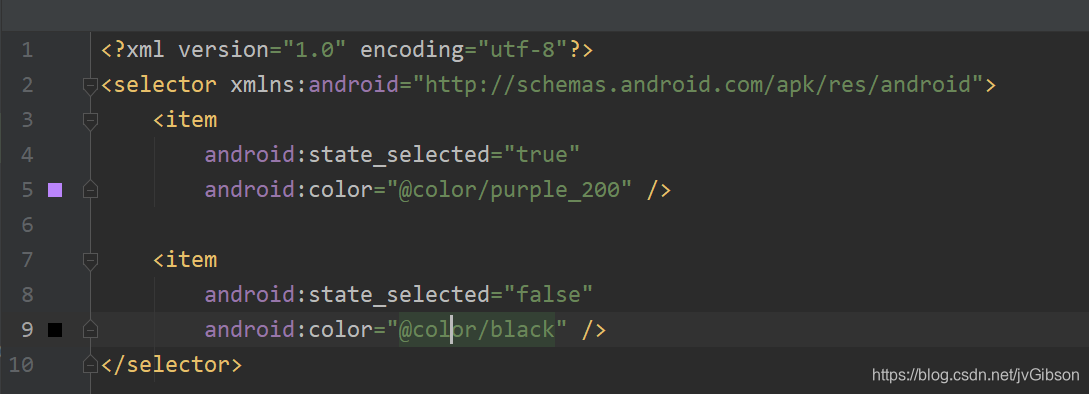
��дһ���任ͼƬ�����������ɫ��xml
<?xml version="1.0" encoding="utf-8"?>
<selector xmlns:android="http://schemas.android.com/apk/res/android">
    <item
        android:state_selected="true"
        android:color="@color/purple_200" />

    <item
        android:state_selected="false"
        android:color="@color/black" />
</selector>

3����д��Ƭ�ļ�
������Ŀ��������д ,��Ҫ������д���� ����ֻ����һ��ʾ��
package com.example.practice.fragment;

import androidx.fragment.app.Fragment;

import android.os.Bundle;
import android.view.LayoutInflater;
import android.view.View;
import android.view.ViewGroup;
import com.example.practice.R;

public class ShopFragment extends Fragment {

    View view ;

    @Override
    public View onCreateView(LayoutInflater inflater , ViewGroup Container , Bundle savedInstanceState) {
        view = inflater.inflate(R.layout.activity_shop_fragment,null);
        return view ;
    }
}
4����дactivity��ҳ��
ȷ������Դ --> ���������� --> smartLayoutװ��������
package com.example.practice;
import android.os.Bundle;
import android.view.LayoutInflater;
import android.view.View;
import android.view.ViewGroup;
import android.widget.ImageView;
import android.widget.TextView;
import androidx.appcompat.app.AppCompatActivity;
import androidx.viewpager.widget.PagerAdapter;
import androidx.viewpager.widget.ViewPager;
import com.example.practice.fragment.ShopFragment;
import com.ogaclejapan.smarttablayout.SmartTabLayout;
import com.ogaclejapan.smarttablayout.utils.v4.FragmentPagerItemAdapter;
import com.ogaclejapan.smarttablayout.utils.v4.FragmentPagerItems;
public class MainActivity extends AppCompatActivity {
private ViewPager viewPager;
private SmartTabLayout smartTabLayout;
@Override
protected void onCreate(Bundle savedInstanceState) {
//��ȡ������
final LayoutInflater inflater = LayoutInflater.from(this);
super.onCreate(savedInstanceState);
setContentView(R.layout.activity_main);
init();
//ȷ������Դ
final int[] tabIcons = {R.drawable.tab_ic_home, R.drawable.tab_ic_orders, R.drawable.tab_ic_me};
final String[] tabTitles = {"��ҳ", "����", "��������"};
//����view��Ƭ
FragmentPagerItems pages = FragmentPagerItems.with(this)
.add("��ҳ", ShopFragment.class)
.add("����", ShopFragment.class)
.add("�ҵ�", ShopFragment.class)
.create();
//����������
FragmentPagerItemAdapter adapter = new FragmentPagerItemAdapter(
getSupportFragmentManager(),
pages);
//װ����Ŷ�G��
viewPager.setOffscreenPageLimit(pages.size());
viewPager.setAdapter(adapter);
//���صײ�ѡ���ʽ�ļ�
smartTabLayout.setCustomTabView(new SmartTabLayout.TabProvider() {
@Override
public View createTabView(ViewGroup container, int position, PagerAdapter adapter) {
View view = inflater.inflate(R.layout.smart_item_style, container, false);
ImageView iconView = (ImageView) view.findViewById(R.id.imageView);
iconView.setImageResource(tabIcons[position % tabIcons.length]);
TextView titleView = (TextView) view.findViewById(R.id.textView2);
titleView.setText(tabTitles[position % tabTitles.length]);
return view;
}
});
//�ײ�ѡ�������viewpager�������任ʹ��
smartTabLayout.setViewPager(viewPager);
}
private void init() {
viewPager = findViewById(R.id.viewpager);
smartTabLayout = findViewById(R.id.smarttablayout);
}
}