uni push
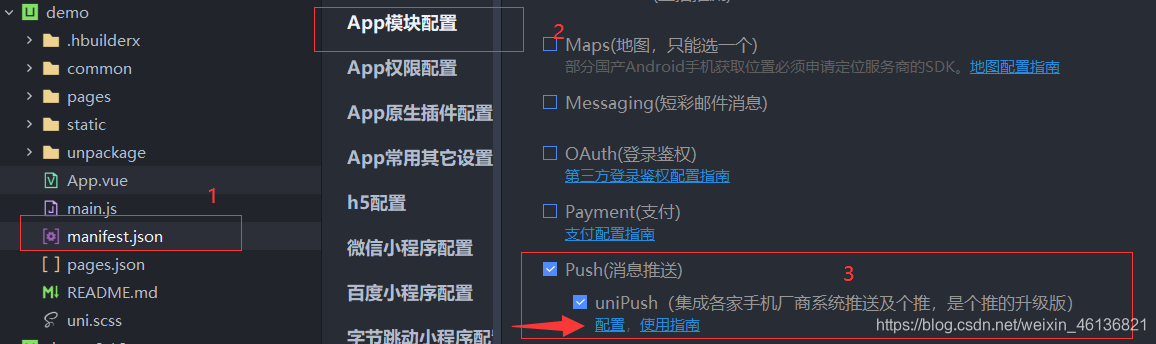
首先,你的app要先开启推送功能,按照下图选择uniPush然后点击配置
填上下面的信息,点击开通就可以了
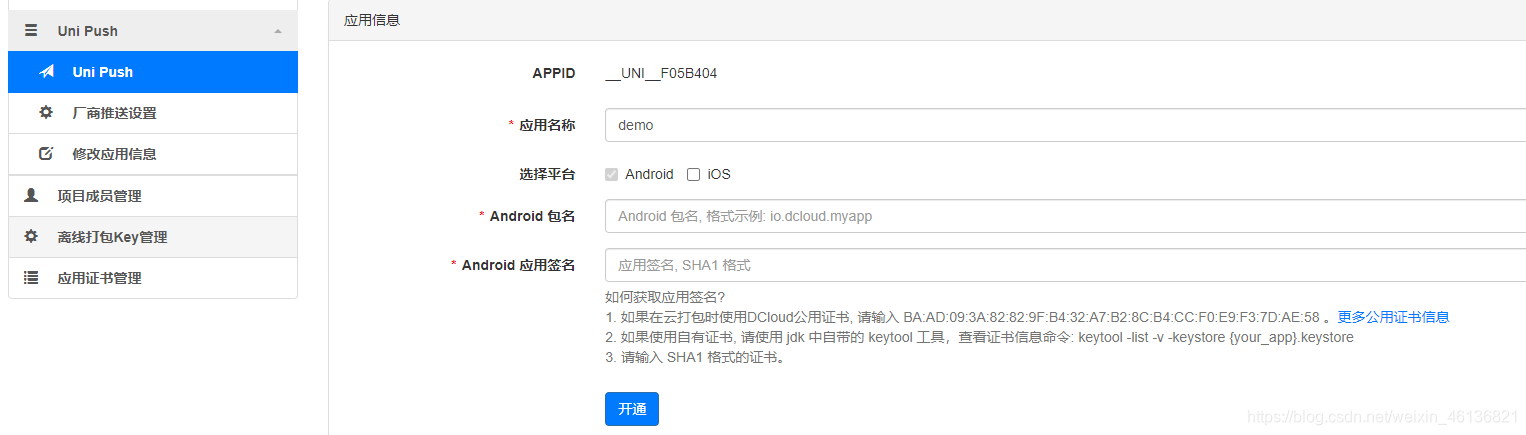
应用名称就是你的项目名称Android 包名你打开HBuilder x中在当前项目中点击发行 > 原生APP-云打包,找到Android 包名粘过来Android 应用签名这个就是自有证书里SHA1的值,粘过来就行
- 什么是自有证书? 我来告诉你!!!
- 有了自有证书怎么查看签名?
keytool -list -v -keystore demoKey.keystore(需要在证书当前目录下cmd键入)
成功开通Uni Push点击创建推送,通过这个页面,你就可以填上通知标题,通知内容,进行预览了,前提是你需要把这个项目云打包然后安装在终端上
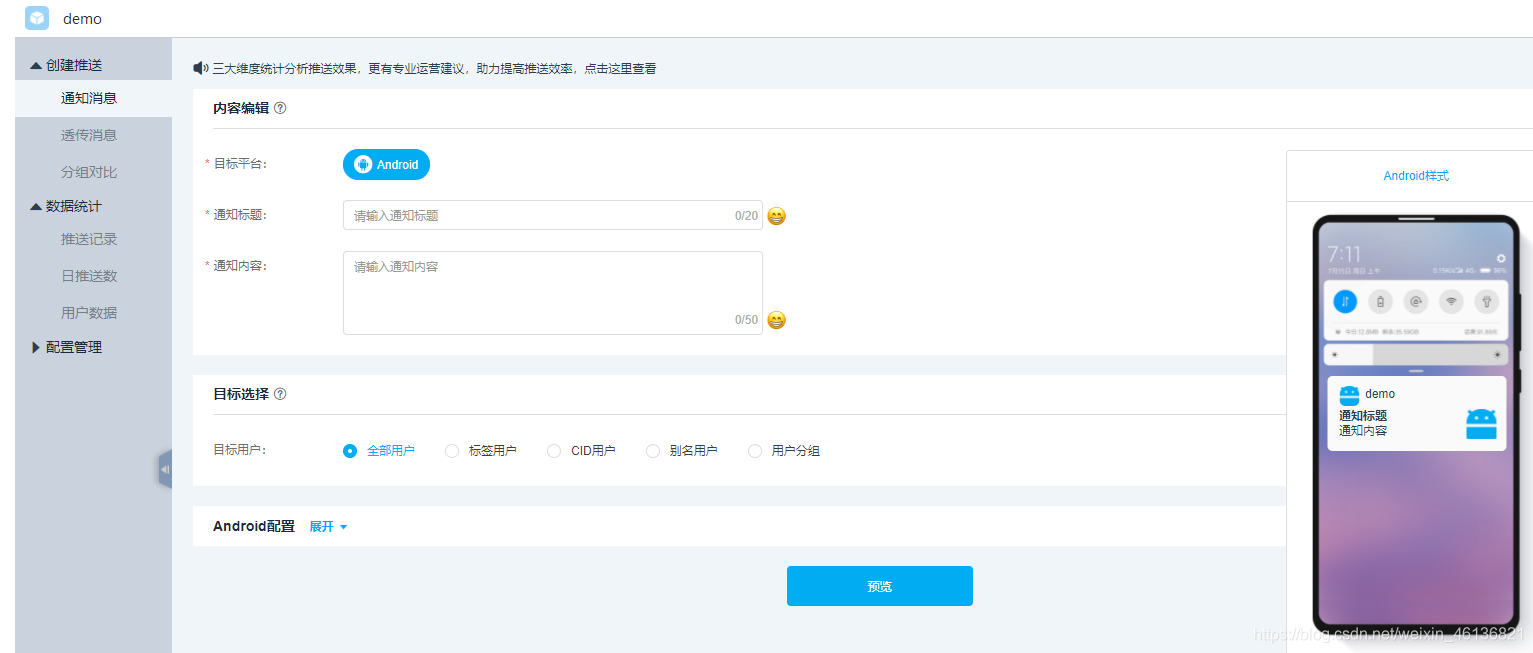
如果预览没问题,你的设备可以接受到你发的测试通知,那么就可以对接个推了,因为我们服务端使用的c#开发,个推官网显示c#的sdk已经不维护了,所以选择使用RestAPI V2
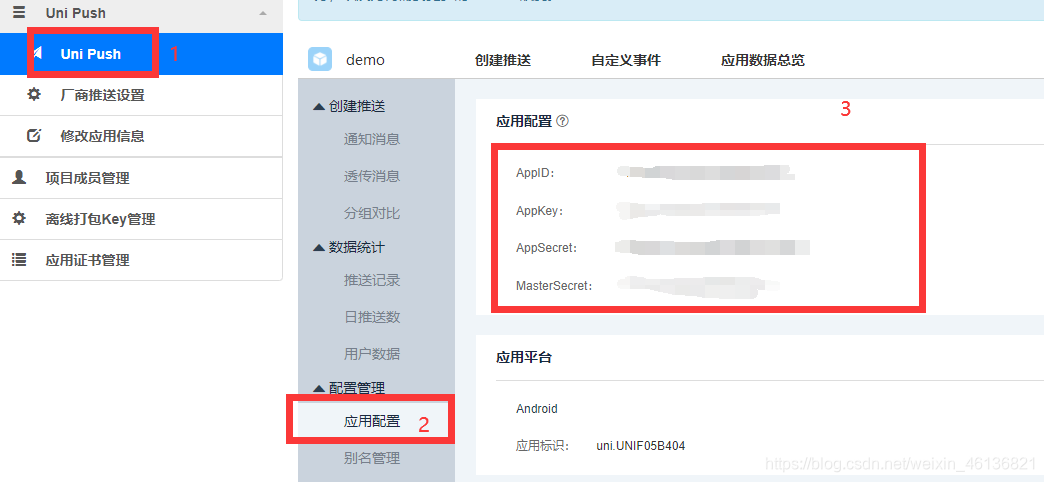
AppID,AppKey,MasterSecret会在下面RestAPI V2中使用到
RestAPI V2
下面的接口都是通过
postman测试
1. 鉴权 ,获取token
token是个推开放平台全局唯一接口调用凭据,访问所有接口都需要此凭据
// 其中$appId为用户创建应用时生成的应用唯一标识(AppId)
https://restapi.getui.com/v2/$appId/auth
参数
{
	"sign": "xxxxxxxx", // 将appkey+timestamp+mastersecret使用sha256加密后的值作为sign的值
	"timestamp": "1627874948175",   // 当前毫秒时间戳
	"appkey": "xxxxxxxx" // 创建应用时生成的AppKey
}
返回值
{
    "msg": "success",
    "code": 0,
    "data": {
        "expire_time": "1627961885803",   // token失效时间
        "token": "xxxxxxxxxxxx"  // token必须放在header参数中传递
    }
}
2. 创建消息 ,获取taskid
此接口用来创建消息体,并返回
taskid,为批量推的前置步骤
https://restapi.getui.com/v2/$appId/push/list/message
参数
{
    "request_id":"10000000000",   // 非必填,请求唯一标识号,10-32位之间;如果request_id重复,会导致消息丢失
    "group_name":"请填写任务组名", // 非必填 ,任务组名
    "settings":{                // 非必填,推送条件设置
        "ttl":3600000         // 	消息离线时间设置,单位毫秒,-1表示不设离线,-1 ~ 3 * 24 * 3600 * 1000(3天)之间
    },
    "push_message":{                // 个推推送消息参数
        "notification":{
            "title":"请填写通知标题",
            "body":"请填写通知内容",
            "click_type":"url",
            "url":"https//:xxx"
        }
    }
}
返回值
{
    "msg": "success",
    "code": 0,
    "data": {
        "taskid": "xxxxxx"
    }
}
3. 按cid批量推
对列表中所有
cid进行消息推送
cid?
个推使用
clientid来标识每个独立的用户,每一台终端上每一个app拥有一个独立的clientid。
通过cid推送必须得app通过云打包后的apk安装后打开App才能成功
手机的cid会受到app的安装卸载改变
plus.push.getClientInfoAsync((info) => {
	console.log(info.clientid)
});
https://restapi.getui.com/v2/$appId/push/list/cid
参数
{
    "audience": {   // 推送目标用户
        "cid": [    // cid数组,数组长度不大于1000
            "xxxxxxx"
        ]
    },
    "taskid": "xxxxxxx",  // 上个接口返回的taskid
    "is_async": true    // 是否异步推送
}
返回值
{
    "msg": "success",
    "code": 0,
    "data": {}
}
到这一步, 你的设备应该收到了来自你发出的通知了