����ѧϰflutter����Ӧ�ö�Ҫ���� Flutter�������İ�
�����������ݾ��������еIJ����¼һ���Լ�ͼ�������������Լ����������
���û���
- ��̻���:
- ����:Android Studio
- ����ϵͳ: Windows 10 64λ
- Git for Windows (Git�������)
- VPN
- ����ϵͳ��������
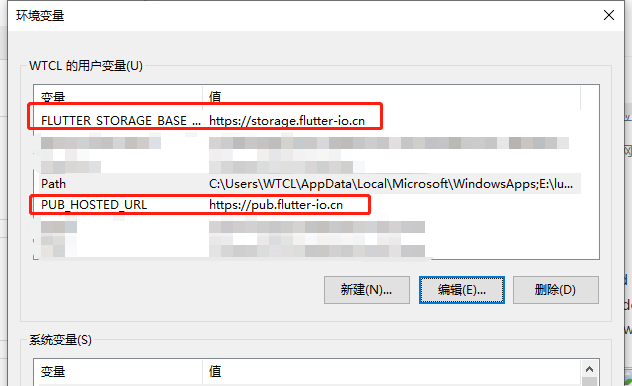
PUB_HOSTED_URL=https://pub.flutter-io.cn
FLUTTER_STORAGE_BASE_URL=https://storage.flutter-io.cn
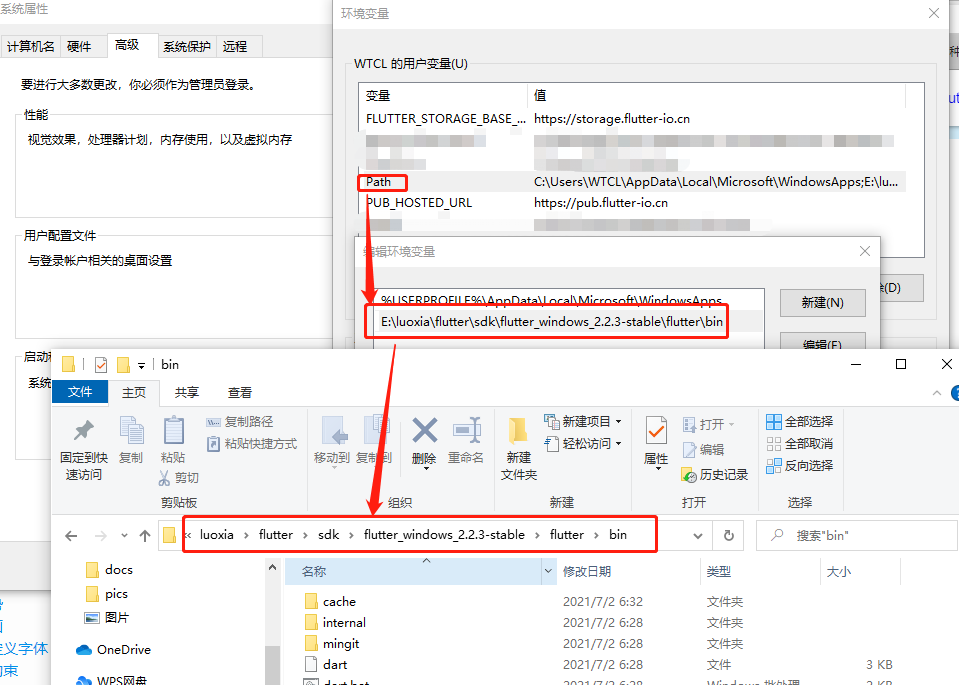
- ���� ����Flutter SDK ,��ѹ
- �Ļ�������Path,�Ӱ�װfluttersdk��binĿ¼
- ����Windows
- ��ѹ���ҵ�flutter�ļ����е�flutter_console.bat��˫��
- ��cmd ,���� flutter doctor �����Լ����������Ƿ�װ(���ʱ����ܳ����ȽϾ�,�����Ҫ��������)
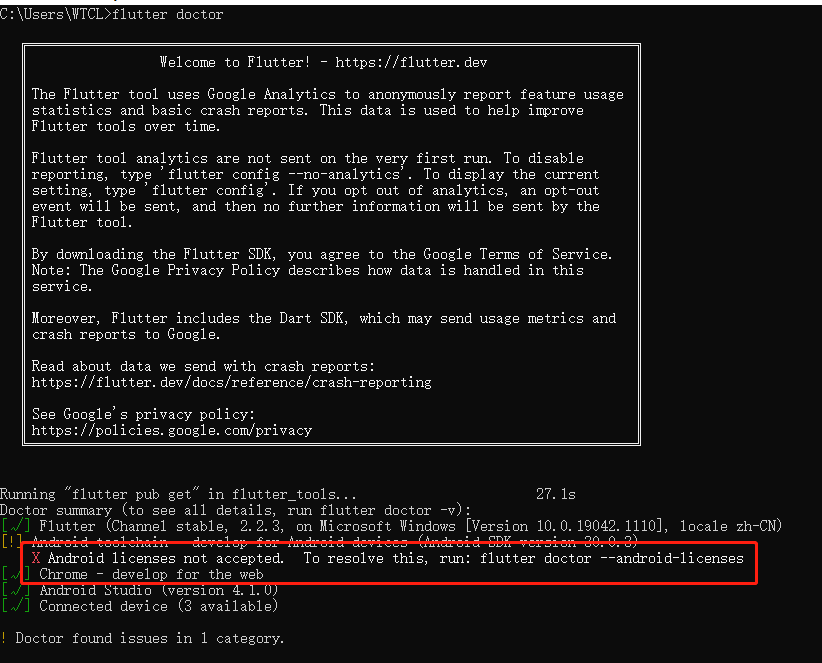
��ʾδ����AndroidЭ��,������ʾ������һ· y ���ռ��ɡ�
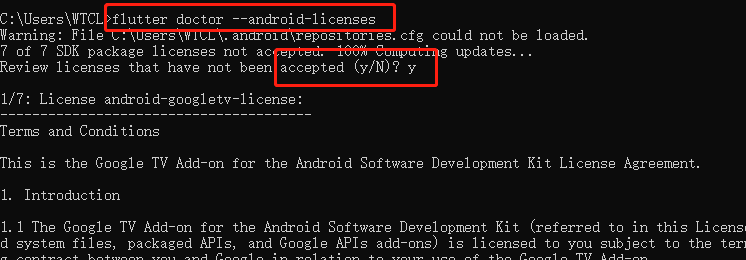
- ����Э�鶼���ܺ��ٴ����� flutter doctor ,��flutter ҽ��������һ���Ƿ�װ��
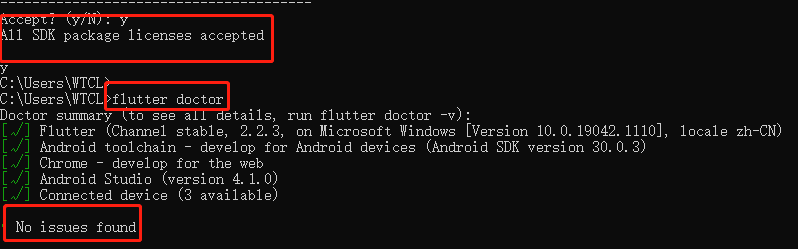
������ȫ�̵�������װok�ˡ�
��װ���
- ��as��,File-Settings-Plugin-����Flutter��Dart��װ����������
д����flutterӦ��
- File-New-New Flutter Project ����һ��flutterӦ��
- ����Ŀǰֻ��Ҫ��д main.dart ����Ĵ��뼴��,pubspec.yaml�ļ��൱��Android��Ŀ��build.gradle�ļ�,���ڼ���һЩ����
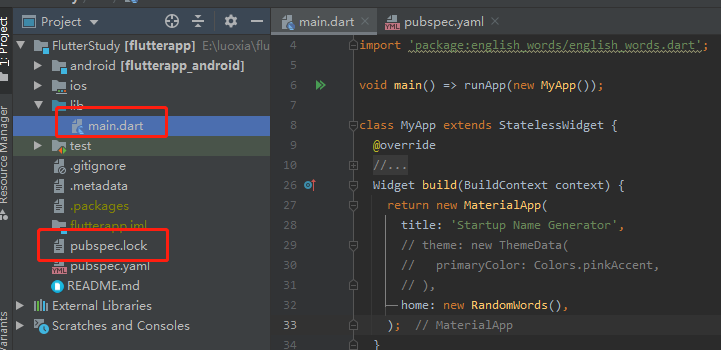
- ���Ǹ����������е����ӱ�дһ����Ӧ��
- main.dart��������
// import 'dart:html';
import 'package:flutter/material.dart';
import 'package:english_words/english_words.dart';
void main() => runApp(new MyApp());
class MyApp extends StatelessWidget {
@override
// Widget build(BuildContext context) {
// final wordPair = new WordPair.random();
// return new MaterialApp(
// title: 'Welcome to Flutter',
// home: new Scaffold(
// appBar: new AppBar(
// title: new Text('Welcome to Flutter'),
// ),
// body: new Center(
// // child: new Text('Hello World'),
// // child: new Text(wordPair.asPascalCase),
// child: new RandomWords(),
// ),
// ),
// );
// }
Widget build(BuildContext context) {
return new MaterialApp(
title: 'Startup Name Generator',
// theme: new ThemeData(
// primaryColor: Colors.pinkAccent,
// ),
home: new RandomWords(),
);
}
}
class RandomWords extends StatefulWidget {
@override
createState() => new RandomWordsState();
}
class RandomWordsState extends State<RandomWords> {
@override
Widget build(BuildContext context) {
// final wordPair = new WordPair.random();
// return new Text(wordPair.asPascalCase);
return new Scaffold(
appBar: new AppBar(
title: new Text('Startup Name Generator'),
actions: <Widget>[
new IconButton(icon: new Icon(Icons.list), onPressed: _pushSaved),
],
),
body: _buildSuggestions(),
);
}
void _pushSaved() {
Navigator.of(context).push(
new MaterialPageRoute(
builder: (context) {
final tiles = _saved.map(
(pair) {
return new ListTile(
title: new Text(
pair.asPascalCase,
style: _biggerFont,
),
);
},
);
final divided = ListTile.divideTiles(
context: context,
tiles: tiles,
).toList();
return new Scaffold(
appBar: new AppBar(
title: new Text('Saved Suggestions'),
),
body: new ListView(children: divided),
);
},
),
);
}
final _suggestions = <WordPair>[];
final _biggerFont = const TextStyle(fontSize: 18.0);
final _saved = new Set<WordPair>();
Widget _buildSuggestions() {
return new ListView.builder(
padding: const EdgeInsets.all(16.0),
// ����ÿ������ĵ��ʶԶ������һ��itemBuilder,Ȼ���ʶ����ӵ�ListTile����
// ��ż����,�ú�����Ϊ���ʶ�����һ��ListTile row.
// ��������,�ú���������һ���ָ���widget,���ָ����ڵĴʶԡ�
// ע��,��С��Ļ��,�ָ��߿��������ܱȽϳ�����
itemBuilder: (context, i) {
// ��ÿһ��֮ǰ,����һ��1���ظߵķָ���widget
if (i.isOdd) return new Divider();
// � "i ~/ 2" ��ʾi����2,������ֵ������(����ȡ��),����iΪ:1, 2, 3, 4, 5
// ʱ,���Ϊ0, 1, 1, 2, 2, ����Լ����ListView�м�ȥ�ָ��ߺ��ʵ�ʵ��ʶ�����
final index = i ~/ 2;
// ����ǽ����б������һ�����ʶ�
if (index >= _suggestions.length) {
// ...����������10�����ʶ�,Ȼ�����ӵ������б�
_suggestions.addAll(generateWordPairs().take(10));
}
return _buildRow(_suggestions[index]);
});
}
Widget _buildRow(WordPair pair) {
final alreadySaved = _saved.contains(pair);
return new ListTile(
title: new Text(
pair.asPascalCase,
style: _biggerFont,
),
trailing: new Icon(
alreadySaved ? Icons.favorite : Icons.favorite_border,
color: alreadySaved ? Colors.red : null,
),
onTap: () {
setState(() {
if (alreadySaved) {
_saved.remove(pair);
} else {
_saved.add(pair);
}
});
},
);
}
}
- pubspec.yaml��������,ע�Ͳ��ֿ��Ժ���
name: flutterapp
description: A new Flutter application.

# The following line prevents the package from being accidentally published to
# pub.dev using `pub publish`. This is preferred for private packages.
publish_to: 'none' # Remove this line if you wish to publish to pub.dev

# The following defines the version and build number for your application.
# A version number is three numbers separated by dots, like 1.2.43
# followed by an optional build number separated by a +.
# Both the version and the builder number may be overridden in flutter
# build by specifying --build-name and --build-number, respectively.
# In Android, build-name is used as versionName while build-number used as versionCode.
# Read more about Android versioning at https://developer.android.com/studio/publish/versioning
# In iOS, build-name is used as CFBundleShortVersionString while build-number used as CFBundleVersion.
# Read more about iOS versioning at
# https://developer.apple.com/library/archive/documentation/General/Reference/InfoPlistKeyReference/Articles/CoreFoundationKeys.html
version: 1.0.0+1

environment:
 sdk: ">=2.12.0 <3.0.0"

dependencies:
 flutter:
   sdk: flutter


 # The following adds the Cupertino Icons font to your application.
 # Use with the CupertinoIcons class for iOS style icons.
 cupertino_icons: ^1.0.2
 english_words: ^3.1.0

dev_dependencies:
 flutter_test:
   sdk: flutter

# For information on the generic Dart part of this file, see the
# following page: https://dart.dev/tools/pub/pubspec

# The following section is specific to Flutter.
flutter:

 # The following line ensures that the Material Icons font is
 # included with your application, so that you can use the icons in
 # the material Icons class.
 uses-material-design: true

 # To add assets to your application, add an assets section, like this:
 # assets:
 #   - images/a_dot_burr.jpeg
 #   - images/a_dot_ham.jpeg

 # An image asset can refer to one or more resolution-specific "variants", see
 # https://flutter.dev/assets-and-images/#resolution-aware.

 # For details regarding adding assets from package dependencies, see
 # https://flutter.dev/assets-and-images/#from-packages

 # To add custom fonts to your application, add a fonts section here,
 # in this "flutter" section. Each entry in this list should have a
 # "family" key with the font family name, and a "fonts" key with a
 # list giving the asset and other descriptors for the font. For
 # example:
 # fonts:
 #   - family: Schyler
 #     fonts:
 #       - asset: fonts/Schyler-Regular.ttf
 #       - asset: fonts/Schyler-Italic.ttf
 #         style: italic
 #   - family: Trajan Pro
 #     fonts:
 #       - asset: fonts/TrajanPro.ttf
 #       - asset: fonts/TrajanPro_Bold.ttf
 #         weight: 700
 #
 # For details regarding fonts from package dependencies,
 # see https://flutter.dev/custom-fonts/#from-packages
- ��,Ȼ��������,�Ϳ��Եõ�һ�����������б�,�����ղغ�ȡ���ղ�,�Լ��ղ��б��Ĺ�����,��������
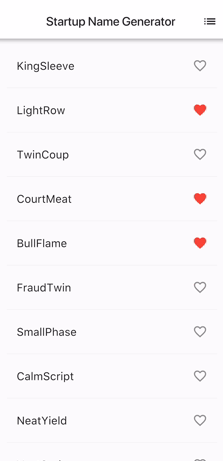
���ò���̾,��flutterдӦ���Dz��Ƕ�����ui��?��icon ��flutter����м���,��һ����Լ��Զ��塭
������������һЩ����
1��������ʾ:Error: Not found: 'dart:html��
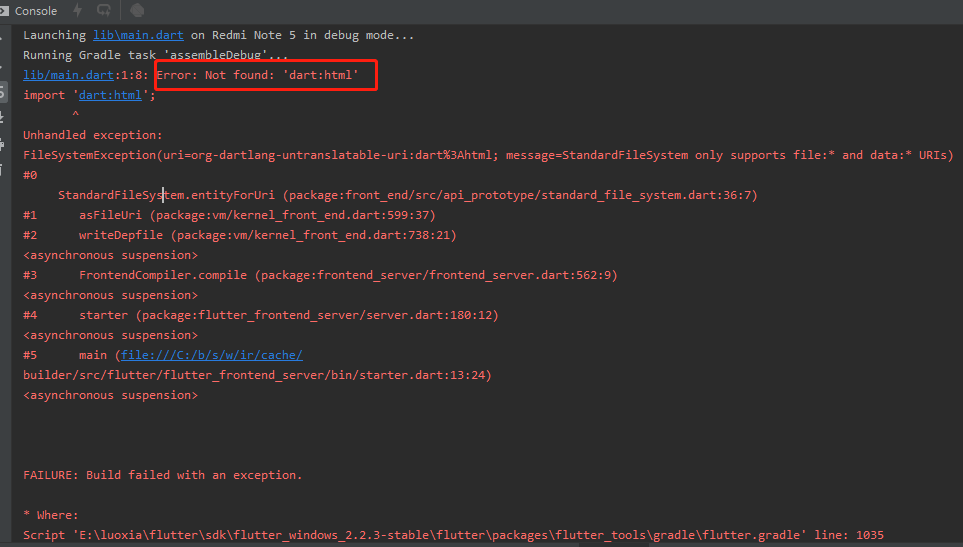
д�����������dart.main�в�С�ĵ��������html
����취:ɾ������
2��������ʾ:Error: Cannot run with sound null safety, because the following dependencies
don��t support null safety:
�汾����,�����ֶ��ع��汾����һ���ȥ,Ҳ��������һ��as,������ѡ��������as
- as��Edit Configuration
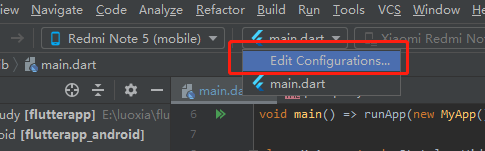
- ��Additional run argsѡ�������� �Cno-sound-null-safety
- ok,��runһ������
3�������������������Ҳ��Ҫ��,��ΪFlutter�������������Ѿ���ÿһ����ɺ�Ĵ������Ӹ���������,�����ſ������ҵ������������ﲻ�ò�Ϊ���������ߵ�һ��������~~