一直觉得自己写的不是技术,而是情怀,一个个的教程是自己这一路走来的痕迹。靠专业技能的成功是最具可复制性的,希望我的这条路能让你们少走弯路,希望我能帮你们抹去知识的蒙尘,希望我能帮你们理清知识的脉络,希望未来技术之巅上有你们也有我。
本文章目标
1.在商品列表顶部上面一个筛选框。
第一步:封装筛选导航
//筛选导航
Widget _subHeaderWidget() {
  return Positioned(
    top: 0,
    height: ScreenAdaper.height(80),
    width: ScreenAdaper.width(750),
    child: Container(
      width: ScreenAdaper.width(750),
      height: ScreenAdaper.height(80),
      // color: Colors.red,
      decoration: BoxDecoration(
          border: Border(
              bottom: BorderSide(
                  width: 1, color: Color.fromRGBO(233, 233, 233, 0.9)))),
      child: Row(
        children: <Widget>[
          Expanded(
            flex: 1,
            child: InkWell(
              child: Padding(
                padding: EdgeInsets.fromLTRB(
                    0, ScreenAdaper.height(16), 0, ScreenAdaper.height(16)),
                child: Text(
                  "综合",
                  textAlign: TextAlign.center,
                  style: TextStyle(color: Colors.red),
                ),
              ),
              onTap: () {},
            ),
          ),
          Expanded(
            flex: 1,
            child: InkWell(
              child: Padding(
                padding: EdgeInsets.fromLTRB(
                    0, ScreenAdaper.height(16), 0, ScreenAdaper.height(16)),
                child: Text("销量", textAlign: TextAlign.center),
              ),
              onTap: () {},
            ),
          ),
          Expanded(
            flex: 1,
            child: InkWell(
              child: Padding(
                padding: EdgeInsets.fromLTRB(
                    0, ScreenAdaper.height(16), 0, ScreenAdaper.height(16)),
                child: Text("价格", textAlign: TextAlign.center),
              ),
              onTap: () {},
            ),
          ),
          Expanded(
            flex: 1,
            child: InkWell(
              child: Padding(
                padding: EdgeInsets.fromLTRB(
                    0, ScreenAdaper.height(16), 0, ScreenAdaper.height(16)),
                child: Text("筛选", textAlign: TextAlign.center),
              ),
              onTap: () {
                _scaffoldKey.currentState.openEndDrawer();
              },
            ),
          ),
        ],
      ),
    ),
  );
}
第二步:主程序进行调用


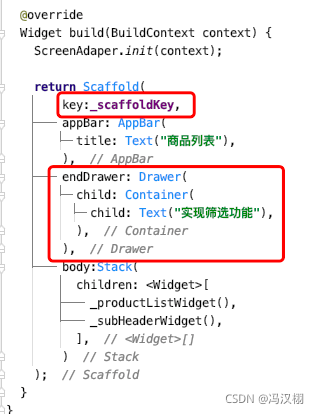
//主程序代码
@override
Widget build(BuildContext context) {
  ScreenAdaper.init(context);

  return Scaffold(
      key:_scaffoldKey,
      appBar: AppBar(
        title: Text("商品列表"),
      ),
      endDrawer: Drawer(
        child: Container(
          child: Text("实现筛选功能"),
        ),
      ),
      body:Stack(
        children: <Widget>[
          _productListWidget(),
          _subHeaderWidget(),
        ],
      )
  );
}
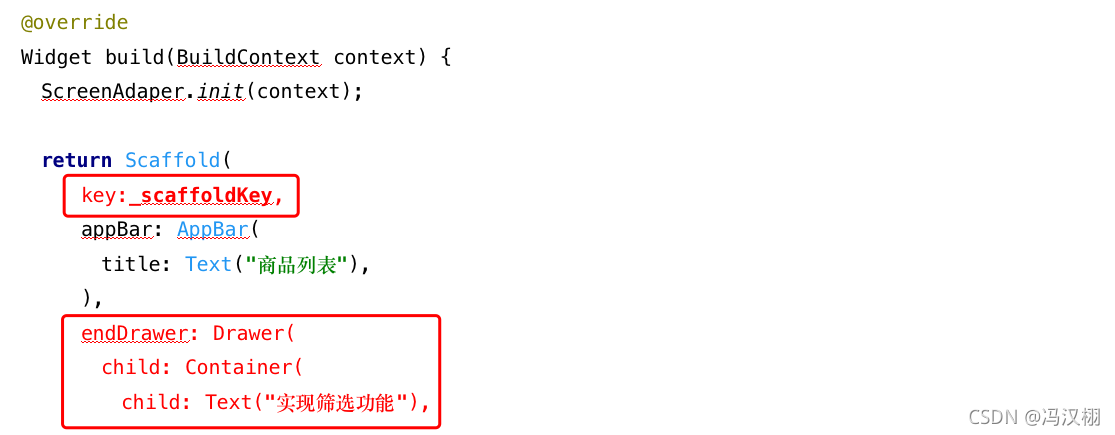
添加下面的代码
最后写调出侧边栏.
利用key相当于ios监听事件调用侧边栏

//写在_ProductListPageState下面  声明
final GlobalKey<ScaffoldState> _scaffoldKey = new GlobalKey<ScaffoldState>();

//写在筛选按键里面
_scaffoldKey.currentState.openEndDrawer();

//写在Scaffold下面注册key
key:_scaffoldKey,


//编写侧边栏控件 写在Scaffold下面
endDrawer: Drawer(
  child: Container(
    child: Text("实现筛选功能"),
  ),
),