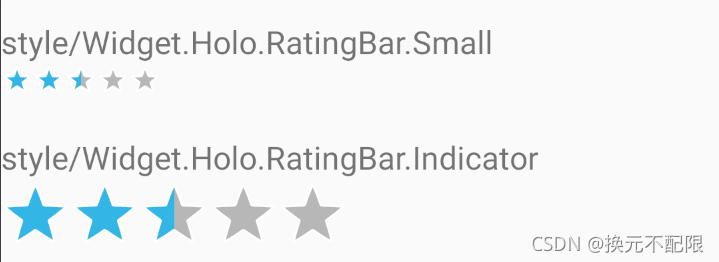
在京东等购物APP上最常见的一个功能就是用户评价:

Android自带就有评分星级条控件RatingBar(见下图),使用很简单,但同样支持的功能也有限。在这个拼颜值的时代,自带的RatingBar控件往往不能满足项目需求,比如不支持更换其他图形,不支持星星间距大小调整等。今天就简单实现一个可以满足这些基本需求的控件。

1.自定义RatingView
public class RatingView extends FrameLayout {
 public RankingView(Context context) {
        this(context, null);
    }

    public RankingView(Context context, AttributeSet attrs) {
        this(context, attrs, 0);
    }

    public RankingView(Context context, AttributeSet attrs, int defStyleAttr) {
        super(context, attrs, defStyleAttr);

    }
}
RatingView继承自FrameLayout,重写构造方法。
2.定义RatingView支持的属性attrs
一个可以通用的自定义View,肯定要定义view的属性。RatingView在Android系统自带RatingBar属性基础上新增加(重命名)了几个属性:
- starCount:类比numStars,定义显示多少个rating item。
- foregroundSrc:定义前景图
- backgroundSrc:定义后景图
- horizontalSpace:定义rating item间距
    <!--    自定义RatingView属性-->
    <declare-styleable name="RankingStar">
        <attr name="starCount" format="integer" />
        <attr name="foregroundSrc" format="reference" />
        <attr name="backgroundSrc" format="reference" />
        <attr name="horizontalSpace" format="dimension" />
        <attr name="stepSize" format="float" />
        <attr name="rating" format="float" />
    </declare-styleable>
代码中获取自定义属性值如下:
        TypedArray ta = context.obtainStyledAttributes(attrs, R.styleable.RankingStar);
        count = ta.getInteger(R.styleable.RankingStar_starCount, DEFAULT_COUNT);
        horizontalSpace = ta.getDimension(R.styleable.RankingStar_horizontalSpace, DEFAULT_HORIZONTAL_SPACE);
        foreground = ta.getDrawable(R.styleable.RankingStar_foregroundSrc);
        background = ta.getDrawable(R.styleable.RankingStar_backgroundSrc);
        stepSize = ta.getFloat(R.styleable.RankingStar_stepSize, DEFAULT_STEP_SIZE);
        rating = ta.getFloat(R.styleable.RankingStar_rating, DEFAULT_RATING);
        ta.recycle();
3.将图形添加到容器中
RatingView采用的思路是:将ImageView遍历添加到LinearLayout容器内,然后再将LinearLayout容器add到继承的FrameLayout内。由于FrameLayout布局具有的属性,前景图的container和后景图的container可以覆盖起来,从而到达评分UI效果。核心的代码如下:
        LinearLayout linearLayout = new LinearLayout(context);
        linearLayout.setOrientation(LinearLayout.HORIZONTAL);
        for (int j = 0; j < count; j++) {
            ImageView backView = new ImageView(context);
            backView.setBackground(background);
            linearLayout.addView(backView);
            setSpace(context, linearLayout);
        }
        this.addView(linearLayout);
4.设置星星间距
设置星星间距的方案有很多,我这里采用的其实还是addView方式:创建一个View,将view的宽设置为属性horizontalSpace,然后setLayoutParams即可(注意背景设置为透明)。
    private void setSpace(Context context, LinearLayout linearLayout) {
        View spaceView = new View(context);
        spaceView.setLayoutParams(new LinearLayout.LayoutParams((int) horizontalSpace, (int) verticalSpace));
        spaceView.setBackgroundColor(Color.TRANSPARENT);
        linearLayout.addView(spaceView);
    }
5.显示半颗星
一般的UI设计中,一颗星占2分(满分10分),这样总星星数就是5颗。但设计同事一般不会给你专门切一张半星图,要是可以这样做,那星星间距也可以直接作图来解决了…那如何解决?可以考虑使用ClipDrawable。ClipDrawable支持设置比例来在旧图上裁出新图(比例0-10000,level=10000时代表截取整张图)。有了思路剩下就是代码实现跟验证了。
        ClipDrawable drawable = new ClipDrawable(foreground, Gravity.START, ClipDrawable.HORIZONTAL);
        drawable.setLevel(5000);
        ImageView imageView = new ImageView(context);
        imageView.setBackground(drawable);
        mLinearLayout2.addView(imageView);
6.最后的效果
