Android常用组件的使用
组件常用控制方法
单击事件
a.setOnClickListener(new View.OnClickListener() {
            @Override
            public void onClick(View v) {
            }
        });
获取组件的值
a.getText()
设置组件的值
a.setText()
获取组件的ID
a.getId()
取消选中
a.setChecked(false)
清空选则
a.clearCheck()
TextView文本控件
常用属性
◆ andorid:height 设置文本的高度
◆ android:width 设置文本的宽度
◆ andorid:text 设置文本的内容
◆ android:textColor 设置文本的颜色
◆ android:textSize 设置文本的字体大小(sp)
◆ android:singleLine 设置文本是否是单行显示。
◆ android:gravity 设置文本框内文本的对齐方式。
????????可选项有:top、bottom、left、right、center、fill、center_vertical、center_horizontal、fill_horizontal等等。
????????这些属性值也可以同时指定,各属性值之间用竖线隔开。例如right|bottom
◆ android:drawableLeft 用于在文本框左侧绘制图片。该属性值通过“@drawable/图片文件名”来设置。
◆ android:drawableRight 用于在文本框左侧绘制图片。该属性值通过“@drawable/图片文件名”来设置。
◆ android:drawableTop 用于在文本框上侧绘制图片。该属性值通过“@drawable/图片文件名”来设置。
◆ android:drawableBottom 用于在文本框下侧绘制图片。该属性值通过“@drawable/图片文件名”来设置。
◆ android:autoLink 给指定的文本增加可单击的超链接。可选项为:none、web、email、phone、map和all。
????????android:autoLink=“web”-设置自动识别链接,值web为匹配Web网址
????????android:autoLink=“phone”-设置自动识别链接,值phone为匹配电话号码
????????android:autoLink=“all”-设置自动识别链接,值all为匹配所有
◆ android:hint 设置当文本框内文本内容为空时,默认显示的提示性文字。
作用
用于显示
Button按钮控件
java.lang.Object
?android.view.View
?android.widget.TextView
?android.widget.Button
Button继承了TextView的所有属性
OnClickListener事件监听器
Android提供了非常良好的UI事件处理机制。View是绘制UI的类,每个View对象都可以向Android注册一个事件监听器。每个事件监听器都包含一个回调方法(callback method),这个回调方法(callback method)主要的工作就是回应或处理用户的操作。
Button实现监听的四种方式
一、内部类:
二、匿名内部类:
以上两种方式本质都是实现了OnClickListener接口
示例 按钮一、二内部类方式监听 按钮三匿名内部类监听
布局
<?xml version="1.0" encoding="utf-8"?>
<LinearLayout xmlns:android="http://schemas.android.com/apk/res/android"
    xmlns:app="http://schemas.android.com/apk/res-auto"
    xmlns:tools="http://schemas.android.com/tools"
    android:layout_width="match_parent"
    android:layout_height="match_parent"
    tools:context=".MainActivity"
    android:orientation="vertical">

    <Button
        android:id="@+id/btnOne"
        android:layout_width="wrap_content"
        android:layout_height="wrap_content"
        android:text="按钮一"
        />
    <Button
        android:id="@+id/btnTwo"
        android:layout_width="wrap_content"
        android:layout_height="wrap_content"
        android:text="按钮二"
        />
    <Button
        android:id="@+id/btnThree"
        android:layout_width="wrap_content"
        android:layout_height="wrap_content"
        android:text="按钮三"
        />
    <Button
        android:id="@+id/btnFour"
        android:layout_width="wrap_content"
        android:layout_height="wrap_content"
        android:onClick="myButtonClick"
        android:text="按钮四"
        />
    <Button
        android:id="@+id/btnFive"
        android:layout_width="wrap_content"
        android:layout_height="wrap_content"
        android:text="按钮五"
        />

</LinearLayout>
代码
import androidx.appcompat.app.AppCompatActivity;

import android.os.Bundle;
import android.view.View;
import android.widget.Button;
import android.widget.Toast;

import static android.view.View.*;

public class MainActivity extends AppCompatActivity {


    private  Button btnOne,btnTwo,btnThree,btnFour,btnFive;

    @Override
    protected void onCreate(Bundle savedInstanceState) {
        super.onCreate(savedInstanceState);
        setContentView(R.layout.activity_main);


        //快速接收 ctrl+alt+v
        btnOne  =findViewById(R.id.btnOne);
        btnTwo  =findViewById(R.id.btnTwo);
        btnThree=findViewById(R.id.btnThree);
        btnFour =findViewById(R.id.btnFour);
        btnFive = findViewById(R.id.btnFive);

        //匿名内部类
        btnThree.setOnClickListener(new OnClickListener() {
        @Override
             public void onClick(View v) {
                 Toast.makeText(MainActivity.this,"点击了按钮三"+btnThree.getId(),Toast.LENGTH_LONG).show();
             }
         });


        //内部类实现
        //实例化监听对象
        MyListener myListener = new MyListener();
        btnOne.setOnClickListener(myListener);
        btnTwo.setOnClickListener(myListener);

    }


    //内部类实现
    class MyListener implements OnClickListener{
        @Override
        public void onClick(View v) {
            switch (v.getId()){
                case R.id.btnOne:
                    btnOne.setText("新的按钮二");
                    break;
                case R.id.btnTwo:
                    Toast.makeText(MainActivity.this,"点击了"+btnTwo.getText().toString(),Toast.LENGTH_LONG).show();
                    btnTwo.setText("新的按钮一");
                    break;
                default:
                    break;
            }
        }
    }

}
效果

三、属性:
android:onClick="myButtonClick"属性可以实现特点方法的监听
注意:
?? 值即方法名
?? 方法的修饰符必须是public
?? 返回值是void类型
?? 只有一个参数View
?? setOnClickLinstener的优先级比xml中android:onClick高
?? 对应页面代码必须有此方法
示例
布局同上 第四个按钮实现
package com.qingsu.yingguday02;

import androidx.appcompat.app.AppCompatActivity;

import android.os.Bundle;
import android.view.View;
import android.widget.Button;
import android.widget.Toast;

import static android.view.View.*;

public class MainActivity extends AppCompatActivity {


    private  Button btnOne,btnTwo,btnThree,btnFour,btnFive;

    @Override
    protected void onCreate(Bundle savedInstanceState) {
        super.onCreate(savedInstanceState);
        setContentView(R.layout.activity_main);


        //快速接收 ctrl+alt+v
        btnOne  =findViewById(R.id.btnOne);
        btnTwo  =findViewById(R.id.btnTwo);
        btnThree=findViewById(R.id.btnThree);
        btnFour =findViewById(R.id.btnFour);
        btnFive = findViewById(R.id.btnFive);

        //匿名内部类
        btnThree.setOnClickListener(new OnClickListener() {
        @Override
             public void onClick(View v) {
                 Toast.makeText(MainActivity.this,"点击了按钮三"+btnThree.getId(),Toast.LENGTH_LONG).show();
             }
         });


        //内部类实现
        //实例化监听对象
        MyListener myListener = new MyListener();
        btnOne.setOnClickListener(myListener);
        btnTwo.setOnClickListener(myListener);

    }


    //内部类实现
    class MyListener implements OnClickListener{
        @Override
        public void onClick(View v) {
            switch (v.getId()){
                case R.id.btnOne:
                    btnOne.setText("新的按钮二");
                    break;
                case R.id.btnTwo:
                    Toast.makeText(MainActivity.this,"点击了"+btnTwo.getText().toString(),Toast.LENGTH_LONG).show();
                    btnTwo.setText("新的按钮一");
                    break;
                default:
                    break;
            }
        }
    }

    //属性实现
    public void myButtonClick(View view){
        //单击按钮三即走此代码
        Toast.makeText(MainActivity.this,"点击了按钮四",Toast.LENGTH_LONG).show();
    }


}
效果

四、让Activity实现监听方法
即页面类实现View.OnClickListener接口重写onClick方法
示例
实现接口
public class MainActivity extends AppCompatActivity implements View.OnClickListener
重写方法
    @Override
    public void onClick(View v) {
        Toast.makeText(MainActivity.this,"点击了按钮五",Toast.LENGTH_LONG).show();
    }
设置监听
//让Activity实现监听方法
        btnFive.setOnClickListener(MainActivity.this);
package com.qingsu.yingguday02;

import androidx.appcompat.app.AppCompatActivity;

import android.os.Bundle;
import android.view.View;
import android.widget.Button;
import android.widget.Toast;

import static android.view.View.*;

public class MainActivity extends AppCompatActivity implements View.OnClickListener{


    private  Button btnOne,btnTwo,btnThree,btnFour,btnFive;

    @Override
    protected void onCreate(Bundle savedInstanceState) {
        super.onCreate(savedInstanceState);
        setContentView(R.layout.activity_main);


        //快速接收 ctrl+alt+v
        btnOne  =findViewById(R.id.btnOne);
        btnTwo  =findViewById(R.id.btnTwo);
        btnThree=findViewById(R.id.btnThree);
        btnFour =findViewById(R.id.btnFour);
        btnFive = findViewById(R.id.btnFive);

        //匿名内部类
        btnThree.setOnClickListener(new OnClickListener() {
        @Override
             public void onClick(View v) {
                 Toast.makeText(MainActivity.this,"点击了按钮三"+btnThree.getId(),Toast.LENGTH_LONG).show();
             }
         });


        //内部类实现
        //实例化监听对象
        MyListener myListener = new MyListener();
        btnOne.setOnClickListener(myListener);
        btnTwo.setOnClickListener(myListener);

        //让Activity实现监听方法
        btnFive.setOnClickListener(MainActivity.this);

    }


    //内部类实现
    class MyListener implements OnClickListener{
        @Override
        public void onClick(View v) {
            switch (v.getId()){
                case R.id.btnOne:
                    btnOne.setText("新的按钮二");
                    break;
                case R.id.btnTwo:
                    Toast.makeText(MainActivity.this,"点击了"+btnTwo.getText().toString(),Toast.LENGTH_LONG).show();
                    btnTwo.setText("新的按钮一");
                    break;
                default:
                    break;
            }
        }
    }

    //属性实现
    public void myButtonClick(View view){
        //单击按钮三即走此代码
        Toast.makeText(MainActivity.this,"点击了按钮四",Toast.LENGTH_LONG).show();
    }


    @Override
    public void onClick(View v) {
        Toast.makeText(MainActivity.this,"点击了按钮五",Toast.LENGTH_LONG).show();
    }


}
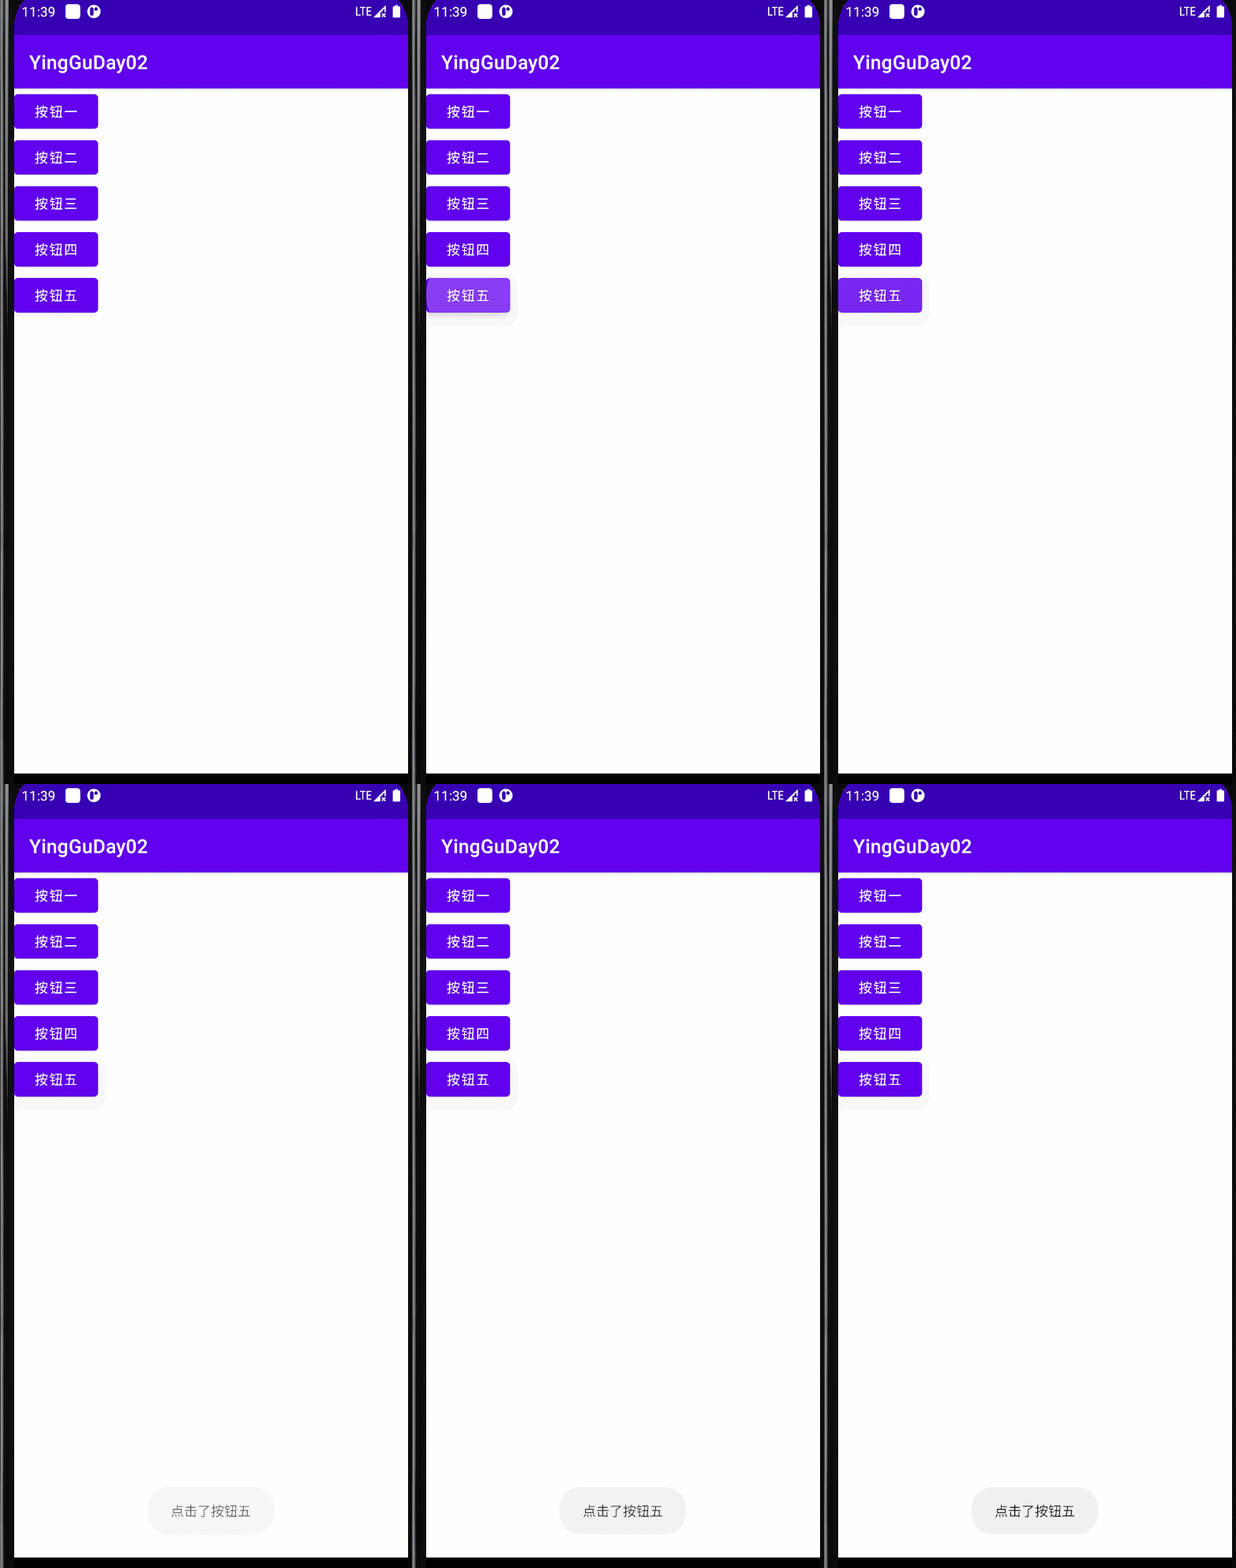
效果
EditText编辑文本控件
编辑框(EditText)是TextView 的子类,在TextView 的基础上增加了文本编辑功能,用于处理用户输入,例如登录框等,是非常常用的组件。
常用属性:
android:hint=“请输入用户名” 设置文本框的提示信息
android:maxLength=“10” 设置输入的最大字符长度
android:inputType=“textPassword” 密码
android:editable=“false” 设置EditText不可编辑 与inputType不能同时使用 替换成:android:enabled=“false”
inputType属性使用
android:inputType=“text”//文本类型,多为大写、小写和数字符号。
android:inputType=“textPassword” //密码
android:inputType=“numberPassword” //数字密码
android:inputType=“textEmailAddress” //电子邮件地址
android:inputType=“phone” //拨号键盘
android:inputType=“time” //时间键盘
android:inputType=“date” //日期键盘
android:inputType=“number” //数字格式
addTextChangedListener()方法监听用户输入状态
示例
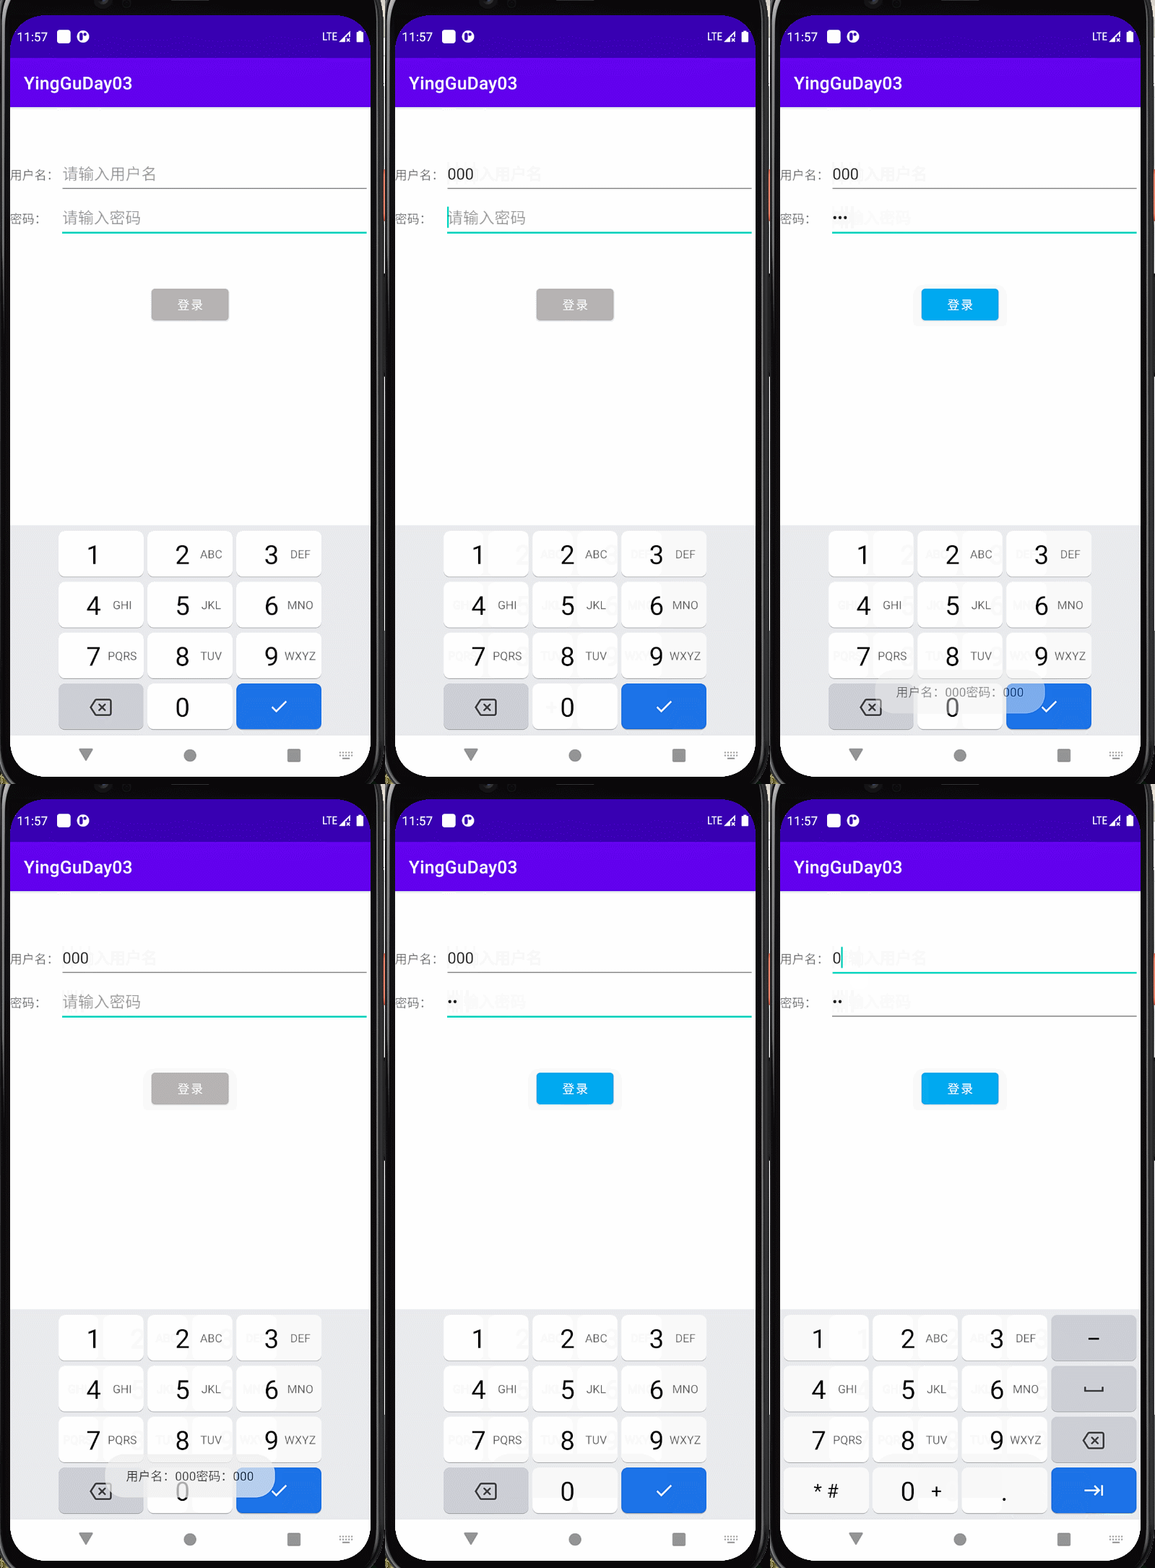
登录界面 用户名和密码都有值时颜色由灰色变成蓝色
布局
<?xml version="1.0" encoding="utf-8"?>
<LinearLayout
    xmlns:android="http://schemas.android.com/apk/res/android"
    android:layout_width="match_parent"
    android:layout_height="match_parent"
    android:orientation="vertical"
    >

    <LinearLayout
        android:layout_width="match_parent"
        android:layout_height="wrap_content"
        android:orientation="horizontal"
        android:layout_marginTop="51dp"
        >

        <TextView
            android:layout_width="wrap_content"
            android:layout_height="wrap_content"
            android:text="用户名:"
            />

        <EditText
            android:id="@+id/etUserName"
            android:layout_width="match_parent"
            android:layout_height="50dp"
            android:text=""
            android:inputType="phone"
            android:hint="请输入用户名"
            android:maxLength="11"
            />
    </LinearLayout>

    <LinearLayout
        android:layout_width="match_parent"
        android:layout_height="wrap_content"
        android:orientation="horizontal"
        >

        <TextView
            android:layout_width="wrap_content"
            android:layout_height="wrap_content"
            android:text="密码:    "
            />

        <EditText
            android:id="@+id/etPassword"
            android:layout_width="match_parent"
            android:layout_height="50dp"
            android:text=""
            android:inputType="numberPassword"
            android:hint="请输入密码"
            />
    </LinearLayout>
    <LinearLayout
        android:layout_width="match_parent"
        android:layout_height="wrap_content"
        android:layout_marginTop="50dp"
        android:gravity="center"
        >
        <Button
            android:id="@+id/btnLongin"
            android:layout_width="wrap_content"
            android:layout_height="wrap_content"
            android:backgroundTint="#D1D7DC"
            android:text="登录"
            />
    </LinearLayout>
</LinearLayout>
代码
import androidx.appcompat.app.AppCompatActivity;
import androidx.core.content.ContextCompat;

import android.os.Bundle;
import android.text.Editable;
import android.text.TextWatcher;
import android.view.View;
import android.widget.Button;
import android.widget.EditText;
import android.widget.Toast;

public class MainActivity extends AppCompatActivity {


    Button mbtnLogin;
    EditText metUserName, metPassword;
    Boolean flagNmae=false;
    Boolean flagPsd=false;
    @Override
    protected void onCreate(Bundle savedInstanceState) {
        super.onCreate(savedInstanceState);
        setContentView(R.layout.activity_edit);

        metUserName = findViewById(R.id.etUserName);
        metPassword = findViewById(R.id.etPassword);
        mbtnLogin = findViewById(R.id.btnLongin);


        //监听事件
        metUserName.addTextChangedListener(new TextWatcher() {
            @Override
            public void beforeTextChanged(CharSequence s, int start, int count, int after) {

            }

            //实时监听
            @Override
            public void onTextChanged(CharSequence s, int start, int before, int count) {
                if(s.length()!=0){
                    flagNmae = true;
                }else {
                    flagNmae = false;
                }
                if(flagNmae&&flagPsd){
                    mbtnLogin.setBackgroundColor(ContextCompat.getColor(MainActivity.this,R.color.blue));
                }else{
                    mbtnLogin.setBackgroundColor(ContextCompat.getColor(MainActivity.this,R.color.grey));
                }

            }

            @Override
            public void afterTextChanged(Editable s) {

            }
        });

        metPassword.addTextChangedListener(new TextWatcher() {
            @Override
            public void beforeTextChanged(CharSequence s, int start, int count, int after) {

            }

            @Override
            public void onTextChanged(CharSequence s, int start, int before, int count) {
                 if(s.length()!=0){
                     flagPsd = true;
                 }else {
                     flagPsd = false;
                 }

                if(flagNmae&&flagPsd){
                    mbtnLogin.setBackgroundColor(ContextCompat.getColor(MainActivity.this,R.color.blue));
                }else {
                    mbtnLogin.setBackgroundColor(ContextCompat.getColor(MainActivity.this,R.color.grey));
                }

            }

            @Override
            public void afterTextChanged(Editable s) {

            }
        });

        mbtnLogin.setOnClickListener(new View.OnClickListener() {
            @Override
            public void onClick(View v) {
                Toast.makeText(MainActivity.this, "用户名:" + metUserName.getText().toString() +
                        "密码:" + metPassword.getText().toString(), Toast.LENGTH_SHORT).show();
            }
        });


    }
}
效果
ImageView图像控件
ImageView 继承自View组件,主要功能是用于显示图片,实际上它不仅仅可以用来显示图片,任何Drawable对象都可以使用ImageView来显示。ImageView可以适用于任何布局中,并且Android为其提供了缩放的一些操作。
常用属性
ImageView为我们提供了adjustViewBounds属性,调整ImageView的边界,使得ImageView和图片有一样的长宽比例。
1)设置layout_width和layout_height为wrap_content;(都为固定值时,无效)
2)设置adjustViewBounds为true;
src 和background
src 和background 属性区别
1)background指的是背景,而src指的是内容;可以同时使用;
2)src填入图片时,是按照图片大小直接填充,并不会进行拉伸;而使用background填入图片,则是会根据ImageView给定的宽度来进行拉伸;
3)background是所有view都有的属性,总是缩放到view的大小,不受scaleType影响;而src是ImageView特有属性,它会受到scaleType的影响。
android:scaleType=“centerCrop”最常用的
图片会被等比缩放直到完全填充整个ImageView,并居中显示
android:scaleType="fitCenter"
默认图片会被等比缩放到能够填充控件大小,并居中展示
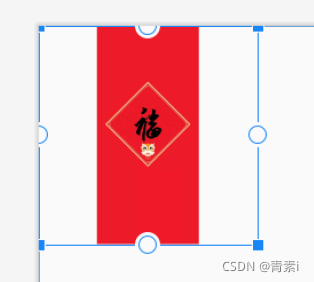
android:scaleType=“fitStart”
图片等比缩放到控件大小,并放置在控件的上边或左边展示,足够高的话,右边留白,足够宽的话,下边留白

android:scaleType=“fitEnd”
图片等比缩放到控件大小,并放置在控件的下边或右边展示,足够高的话,左边留白,足够宽的话,上边留白

android:scaleType=“fitXY”
图片缩放到控件大小,完全填充控件大小展示。注意,此模式不是等比缩放

CheckBox复选控件
CheckBox继承于Button,所以具有普通按钮的各种属性,但是与普通按钮不同的是,CheckBox 提供了可选中的功能。
【备注:】CheckBox有一个父类是CompoundButton,所以在使用监听器的时候要注意跟单选项进行区别。
Checked属性是CheckBox最重要的属性之一。
CheckBox的常用方法
1)ChexkBox继承自CompoundButton组件;
2)isChecked()–确定是否选中;setChecked(bool checked)–设置选中或取消选中;getText();–//获取单选框的值
3)监听事件:CompoundButton.OnCheckedChangeListener
示例
布局
<?xml version="1.0" encoding="utf-8"?>
<LinearLayout
    xmlns:android="http://schemas.android.com/apk/res/android"
    android:layout_width="match_parent"
    android:layout_height="match_parent"
    android:orientation="vertical"
    android:gravity="center_horizontal"
    >

    <CheckBox
        android:id="@+id/chbOne"
        android:layout_width="wrap_content"
        android:layout_height="wrap_content"
        android:checked="true"
        android:text="吃饭"
        />
    <CheckBox
        android:id="@+id/chbTwo"
        android:layout_width="wrap_content"
        android:layout_height="wrap_content"
        android:text="睡觉"
        />
    <CheckBox
        android:id="@+id/chbThree"
        android:layout_width="wrap_content"
        android:layout_height="wrap_content"
        android:text="读书"
        />


    <Button
        android:id="@+id/btnCheck"
        android:layout_width="wrap_content"
        android:layout_height="wrap_content"
        android:text="提交"
        />

</LinearLayout>
代码
package com.qingsu.yingguday03;

import android.os.Bundle;
import android.view.View;
import android.widget.Button;
import android.widget.CheckBox;
import android.widget.RadioButton;
import android.widget.RadioGroup;
import android.widget.Toast;

import androidx.appcompat.app.AppCompatActivity;

public class CheckBoxDemo extends AppCompatActivity {


    CheckBox mTCheckOne,mTCheckTwo,mTCheckThree;
    RadioGroup mGroupTset;
    RadioButton mRbtA,mRbtB,mRbtC,mRbtD;
    Button  mButton;
    StringBuilder strb = new StringBuilder();
    protected void onCreate(Bundle savedInstanceState) {

        super.onCreate(savedInstanceState);
        setContentView(R.layout.activity_iamge);


        mTCheckOne =  findViewById(R.id.chbOne);
        mTCheckTwo =  findViewById(R.id.chbTwo);
        mTCheckThree =  findViewById(R.id.chbThree);

        mButton   =   findViewById(R.id.btnCheck);


        mButton.setOnClickListener(new View.OnClickListener() {
            @Override
            public void onClick(View v) {
                if(mTCheckOne.isChecked()){
                    strb.append(mTCheckOne.getText().toString());
                }
                if(mTCheckTwo.isChecked()){
                    strb.append(mTCheckTwo.getText().toString());
                }
                if(mTCheckThree.isChecked()){
                    strb.append(mTCheckThree.getText().toString());
                }
                Toast.makeText(CheckBoxDemo.this,strb,Toast.LENGTH_SHORT).show();

                strb.delete(0,strb.length());
            }
        });


    }


}
效果

RadioButton单选控件
RadioButton控件
RadioGroup相关属性:
RadioGroup.getCheckedRadioButtonId ();–获取选中按钮的id
RadioGroup.clearCheck ();//—清除选中状态
RadioGroup.check (int id);//—通过参入选项id来设置该选项为选中状态如果传递-1作为指定的选择标识符来清除单选按钮组的勾选状态,相当于调用clearCheck()操作
setOnCheckedChangeListener (RadioGroup.OnCheckedChangeListener listener); //–一个当该单选按钮组中的单选按钮勾选状态发生改变时所要调用的回调函数
【备注:】RadioGroup是LinearLayout的子类,所以RadioGroup本质上是一个存放RadioButton的布局容器。
需要记住的是:默认的LinearLayout布局的Orientation属性是水平的,而默认的RadioGroup的Orientation属性是垂直的。
RadioButton继承于Button,所以具有普通按钮的各种属性,但是与普通按钮不同的是,RadioButton提供了可选中的功能。在使用RadioButton的时候,要使用RadioGroup来包围起这些RadioButton。
RadioGroup是父组件
RadioButton是子组件 多个构成一组单选
示例
布局
<?xml version="1.0" encoding="utf-8"?>
<LinearLayout
    xmlns:android="http://schemas.android.com/apk/res/android"
    android:layout_width="match_parent"
    android:layout_height="match_parent"
    android:orientation="vertical"
    android:gravity="center_horizontal"
    >

    <TextView
        android:layout_marginTop="20dp"
        android:layout_width="wrap_content"
        android:layout_height="wrap_content"
        android:textSize="30sp"
        android:text="小牛吃什么"
        />
    <RadioGroup
        android:id="@+id/group_test"
        android:layout_width="wrap_content"
        android:layout_height="wrap_content"
        android:orientation="horizontal"
        android:gravity="center_horizontal"
        >
        <RadioButton
            android:id="@+id/rbtA"
            android:layout_width="wrap_content"
            android:layout_height="wrap_content"
            android:text="A、肉"
            />
        <RadioButton
            android:id="@+id/rbtB"
            android:layout_width="wrap_content"
            android:layout_height="wrap_content"
            android:text="B、草"
            />
        <RadioButton
            android:id="@+id/rbtC"
            android:layout_width="wrap_content"
            android:layout_height="wrap_content"
            android:text="C、虫子"
            />
        <RadioButton
            android:id="@+id/rbtD"
            android:layout_width="wrap_content"
            android:layout_height="wrap_content"
            android:text="D、鱼"
            />

    </RadioGroup>
    <Button
        android:id="@+id/btnCheck"
        android:layout_width="wrap_content"
        android:layout_height="wrap_content"
        android:text="提交"
        />

</LinearLayout>
代码
package com.qingsu.yingguday03;

import android.os.Bundle;
import android.view.View;
import android.widget.Button;
import android.widget.CheckBox;
import android.widget.RadioButton;
import android.widget.RadioGroup;
import android.widget.Toast;

import androidx.appcompat.app.AppCompatActivity;

public class CheckBoxDemo extends AppCompatActivity {


    CheckBox mTCheckOne,mTCheckTwo,mTCheckThree;
    RadioGroup mGroupTset;
    RadioButton mRbtA,mRbtB,mRbtC,mRbtD;
    Button  mButton;
    StringBuilder strb = new StringBuilder();
    String str="";
    protected void onCreate(Bundle savedInstanceState) {

        super.onCreate(savedInstanceState);
        setContentView(R.layout.activity_iamge);

        mButton   =   findViewById(R.id.btnCheck);

        mGroupTset = findViewById(R.id.group_test);

        mRbtA = findViewById(R.id.rbtA);
        mRbtB = findViewById(R.id.rbtB);
        mRbtC = findViewById(R.id.rbtC);
        mRbtD = findViewById(R.id.rbtD);

        mButton.setOnClickListener(new View.OnClickListener() {
            @Override
            public void onClick(View v) {
                Toast.makeText(CheckBoxDemo.this,str,Toast.LENGTH_SHORT).show();
            }
        });


        mGroupTset.setOnCheckedChangeListener(new RadioGroup.OnCheckedChangeListener() {
            @Override
            public void onCheckedChanged(RadioGroup group, int checkedId) {
                switch (checkedId){
                    case R.id.rbtA:
                        str="肉";
                        break;
                    case R.id.rbtB:
                        str="草";
                        break;
                    case R.id.rbtC:
                        str="虫子";
                        break;
                    case R.id.rbtD:
                        str="鱼";
                        break;
                    default:
                        str= "我不饿,我不吃!";
                        break;
                }
            }
        });

    }


}
效果

Spinner 下拉菜单
布局使用
        <Spinner
            android:id="@+id/spcheak"
            android:layout_width="wrap_content"
            android:layout_height="wrap_content">
        </Spinner>
使用步骤
1、初始化数据
String[] title = new String[]{“Android课程”, “iOS课程”, “Java课程”, “C语音课程”};
2、找到Spinner组建
spinner = findViewById(R.id.spinner);
3、创建ArrayAdapter
new ArrayAdapter(this, android.R.layout.simple_spinner_item,title);
4、setAdapter
spinner.setAdapter(stringArrayAdapter);
示例
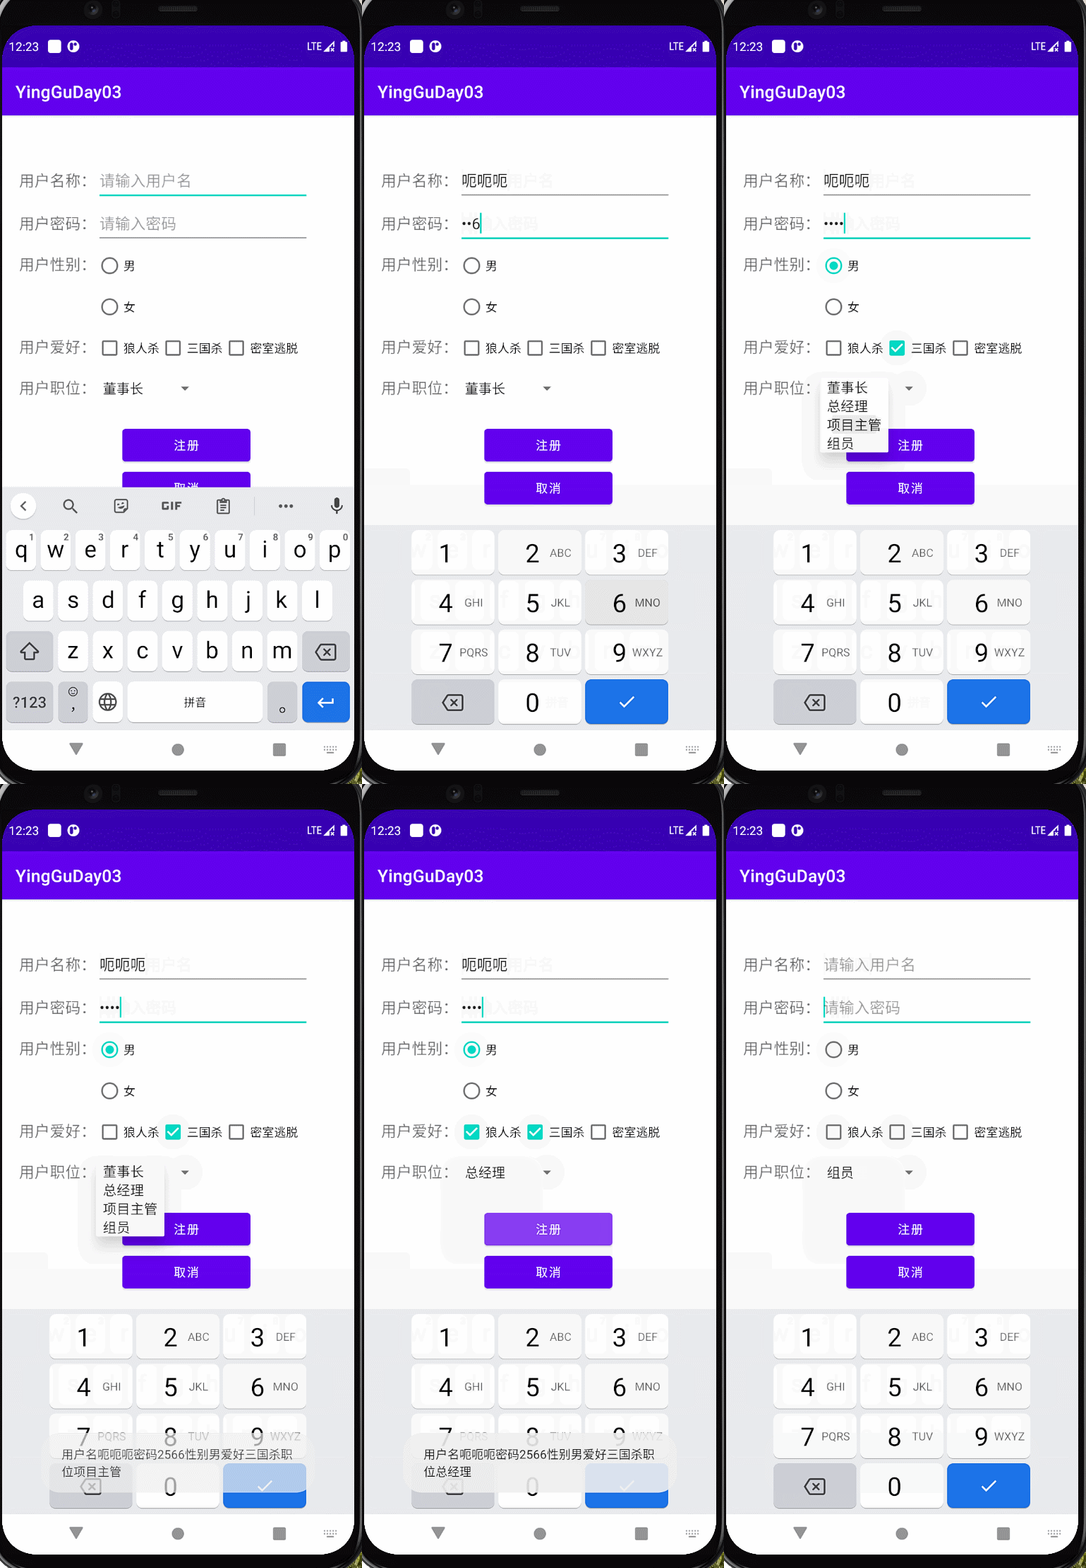
实现以下效果

布局
<?xml version="1.0" encoding="utf-8"?>
<LinearLayout
    xmlns:android="http://schemas.android.com/apk/res/android"
    android:layout_width="match_parent"
    android:layout_height="match_parent"
    android:orientation="vertical"
    android:paddingLeft="20dp"
    >

    <LinearLayout
        android:layout_width="match_parent"
        android:layout_height="wrap_content"
        android:orientation="horizontal"
        android:layout_marginTop="51dp"
        android:layout_gravity="center"
        >

        <TextView
            android:layout_width="wrap_content"
            android:layout_height="wrap_content"
            android:textSize="18sp"
            android:text="用户名称:"
            />

        <EditText
            android:id="@+id/etName"
            android:layout_width="250dp"
            android:layout_height="50dp"
            android:text=""
            android:hint="请输入用户名"
            android:maxLength="11"
            />
    </LinearLayout>

    <LinearLayout
        android:layout_width="match_parent"
        android:layout_height="wrap_content"
        android:orientation="horizontal"
        >

        <TextView
            android:layout_width="wrap_content"
            android:layout_height="wrap_content"
            android:textSize="18sp"
            android:text="用户密码:"
            />
        <EditText
            android:id="@+id/etPassword"
            android:layout_width="250dp"
            android:layout_height="50dp"
            android:text=""
            android:inputType="numberPassword"
            android:hint="请输入密码"
            />
    </LinearLayout>

    <LinearLayout
        android:layout_width="wrap_content"
        android:layout_height="wrap_content"
        android:orientation="horizontal"
        >
        <TextView
            android:layout_width="wrap_content"
            android:layout_height="wrap_content"
            android:textSize="18sp"
            android:paddingTop="10dp"
            android:text="用户性别:"
            />
        <RadioGroup
            android:id="@+id/groupSex"
            android:layout_width="wrap_content"
            android:layout_height="wrap_content"
            android:gravity="center_horizontal"
            >
            <RadioButton
                android:id="@+id/rbtboy"
                android:layout_width="wrap_content"
                android:layout_height="wrap_content"
                android:text="男"
                />
            <RadioButton
                android:id="@+id/rbtGirl"
                android:layout_width="wrap_content"
                android:layout_height="wrap_content"
                android:text="女"
                />
        </RadioGroup>
    </LinearLayout>

    <LinearLayout
        android:layout_width="wrap_content"
        android:layout_height="wrap_content"
        android:orientation="horizontal"
        >

        <TextView
            android:layout_width="wrap_content"
            android:layout_height="wrap_content"
            android:textSize="18sp"
            android:paddingTop="10dp"
            android:text="用户爱好:"
            />

        <CheckBox
            android:id="@+id/chbLRS"
            android:layout_width="wrap_content"
            android:layout_height="wrap_content"
            android:text="狼人杀"
            />
        <CheckBox
            android:id="@+id/chbSGS"
            android:layout_width="wrap_content"
            android:layout_height="wrap_content"
            android:text="三国杀"
            />
        <CheckBox
            android:id="@+id/chbMSTT"
            android:layout_width="wrap_content"
            android:layout_height="wrap_content"
            android:text="密室逃脱"
            />

    </LinearLayout>


    <LinearLayout
        android:layout_width="wrap_content"
        android:layout_height="wrap_content">

        <TextView
            android:layout_width="wrap_content"
            android:layout_height="wrap_content"
            android:textSize="18sp"
            android:paddingTop="10dp"
            android:text="用户职位:"
            />

        <Spinner
            android:id="@+id/spcheak"
            android:layout_width="wrap_content"
            android:layout_height="wrap_content">
        </Spinner>

    </LinearLayout>


<LinearLayout
    android:layout_width="wrap_content"
    android:layout_height="wrap_content"
    android:layout_marginTop="30dp"
    android:orientation="vertical"
    android:layout_gravity="center"
    >

    <Button
        android:id="@+id/btnRegister"
        android:layout_width="150dp"
        android:layout_height="50dp"
        android:text="注册"
        />

    <Button
        android:id="@+id/btnCancel"
        android:layout_width="150dp"
        android:layout_height="50dp"
        android:text="取消"
        />

</LinearLayout>


    </LinearLayout>
代码
import android.os.Bundle;
import android.view.View;
import android.widget.ArrayAdapter;
import android.widget.Button;
import android.widget.CheckBox;
import android.widget.EditText;
import android.widget.RadioButton;
import android.widget.RadioGroup;
import android.widget.Spinner;
import android.widget.Toast;

import androidx.appcompat.app.AppCompatActivity;

public class DemoOne extends AppCompatActivity {

    EditText mUserNmae,mUserPassword;
    RadioGroup  mSexCheck;
    RadioButton mBoy,mGirl;
    CheckBox    mLRS,mSGS,mMSTT;
    Button      mRegister,mCancel;
    Spinner  mSpCheak;

    String name,psd,sex,userposition;

    StringBuffer hobby = new StringBuffer();


    protected void onCreate(Bundle savedInstanceState) {
        super.onCreate(savedInstanceState);
        setContentView(R.layout.activity_demo);
        String[] userPosition = {"董事长","总经理","项目主管","组员"};


        initview();

        //创建适配器
        //第一个参数 页面
        //第二个参数 布局文件
        //第三个参数 数据源
        ArrayAdapter<String> arrayAdapter = new ArrayAdapter<>(DemoOne.this, android.R.layout.simple_spinner_item, userPosition);
        mSpCheak.setAdapter(arrayAdapter);

        mRegister.setOnClickListener(new View.OnClickListener() {
            @Override
            public void onClick(View v) {


                name = mUserNmae.getText().toString();
                psd  = mUserPassword.getText().toString();

                if(mLRS.isChecked()){
                    hobby.append(mLRS.getText().toString());
                }
                if(mSGS.isChecked()){
                    hobby.append(mSGS.getText().toString());
                }
                if(mMSTT.isChecked()){
                    hobby.append(mMSTT.getText().toString());
                }

                userposition =  mSpCheak.getSelectedItem().toString();
                //Toast.makeText(DemoOne.this,userposition,Toast.LENGTH_SHORT).show();
               //Toast.makeText(DemoOne.this,name+psd+sex+hobby+userposition,Toast.LENGTH_SHORT).show();

                Toast.makeText(DemoOne.this,"用户名"+name+"密码"+psd+"性别"+sex+"爱好"+hobby+"职位"+userposition,Toast.LENGTH_SHORT).show();
                hobby.delete(0,hobby.length());

            }
        });

        mSexCheck.setOnCheckedChangeListener(new RadioGroup.OnCheckedChangeListener() {
            @Override
            public void onCheckedChanged(RadioGroup group, int checkedId) {
              switch (checkedId){
                  case R.id.rbtboy:
                      sex=mBoy.getText().toString();
                      break;
                  case R.id.rbtGirl:
                      sex=mGirl.getText().toString();
                      break;
                  default:
                      sex="";
                      break;
              }
            }
        });


        mCancel.setOnClickListener(new View.OnClickListener() {
            @Override
            public void onClick(View v) {
                mUserNmae.setText(null);
                mUserPassword.setText(null);
                mSexCheck.clearCheck();
                mLRS.setChecked(false);
                mSGS.setChecked(false);
                mMSTT.setChecked(false);
                mSpCheak.setSelection(3);
            }
        });


    }


    public void initview(){
        mUserNmae = findViewById(R.id.etName);
        mUserPassword = findViewById(R.id.etPassword);

        mSexCheck = findViewById(R.id.groupSex);

        mBoy = findViewById(R.id.rbtboy);
        mGirl = findViewById(R.id.rbtGirl);

        mLRS = findViewById(R.id.chbLRS);
        mSGS = findViewById(R.id.chbSGS);
        mMSTT = findViewById(R.id.chbMSTT);

        mRegister = findViewById(R.id.btnRegister);
        mCancel   = findViewById(R.id.btnCancel);
        mSpCheak = findViewById(R.id.spcheak);
    }

}
效果
