天上多鸿雁,池中足鲤鱼;相看过半百,不寄一行书。–杜甫《寄高三十五詹事》
前言
上文由易到难总结了震动器,闪光灯,各类传感器,定位模块和红外发射器总计五种硬件的控制方法,那么书接上文,本文按照同样的风格接着总结其他硬件的控制,包括:扬声器,麦克风,摄像头,NFC和蓝牙。话说这些硬件模块无论是底层驱动还是这里总结的APP层的使用都是有难度的,究其原因,是现在的手机搭载的硬件越来越先进了,比如摄像头模组,用户的体验是越来越好了,但开发者控制硬件也越来越复杂了。六、扬声器
1.简介
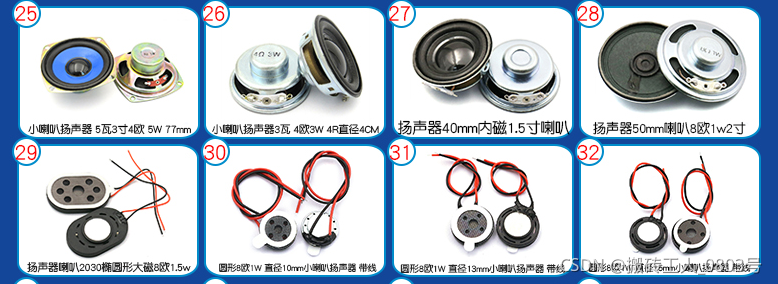
俗称喇叭,扬声器是一种把电信号转变为声信号的换能器件,扬声器的种类很多,按其换能原理可分为电动式(即动圈式)、静电式(即电容式)、电磁式(即舌簧式)、压电式(即晶体式)等几种,音频根据其编码格式来分类有:.arm,.wav,.mp3,.3gp和未经编码的原始音频等。
使用扬声器播放音频是一个常见的需求,为此Android为我们提供了多个方案来实现。这里总结两种常用的方式:媒体播放器MediaPlayer和声音池SoundPool,它们俩各有优点和缺点,恰好是互补关系。
①MediaPlayer的优点是支持为声音增加额外的特效,支持大时长的音频文件,缺点是不支持多个音频文件的同时播放,占用的系统资源也多,而且响应速度较慢。
②SoundPool的优点在于资源占用少,支持多个音频文件同时播放,缺点是只能播放时长短的音频,而且不建议在播放过程中暂停。
(一)媒体播放器MediaPlayer既可用来播放音频文件,又可用来播放视频文件(不常用),支持的音频格式有:.arm,.wav,.mp3,.3gp,.ogg等,提供了相应的方法来指定音频文件来源,控制播放过程和对声音特效的控制,现分别说明如下:
(1)指定音频文件来源:通常使用其多个重载的setDataSource方法指定音频文件的来源,或者直接使用其静态方法create来直接装载音频文件。根据音频文件的来源不同,可分为以下场景:
①播放APP自带的音频文件(/res/raw目录下的音频),则直接使用MediaPlayer的静态方法
static MediaPlayer create(Context context, int resid):装载指定ID的音频,并返回创建的MediaPlayer对象。或者调用Context的getResources方法获取Resources对象,再调用它的openRawResourceFd方法获取一个AssetFileDescriptor对象,其余步骤同②。
②播放APP自带的原始资源文件(assets目录下的音频),使用MediaPlayer对象的方法
void setDataSource(FileDescriptor fd, long offset, long length):fd是文件描述符,offset和length分别表示文件起始位置和结束位置(byte)。这三个参数通过以下流程获得:
调用Context的getAssets方法获取AssetManager 实例对象–>调用该对象的openFd方法获取一个AssetFileDescriptor对象–>调用该对象的getFileDescriptor方法,getStartOffset方法和getLength方法分别设置三个参数。
③外部存储器上的音频,使用MediaPlayer对象的方法: void setDataSource(String path)。
④来自网络上的音频文件,使用MediaPlayer对象的方法: void setDataSource(Context context, Uri uri)。
(2)控制播放过程的主要方法有:
①void reset():将MediaPlayer重置为初始化状态。
②void prepare():正式装载音频文件,准备播放。
③void start():从头开始播放。
④void stop():停止播放。
⑤void setOnPreparedListener(MediaPlayer.OnPreparedListener listener)
void setOnCompletionListener(MediaPlayer.OnCompletionListener listener)
void setOnSeekCompleteListener(MediaPlayer.OnSeekCompleteListener listener):设置准备播放/播放完成/拖动播放的监听器。
⑥void setVolume(float leftVolume, float rightVolume):设置音量,两参数分别是左右声道的音量(范围0-1)。
⑦void setAudioStreamType(int streamtype):设置音频流的类型,取值为AudioManager的常量,有通话音/系统/铃音/媒体/闹钟/通知音。
⑧void setLooping(boolean looping):是否循环播放。
⑨boolean isPlaying():是否正在播放。
⑩void seekTo(int msec):拖动播放进度到指定位置。
?int getCurrentPosition():获取当前播放进度。
?int getDuration():获取音频总时长(mS)。
?void pause():暂停播放。
?void release():释放MediaPlayer对象关联的资源。
(3)声音特效控制:可以控制声音的均衡器,重低音,音场,波形图等,这些功能需要靠音频框架提供的音频效果的基类–音效AudioEffect的子类来提供:AcousticEchoCanceler, AutomaticGainControl,LoudnessEnhancer, NoiseSuppressor, PresetReverb,Equalizer,Virtualizer,BassBoost,PresetReverb和EnvironmentalReverb。
在创建具体的AudioEffect时要指定MediaPlayer实例的ID,此参数需要MediaPlayer对象的方法
int getAudioSessionId() 为具体的音频特效绑定ID之后,接着设置特效相关的参数,然后启用这些特效即可,相关的方法很简单,这里就不再啰嗦了。
(二)声音池SoundPool建议只用来播放时长短的ogg格式音频文件,它可以将APP自带的或手机存储器中的音频文件加载到内存中,SoundPool装载音频的时候使用MediaPlayer的相关服务将音频解码为原始16位PCM单声道或立体声流,而不必在播放过程中占用CPU和存在解压延迟。
SoundPool的常用方法有:
①final void autoPause()
final void autoResume():暂停/恢复以前所有音频流。
②int load(Context context, int resId, int priority)
int load(String path, int priority)
int load(AssetFileDescriptor afd, int priority)
int load(FileDescriptor fd, long offset, long length, int priority):同MediaPlayer的setDataSource方法类似,SoundPool根据使用场景也提供了多个重载方法来装载音频:参数priority无意义,直接设置为1即可,返回值为该音频文件的编号,通常使用HashMap<Integer,Integer>来管理返回的音频编号。
③final void pause(int streamID)
final void resume(int streamID):暂停/恢复指定声音编号的音频流。
④final void stop(int streamID)
final int play(int soundID, float leftVolume, float rightVolume, int priority, int loop, float rate):停止/开始播放指定声音编号的音频。
⑤final void release():释放SoundPool资源。
⑥final void setLoop(int streamID, int loop)
final void setRate(int streamID, float rate)
final void setVolume(int streamID, float leftVolume, float rightVolume):
设置循环模式(-1循环,0不循环)/播放速率(0.5-2)/音量(0-1)。
⑦void setOnLoadCompleteListener(SoundPool.OnLoadCompleteListener listener):设置播放完成的监听器。
⑧final boolean unload(int soundID):从SoundPool中卸载指定编号的声音。
SoundPool.Builder是SoundPool的构造类,用于设置SoundPool的整体属性,其方法有:
①SoundPool.Builder setMaxStreams(int maxStreams):设置可同时播放的音频流的最大数量。
②SoundPool build():根据配置构建SoundPool实例对象。
③SoundPool.Builder setAudioAttributes(AudioAttributes attributes):设置音频属性。音频属性AudioAttributes 通过其内部类AudioAttributes.Builder实例化,AudioAttributes.Builder的常用方法有:
①AudioAttributes build():组合所有已设置的属性并返回一个新的 AudioAttributes对象。
②AudioAttributes.Builder setContentType(int contentType):设置描述音频信号的内容类型的属性,取值有:STREAM_VOICE_CALL, STREAM_SYSTEM, STREAM_RING, STREAM_MUSIC, STREAM_ALARM, STREAM_NOTIFICATION,分别表示通话音/系统/铃音/媒体/闹钟/通知音。
③AudioAttributes.Builder setUsage(int usage):设置描述音频的使用场景,取值有:USAGE_UNKNOWN,USAGE_MEDIA, USAGE_GAME等等。
(三)音量控制
手机播放音频的时候,调节音量也是一个常见的需求。对于用户来说,最方便的是通过手机的音量按键来控制,但对于开发者来说,如何在代码中控制呢?(或者说用户怎么通过APP而不是手机按键控制手机音量呢)
Android根据音频的用途不同划分了声音:STREAM_SYSTEM,STREAM_RING,STREAM_MUSIC,STREAM_ALARM,STREAM_NOTIFICATION(系统,铃音,媒体,闹钟和通知音)等,管理这几类声音的是音频管理器AudioManager,其实例对象通过系统服务AUDIO_SERVICE获取,常用方法有:
①int getStreamMaxVolume(int streamType):返回指定声音类别的最大音量。
②int getStreamVolume(int streamType):返回指定声音类别的当前音量。
③int getRingerMode():返回当前的铃声模式,范围为:RINGER_MODE_NORMAL,RINGER_MODE_SILENT, RINGER_MODE_VIBRATE,分别表示正常,静音,震动。
④void setRingerMode (int ringerMode):设置铃声模式。
⑤void adjustStreamVolume(int streamType, int direction, int flags):将指定声音类别的音量调整大小方向,direction取值范围: ADJUST_LOWER, ADJUST_RAISE, ADJUST_SAME(减小,增大,不变)。
2.使用方法
使用MediaPlayer播放音频的基本流程如下:
①创建MediaPlayer对象,调用它的setDataSource方法指定音频文件来源,调用它的其他方法设置相关属性。
②调用其prepare方法装载音频或者直接使用静态方法create装载,准备开始播放。
③调用它的play方法从头播放音频,调用其他方法控制播放过程。
使用SoundPool播放音频的基本流程如下:
①使用内部构造类SoundPool.Builder的相关静态方法设置声音池的属性,并得到一个Builder实例。
②通过Builder实例的build方法创建SoundPool的实例对象。
③通过SoundPool的实例对象的load方法装载音频,并使用HashMap管理得到的音频编号。
④调用其play方法播放指定编号的音频,注意最好不要干预播放过程。
同前面一样,通过一个小例子来熟悉基本流程。
页面布局如下:
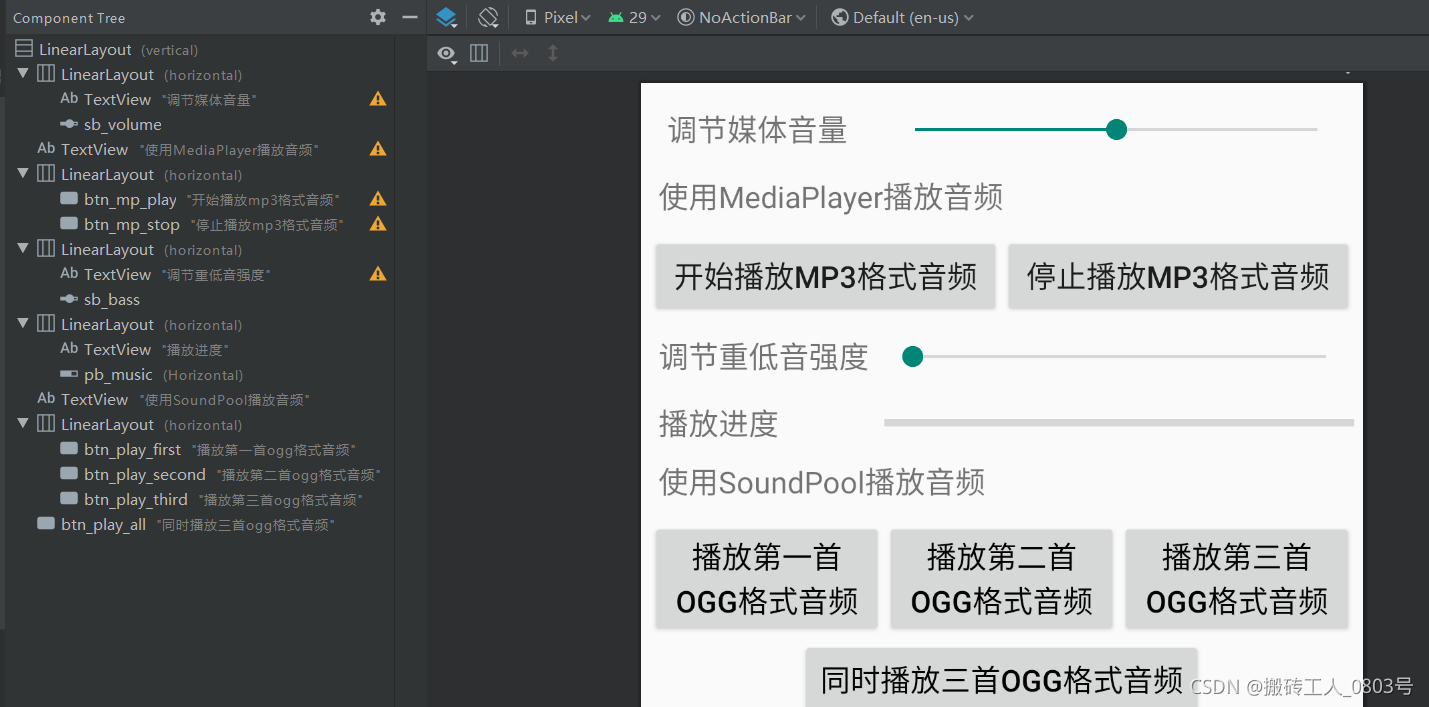
复制一首MP3格式和三首ogg格式的音频文件到模块的/res/raw目录下,然后重命名。详见MainActivity代码:
public class MainActivity extends AppCompatActivity implements
        View.OnClickListener, MediaPlayer.OnCompletionListener {
    @Override
    protected void onCreate(Bundle savedInstanceState) {
        super.onCreate(savedInstanceState);
        setContentView(R.layout.activity_main);
        sb_volume = findViewById(R.id.sb_volume);
        sb_bass = findViewById(R.id.sb_bass);
        pb_music = findViewById(R.id.pb_music);
        findViewById(R.id.btn_mp_play).setOnClickListener(this);
        findViewById(R.id.btn_mp_stop).setOnClickListener(this);
        findViewById(R.id.btn_play_all).setOnClickListener(this);
        findViewById(R.id.btn_play_first).setOnClickListener(this);
        findViewById(R.id.btn_play_second).setOnClickListener(this);
        findViewById(R.id.btn_play_third).setOnClickListener(this);
        setStreamVolume(SOUND_TYPE);// 设置媒体音频类型的音量大小
        initMediaPlayer();// 初始化媒体播放器
        initBassBoost();// 初始化重低音控制器
        initSoundPool();// 初始化声音池
    }

    private SeekBar sb_volume; //音量拖动条
    private AudioManager mAudioMgr; // 声明一个音频管理器对象
    private int mMaxVolume; // 最大音量
    private int mNowVolume; // 当前音量
    private final int SOUND_TYPE = AudioManager.STREAM_MUSIC; // 音频流的音乐类型

    // 设置各音频类型的音量大小
    void setStreamVolume(int type) {
        // 从系统服务中获取音频管理器
        mAudioMgr = (AudioManager) getSystemService(Context.AUDIO_SERVICE);
        // 获取指定音频类型的最大音量
        mMaxVolume = mAudioMgr.getStreamMaxVolume(type);
        // 获取指定音频类型的当前音量
        mNowVolume = mAudioMgr.getStreamVolume(type);
        //设置当前音量代表的进度
        sb_volume.setProgress(sb_volume.getMax() * mNowVolume / mMaxVolume);
        //为拖动条设置监听器
        sb_volume.setOnSeekBarChangeListener(new SeekBar.OnSeekBarChangeListener() {
            @Override
            public void onProgressChanged(SeekBar seekBar, int progress, boolean fromUser) {
                //获取拖动条代表的音量
                int volume = mMaxVolume * seekBar.getProgress() / seekBar.getMax();
                if (volume != mNowVolume) {
                    mNowVolume = volume;
                }
                // 设置该音频类型的当前音量
                mAudioMgr.setStreamVolume(type, volume, AudioManager.FLAG_PLAY_SOUND);
            }
            @Override
            public void onStartTrackingTouch(SeekBar seekBar) {
            }
            @Override
            public void onStopTrackingTouch(SeekBar seekBar) {
            }
        });
    }

    private MediaPlayer mMediaPlayer; // 定义播放声音的MediaPlayer

    // 初始化媒体播放器
    private void initMediaPlayer()
    {
        // 创建一个媒体播放器,装载APP自带的音频文件
        mMediaPlayer = new MediaPlayer();
        AssetFileDescriptor afd = getResources().openRawResourceFd(R.raw.music);
        try {
            mMediaPlayer.setDataSource(afd.getFileDescriptor(), afd.getStartOffset(), afd.getLength());
            afd.close();
        } catch (IOException e) {
            e.printStackTrace();
        }
        // 设置音频流的类型为音乐
        mMediaPlayer.setAudioStreamType(SOUND_TYPE);
        // 设置媒体播放器的播放完成监听器
        mMediaPlayer.setOnCompletionListener(this);
    }

    private ProgressBar pb_music;//音频时长进度条
    private Timer mTimer; // 计时器
    private boolean isFinished = true; // 是否播放结束

    // MediaPlayer开始播放MP3
    private void startPlayMP3() {
        if (isFinished){
            try {
                // 通过create方法创建的播放器实例,无需再调用prepare方法,因为create内部已经调用过了
                mMediaPlayer.prepare();
            } catch (IOException e) {
                e.printStackTrace();
            }
            // 媒体播放器开始播放
            mMediaPlayer.start();
            // 设置进度条的最大值,也就是音频的播放时长
            pb_music.setMax(mMediaPlayer.getDuration());
            mTimer = new Timer(); // 创建一个计时器
            // 计时器每隔一秒就更新进度条上的播放进度
            mTimer.schedule(new TimerTask() {
                @Override
                public void run() {
                    pb_music.setProgress(mMediaPlayer.getCurrentPosition());
                }
            }, 0, 1000);
        }
        isFinished = false;
    }

    //MediaPlayer停止播放MP3
    private void stopPlayMP3()
    {
        if (!isFinished){
            if (mTimer != null) {
                mTimer.cancel(); // 取消计时器
            }
            mMediaPlayer.stop();
        }
        isFinished = true;
    }
    // 一旦发现媒体播放完毕,就触发播放完成监听器的onCompletion方法
    public void onCompletion(MediaPlayer mp) {
        Toast.makeText(this, "已完成播放", Toast.LENGTH_SHORT).show();
    }

    private SeekBar sb_bass;    // 重低音拖动条
    private BassBoost mBass;    // 定义系统的重低音控制器

    // 初始化重低音控制器
    private void initBassBoost()
    {
        // 以MediaPlayer的AudioSessionId创建BassBoost,建立绑定
        mBass = new BassBoost(0, mMediaPlayer.getAudioSessionId());
        // 设置启用重低音效果
        mBass.setEnabled(true);
        // 为SeekBar的拖动事件设置事件监听器
        sb_bass.setOnSeekBarChangeListener(new SeekBar.OnSeekBarChangeListener()
        {
            @Override
            public void onProgressChanged(SeekBar seekBar, int progress, boolean fromUser)
            {
                // 设置重低音的强度
                mBass.setStrength((short)progress);
            }
            @Override
            public void onStartTrackingTouch(SeekBar seekBar)
            {
            }
            @Override
            public void onStopTrackingTouch(SeekBar seekBar)
            {
            }
        });
    }

    private SoundPool mSoundPool; // 初始化一个声音池对象
    private HashMap<Integer, Integer> mSoundMap; // 声音编号映射

    // 初始化声音池
    @TargetApi(Build.VERSION_CODES.LOLLIPOP)
    private void initSoundPool() {
        mSoundMap = new HashMap<>();
        // 初始化声音池,最多容纳三个声音
        AudioAttributes attributes = new AudioAttributes.Builder()
                .setLegacyStreamType(SOUND_TYPE).build();
        SoundPool.Builder builder = new SoundPool.Builder();
        builder.setMaxStreams(3).setAudioAttributes(attributes);
        mSoundPool = builder.build();
        loadSound(1, R.raw.sound1); // 加载第一个声音
        loadSound(2, R.raw.sound2); // 加载第二个声音
        loadSound(3, R.raw.sound3); // 加载第三个声音
    }

    // 把音频资源添加进声音池
    private void loadSound(int seq, int resid) {
        // 把声音文件加入到声音池中,同时返回该声音文件的编号
        int soundID = mSoundPool.load(this, resid, 1);
        mSoundMap.put(seq, soundID);
    }

    // 播放指定序号的声音
    private void playSound(int seq) {
        int soundID = mSoundMap.get(seq);
        // 播放声音池中指定编号的声音文件
        mSoundPool.play(soundID, 1.0f, 1.0f, 1, 0, 1.0f);
    }

    @Override
    public void onClick(View v) {
        if (v.getId() == R.id.btn_mp_play) { //开始停止播放MP3
            startPlayMP3();
        } else if (v.getId() == R.id.btn_mp_stop) { //停止播放MP3
            stopPlayMP3();
        } else if (v.getId() == R.id.btn_play_all) { //同时播放三个声音
            playSound(1);
            playSound(2);
            playSound(3);
        } else if (v.getId() == R.id.btn_play_first) { // 播放第一个声音
            playSound(1);
        } else if (v.getId() == R.id.btn_play_second) { // 播放第二个声音
            playSound(2);
        } else if (v.getId() == R.id.btn_play_third) { // 播放第三个声音
            playSound(3);
        }
    }

    @Override
    protected void onDestroy() {
        if (mMediaPlayer != null) {
            mMediaPlayer.release();//释放MediaPlayer资源
        }
        if (mSoundPool != null) {
            mSoundPool.release(); // 释放声音池资源
        }
        super.onDestroy();
    }
通过以上代码,可以实现音量大小的调节,开始/暂停播放APP自带的MP3音频文件并显示其播放进度,添加重低音音效,同时播放多首ogg格式的音频。开发流程比较固定,总体难度不大。
七、麦克风
1.简介
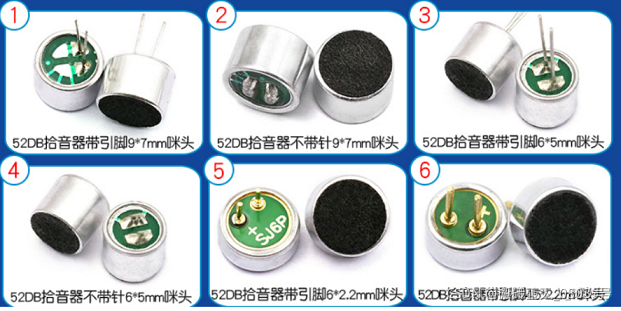
俗称拾音器,话筒,咪头,是将声音信号转化为电信号的器件,分类有动固式,电容式,驻极体等。
媒体录制器MediaRecorder是Android中用来录制音频和视频的类,单独录制音频很简单,有一套通用的代码模板,这里先总结MediaRecorder录制音频的有关方法:
①void reset():将MediaRecorder初始化为空闲状态。
②void release():释放与此MediaRecorder对象关联的资源。
③void setOnErrorListener(MediaRecorder.OnErrorListener l)
void setOnInfoListener(MediaRecorder.OnInfoListener listener):设置录制器时发生错误时,状态变化事件时的监听器。
④void setMaxDuration(int max_duration_ms):设置录制的最大持续时间(mS)。
⑤void setMaxFileSize(long max_filesize_bytes):设置录制的最大文件字节(byte)。
⑥void setOutputFile(String path):设置要生成的输出文件的路径。
⑦void setOutputFormat(int output_format):设置录制过程中输出文件的格式。该方法必须在setAudioSource和setVideoSource方法之后但在prepare方法之前调用。参数取值有MediaRecorder.OutputFormat的常量:AAC_ADTS,AMR_NB,AMR_WB,MPEG_4,THREE_GPP,WEBM。
⑧void setAudioSource(int audio_source):设置要用于录制的音频源。参数取值范围为MediaRecorder.AudioSource中的常量。
⑨void setAudioSamplingRate(int samplingRate):设置录制的音频采样率(KHz)。 采样率实际上取决于录音的格式以及平台的功能。 例如,AAC音频编码标准支持的采样率范围为8至96 kHz,AMRNB支持的采样率为8 kHz,AMRWB支持的采样率为16 kHz。
⑩void setAudioEncoder(int audio_encoder):设置要用于录制的音频编码器。参数取值范围为MediaRecorder.AudioEncoder中的常量。
?void setAudioChannels(int numChannels):设置录制的音频通道数量(1单声道,2双声道)。
?void prepare():准备录音机开始录制和数据编码。
?void setAudioEncodingBitRate(int bitRate):设置录制的音频编码比特率。
?void pause()
void resume()
void start()
void stop():暂停录制。恢复录制。开始捕获数据并将其编码到setOutputFile指定的文件中。停止录制。
2.使用方法
使用MediaRecorder单独录制音频的基本流程如下:
①在配置文件声明录音权限RECORD_AUDIO和存储写入权限WRITE_EXTERNAL_STORAGE,而且在代码中使用录制器的时候提前动态授权。
    <uses-permission android:name="android.permission.RECORD_AUDIO" />
    <uses-permission android:name="android.permission.WRITE_EXTERNAL_STORAGE" />
②通过构造器创建一个MediaRecorder的实例对象,为它设置录制监听器,当发生录制错误时,一定要释放相关资源。
③调用setAudioSource指定音频源,参数通常设置为MediaRecorder.AudioSource.MIC即麦克风。
④调用setOutputFormat方法指定音频的输出格式。
⑤调用setAudioEncoder,setAudioSamplingRate,setAudioEncodingBitRate方法设置音频的编码格式,采样率,编码位率。
⑥调用setOutputFile指定输出文件的存储位置。
⑦调用prepare准备与录制相关的资源,调用start方法开始录制。
⑧调用stop结束录制,调用release方法释放录制器资源。
整个流程比较简单,开发者只需特别注意一点即可:setAudioEncoder必须在setOutputFormat之后调用。
接下来举个例子来熟悉一下基本流程吧:
页面布局很简单,就两个按钮:开始录制和停止录制。
MainActivity中的主要代码如下:
    private File soundFile;// 要保存的音频文件
    private MediaRecorder mRecorder;//媒体录制器
    View.OnClickListener listener = source -> {//按钮的监听器
                switch (source.getId()) {
                    case R.id.btn_startRecord: // 开始录制
                        // 创建保存录音的音频文件
                        soundFile = new File(Environment.getExternalStorageDirectory()
                                .toString() + "/mySound.amr");
                        mRecorder = new MediaRecorder();
                        //设置错误监听器
                        mRecorder.setOnErrorListener(this);
                        // 设置录音的声音来源
                        mRecorder.setAudioSource(MediaRecorder.AudioSource.MIC);
                        // 设置录制的声音的输出格式(必须在设置声音编码格式之前设置)
                        mRecorder.setOutputFormat(MediaRecorder.OutputFormat.THREE_GPP);
                        // 设置声音编码格式
                        mRecorder.setAudioEncoder(MediaRecorder.AudioEncoder.AMR_NB);
                        mRecorder.setOutputFile(soundFile.getAbsolutePath());
                        try {
                            mRecorder.prepare();
                        } catch (IOException e) {
                            e.printStackTrace();
                        }
                        // 开始录音
                        mRecorder.start();
                        break;
                    case R.id.btn_stopRecord:// 单击停止录制按钮
                        if (soundFile != null && soundFile.exists()) {
                            // 停止录音
                            mRecorder.stop();
                            // 释放资源
                            mRecorder.release();
                            mRecorder = null;
                        }
                        break;
                }
            };

    //发生录制错误时,一定要释放资源
    @Override
    public void onError(MediaRecorder mr, int what, int extra) {
        if (soundFile != null && soundFile.exists()) {
            // 停止录音
            mr.stop();
            // 释放资源
            mr.release();
        }
    }

    //退出页面时释放资源
    @Override
    public void onDestroy()
    {
        if (soundFile != null && soundFile.exists()) {
            // 停止录音
            mRecorder.stop();
            // 释放资源
            mRecorder.release();
            mRecorder = null;
        }
        super.onDestroy();
    }
当录制完成后,APP会在外部存储器的根目录下生成一个mySound.amr的音频文件,可以使用手机自带的播放器播放,当然开发者要练习使用的话,可以结合上面总结的媒体播放器来播放。
八、摄像头
1.简介
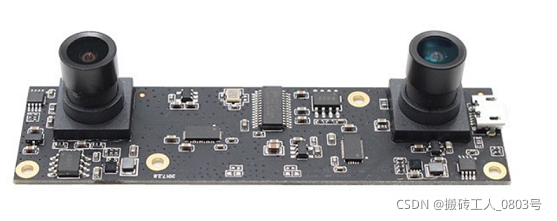
摄像头按输出信号的类型可以分为数字摄像头和模拟摄像头,按照摄像头图像传感器材料构成来看可以分为 CCD 和 CMOS,现在智能手机的摄像头绝大部分都是 CMOS 类型的数字摄像头。
模拟摄像头的像素一般情况下只有几十个W ,数字摄像头的像素就有点夸张了,现在已经几个亿了。但数字摄像头的成像质量不一定碾压模拟摄像头,原因在于模拟摄像头输出的是模拟视频信号,一般直接送到显示器,其感光器件的分辨率与显示器的扫描数呈一定的换算关系,因此实际上模拟摄像头的感光器件的分辨率没必要做这么高,几十个W足矣。
Android在5.0之后推出了camera2这一新版API来控制摄像头,按照文档介绍,支持以下特性:支持每秒30帧全高清连拍,支持在每帧之间使用不同的设置,支持原生格式的图像输出,支持零延迟快门和电影速拍。支持摄像头在其他方面的设置,比如噪音消除级别。Android 9 对相机API做了进一步增强,增强后的API允许获取指定的或者融合的数据流。
众所周知,Android只允许开发者在主线程中绘制界面,拍照和摄像都需要实时预览画面,整个界面 刷新速度非常快,为此必须有一种能在分线程中绘制界面的视图来装载实时变化的图像。表面视图SurfaceView和纹理视图TextureView都可以实现这个载体的功能,它们的详细用法会在下一节中总结,在这里简单的使用TextureView来作为相机的预览界面。
拍照涉及到的其他类有相机管理器CameraManager,相机设备CameraDevice,相机拍照会话CameraCaptureSession,图像读取器ImageReader。在总结闪光灯使用时粗略的说了CameraManager,那么接下来详细总结下吧:
(一)CameraManager可用来获取摄像头列表,打开摄像头,获取指定摄像头的特性等,常用方法如下:
①String[] getCameraIdList():返回可用的摄像头设备列表,通常是{“0”,“1”},分别表示后置和前置摄像头。
②CameraCharacteristics getCameraCharacteristics(String cameraId):查询指定摄像头的功能。
③void openCamera(String cameraId, CameraDevice.StateCallback callback, Handler handler):打开指定ID的摄像机,cameraId为“0”(后置)或者“1”(前置),callback为摄像头的状态变化监听器,handler是负责执行callback回调方法的对象,如果要在当前线程处理,则设置为null。
④void setTorchMode(String cameraId, boolean enabled):在不打开摄像头的情况下打开闪光灯,通常只有后置摄像头模块才有闪光灯,故cameraId一般设置为“0”。
(二)CameraDevice用于创建拍照请求,添加预览界面,创建拍照会话等,常用方法如下:
①abstract void close():尽可能快地关闭与摄像头设备的连接。
②abstract void createCaptureSession(List< Surface> outputs,CameraCaptureSession.StateCallback callback, Handler handler):通过向相机设备提供Surface输出集,创建新的拍照会话。参数outputs封装了所有需要获取图片的Surface。handler是执行callback的处理器,设置为null则在当前线程处理。callback为会话状态监听器,需实现回调方法:
abstract void onConfigured(CameraCaptureSession session):摄像机设备完成自身配置后会调用此方法,并且会话可以开始处理拍照请求。在此方法中调用CameraCaptureSession对象的setRepeatingRequest方法将相片预览输出到屏幕。
③CaptureRequest.Builder createCaptureRequest (int templateType):创建一个新的拍照请求的构造类。参数取值范围为:TEMPLATE_MANUAL(直接控制的基本模板),TEMPLATE_PREVIEW(创建一个适合相机预览的请求),TEMPLATE_RECORD(创建适合视频录制的请求),TEMPLATE_STILL_CAPTURE(创建适合静态图像捕获的请求),TEMPLATE_VIDEO_SNAPSHOT(在录制视频时创建适合拍摄静态图像的请求),TEMPLATE_ZERO_SHUTTER_LAG(创建一个适合于零延迟的拍照请求)。返回值CaptureRequest.Builder负责设置拍照的各种参数,包括传感器,镜头,闪光灯和后期处理设置。
(三)CameraCaptureSession用于捕获摄像头中的图像或重新处理之前在同一会话中从摄像头捕获的图像,当程序需要预览或者拍照,都需要先创建一个Session,常用方法如下:
①abstract CameraDevice getDevice():获取创建此会话的相机设备。
②abstract int capture(CaptureRequest request, CameraCaptureSession.CaptureCallback listener, Handler handler):提交拍照图请求,并输出图片到指定目标。
③abstract int setRepeatingRequest(CaptureRequest request, CameraCaptureSession.CaptureCallback listener, Handler handler):通过此会话请求来连拍。
④abstract void stopRepeating():停止连拍。
(四)ImageReader用于获取并保存图像,常用方法如下:
①Surface getSurface():获取图像读取器的表面对象 。
②void setOnImageAvailableListener(ImageReader.OnImageAvailableListener listener, Handler handler):注册一个图像获取监听器,当ImageReader中有新图像可用时,会立即触发listener中的回调方法:abstract void onImageAvailable(ImageReader reader)
以上是控制摄像头拍照,控制摄像头录制视频需要前面介绍的MediaRecorder类,与录制视频有关的方法:
①void setPreviewDisplay(Surface sv):设置预览界面,参数sv可通过SurfaceHolder对象的getSurface获得。
②void setOrientationHint(int degrees):设置预览的方向。
③void setVideoSource(int video_source):设置要用于录制的视频源,一般为MediaRecorder.VideoSource.CAMERA。
④void setVideoEncoder(int video_encoder):设置要视频编码器。
⑤void setVideoSize(int width, int height):设置要捕获的视频的宽度和高度。
⑥void setVideoFrameRate(int rate):设置要捕获的视频的帧率。
⑦void setVideoEncodingBitRate(int bitRate):设置视频编码比特率。
2.使用方法
控制摄像头拍照的基本流程如下:
①首先要创建一个显示实时图像的载体,采用继承自纹理视图的自定义视图。设置自定义视图的尺寸,让其可以显示摄像头最大分辨率的图像,设置自定义视图的状态监听器监听创建成功和销毁的状态。
②同时还需要创建一个JPEG格式的与分辨率匹配的图像读取器,为其设置状态监听器。当有可用的图像数据时,调用有关方法来保存。
③当自定义视图创建完毕后在其回调方法中打开摄像头的连接,获取摄像头设备,并为设备注册状态监听器。当自定义视图销毁时,断开摄像头连接。
④当摄像头设备打开时,创建画面预览会话,然后将预览画面和自定义视图、图像读取器绑定在一起。
⑤接着用户点击拍照的时候,需要创建拍照请求,包括图像的各种参数设置,图像存储位置等。
当然,别忘了权限声明:CAMERA和WRITE_EXTERNAL_STORAGE!
自定义图像显示视图代码如下:
public class Camera2View extends TextureView {
    private static final String TAG = "Camera2View";
    private Context mContext; // 声明一个上下文对象
    private Handler mHandler;
    private HandlerThread mThreadHandler;
    private CaptureRequest.Builder mPreviewBuilder; // 声明一个拍照请求构建器对象
    private CameraCaptureSession mCameraSession; // 声明一个相机拍照会话对象
    private CameraDevice mCameraDevice; // 声明一个相机设备对象
    private ImageReader mImageReader; // 声明一个图像读取器对象
    private Size mPreViewSize; // 预览画面的尺寸
    private int mCameraType = CameraCharacteristics.LENS_FACING_FRONT; // 摄像头类型
    private int mTakeType = 0; // 拍摄类型。0为单拍,1为连拍

    public Camera2View(Context context) {
        this(context, null);
    }

    public Camera2View(Context context, AttributeSet attrs) {
        super(context, attrs);
        mContext = context;
        mThreadHandler = new HandlerThread("camera2");
        mThreadHandler.start();
        mHandler = new Handler(mThreadHandler.getLooper());
    }

    // 打开指定摄像头,给外部调用
    public void open(int camera_type) {
        mCameraType = camera_type;
        // 设置表面纹理变更监听器
        setSurfaceTextureListener(mSurfacetextlistener);
    }

    // 定义一个表面纹理变更监听器。TextureView准备就绪后,立即开启相机
    private SurfaceTextureListener mSurfacetextlistener = new SurfaceTextureListener() {
        // 在纹理表面可用时触发
        public void onSurfaceTextureAvailable(SurfaceTexture surface, int width, int height) {
            openCamera(); // 打开相机
        }

        // 在纹理表面的尺寸发生改变时触发
        public void onSurfaceTextureSizeChanged(SurfaceTexture surface, int width, int height) {
        }

        // 在纹理表面销毁时触发
        public boolean onSurfaceTextureDestroyed(SurfaceTexture surface) {
            closeCamera(); // 关闭相机
            return true;
        }

        // 在纹理表面更新时触发
        public void onSurfaceTextureUpdated(SurfaceTexture surface) {
        }
    };

    // 关闭相机
    private void closeCamera() {
        if (null != mCameraSession) {
            mCameraSession.close(); // 关闭相机拍摄会话
            mCameraSession = null;
        }
        if (null != mCameraDevice) {
            mCameraDevice.close(); // 关闭相机设备
            mCameraDevice = null;
        }
        if (null != mImageReader) {
            mImageReader.close(); // 关闭图像读取器
            mImageReader = null;
        }
    }

    // 打开相机
    private void openCamera() {
        // 从系统服务中获取相机管理器
        CameraManager cm = (CameraManager) mContext.getSystemService(Context.CAMERA_SERVICE);
        String cameraid = mCameraType + "";
        try {
            // 获取可用相机设备列表
            CameraCharacteristics cc = cm.getCameraCharacteristics(cameraid);
            //获取相机支持的所有分辨率
            StreamConfigurationMap map = cc.get(CameraCharacteristics.SCALER_STREAM_CONFIGURATION_MAP);
            //找到最大分辨率
            Size largest = Collections.max(Arrays.asList(map.getOutputSizes(ImageFormat.JPEG)), new Comparator<Size>() {
                @Override
                public int compare(Size lhs, Size rhs) {
                    return Long.signum((long) lhs.getWidth() * lhs.getHeight()
                            - (long) rhs.getWidth() * rhs.getHeight());
                }
            });
            // 获取预览画面的尺寸
            mPreViewSize = map.getOutputSizes(SurfaceTexture.class)[0];
            // 创建一个JPEG格式的图像读取器
            mImageReader = ImageReader.newInstance(largest.getWidth(), largest.getHeight(), ImageFormat.JPEG, 10);
            // 设置图像读取器的图像可用监听器,一旦捕捉到图像数据就会触发监听器的onImageAvailable方法
            mImageReader.setOnImageAvailableListener(onImageAvaiableListener, mHandler);
            if (ActivityCompat.checkSelfPermission(mContext, Manifest.permission.CAMERA) == PackageManager.PERMISSION_GRANTED) {
                // 开启摄像头
                cm.openCamera(cameraid, mDeviceStateCallback, mHandler);
            }
        } catch (CameraAccessException e) {
            e.printStackTrace();
        }
    }
    // 一旦有图像数据生成,立刻触发onImageAvailable事件
    private OnImageAvailableListener onImageAvaiableListener = new OnImageAvailableListener() {
        @Override
        public void onImageAvailable(ImageReader imageReader) {
            Log.d(TAG, "onImageAvailable");
            mHandler.post(new ImageSaver(imageReader.acquireNextImage()));
        }
    };
    // 定义一个图像保存任务
    private class ImageSaver implements Runnable {
        private Image mImage;
        public ImageSaver(Image reader) {
            mImage = reader;
        }
        @Override
        public void run() {
            // 获取本次拍摄的照片保存路径
            String path = String.format("%s%s.jpg", Environment.getExternalStorageDirectory().toString(),
                    new SimpleDateFormat("yyyyMMddHHmmss").format(new Date()));
            Log.d(TAG, "正在保存图片 path=" + path);
            // 保存图片文件到存储器
            BitmapUtil.saveBitmap(path, mImage.getPlanes()[0].getBuffer(), 4, "JPEG", 80);
            //BitmapUtil.setPictureDegreeZero(path);
            if (mImage != null) {
                mImage.close();
                if (mTakeType == 0) { // 单拍
                    mPhotoPath = path;
                } else { // 连拍
                    mShootingArray.add(path);
                }
                Log.d(TAG, "完成保存图片 path=" + path);
            }
        }
    }

    // 相机准备就绪后,开启捕捉影像的会话
    private CameraDevice.StateCallback mDeviceStateCallback = new CameraDevice.StateCallback() {
        @Override
        public void onOpened(CameraDevice cameraDevice) {
            mCameraDevice = cameraDevice;
            createCameraPreviewSession();
        }

        @Override
        public void onDisconnected(CameraDevice cameraDevice) {
            cameraDevice.close();
            mCameraDevice = null;
        }

        @Override
        public void onError(CameraDevice cameraDevice, int error) {
            cameraDevice.close();
            mCameraDevice = null;
        }
    };

    // 创建相机预览会话
    private void createCameraPreviewSession() {
        // 获取纹理视图的表面纹理
        SurfaceTexture texture = getSurfaceTexture();
        // 设置表面纹理的默认缓存尺寸
        texture.setDefaultBufferSize(mPreViewSize.getWidth(), mPreViewSize.getHeight());
        // 创建一个该表面纹理的表面对象
        Surface surface = new Surface(texture);
        try {
            mPreviewBuilder = mCameraDevice.createCaptureRequest(CameraDevice.TEMPLATE_PREVIEW);
            // 把纹理视图添加到预览目标
            mPreviewBuilder.addTarget(surface);
            // 设置自动对焦模式
            mPreviewBuilder.set(CaptureRequest.CONTROL_AF_MODE,
                    CaptureRequest.CONTROL_AF_MODE_CONTINUOUS_PICTURE);
            // 设置自动曝光模式
            mPreviewBuilder.set(CaptureRequest.CONTROL_AF_MODE,
                    CaptureRequest.CONTROL_AE_MODE_ON_AUTO_FLASH);
            // 开始对焦
            mPreviewBuilder.set(CaptureRequest.CONTROL_AF_TRIGGER,
                    CameraMetadata.CONTROL_AF_TRIGGER_START);
            // 设置照片的方向
            mPreviewBuilder.set(CaptureRequest.JPEG_ORIENTATION, (mCameraType == CameraCharacteristics.LENS_FACING_FRONT) ? 90 : 270);
            // 创建一个相片捕获会话。此时预览画面显示在纹理视图上
            mCameraDevice.createCaptureSession(Arrays.asList(surface, mImageReader.getSurface()),
                    mSessionStateCallback, mHandler);
        } catch (CameraAccessException e) {
            e.printStackTrace();
        }
    }

    // 影像配置就绪后,将预览画面呈现到手机屏幕上
    private CameraCaptureSession.StateCallback mSessionStateCallback = new CameraCaptureSession.StateCallback() {
        @Override
        public void onConfigured(CameraCaptureSession session) {
            try {
                Log.d(TAG, "onConfigured");
                mCameraSession = session;
                // 设置连拍请求。此时预览画面只会发给手机屏幕
                mCameraSession.setRepeatingRequest(mPreviewBuilder.build(), null, mHandler);
            } catch (CameraAccessException e) {
                e.printStackTrace();
            }
        }

        @Override
        public void onConfigureFailed(CameraCaptureSession session) {
        }
    };

    private String mPhotoPath; // 照片的保存路径
    // 获取照片的保存路径,供外部调用
    public String getPhotoPath() {
        return mPhotoPath;
    }

    private ArrayList<String> mShootingArray; // 连拍的相片保存路径列表
    // 获取连拍的相片保存路径列表,,供外部调用
    public ArrayList<String> getShootingList() {
        Log.d(TAG, "mShootingArray.size()=" + mShootingArray.size());
        return mShootingArray;
    }

    // 预览完毕,用户点击拍照,则调用此方法
    public void takePicture() {
        Log.d(TAG, "正在拍照");
        mTakeType = 0;
        try {
            CaptureRequest.Builder builder = mCameraDevice.createCaptureRequest(CameraDevice.TEMPLATE_PREVIEW);
            // 把图像读取器添加到预览目标
            builder.addTarget(mImageReader.getSurface());
            // 设置自动对焦模式
            builder.set(CaptureRequest.CONTROL_AF_MODE,
                    CaptureRequest.CONTROL_AF_MODE_AUTO);
            // 设置自动曝光模式
            builder.set(CaptureRequest.CONTROL_AF_MODE,
                    CaptureRequest.CONTROL_AE_MODE_ON_AUTO_FLASH);
            // 开始对焦
            builder.set(CaptureRequest.CONTROL_AF_TRIGGER,
                    CameraMetadata.CONTROL_AF_TRIGGER_START);
            // 设置照片的方向
            builder.set(CaptureRequest.JPEG_ORIENTATION, (mCameraType == CameraCharacteristics.LENS_FACING_FRONT) ? 90 : 270);
            // 拍照会话开始捕获相片
            mCameraSession.capture(builder.build(), null, mHandler);
        } catch (CameraAccessException e) {
            e.printStackTrace();
        }
    }

    // 开始连拍
    public void startShooting(int duration) {
        Log.d(TAG, "正在连拍");
        mTakeType = 1;
        mShootingArray = new ArrayList<String>();
        try {
            // 停止连拍
            mCameraSession.stopRepeating();
            // 把图像读取器添加到预览目标
            mPreviewBuilder.addTarget(mImageReader.getSurface());
            // 设置连拍请求。此时预览画面会同时发给手机屏幕和图像读取器
            mCameraSession.setRepeatingRequest(mPreviewBuilder.build(), null, mHandler);
            // duration小等于0时,表示持续连拍,此时外部要调用stopShooting方法来结束连拍
            if (duration > 0) {
                // 延迟若干秒后启动拍摄停止任务
                mHandler.postDelayed(mStop, duration);
            }
        } catch (CameraAccessException e) {
            e.printStackTrace();
        }
    }

    // 停止连拍
    public void stopShooting() {
        try {
            // 停止连拍
            mCameraSession.stopRepeating();
            // 移除图像读取器的预览目标
            mPreviewBuilder.removeTarget(mImageReader.getSurface());
            // 设置连拍请求。此时预览画面只会发给手机屏幕
            mCameraSession.setRepeatingRequest(mPreviewBuilder.build(), null, mHandler);
        } catch (CameraAccessException e) {
            e.printStackTrace();
        }
        Toast.makeText(mContext, "已完成连拍,按返回键回到上页查看照片。", Toast.LENGTH_SHORT).show();
    }

    // 定义一个拍摄停止任务
    private Runnable mStop = new Runnable() {
        @Override
        public void run() {
            stopShooting();
        }
    };
}
主页面布局有两个按钮,用于选择使用前置还是后置摄像头。
MainActivity代码如下:
public class MainActivity extends AppCompatActivity implements View.OnClickListener {
    private static final String TAG = "ShootingActivity";
    private Camera2View camera2_view; // 声明一个二代相机视图对象
    @Override
    protected void onCreate(Bundle savedInstanceState) {
        super.onCreate(savedInstanceState);
        setContentView(R.layout.activity_main);
        findViewById(R.id.btn_back).setOnClickListener(this);
        findViewById(R.id.btn_front).setOnClickListener(this);
    }
    @Override
    public void onClick(View v) {
        // 前往camera2的拍照页面
        Intent intent = new Intent(this, TakeShootingActivity.class);
        switch (v.getId()) {
            case R.id.btn_back: //后置摄像头
                    // 类型为后置摄像头
                    intent.putExtra("type", CameraCharacteristics.LENS_FACING_FRONT);
                    // 需要处理拍照页面的返回结果
                    startActivityForResult(intent, 1);
                break;
            case R.id.btn_front: //前置摄像
                    // 类型为前置摄像头
                    intent.putExtra("type", CameraCharacteristics.LENS_FACING_BACK);
                    // 需要处理拍照页面的返回结果
                    startActivityForResult(intent, 1);
        }
    }
    // 处理camera2拍照页面的返回结果
    public void onActivityResult(int requestCode, int resultCode, Intent intent) {
        super.onActivityResult(requestCode, resultCode, intent);
        Log.d(TAG, "onActivityResult. requestCode=" + requestCode + ", resultCode=" + resultCode);
        Bundle resp = intent.getExtras(); // 获取返回的包裹
        String is_null = resp.getString("is_null");
        if (!TextUtils.isEmpty(is_null) && !is_null.equals("yes")) { // 有发生拍照动作
            int type = resp.getInt("type");
            Log.d(TAG, "type=" + type);
            if (type == 0) { // 单拍。一次只拍一张
                Toast.makeText(this, "已保存单拍照片", Toast.LENGTH_SHORT).show();
            } else if (type == 1) { // 连拍。一次连续拍了好几张
                Toast.makeText(this, "已保存连拍照片", Toast.LENGTH_SHORT).show();
            }
        }
    }
}
选定摄像头之后,选择新的页面来预览图像。预览界面布局如下:
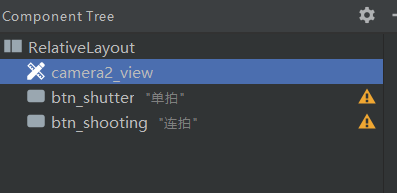
预览界面TakeShootingActivity的代码如下:
public class TakeShootingActivity extends AppCompatActivity implements OnClickListener {
    private static final String TAG = "TakeShootingActivity";
    private Camera2View camera2_view; // 声明一个二代相机视图对象
    private int mTakeType = 0; // 拍照类型。0为单拍,1为连拍

    @Override
    protected void onCreate(Bundle savedInstanceState) {
        super.onCreate(savedInstanceState);
        setContentView(R.layout.activity_take_shooting);
        // 获取前一个页面传来的摄像头类型
        int camera_type = getIntent().getIntExtra("type", CameraCharacteristics.LENS_FACING_FRONT);
        // 从布局文件中获取名叫camera2_view的二代相机视图
        camera2_view = findViewById(R.id.camera2_view);
        // 设置二代相机视图的摄像头类型
        camera2_view.open(camera_type);
        findViewById(R.id.btn_shutter).setOnClickListener(this);
        findViewById(R.id.btn_shooting).setOnClickListener(this);
    }

    @Override
    public void onBackPressed() {
        Intent intent = new Intent(); // 创建一个新意图
        Bundle bundle = new Bundle(); // 创建一个新包裹
        String photo_path = camera2_view.getPhotoPath(); // 获取照片的保存路径
        bundle.putInt("type", mTakeType);
        if (photo_path == null && mTakeType == 0) { // 未发生拍照动作
            bundle.putString("is_null", "yes");
        } else { // 有发生拍照动作
            bundle.putString("is_null", "no");
            if (mTakeType == 0) { // 单拍。一次只拍一张
                bundle.putString("path", photo_path);
            } else if (mTakeType == 1) { // 连拍。一次连续拍了好几张
                bundle.putStringArrayList("path_list", camera2_view.getShootingList());
            }
        }
        intent.putExtras(bundle); // 往意图中存入包裹
        setResult(Activity.RESULT_OK, intent); // 携带意图返回前一个页面
        finish(); // 关闭当前页面
    }

    @Override
    public void onClick(View v) {
        if (v.getId() == R.id.btn_shutter) { // 点击了单拍按钮
            mTakeType = 0;
            // 命令二代相机视图执行单拍操作
            camera2_view.takePicture();
            // 拍照需要完成对焦、图像捕获、图片保存等一系列动作,因而要留足时间给系统处理
            new Handler().postDelayed(new Runnable() {
                @Override
                public void run() {
                    Toast.makeText(TakeShootingActivity.this, "已完成拍照", Toast.LENGTH_SHORT).show();
                }
            }, 1500);
        } else if (v.getId() == R.id.btn_shooting) { // 点击了连拍按钮
            mTakeType = 1;
            // 命令二代相机视图执行连拍操作
            camera2_view.startShooting(7000);
        }
    }
}
预览界面效果如图:
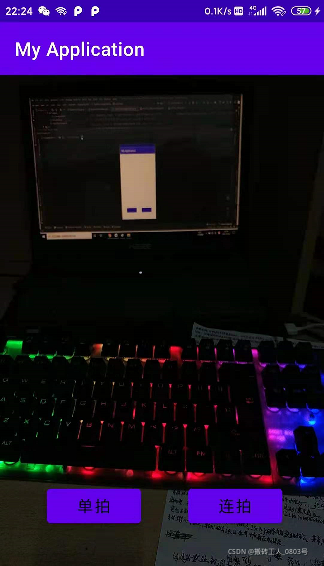
总体来说,流程复杂,要熟练使用是个不小的考验。至于控制摄像头来拍摄视频,与录音流程类似,限于篇幅,自行摸索吧。
题外话: 现在手机厂商越来越离谱了啊,兄弟姐妹们,摄像头的数量越来越多,难道说不久的将来,整个手机背面都要塞满摄像头吗?

双摄最早出现在HTC在2011年发布的手机上,在我印象里双摄真正火起来的时候是我读高二的时候(2016)苹果7搭载的双摄,后来所有的手机厂商开始借鉴,不仅摄像头数量增加,像素也成倍增加。言归正传,随便手机厂商怎么折腾,普通开发者凭借Android系统提供的标准API也能控制摄像头而不用关心底层驱动,不过,随着手机搭载的摄像头越来越高级,开发难度也越来越大了。
九、NFC
1.简介
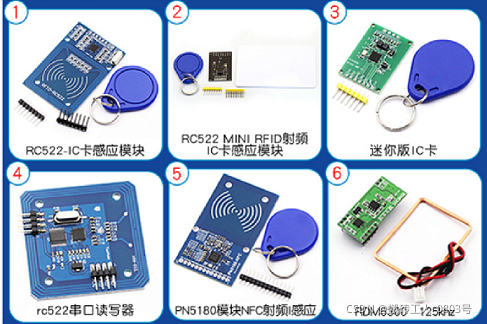
NFC是一种短距离,高频的无线电技术,NFCIP-1协议规定了NFC的通信距离为10cm以内,运行频率为13.56MHz,传输速度有:106、212、424Kbit/S三种,它的工作模式分为主动和被动模式:
主动模式中,发起设备和目标设备向对方发送数据时都要主动产生射频场,都需供电装置来提供能量,在这种通信模式下双方是对等的,因此可获得较快的连接速率。
被动模式中,NFC发起设备(主设备)需要供电装置,主设备利用供电装置提供的能量产生射频场,并将数据发送到NFC目标设备(从设备),从设备不需要供电装置,而是利用主设备产生的射频场转化为电能,为自己供电,接收主设备的数据,利用负载调制技术,以相同的速度将数据传回主设备。
ISO1443通信协议有3个常用的子协议:NfcA、NfcB、IsoDep,有各自不同的使用场景:
NfcA遵循ISO1443-3A标准,常用于门禁卡。
NfcB遵循ISO1443-3B标准,常用于二代身份证。
IsoDep遵循ISO14434-4标准,常用于公交卡。
MifareClassic是Android提供解析NfcA协议对应数据格式的类,它的常用方法有:
①static MifareClassic get(Tag tag):从指定标签获取 MifareClassic的实例对象。
②void connect():连接卡片。
③void close():断开连接,并释放资源。
④int getBlockCount():返回卡片的分块个数。
⑤int getSectorCount():返回卡片的扇区总数。
⑥int getSize():以字节为单位返回卡片的存储空间大小。
⑦int getType():返回卡片的类型,TYPE_UNKNOWN,TYPE_CLASSIC,TYPE_PLUS或者TYPE_PRO(未知,传统,增强,专业型)。
IsoDep是IsoDep协议的数据格式解析类,其常用方法有:
①static IsoDep get(Tag tag):从卡片获取IsoDep实例。
②void connect()
void close():
启用对卡片对象的I / O操作。禁用对卡片对象的I / O操作,并释放资源。
③byte[] transceive(byte[] data):将原始ISO-DEP数据发送到标签并接收响应。
NFC适配器NfcAdapter是Android管理NFC的工具类,它的常用方法有:
①static NfcAdapter getDefaultAdapter(Context context):获取默认的NFC适配器,若手机不支持NFC功能,则返回null。
②void enableForegroundDispatch(Activity activity, PendingIntent intent, IntentFilter[] filters,String[][] techLists): 启用禁用NFC感应,intent是响应动作,filters和techLists是过滤动作和过滤标签列表。此方法需在页面的onResume方法中调用。
③void disableForegroundDispatch(Activity activity):禁用感应功能,需在页面的onPause方法中调用。
2.使用方法
使用NFC来感应卡片的基本流程如下:
①在配置文件里声明NFC的操作权限NFC。
    <!-- NFC -->
    <uses-permission android:name="android.permission.NFC" />
    <!-- 仅在支持NFC的设备上运行 -->
    <uses-feature android:name="android.hardware.nfc" android:required="true" />
②对使用NFC功能的Activity额外添加响应过滤器< intent-filter>标签,指定此Activity可被卡片检测事件自动启动。Android支持DEF_DISCOVERED、TAG_DISCOVERED、TECH_DISCOVERED三种卡片检测事件,都加入过滤器中:
        <activity android:name=".MainActivity">
            <intent-filter>
                <action android:name="android.nfc.action.NDEF_DISCOVERED" />
            </intent-filter>
            <intent-filter>
                <action android:name="android.nfc.action.TAG_DISCOVERED" />
                <category android:name="android.intent.category.DEFAULT" />
            </intent-filter>
            <intent-filter>
                <action android:name="android.nfc.action.TECH_DISCOVERED" />
            </intent-filter>
            <meta-data
                android:name="android.nfc.action.TECH_DISCOVERED"
                android:resource="@xml/nfc_tech_filter" />
        </activity>
其中TECH_DISCOVERED额外指定过滤器数据来源是@xml/nfc_tech_filter,该文件内容如下:
<resources>
    <!-- 可以处理所有Android支持的NFC类型 -->
    <tech-list>
        <tech>android.nfc.tech.NfcA</tech>
        <tech>android.nfc.tech.NfcB</tech>
        <tech>android.nfc.tech.NfcF</tech>
        <tech>android.nfc.tech.NfcV</tech>
        <tech>android.nfc.tech.IsoDep</tech>
        <tech>android.nfc.tech.Ndef</tech>
        <tech>android.nfc.tech.NdefFormatable</tech>
        <tech>android.nfc.tech.MifareClassic</tech>
        <tech>android.nfc.tech.MifareUltralight</tech>
    </tech-list>
</resources>
③调用NfcAdapter的静态方法getDefaultAdapter获取NFC适配器实例对象,在页面的onResume方法中调用enableForegroundDispatch启用卡片感应。
④探测到NFC卡片后,必须以FLAG_ACTIVITY_SINGLE_TOP方式启动Activity,保证无论NFC标签靠近手机多少次,Activity实例都只有一个。在感应到卡片时会回调Activity的onNewIntent方法,在这里可获取并解析数据。
接下来通过一个小例子来熟悉一下基本流程:
页面布局只有两个文本视图,其中一个用于显示卡片信息。
MainActivity中的主要代码如下:
private TextView tv_nfc_result;
    private NfcAdapter mNfcAdapter; // 声明一个NFC适配器对象
    // 获取NFC适配器实例对象
    private void initNfc() {
        // 获取系统默认的NFC适配器
        mNfcAdapter = NfcAdapter.getDefaultAdapter(this);
        if (mNfcAdapter == null) {
            tv_nfc_result.setText("当前手机不支持NFC");
        } else if (!mNfcAdapter.isEnabled()) {
            tv_nfc_result.setText("请先在系统设置中启用NFC功能");
        } else {
            tv_nfc_result.setText("当前手机支持NFC");
        }
    }

    @Override
    protected void onResume() {
        super.onResume();
        if (mNfcAdapter==null || !mNfcAdapter.isEnabled()) {
            return;
        }
        // 探测到NFC卡片后,必须以FLAG_ACTIVITY_SINGLE_TOP方式启动一个全新的Activity
        Intent intent = new Intent(this, MainActivity.class)
                .addFlags(Intent.FLAG_ACTIVITY_SINGLE_TOP);
        // 声明一个NFC卡片探测事件的相应动作
        PendingIntent pendingIntent = PendingIntent.getActivity(this, 0,
                intent, PendingIntent.FLAG_UPDATE_CURRENT);
        // 读标签之前先确定标签类型。这里以NfcA为例
        String[][] techLists = new String[][]{new String[]{NfcA.class.getName()}, {IsoDep.class.getName()}};
        try {
            // 定义一个过滤器(检测到NFC卡片)
            IntentFilter[] filters = new IntentFilter[]{new IntentFilter(NfcAdapter.ACTION_TECH_DISCOVERED, "*/*")};
            // 为本App启用NFC感应
            mNfcAdapter.enableForegroundDispatch(this, pendingIntent, filters, techLists);
        } catch (Exception e) {
            e.printStackTrace();
        }
    }

    @Override
    public void onPause() {
        super.onPause();
        if (mNfcAdapter==null || !mNfcAdapter.isEnabled()) {
            return;
        }
        // 禁用本App的NFC感应
        mNfcAdapter.disableForegroundDispatch(this);
    }

    // 将Byte数组转换为16进制字符串
    private String ByteArrayToHexString(byte[] bytesId) {
        int i, j, in;
        String[] hex = {"0", "1", "2", "3", "4", "5", "6", "7", "8", "9", "A", "B", "C", "D", "E", "F"};
        String output = "";
        for (j = 0; j < bytesId.length; ++j) {
            in = bytesId[j] & 0xff;
            i = (in >> 4) & 0x0f;
            output += hex[i];
            i = in & 0x0f;
            output += hex[i];
        }
        return output;
    }

    //在此方法中解析卡片
    @Override
    protected void onNewIntent(Intent intent) {
        super.onNewIntent(intent);
        String action = intent.getAction(); // 获取到本次启动的action
        if (action.equals(NfcAdapter.ACTION_NDEF_DISCOVERED) // NDEF类型
                || action.equals(NfcAdapter.ACTION_TECH_DISCOVERED) // 其他类型
                || action.equals(NfcAdapter.ACTION_TAG_DISCOVERED)) { // 未知类型
            // 从intent中读取NFC卡片内容
            Tag tag = intent.getParcelableExtra(NfcAdapter.EXTRA_TAG);
            // 获取NFC卡片的序列号
            byte[] ids = tag.getId();
            String card_info = String.format("卡片的序列号为: %s", ByteArrayToHexString(ids));
            String result = readGuardCard(tag);
            card_info = String.format("%s\n详细信息如下:\n%s", card_info, result);
            tv_nfc_result.setText(card_info);
        }
    }

    // 读取门禁卡信息
    public String readGuardCard(Tag tag) {
        MifareClassic classic = MifareClassic.get(tag);
        String info = "";
        try {
            classic.connect(); // 连接卡片数据
            int type = classic.getType(); //获取TAG的类型
            String typeDesc;
            if (type == MifareClassic.TYPE_CLASSIC) {
                typeDesc = "传统类型";
            } else if (type == MifareClassic.TYPE_PLUS) {
                typeDesc = "增强类型";
            } else if (type == MifareClassic.TYPE_PRO) {
                typeDesc = "专业类型";
            } else {
                typeDesc = "未知类型";
            }
            info = String.format("\t卡片类型:%s\n\t扇区数量:%d\n\t分块个数:%d\n\t存储空间:%d字节",
                    typeDesc, classic.getSectorCount(), classic.getBlockCount(), classic.getSize());
        } catch (Exception e) {
            e.printStackTrace();
        } finally { // 无论是否发生异常,都要释放资源
            try {
                classic.close(); // 释放卡片数据
            } catch (Exception e) {
                e.printStackTrace();
            }
        }
        return info;
    }
当把卡片放在手机背面之后,解析结果如下:

以上解析了卡片的总体属性,具体存储到每个扇区的数据可通过MifareClassic的有关方法获取,但是获取到的原始数据通常都是经过加密处理的,直接看都是乱码,要获得卡中的信息就必须通过解密方法还原。
十、蓝牙
1.简介

“蓝牙”一词取自十世纪丹麦国王哈拉尔(Harald Bluetooth),创造它的工程师希望蓝牙技术像丹麦国王统一国家一样成为统一的通用传输标准。蓝牙技术开始于1994年爱立信创建的方案,重要的两个版本为2004年的蓝牙2.0:新增的EDR技术通过提高多任务处理和多种蓝牙设备同时运行的能力,使蓝牙设备的传输速率达到3Mbps。2010年的蓝牙4.0,是一个蓝牙综合协议规范,其中最重要的是BLE(Bluetooth Low Energy)低功耗技术,功耗较老版本降低90%,传输距离范围也提升到100米。
当然现在已经推出了第五代蓝牙技术,传输速率更高,传输距离更远,功耗越低,通信越安全。
在Android中与蓝牙有关的类有:BluetoothManager,BluetoothAdapter,BluetoothDevice,BluetoothServerSocket,BluetoothSocket,BluetoothA2dp。
蓝牙管理器BluetoothManager通过系统服务BLUETOOTH_SERVICE获取管理器实例,该实例对象可用于获取 BluetoothAdapter的实例并整体管理蓝牙设备。它的常用方法如下:
①BluetoothAdapter getAdapter():获取此设备的默认BluetoothAdapter。
②List< BluetoothDevice> getConnectedDevices(int profile):获取指定的蓝牙连接设备。profile可取值:GATT(GATT客服端)或GATT_SERVER(GATT服务端)。
③int getConnectionState(BluetoothDevice device, int profile):获取远程设备的连接状态。返回值范围: STATE_CONNECTED, STATE_CONNECTING, STATE_DISCONNECTED, STATE_DISCONNECTING(已连接,连接中,已断开连接,断开连接中)。
蓝牙适配器BluetoothAdapter是管理具体每一个蓝牙设备的类,可执行基本的蓝牙任务,例如启动设备发现,查询绑定(配对)设备列表,使用已知MAC地址实例化BluetoothDevice ,创建一个BluetoothServerSocket以侦听来自其他设备的连接请求,启动扫描蓝牙LE设备。它的实例对象通常通过BluetoothManager的getAdapter方法获取或者自身的静态方法获取(不推荐此方法),它的常用方法有:
①boolean isEnabled():蓝牙功能是否启用。
②boolean disable():关闭蓝牙功能。
③boolean enable():启用底层蓝牙硬件,并启动所有蓝牙系统服务, 由于打开后没有任何提示,所以一般不直接使用此方法来打开蓝牙。
④boolean startDiscovery():开始搜索周围的蓝牙设备,搜索结果通过广播返回。
⑤boolean cancelDiscovery():取消搜索。
⑥boolean isDiscovering():是否正在搜索。
⑦Set< BluetoothDevice> getBondedDevices():获取已绑定的蓝牙设备集合。返回结果是已绑定设备的历史记录,而非当前能连接的设备。
⑧String getName()
boolean setName(String name):获取/设置本地蓝牙名称。
⑨String getAddress():返回本机蓝牙的硬件地址。
⑩BluetoothDevice getRemoteDevice(byte[] address)
BluetoothDevice getRemoteDevice(String address):获取给定硬件地址的远程蓝牙设备。
?int getState():获取本机蓝牙的当前状态。返回值范围: STATE_OFF ,STATE_TURNING_ON, STATE_ON , STATE_TURNING_OFF。
?BluetoothServerSocket listenUsingInsecureRfcommWithServiceRecord(String name, UUID uuid):根据名称和UUID创建一个不安全的带有服务记录的RFCOMM蓝牙套接字。
?BluetoothServerSocket listenUsingRfcommWithServiceRecord(String name, UUID uuid):根据名称和UUID创建一个安全的带有服务记录的RFCOMM蓝牙套接字。
?boolean getProfileProxy(Context context, BluetoothProfile.ServiceListener listener, int profile):获取与配置文件关联的代理对象并设置它的监听器listener。参数profile的取值范围:HEALTH, HEADSET, A2DP,GATT,GATT_SERVER.
蓝牙设备BluetoothDevice是蓝牙硬件设备的抽象表示,常用方法有:
①String getAddress():返回此BluetoothDevice的硬件地址。
②int getBondState():获取此BluetoothDevice的绑定状态。返回值范围为:BOND_NONE ,BOND_BONDING , BOND_BONDED。
③String getName():获取此BluetoothDevice的蓝牙名称。
④boolean createBond():创建绑定(配对)请求,结果通过广播返回。
⑤BluetoothSocket createInsecureRfcommSocketToServiceRecord(UUID uuid):根据UUID创建一个到远程设备的不安全BluetoothSocket。
⑥BluetoothSocket createRfcommSocketToServiceRecord(UUID uuid):根据UUID创建一个到远程设备的安全BluetoothSocket。
蓝牙服务端套接字BluetoothServerSocket类似众所周知的TCP中的ServerSocket,常用方法如下:
①BluetoothSocket accept(int timeout)
BluetoothSocket accept():阻塞线程直到建立连接,timeout用于指定阻塞时间。
②void close():关闭套接字,并释放所有关联的资源。
蓝牙客服端套接字BluetoothSocket和TCP中的Socket同理,常用方法:
①void close():关闭此套接字,释放与其关联的所有系统资源。
②void connect():尝试连接到远程蓝牙设备。
③InputStream getInputStream()
OutputStream getOutputStream():获取与此套接字关联的输入流/输出流。
④BluetoothDevice getRemoteDevice():获取此套接字连接的远程蓝牙设备。
⑤boolean isConnected():获取此套接字的连接状态。
蓝牙A2DP代理BluetoothA2dp提供有关API来通过A2DP连接蓝牙设备。
A2DP的全称是Advanced Audio Distribution Profile(蓝牙音频传输协议),安装了这个协议的手机和蓝牙音箱/耳机就可以实现音频数据的快速传输。从开发者的角度来看,只需要通过BluetoothA2dp连接到蓝牙音箱/耳机设备即可,无需关心音频数据的传输。那么它的常用方法有:
①@UnsupportedAppUsage
public boolean connect(BluetoothDevice device):启动与远程蓝牙设备使用A2DP的连接。
②@UnsupportedAppUsage
public boolean disconnect(BluetoothDevice device):断开与蓝牙设备的连接,若音频正在蓝牙设上播放,调用此方法则会在扬声器上播放。
③public boolean setPriority(BluetoothDevice device, int priority):设置A2DP设备的优先级。需要设置为100,其他值则表示使用扬声器播放音频。
说明:以上三个方法都需要通过反射来调用。 因此,为了方便使用,自定义一个蓝牙工具类BluetoothUtil把这三个方法封装起来,然后把一些常用的代码片段也封起来:
    // 获取蓝牙的开关状态
    public static boolean getBlueToothStatus(Context context) {
        BluetoothAdapter bluetoothAdapter = BluetoothAdapter.getDefaultAdapter();
        boolean enabled;
        switch (bluetoothAdapter.getState()) {
            case BluetoothAdapter.STATE_ON:
            case BluetoothAdapter.STATE_TURNING_ON:
                enabled = true;
                break;
            case BluetoothAdapter.STATE_OFF:
            case BluetoothAdapter.STATE_TURNING_OFF:
            default:
                enabled = false;
                break;
        }
        return enabled;
    }
    // 建立蓝牙配对
    public static boolean createBond(BluetoothDevice device) {
        try {
            Method createBondMethod = BluetoothDevice.class.getMethod("createBond");
            Boolean result = (Boolean) createBondMethod.invoke(device);
            return result;
        } catch (Exception e) {
            e.printStackTrace();
            return false;
        }
    }

    // 取消蓝牙配对
    public static boolean removeBond(BluetoothDevice device) {
        try {
            Method createBondMethod = BluetoothDevice.class.getMethod("removeBond");
            Boolean result = (Boolean) createBondMethod.invoke(device);
            return result;
        } catch (Exception e) {
            e.printStackTrace();
            return false;
        }
    }

    // 打开或关闭蓝牙
    public static void setBlueToothStatus(Context context, boolean enabled) {
        BluetoothAdapter bluetoothAdapter = BluetoothAdapter.getDefaultAdapter();
        if (enabled) {
            bluetoothAdapter.enable();
        } else {
            bluetoothAdapter.disable();
        }
    }
   // 建立A2DP连接
    public static boolean connectA2dp(BluetoothA2dp a2dp, BluetoothDevice device) {
        try {
            Method setMethod = BluetoothA2dp.class.getMethod("setPriority", BluetoothDevice.class, int.class);
            Boolean setResult = (Boolean) setMethod.invoke(a2dp, device, 100);
            Method connectMethod = BluetoothA2dp.class.getMethod("connect", BluetoothDevice.class);
            Boolean connectResult = (Boolean) connectMethod.invoke(a2dp, device);
            return connectResult;
        } catch (Exception e) {
            e.printStackTrace();
            return false;
        }
    }
    // 取消A2DP连接
    public static boolean disconnectA2dp(BluetoothA2dp a2dp, BluetoothDevice device) {
        try {
            Method method = BluetoothA2dp.class.getMethod("disconnect", BluetoothDevice.class);
            Boolean result = (Boolean) method.invoke(a2dp, device);
            return result;
        } catch (Exception e) {
            e.printStackTrace();
            return false;
        }
    }
2.使用方法
对于用户来说,蓝牙的使用场景有二:①手机之间传输文件。②手机连接蓝牙音箱/耳机来播放音频。当然,第二种情况是第一种的特例。
对于开发者来说,场景②不需要开发者过多关注播放音频传输的数据,只需要监听一下蓝牙音箱/耳机 播放状态提醒一下用户即可。场景①传输的数据需要额外处理(双方要知道传输的数据代表什么意思)。以上两个场景都有个共同的前提:蓝牙设备双方之间建立连接!
(1)与另一个蓝牙设备建立连接分为四个步骤:
①在配置文件中声明蓝牙权限:
    <!-- 蓝牙 -->
    <uses-permission android:name="android.permission.BLUETOOTH_ADMIN" />
    <uses-permission android:name="android.permission.BLUETOOTH" />
    <!-- 仅在支持BLE(即蓝牙4.0)的设备上运行 -->
    <uses-feature android:name="android.hardware.bluetooth_le" android:required="true"/>
    <!-- 如果Android6.0 蓝牙搜索不到设备,需要补充下面两个权限 -->
    <uses-permission android:name="android.permission.ACCESS_FINE_LOCATION" />
    <uses-permission android:name="android.permission.ACCESS_COARSE_LOCATION" />
②通过BluetoothManager的getAdapter方法获取蓝牙适配器对象。打开蓝牙功能,且弹窗由用户选择本机是否被其他设备检测(此过程是异步的,用户选择结果必须通过有关回调函数获得)。
③调用蓝牙适配器对象的startDiscovery方法搜索周围蓝牙设备,但搜索过程是异步的,因此搜索结果会通过广播事件BluetoothDevice.ACTION_FOUND获取新发现的蓝牙设备,那么也就需要注册一个广播接收器来解析广播获取蓝牙设备。
④新发现的蓝牙设备如果是未配对的,那就不能相互通信。故要先与新的蓝牙设备配对,即调用BluetoothDevice的createBond方法来创建配对请求,这时系统会弹出一个对话框供用户选择配对码,只有两台手机都选择配对这一选项,才算配对成功。当然配对结果也是通过广播事件BluetoothDevice.ACTION_BOND_STATE_CHANGED返回的。为了方便,就在③中注册的广播接收器中添加关于绑定的处理即可。
那么举个例子来熟悉一下以上流程,在页面布局中,使用一个列表视图来显示搜索得到的蓝牙设备:

列表视图的每一项由三个文本视图组成,分别表示蓝牙的名称,地址和状态。那么很容易得到列表视图的适配器如下:
// 展示蓝牙设备列表的适配器
public class BlueListAdapter extends BaseAdapter {
    private static final String TAG = "BlueListAdapter";
    private Context mContext;
    private ArrayList<BluetoothDevice> mBlueList;
    //在BluetoothDevice中常量值分别为10,11,12,13
    private String[] mStateArray = {"未绑定", "绑定中", "已绑定", "已连接"};
    public static int CONNECTED = 13;

    public BlueListAdapter(Context context, ArrayList<BluetoothDevice> blue_list) {
        mContext = context;
        mBlueList = blue_list;
    }

    @Override
    public int getCount() {
        return mBlueList.size();
    }

    @Override
    public Object getItem(int position) {
        return mBlueList.get(position);
    }

    @Override
    public long getItemId(int position) {
        return position;
    }

    @Override
    public View getView(int position, View convertView, ViewGroup parent) {
        ViewHolder holder;
        if (convertView == null) {
            holder = new ViewHolder();
            convertView = LayoutInflater.from(mContext).inflate(R.layout.item_bluetooth, null);
            holder.tv_blue_name = convertView.findViewById(R.id.tv_blue_name);
            holder.tv_blue_address = convertView.findViewById(R.id.tv_blue_address);
            holder.tv_blue_state = convertView.findViewById(R.id.tv_blue_state);
            convertView.setTag(holder);
        } else {
            holder = (ViewHolder) convertView.getTag();
        }

        BluetoothDevice device = mBlueList.get(position);
        holder.tv_blue_name.setText(device.getName()); // 显示蓝牙设备的名称
        holder.tv_blue_address.setText(device.getAddress()); // 显示蓝牙设备的地址
        holder.tv_blue_state.setText(mStateArray[device.getBondState()-10]); // 显示蓝牙设备的状态
        return convertView;
    }

    public final class ViewHolder {
        public TextView tv_blue_name;
        public TextView tv_blue_address;
        public TextView tv_blue_state;
    }

}
在MainActivity中,与蓝牙设备列表显示方式的有关代码如下:
    private BluetoothAdapter mBluetoothAdapter; // 声明一个蓝牙适配器对象
    // 初始化蓝牙适配器
    private void initBluetooth() {
        // Android从4.3开始增加支持BLE技术(即蓝牙4.0及以上版本)
        if (Build.VERSION.SDK_INT >= Build.VERSION_CODES.JELLY_BEAN_MR2) {
            // 从系统服务中获取蓝牙管理器
            BluetoothManager bm = (BluetoothManager)
                    getSystemService(Context.BLUETOOTH_SERVICE);
            mBluetoothAdapter = bm.getAdapter();
        } else {
            // 获取系统默认的蓝牙适配器
            mBluetoothAdapter = BluetoothAdapter.getDefaultAdapter();
        }
        if (mBluetoothAdapter == null) {
            Toast.makeText(this, "本机未找到蓝牙功能", Toast.LENGTH_SHORT).show();
            finish();//退出APP
        }
    }

    private ListView lv_bluetooth; // 声明一个用于展示蓝牙设备的列表视图对象
    private BlueListAdapter mListAdapter; // 声明一个蓝牙设备的列表适配器对象
    private ArrayList<BluetoothDevice> mDeviceList = new ArrayList<>(); // 蓝牙设备队列
    // 初始化蓝牙设备列表
    private void initBlueDevice() {
        mDeviceList.clear();
        // 获取已经配对的蓝牙设备集合(历史记录不代表现在存在)
        Set<BluetoothDevice> bondedDevices = mBluetoothAdapter.getBondedDevices();
        mDeviceList.addAll(bondedDevices);
        if (mListAdapter == null) { // 首次打开页面,则创建一个新的蓝牙设备列表
            mListAdapter = new BlueListAdapter(this, mDeviceList);
            lv_bluetooth.setAdapter(mListAdapter);
            lv_bluetooth.setOnItemClickListener(this);
        } else { // 不是首次打开页面,则刷新蓝牙设备列表
            mListAdapter.notifyDataSetChanged();
        }
    }

    @Override
    public void onItemClick(AdapterView<?> parent, View view, int position, long id) {
        BluetoothDevice device = mDeviceList.get(position);
        if (device.getBondState() == BluetoothDevice.BOND_NONE) { // 尚未配对
            BluetoothUtil.createBond(device); // 创建配对信息
        } else if (device.getBondState() == BluetoothDevice.BOND_BONDED) { // 已经配对
            boolean isSucc = BluetoothUtil.removeBond(device); // 移除配对信息
            if (!isSucc) {
                refreshDevice(device);
            }
        }
    }

    // 刷新蓝牙设备列表
    private void refreshDevice(BluetoothDevice device) {
        for (int i = 0; i < mDeviceList.size(); i++) {
            BluetoothDevice item = mDeviceList.get(i);
            if (item.getAddress().equals(device.getAddress())) {
                mDeviceList.set(i, item);
                break;
            }
            if (i == mDeviceList.size()) {//不在现有列表的新设备
                mDeviceList.add(device);
            }
        }
        mListAdapter.notifyDataSetChanged();
    }
设置了列表项的显示方式,接下来应得到列表项的内容来源,即扫描并获取周围的蓝牙设备:
    private Handler mHandler = new Handler(); // 声明一个处理器对象
    // 定义一个刷新任务,每隔两秒刷新扫描到的蓝牙设备
    private Runnable mRefresh = new Runnable() {
        @Override
        public void run() {
            beginDiscovery(); // 开始扫描周围的蓝牙设备
            // 延迟2秒后再次启动蓝牙设备的刷新任务
            mHandler.postDelayed(this, 2000);
        }
    };
    @Override
    protected void onStart() {
        super.onStart();
        mHandler.postDelayed(mRefresh, 50);
        // 需要过滤多个动作,则调用IntentFilter对象的addAction添加新动作
        IntentFilter discoveryFilter = new IntentFilter();
        discoveryFilter.addAction(BluetoothDevice.ACTION_FOUND);
        discoveryFilter.addAction(BluetoothAdapter.ACTION_DISCOVERY_FINISHED);
        discoveryFilter.addAction(BluetoothDevice.ACTION_BOND_STATE_CHANGED);
        // 注册蓝牙设备搜索的广播接收器
        registerReceiver(discoveryReceiver, discoveryFilter);
    }
    // 开始扫描周围的蓝牙设备
    private void beginDiscovery() {
        // 如果当前不是正在搜索,则开始新的搜索任务
        if (!mBluetoothAdapter.isDiscovering()) {
            initBlueDevice(); // 初始化蓝牙设备列表
            tv_discovery.setText("正在搜索蓝牙设备");
            mBluetoothAdapter.startDiscovery(); // 开始扫描周围的蓝牙设备
        }
    }

    @Override
    protected void onStop() {
        super.onStop();
        cancelDiscovery(); // 取消蓝牙设备的搜索
        // 注销蓝牙设备搜索的广播接收器
        unregisterReceiver(discoveryReceiver);
    }
    // 取消蓝牙设备的搜索
    private void cancelDiscovery() {
        mHandler.removeCallbacks(mRefresh);
        tv_discovery.setText("取消搜索蓝牙设备");
        // 当前正在搜索,则取消搜索任务
        if (mBluetoothAdapter.isDiscovering()) {
            mBluetoothAdapter.cancelDiscovery(); // 取消扫描周围的蓝牙设备
        }
    }

    // 蓝牙设备的搜索结果通过广播返回
    private BroadcastReceiver discoveryReceiver = new BroadcastReceiver() {
        @Override
        public void onReceive(Context context, Intent intent) {
            String action = intent.getAction();
            // 获得已经搜索到的蓝牙设备
            if (action.equals(BluetoothDevice.ACTION_FOUND)) { // 发现新的蓝牙设备
                BluetoothDevice device = intent.getParcelableExtra(BluetoothDevice.EXTRA_DEVICE);
                refreshDevice(device); // 将发现的蓝牙设备加入到设备列表
            } else if (action.equals(BluetoothAdapter.ACTION_DISCOVERY_FINISHED)) { // 搜索完毕
                tv_discovery.setText("蓝牙设备搜索完成");
            } else if (action.equals(BluetoothDevice.ACTION_BOND_STATE_CHANGED)) { // 配对状态变更
                BluetoothDevice device = intent.getParcelableExtra(BluetoothDevice.EXTRA_DEVICE);
                if (device.getBondState() == BluetoothDevice.BOND_BONDING) {
                    tv_discovery.setText("正在配对" + device.getName());
                } else if (device.getBondState() == BluetoothDevice.BOND_BONDED) {
                    tv_discovery.setText("完成配对" + device.getName());
                    mHandler.postDelayed(mRefresh, 50);
                } else if (device.getBondState() == BluetoothDevice.BOND_NONE) {
                    tv_discovery.setText("取消配对" + device.getName());
                    refreshDevice(device);
                }
            }
        }
    };
最后需要为蓝牙开关的状态变化做出响应:
    private int mOpenCode = 1; // 是否允许扫描蓝牙设备的选择对话框返回结果代码
    @Override
    public void onCheckedChanged(CompoundButton buttonView, boolean isChecked) {
        if (buttonView.getId() == R.id.sw_bluetooth) {
            if (isChecked) { // 开启蓝牙功能
                sw_bluetooth.setText("蓝牙开");
                if (!BluetoothUtil.getBlueToothStatus(this)) {
                    BluetoothUtil.setBlueToothStatus(this, true); // 开启蓝牙功能
                }
                mHandler.post(mDiscoverable);
            } else { // 关闭蓝牙功能
                sw_bluetooth.setText("蓝牙关");
                cancelDiscovery(); // 取消蓝牙设备的搜索
                BluetoothUtil.setBlueToothStatus(this, false); // 关闭蓝牙功能
                initBlueDevice(); // 初始化蓝牙设备列表
            }
        }
    }
    //定义一个任务:弹出蓝牙启动的用户选择框
    private Runnable mDiscoverable = new Runnable() {
        public void run() {
            // Android8.0要在已打开蓝牙功能时才会弹出下面的选择窗
            if (BluetoothUtil.getBlueToothStatus(MainActivity.this)) {
                // 弹出是否允许扫描蓝牙设备的选择对话框
                Intent intent = new Intent(BluetoothAdapter.ACTION_REQUEST_DISCOVERABLE);
                startActivityForResult(intent, mOpenCode);
            } else {
                mHandler.postDelayed(this, 1000);
            }
        }
    };

    @Override
    protected void onActivityResult(int requestCode, int resultCode, Intent intent) {
        super.onActivityResult(requestCode, resultCode, intent);
        if (requestCode == mOpenCode) { // 来自允许蓝牙扫描的对话框
            // 延迟50毫秒后启动蓝牙设备的刷新任务
            mHandler.postDelayed(mRefresh, 50);
            if (resultCode == RESULT_OK) {
                Toast.makeText(this, "允许本地蓝牙被附近的其它蓝牙设备发现",
                        Toast.LENGTH_SHORT).show();
            } else if (resultCode == RESULT_CANCELED) {
                Toast.makeText(this, "不允许蓝牙被附近的其它蓝牙设备发现",
                        Toast.LENGTH_SHORT).show();
            }
        }
    }
MainActivity其余的代码如下:
    private Switch sw_bluetooth;
    private TextView tv_discovery;
    @Override
    protected void onCreate(Bundle savedInstanceState) {
        super.onCreate(savedInstanceState);
        setContentView(R.layout.activity_main);
        initBluetooth(); // 初始化蓝牙适配器
        sw_bluetooth = findViewById(R.id.sw_bluetooth);
        tv_discovery = findViewById(R.id.tv_discovery);
        lv_bluetooth = findViewById(R.id.lv_bluetooth);
        sw_bluetooth.setOnCheckedChangeListener(this);
        if (BluetoothUtil.getBlueToothStatus(this)) {
            sw_bluetooth.setChecked(true);
        }
        initBlueDevice(); // 初始化蓝牙设备列表
    }
效果如下:

通过以上代码实现了定时扫描并显示周围蓝牙设备,可与指定列表中的蓝牙设备配对。
(2)为了监听A2DP设备播放状态,只需在(1)代码的列表项的选择onItemClick方法中添加:
else if (device.getBondState() == BlueListAdapter.CONNECTED) { // 已经建立A2DP连接
            BluetoothUtil.disconnectA2dp(bluetoothA2dp, device); // 断开A2DP连接
        }
在(1)代码的onStart中获取A2DP的蓝牙代理,添加注册A2DP广播接收器的代码:
        // 获取A2DP的蓝牙代理
        mBluetoothAdapter.getProfileProxy(this, serviceListener, BluetoothProfile.A2DP);
        // 创建一个意图过滤器
        IntentFilter a2dpFilter = new IntentFilter();
        // 指定A2DP的连接状态变更广播
        a2dpFilter.addAction(BluetoothA2dp.ACTION_CONNECTION_STATE_CHANGED);
        // 指定A2DP的播放状态变更广播
        a2dpFilter.addAction(BluetoothA2dp.ACTION_PLAYING_STATE_CHANGED);
        // 注册A2DP连接管理的广播接收器
        registerReceiver(a2dpReceiver, a2dpFilter);
在(1)代码的onStop中添加注销广播接收器:
  // 注销A2DP连接管理的广播接收器
        unregisterReceiver(a2dpReceiver);
在(1)代码的基础上添加A2DP广播接收器的具体代码:
private BluetoothA2dp bluetoothA2dp; // 声明一个蓝牙音频传输对象
    // 定义一个A2DP的服务监听器
    private BluetoothProfile.ServiceListener serviceListener = new BluetoothProfile.ServiceListener() {

        // 在服务断开连接时触发
        public void onServiceDisconnected(int profile) {
            if (profile == BluetoothProfile.A2DP) {
                Toast.makeText(MainActivity.this, "onServiceDisconnected", Toast.LENGTH_SHORT).show();
                // A2DP已连接,则释放A2DP的蓝牙代理
                bluetoothA2dp = null;
            }
        }

        // 在服务建立连接时触发
        public void onServiceConnected(int profile, final BluetoothProfile proxy) {
            if (profile == BluetoothProfile.A2DP) {
                Toast.makeText(MainActivity.this, "onServiceConnected", Toast.LENGTH_SHORT).show();
                // A2DP已连接,则设置A2DP的蓝牙代理
                bluetoothA2dp = (BluetoothA2dp) proxy;
            }
        }
    };

    // 定义一个A2DP连接的广播接收器
    private BroadcastReceiver a2dpReceiver = new BroadcastReceiver() {
        @Override
        public void onReceive(Context context, Intent intent) {
            switch (intent.getAction()) {
                // 侦听到A2DP的连接状态变更广播
                case BluetoothA2dp.ACTION_CONNECTION_STATE_CHANGED:
                    BluetoothDevice device = intent.getParcelableExtra(BluetoothDevice.EXTRA_DEVICE);
                    int connectState = intent.getIntExtra(BluetoothA2dp.EXTRA_STATE,
                            BluetoothA2dp.STATE_DISCONNECTED);
                    if (connectState == BluetoothA2dp.STATE_CONNECTED) {
                        // 收到连接上的广播,则更新设备状态为已连接
                        refreshDevice(device);
                        Toast.makeText(MainActivity.this, "已连上蓝牙音箱。快来播放音乐试试",
                                Toast.LENGTH_SHORT).show();
                    } else if (connectState == BluetoothA2dp.STATE_DISCONNECTED) {
                        // 收到断开连接的广播,则更新设备状态为已断开
                        refreshDevice(device);
                        Toast.makeText(MainActivity.this, "已断开蓝牙音箱",
                                Toast.LENGTH_SHORT).show();
                    }
                    break;
                // 侦听到A2DP的播放状态变更广播
                case BluetoothA2dp.ACTION_PLAYING_STATE_CHANGED:
                    int playState = intent.getIntExtra(BluetoothA2dp.EXTRA_STATE,
                            BluetoothA2dp.STATE_NOT_PLAYING);
                    if (playState == BluetoothA2dp.STATE_PLAYING) {
                        Toast.makeText(MainActivity.this, "蓝牙音箱正在播放",
                                Toast.LENGTH_SHORT).show();
                    } else if (playState == BluetoothA2dp.STATE_NOT_PLAYING) {
                        Toast.makeText(MainActivity.this, "蓝牙音箱停止播放",
                                Toast.LENGTH_SHORT).show();
                    }
                    break;
            }
        }
    };
(3)限于篇幅,而且相信大家对于使用套接字来通信已经十分熟练了,所以本文蓝牙设备之间使用套接字传输数据的具体代码就不再演示了。接下来就说一下蓝牙套接字的三个主要的方面:
①蓝牙服务端要开启一个侦听蓝牙客服端连接的任务,一旦有客户端连接进来,就返回该客户端的蓝牙Socket,该任务代码如下:
public class BlueAcceptTask extends AsyncTask<Void, Void, BluetoothSocket> {
    private static final String NAME_SECURE = "BluetoothChatSecure";
    private static final String NAME_INSECURE = "BluetoothChatInsecure";
    private static BluetoothServerSocket mServerSocket; // 声明一个蓝牙服务端套接字对象

    public BlueAcceptTask(boolean secure) {
        BluetoothAdapter adapter = BluetoothAdapter.getDefaultAdapter();
        // 在不同情况下获得服务端的Socket对象
        try {
            if (mServerSocket != null) {
                mServerSocket.close();
            }
            if (secure) { // 安全连接
                mServerSocket = adapter.listenUsingRfcommWithServiceRecord(
                        NAME_SECURE, UUID.fromString("00001101-0000-1000-8000-00805F9B34FB"));
            } else { // 不安全连接
                mServerSocket = adapter.listenUsingInsecureRfcommWithServiceRecord(
                        NAME_INSECURE, UUID.fromString("00001101-0000-1000-8000-00805F9B34FB"));
            }
        } catch (Exception e) {
            e.printStackTrace();
        }
    }

    // 线程正在后台处理
    protected BluetoothSocket doInBackground(Void... params) {
        BluetoothSocket socket = null;
        while (true) {
            try {
                // accept方法是阻塞的,有返回则表示客服端连接来了
                socket = mServerSocket.accept();
            } catch (Exception e) {
                e.printStackTrace();
                try {
                    Thread.sleep(1000);
                } catch (InterruptedException e1) {
                    e1.printStackTrace();
                }
            }
            if (socket != null) { // socket非空,则建立了通信连接
                break;
            }
        }
        return socket; // 返回侦听到的客户端Socket实例
    }

    // 线程已经完成处理
    protected void onPostExecute(BluetoothSocket socket) {
        // 侦听结束,通知监听器客户端Socket连了进来
        mListener.onBlueAccept(socket);
    }

    private BlueAcceptListener mListener; // 声明一个蓝牙侦听的监听器对象
    // 提供给外部设置蓝牙侦听监听器
    public void setBlueAcceptListener(BlueAcceptListener listener) {
        mListener = listener;
    }

    // 定义一个蓝牙侦听的监听器接口,用于在倾听响应之后回调onBlueAccept方法
    public interface BlueAcceptListener {
        void onBlueAccept(BluetoothSocket socket);
    }

}
②收到客服端的连接之后,服务端开启数据接收线程:
public class BlueReceiveTask extends Thread {
    private BluetoothSocket mSocket; // 声明一个蓝牙套接字对象
    private Handler mHandler; // 声明一个处理器对象

    public BlueReceiveTask(BluetoothSocket socket, Handler handler) {
        mSocket = socket;
        mHandler = handler;
    }

    @Override
    public void run() {
        byte[] buffer = new byte[1024];
        int bytes;
        while (true) {
            try {
                // 从蓝牙Socket获得输入流,并从中读取输入数据
                bytes = mSocket.getInputStream().read(buffer);
                // 将读到的数据通过处理器送回给UI主线程处理
                mHandler.obtainMessage(0, bytes, -1, buffer).sendToTarget();
            } catch (Exception e) {
                e.printStackTrace();
                break;
            }
        }
    }
}
③普通的套接字读写方法:
 // 读取对方设备的输入信息
    public static String readInputStream(InputStream inStream) {
        String result = "";
        try {
            ByteArrayOutputStream outStream = new ByteArrayOutputStream();
            byte[] buffer = new byte[1024];
            int len;
            while ((len = inStream.read(buffer)) != -1) {
                outStream.write(buffer, 0, len);
            }
            byte[] data = outStream.toByteArray();
            outStream.close();
            inStream.close();
            result = new String(data, "utf8");
        } catch (Exception e) {
            e.printStackTrace();
        }
        return result;
    }

    // 向对方设备发送信息
    public static void writeOutputStream(BluetoothSocket socket, String message) {
        try {
            // 获得蓝牙Socket对象的输出流
            OutputStream outStream = socket.getOutputStream();
            // 往输出流写入字节形式的数据
            outStream.write(message.getBytes());
            outStream.flush();
            outStream.close();
        } catch (Exception e) {
            e.printStackTrace();
        }
    }
总结
用了两篇笔记终于总结完了Android的硬件控制,内容包括:震动器、闪光灯、各类传感器、定位模块、红外发射器、扬声器、麦克风、摄像头、蓝牙、NFC。算不得多么累,反正我是个闲人。。。

最后的最后祝大家国庆节快乐吧!