APP门户设计界面
文章目录
一、内容
根据课程实操实现APP门户界面框架设计,至少包含4个tab页,能实现tab页之间的点击切换。
二、核心技术
使用布局(layouts)和分段(fragment),对控件进行点击监听;
布局(layouts)
常见布局(Common Layouts)
ViewGroup类的子类提供独特的方式来显示嵌入到ViewGroup中view。下面是一些常见的布局类型内置在Android平台中。
(1) 线性布局(Linear Layout)
线性布局以一个单一的水平或是垂直的排列方式来组织里面的view,如果布局窗口的长度超过屏幕的长度,它就创建一个滚动条。
(2) 相对布局(Relative Layout)
相对布局是子控件以控件之间的相对位置或子类控件相对于父容器的位置排列。所以每个子控件可以通过两种参考系来决定自己的位置。
(3) FrameLayout帧布局
帧布局是所有子控件均放在左上角且后面元素直接覆盖在前面元素之上。两个常用属性:android:foreground(设置改帧布局容器的前景图像,前景图像是永远处于帧布局最上面的图像,就是不会被覆盖的图片)
android:foregroundGravity(设置前景图像显示的位置)。
参考资料来源于学习笔记| AS入门(三) 布局篇
分段(fragment)
Fragment是activity的界面中的一部分或一种行为。可以把多个Fragment组合到一个activity中来创建一个多界面,并且可以在多个activity中重用一个Fragment。可以把Fragment任务模块化的一段activity,它具有自己的生命周期,接收它自己的事件,并可以在activity运行时被添加或删除。
Fragment不能独立存在,它必须嵌入到activity中,而且Fragment的生命周期直接受所在的activity的影响。
事件侦昕器(Event Listener)是视图View类的内部接口,包含一个单独的回调方法。这些方法将在视图中注册的侦听器被用户界面操作触发时由Android框架调用。下面这些回调方法被包含在事件侦听器接口中:
? onClick()包含于View.OnClickListener中,单击时调用;
? onLongClick()包含于View.OnLongClickListener中,长按时调用;
? onTouch()包含于View.OnTouchListener中,当用户执行的动作被当作一个触摸事件时被调用,包括按下、释放和在屏幕上进行的任何移动手势。
三、开发关键步骤及其代码
1、top界面
新建一个Layout Resource File

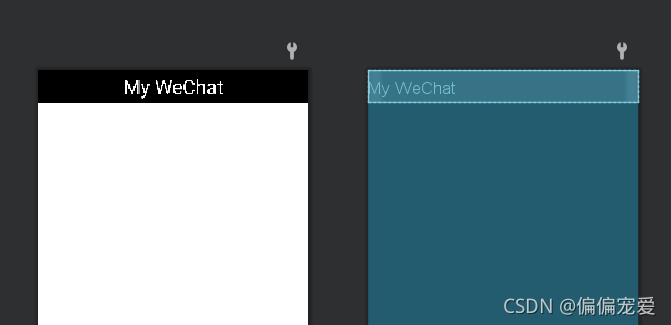
将ConstrainLayout转化为LinearLayout,添加控件textView,设置一系列属性,代码如下:
<LinearLayout xmlns:android="http://schemas.android.com/apk/res/android"
    android:layout_width="match_parent"
    android:layout_height="50dp">

    <TextView
        android:id="@+id/textView"
        android:layout_width="wrap_content"
        android:layout_height="50dp"
        android:layout_weight="1"
        android:background="@color/black"
        android:gravity="center"
        android:text="My WeChat"
        android:textColor="@color/white"
        android:textSize="30sp" />

</LinearLayout>
top界面如下:
2、bottom界面
新建一个Layout Resource File,将ConstrainLayout转化为LinearLayout,添加控件LinearLayout,在LinearLayout中添加ImageView、textView,复制四次,设置一系列属性,如下:
导入图片: 搜索阿里矢量库下载图标,拖入drawble文件中。
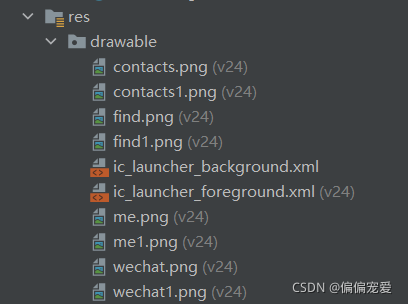
图片如下::
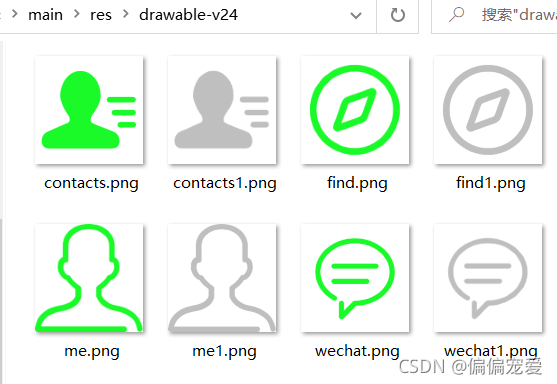
此处为了让四个LinearLayout平铺,需要设置android:layout_weight=“1”;
属性设置代码如下:
<LinearLayout xmlns:android="http://schemas.android.com/apk/res/android"
    xmlns:app="http://schemas.android.com/apk/res-auto"
    android:layout_width="match_parent"
    android:layout_height="87dp"
    android:layout_gravity="bottom"
    android:background="#000020">

    <LinearLayout
        android:id="@+id/LinearLayout_wechat"
        android:layout_width="match_parent"
        android:layout_height="85dp"
        android:layout_weight="1"
        android:orientation="vertical">

        <ImageView
            android:id="@+id/wechat"
            android:layout_width="match_parent"
            android:layout_height="50dp"
            app:srcCompat="@drawable/wechat1" />

        <TextView
            android:id="@+id/textView2"
            android:layout_width="match_parent"
            android:layout_height="wrap_content"
            android:gravity="center"
            android:text="微信"
            android:textColor="@color/white"
            android:textSize="30sp" />

    </LinearLayout>

    <LinearLayout
        android:id="@+id/LinearLayout_contacts"
        android:layout_width="match_parent"
        android:layout_height="match_parent"
        android:layout_weight="1"
        android:orientation="vertical">

        <ImageView
            android:id="@+id/contacts"
            android:layout_width="match_parent"
            android:layout_height="50dp"
            app:srcCompat="@drawable/contacts1" />

        <TextView
            android:id="@+id/textView3"
            android:layout_width="match_parent"
            android:layout_height="wrap_content"
            android:gravity="center"
            android:text="通讯录"
            android:textColor="@color/white"
            android:textSize="30sp" />
    </LinearLayout>

    <LinearLayout
        android:id="@+id/LinearLayout_find"
        android:layout_width="match_parent"
        android:layout_height="match_parent"
        android:layout_weight="1"
        android:orientation="vertical">

        <ImageView
            android:id="@+id/find"
            android:layout_width="match_parent"
            android:layout_height="50dp"
            app:srcCompat="@drawable/find1" />

        <TextView
            android:id="@+id/textView4"
            android:layout_width="match_parent"
            android:layout_height="wrap_content"
            android:gravity="center"
            android:text="发现"
            android:textColor="@color/white"
            android:textSize="30sp" />
    </LinearLayout>

    <LinearLayout
        android:id="@+id/LinearLayout_me"
        android:layout_width="match_parent"
        android:layout_height="match_parent"
        android:layout_weight="1"
        android:orientation="vertical">

        <ImageView
            android:id="@+id/me"
            android:layout_width="match_parent"
            android:layout_height="50dp"
            app:srcCompat="@drawable/me1" />

        <TextView
            android:id="@+id/textView5"
            android:layout_width="match_parent"
            android:layout_height="wrap_content"
            android:gravity="center"
            android:text="我"
            android:textColor="@color/white"
            android:textSize="30sp" />
    </LinearLayout>

</LinearLayout>
bottom界面如下:

3、activity_main界面
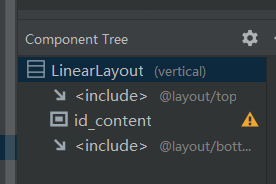
将ConstrainLayout转化为LinearLayout,添加控件FrameLayout,建立与top.xml和bottom.xml的链接。
代码如下
    <include layout="@layout/top" />

    <FrameLayout
        android:id="@+id/id_content"
        android:layout_width="wrap_content"
        android:layout_height="match_parent"
        android:layout_weight="1">

    </FrameLayout>

    <include layout="@layout/bottom" />
activity_main界面如下:

4、建立Fragment
按如下图方式,在java文件中建立四个fragment(Blank)


文件分别命名为:
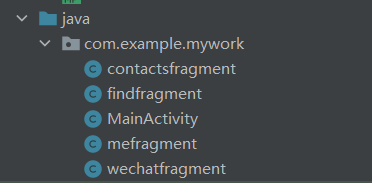
会自动生成如下文件:
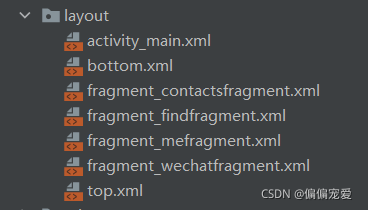
在四个fragment里删改一下代码,只留如下代码
public class findfragment extends Fragment {


    public findfragment() {
        // Required empty public constructor
    }

    @Override
    public View onCreateView(LayoutInflater inflater, ViewGroup container,
                             Bundle savedInstanceState) {
        // Inflate the layout for this fragment
        return inflater.inflate(R.layout.fragment_findfragment, container, false);
    }
}
在四个自动生成的文件.xml拖控件textView,设置一系列属性

代码如下:(四个.xml类似)
    <!-- TODO: Update blank fragment layout -->
    <TextView
        android:layout_width="match_parent"
        android:layout_height="match_parent"
        android:gravity="center"
        android:text="这是发现界面"
        android:textSize="40dp" />
界面如下:(仅展示2个界面)

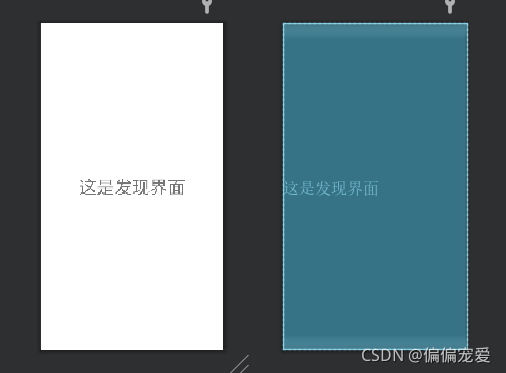
5、MainActivity.java文件
重要代码如下:
package com.example.mywork;

import androidx.appcompat.app.AppCompatActivity;
import android.app.Fragment;
import android.app.FragmentManager;
import android.app.FragmentTransaction;
import android.os.Bundle;
import android.view.View;
import android.view.Window;
import android.widget.ImageView;
import android.widget.LinearLayout;

public class MainActivity extends AppCompatActivity implements View.OnClickListener{

    private Fragment wechatFragment=new wechatfragment();
    private Fragment contactsFragment=new contactsfragment();
    private Fragment findFragment=new findfragment();
    private Fragment meFragment=new mefragment();

    private FragmentManager fragmentManager;

    private LinearLayout LinearLayout1,LinearLayout2,LinearLayout3,LinearLayout4;
    private ImageView ImageView1,ImageView2,ImageView3,ImageView4;

    @Override
    protected void onCreate(Bundle savedInstanceState) {
        super.onCreate(savedInstanceState);
        supportRequestWindowFeature(Window.FEATURE_NO_TITLE);
        setContentView(R.layout.activity_main);

        LinearLayout1=findViewById(R.id.LinearLayout_wechat);
        LinearLayout2=findViewById(R.id.LinearLayout_contacts);
        LinearLayout3=findViewById(R.id.LinearLayout_find);
        LinearLayout4=findViewById(R.id.LinearLayout_me);

        ImageView1=findViewById(R.id.wechat);
        ImageView2=findViewById(R.id.contacts);
        ImageView3=findViewById(R.id.find);
        ImageView4=findViewById(R.id.me);

        LinearLayout1.setOnClickListener(this);
        LinearLayout2.setOnClickListener(this);
        LinearLayout3.setOnClickListener(this);
        LinearLayout4.setOnClickListener(this);

        initFragment();
        showFragment(1);

    }

    private void initFragment(){              //初始化
        fragmentManager=getFragmentManager();
        FragmentTransaction transaction=fragmentManager.beginTransaction();
        transaction.add(R.id.id_content,wechatFragment);
        transaction.add(R.id.id_content,contactsFragment);
        transaction.add(R.id.id_content,findFragment);
        transaction.add(R.id.id_content,meFragment);
        transaction.commit();
    }

    private void hideFragment(FragmentTransaction transaction){
        transaction.hide(wechatFragment);
        transaction.hide(contactsFragment);
        transaction.hide(findFragment);
        transaction.hide(meFragment);
    }

    private void recover(){
        ImageView1.setImageResource(R.drawable.wechat1);
        ImageView2.setImageResource(R.drawable.contacts1);
        ImageView3.setImageResource(R.drawable.find1);
        ImageView4.setImageResource(R.drawable.me1);
    }

    @Override
    public void onClick(View view) {
        recover();
       switch(view.getId()){
           case R.id.LinearLayout_wechat:
               showFragment(1);
               break;
           case R.id.LinearLayout_contacts:
               showFragment(2);
               break;
           case R.id.LinearLayout_find:
               showFragment(3);
               break;
           case R.id.LinearLayout_me:
               showFragment(4);
               break;
           default:
               break;
       }
    }

    private void showFragment(int i) {
        FragmentTransaction transaction=fragmentManager.beginTransaction();
        hideFragment(transaction);
        switch(i){
            case 1:
                transaction.show(wechatFragment);
                ImageView1.setImageResource(R.drawable.wechat);
                break;
            case 2:
                transaction.show(contactsFragment);
                ImageView2.setImageResource(R.drawable.contacts);
                break;
            case 3:
                transaction.show(findFragment);
                ImageView3.setImageResource(R.drawable.find);
                break;
            case 4:
                transaction.show(meFragment);
                ImageView4.setImageResource(R.drawable.me);
                break;
            default:break;
        }
        transaction.commit();
    }
6、备注
由于版本兼容问题,我们采用最原始的写法,导入不同的包有不同的效果,如果导入的包在整个项目中不一致会报错,注意import androidx.fragment.app.Fragment是现在3.0以后的,import androidx.fragment.app.Fragment 是以前的,所以如果有错误发生,记得转换这两个包,以后来填两者的区别。
四、运行结果

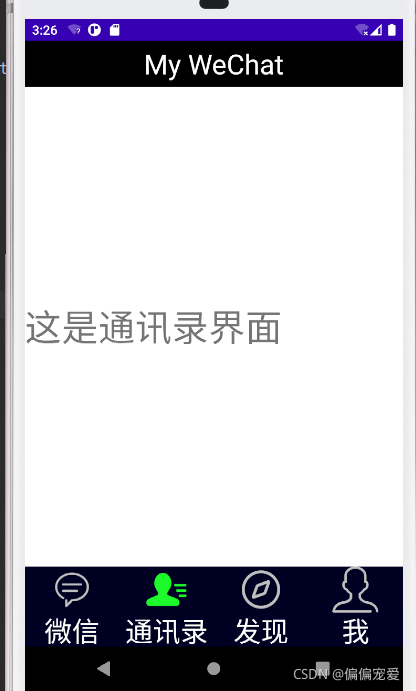


五、仓库链接地址
六、心得体会
-
这次APP门户设计界面在生活中非常的实用,我们可以通过此次实验自己动手做QQ或其他小程序的用户界面。这次印象最深的是事件监听器的使用,Android程序通常需要侦昕用户和应用程序之间交互的事件。对于用户界面中的事件,侦听方法就是从与用户交互的特定视图对象中截获这些事件。Android视图类android.view.View提供了用于处理屏幕事件的多个内部接口(如OnClickListener等)及常用方法(如setVisibility()等。
-
res/layout目录下存放定义UI设计的XML文件。UI设计有两种方式: 一种是Text视图方式,在XML文件中,可以直接写布局及控件代码:另一种是Design视图方式,可以直接拖曳控件至设计区域。个人建议第一种方法, 简单、明了,而且可以将应用的视图控制逻辑从Java代码中分离出来,放入XML文件中控制,从而更好地体现MVC原则。
-
如果要实现Java程序中控制界面的组件,则必须为界面文件的组件定义一个id,也就是通过id把资源文件以及组件引用过来进行控制。
组件定义格式如下:android:id="@+id/<组件id>" -
ps:一定要学会备注文件,错了可以用备份的,不用重新再来!!!