2021/10/16最近在做微信小程序,这里会记录项目中遇到的知识点,近期会不断更新补充!
一、获取图片宽高
// wxml
<image src="{{imgSrc}}"  bindload="imgLoadFunc" style="width:{{contentImgWidth}}rpx; height:{{contentImgHeight }}rpx;"></image>

// js
data:{
    contentImgWidth: 0,
    contentImgHeight: 0,
},
imgLoadFunc: function(e) {
    var tempWidth = e.detail.width; // 获取图片实际宽度
    var tempHeight = e.detail.height; // 获取图片实际高度
    this.setData({
      contentImgWidth: tempWidth,
      contentImgHeight: tempHeight
    })
},
二、图片点击可发大查看
// wxml
<image src="{{imgList[0]}}" bindtap="preview" data-src="{{imgList[0]}}"></image>
<image src="{{imgList[1]}}" bindtap="preview" data-src="{{imgList[1]}}"></image>
<image src="{{imgList[2]}}" bindtap="preview" data-src="{{imgList[2]}}"></image>

// js
Page({
  data: {
    imgList: [
      "https://ss0.bdstatic.com/70cFuHSh_Q1YnxGkpoWK1HF6hhy/it/u=508387608,2848974022&fm=26&gp=0.jpg",
      "https://ss3.bdstatic.com/70cFv8Sh_Q1YnxGkpoWK1HF6hhy/it/u=3139953554,3011511497&fm=26&gp=0.jpg",
      "https://ss0.bdstatic.com/70cFvHSh_Q1YnxGkpoWK1HF6hhy/it/u=1022109268,3759531978&fm=26&gp=0.jpg"
    ]
  },

  //预览图片,放大预览
  preview(event) {
    console.log(event.currentTarget.dataset.src)
    let currentUrl = event.currentTarget.dataset.src
    wx.previewImage({
      current: currentUrl, // 当前显示图片的http链接
      urls: this.data.imgList // 需要预览的图片http链接列表
    })
  }
})
三、获取屏幕宽高
onLoad: function () {
   this.setData({
     height: wx.getSystemInfoSync().windowHeight,
     width: wx.getSystemInfoSync().windowWidth
   })
 }
四、打开APP 端
注意 当小程序从 APP 打开的场景打开时(场景值 1069),小程序会获得返回 APP 的能力,此时用户点击按钮可以打开拉起该小程序的 APP。即小程序不能打开任意 APP,只能 跳回 APP。
五、去掉右上角返回键
//home.wxml
 <view bindtap="gotopost">另一种跳转方式</view>
//home.js
 gotopost(){
    wx.reLaunch({url: "/pages/post/index?id=62"});
  }

 //post.js
 onShow(){
   wx.hideHomeButton();
 },
六、子组件使用全局样式
如果没有这句话,小程序中的样式会在样式前加 index–
Component({
  options: {
    addGlobalClass: true
  }
})
七、关于iconfont引入后真机调试不显示
解决办法:将woff、及woff2文件转换为base64后引入使用
转换网址:https://transfonter.org/
八、小程序UI框架引入(vant)
简书上的一篇文章:https://www.jianshu.com/p/54ed83b6c81a
vant官网安装教程:https://youzan.github.io/vant-weapp/#/quickstart
- 在微信开发者工具中打开终端,输入
npm init, 一路ok至生成新的package.json - 参照vant官网,
npm i @vant/weapp -S --production安装最新版,余下的步骤参照vant官网安装教程即可
/(ㄒoㄒ)/~~
一通按照官网配置完事了,开发预览与真机测试都能看到,上传代码发布成体验版时,一片空白,什么啊,上网搜过后,删除npm包又重新安装,重来一遍,时不时的构建下npm,一顿操作后解决了
九、小程序网络请求方法封装
小程序网络请求封装:https://www.cnblogs.com/-pdd/p/14292614.html
十、文本框过滤字母,只留数字
  //输入框输入触发的函数
  handleTel(e){
    console.log(e.detail);
    var mobile = "queryform.mobile";
    var tel = e.detail.value;
    var reg = /[a-zA-Z]+/;
    var result;
    while(result = tel.match(reg)){
      tel = tel.replace(result[0],'');
    }
    this.setData({
      [mobile]:tel
    })
  }
    //只保留数字部分,此种方法最方便,不仅过滤字母,还有其他特殊符号等等
    var s ="价格4500元";
    var num= s.replace(/[^0-9]/ig,"");
    alert(num);//4500
十一、小程序嵌套循环
使用wx:for-item="newitem"重新指定item名
  <van-index-bar index-list="{{ indexList }}" highlight-color="#f00">
    <view wx:for="{{ zoneList }}" wx:key="index">
      <van-index-anchor index="{{item.key}}" />
      <van-cell
      wx:for="{{ item.list }}"
      wx:key="index"
      wx:for-item="newitem"
      title="{{newitem.name}}"
      value="{{'+' + newitem.tel}}"
      ></van-cell>
    </view>
  </van-index-bar>
十二、上传头像
参考文章:https://www.yisu.com/zixun/184804.html
    <!-- 头像 -->
    <view class="avatar-wrap" bindtap="changeAvatar">
        <image class="avatar"  mode="aspectFill" src="{{registerform.avatar}}" ></image>
    </view>

	// js方法
	changeAvatar(){
    var that = this;
    var avatarimg = "registerform.avatar"
    wx.chooseImage({
      count: 1,
      sizeType: ['compressed'],
      sourceType: ['album', 'camera'],
      success: function (res) {
        const tempFilePaths = res.tempFilePaths
        wx.uploadFile({
          url: BASEURL + '/api/common/upload',
          filePath: tempFilePaths[0],
          name: 'file',
          formData: {
            'user': 'test'
          },
          success (res){
            console.log(JSON.parse(res.data));
            const result = JSON.parse(res.data);
            if(result.code==0){
              that.setData({
                [avatarimg]:result.data.url
              })
            }else{
              wx.showToast({
                title: '上传失败',
                icon:'none'
              })
            }

          }
        })


        },
        fail: function () {// fail

        },
        complete: function () {// complete

        }
    });
十三、WXML中使用函数
<view>{{ formate(time) }}</view>
使用注意点:https://blog.csdn.net/weixin_39725702/article/details/93710992
参考文章:https://blog.csdn.net/Umbrella_Um/article/details/107253834

// wxml页面中,先引入wxs文件,再使用
<wxs module="filter" src="../../utils/wxs/common.wxs"></wxs>
<text class="font26">{{ filter.calc(postObj.browse_num) }}浏览</text>

//wxs文件中
var filter = {
	calc:function(num){
    var total = null;
    if(num > 10000){
      total = (num/10000).toFixed(1) + 'w';
    }else{
      total = num;
    }
    return total
  }
}
module.exports = {
  calc:filter.calc
};
十四、wxs中正则匹配
参考文章:https://blog.csdn.net/yilingsj/article/details/106873785
正则方法参考:https://www.php.cn/wenda/55033.html
微信官方文档:https://developers.weixin.qq.com/miniprogram/dev/reference/wxs/06datatype.html#regexp
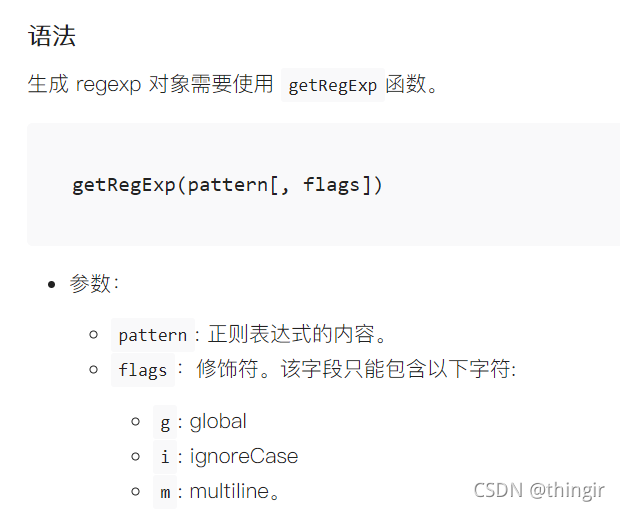
wxs 中不支持js中正则匹配写法,要使用微信的
getRegExp函数。

// wxs 文件
  replaceStr:function(str){
    var strnew = str + ' ';
    var reg = getRegExp('@([^@\s]*)\s', 'g');
    if(strnew.match('@')){
      strnew = strnew.replace(reg,function (match,param,offset,string) {
          var html = "<span style='color:#41AEF5'>" + match +"</span>";
          return html;
      })
      return strnew;
    }else{
      return str;
    }

  }


// wxml文件
<wxs module="filter" src="../../utils/wxs/common.wxs"></wxs>
<view class="mt30 font30">
  <rich-text nodes="{{ filter.replaceStr(item.content) }}"></rich-text>
</view>
十五、 动态设置小程序navigationBarTitleText
wx.setNavigationBarTitle({
      title: '动态标题'
})
十六、导航栏背景色 随滚动条滚动而变化
参考文章:https://blog.csdn.net/u013633921/article/details/114014500
<!-- wxml -->
<scroll-view scroll-y="true" style="height: 100%;" bindscroll="scroll">
	<!-- 自定义导航栏 -->
	<view class="nav-top" style="padding-top: {{ statusBarHeight }}px; background: {{ navTopBgcolor }}; color:{{navColor}}">
      <view class="nav-top-img-view" bindtap="onBack">
      <!-- <van-icon name="arrow-left" />  -->
      </view>
      <view class="nav-top-title">个人主页</view>
      <view class="nav-top-img-view"></view>
    </view>
</scroll-view>
// js
  data: {
    statusBarHeight: wx.getSystemInfoSync()['statusBarHeight'],
    navTopBgcolor:'transparent',
    navColor:'#fff',
  }
// 滚动条滚动,标题栏变色
  scroll(e) {
    if (e.detail.scrollTop < 100) {
			this.setData({
        navTopBgcolor: 'transparent',
        navColor:'#fff'
			})
		} else {
			this.setData({
        navTopBgcolor: '#fff',
        navColor:'#333'
			})
    }
  },

// wxss
/*顶部导航栏*/
.nav-top{
  position: fixed;
  top: 0;
	left: 0;
	height: 45px;
	width: 100%;
	/* opacity: .5; */
	display: flex;
  flex-direction: row;
  z-index:1000;
  transition: 0.3s all linear;
}

.nav-top-img-view {
	height: 45px;
  width: 45px;
  line-height: 45px;
  text-align: center;
}

.nav-top image {
	height: 20px;
	width: 20px;
	margin: 12.5px;
}

.nav-top-title {
  font-size:30rpx;
  transition: 0.3s all linear;
	text-align: center;
	line-height: 45px;
	flex: 1;
}
十七、封装选择日期组件(只选月日, 默认当前年)
参考文章 – 计算每月多少天:https://www.cnblogs.com/liufulin/p/10206730.html
参考网址–获取一个月中哪几号是周六或周日:https://zhidao.baidu.com/question/647038965226768525.html
十八、子组件与父组件通信
<!-- 在自定义组件中 -->
<button bindtap="onTap">点击这个按钮将触发“myevent”事件</button>
Component({
  properties: {},
  methods: {
    onTap: function(){
      var myEventDetail = {} // detail对象,提供给事件监听函数
      var myEventOption = {} // 触发事件的选项
      this.triggerEvent('customevent', myEventDetail, myEventOption)
    }
  }
})

<!-- 在父组件中 -->
<view bindcustomevent="myEventListener">
  <slot />
</view>
Page({
  myEventListener: function(e){
    e.detail // 自定义组件触发事件时提供的detail对象
  }
})