最近做了一个需求(效果部分参照腾讯云 https://cloud.tencent.com/),Web端生成二维码,跳转微信小程序并确认授权,实现小程序和Web的同时登录
一、预期效果(腾讯云)
首先扫web端的这个二维码
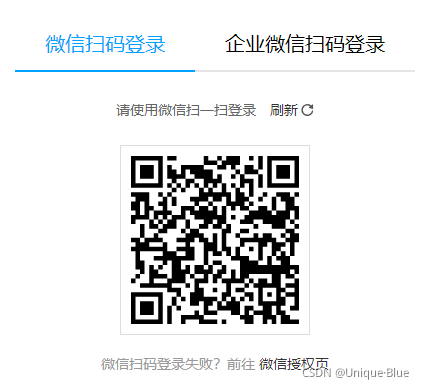
然后跳转对应的小程序,点击小程序中的确认登录后,调起授权成功后实现小程序和Web同时登录
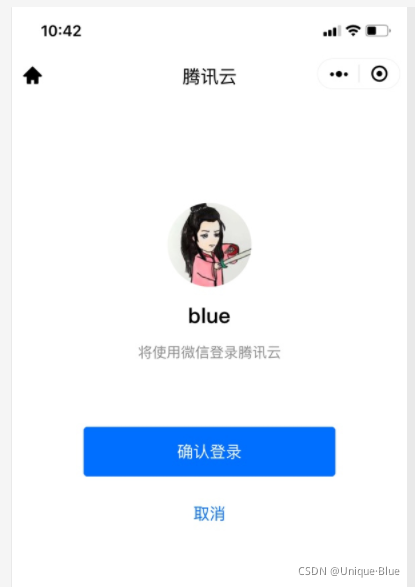
二、梳理思路
-
因为跳转的是小程序页面,所以web端的码对应的是小程序某页面的二维码
-
若要实现小程序和Web的同时登录,web扫码后,
① 一定需要有一个“唯一信件”,从Web带到小程序(拼接在二维码中),在小程序中解析出来以后,登录时把它带给后端;
② web端要轮询去调后端的接口,并且是带着这个“唯一信件”,来询问这个“唯一信件”有没有在小程序中获得登录这个过程就好像,小孩拿着身份证去学校报道,父母在家里持续打电话询问学校:身份证号为XX的小孩现在是否完成报道
-
在上一步的基础上,这个“唯一信件” 还存在一个过期时间,比如超过10分钟后就自动失效
-
从代码的角度来讲,这个“唯一信件” 应由后端生成,这样也方便后端去维护过期状态
至此,应该只剩下一个问题:web端的这个二维码,由前端还是后端生成?怎样生成?
三、关于web端的二维码
-
如果由前端生成,可以采用 扫普通链接二维码 打开小程序,根据官方给出的示例去配置,前端安装qrcodejs2插件生成二维码。
只需要注意一点:开发时只能采用对应的
测试链接进行模拟(动态参数无法跳转),规则正式发布以后,才可以拿到动态参数 -
上面的这种方式,二维码的内容对应的是链接地址,所以是先跳转链接,然后再唤起小程序,从体验上来说,不是那么友好
-
并且上述过程中需要后端往服务器放校验文件、前端需要下载qrcode库,整体并不快捷
-
况且 后端调微信接口直接生成小程序码 的方式有很多种,功能场景也很完善(我这里后端采用的是wxacode.getUnlimited 这种)
对比下来,后端来生成,开发过程更清晰、开发时间成本也更低、后续也更好维护
四、前端代码实现
前端代码实现——web篇
  <div class="main">
	<div id="login_container_wechat" ref="qrCodeUrl">
	  <!-- 二维码 -->
	  <img :src="qrCode" alt="" v-show="qrCode">
	  <div class="timeout-cover" v-show="timeOut">
	    <div>您的二维码已失效</div>
	    <div>请点击下方刷新按钮</div>
	  </div>
	</div>
	<div style="text-align: center; margin: 30px auto">
	  请使用微信扫一扫登录
	  <a href="javascript:;" @click="refreshCode"><a-icon type="redo" />刷新 </a>
	</div>
  </div>
.main {
  width: 384px;
  height: 300px;
  background: #fff;
  margin-top: 100px;
}
#login_container_wechat {
  width: 200px;
  height: 200px;
  display: inline-block;
  display: flex;
  justify-content: center;
  margin: 30px auto;
  position: relative;
}
.timeout-cover {
  position: absolute;
  width: 100%;
  height: 100%;
  left: 0;
  top: 0;
  display: flex;
  flex-direction: column;
  align-items: center;
  justify-content: center;
  background: rgba(255, 255, 255, 0.9);
  color: rgb(245, 59, 59);
}
#login_container_wechat img {
  width: 200px;
  height: 200px;
  background: #f5f5f5;
}
data () {
  return {
    // 微信登录定时器
    wechatTimer: null,
    // 微信登录定时器倒计时
    wechatTimerCount: 0,
    // 微信登录二维码
    qrCode: undefined,
    // 微信登录唯一标志
    qToken: undefined,
    // 微信登录二维码是否超时
    timeOut: false
  }
},
mounted () {
  // 初始化微信二维码,带上邀请码
  this.getLoginWxQrCode()
},
// 获取绑定二维码
getLoginWxQrCode () {
  getLoginWxQrCodeApi().then(res => {
    const { code, data, msg } = res
    if (code === 0) {
      // 超时状态重置
      this.timeOut = false
      // 二维码、唯一标志QToken
      this.qrCode = data.QCode
      this.qToken = data.QToken
      // 轮询,获取小程序微信登录结果
      this.wechatTimer = setInterval(() => {
        this.getWechatLoginResult()
        // 定时器累加
        this.wechatTimerCount = this.wechatTimerCount + 1
        // 超过一分钟,清除定时器
        if (this.wechatTimerCount > 180) {
          this.clearWechatTimer()
        }
      }, 1000)
    } else {
      this.$message.error(msg)
    }
  })
},
// 获取微信授权结果
getWechatLoginResult () {
  getQrCodeStatusApi({
    QToken: this.qToken
  }).then(res => {
    const { code, data } = res
    if (code === 0) {
      // [status]: -1过期   0二维码正常  1已被扫描   2已被操作(成功或失败)
      const status = data.status
      if (status === 0) {
        console.log('二维码状态正常')
      } else if (status === 1) {
        console.log('二维码已被扫描')
      } else if (status === 2) {
        console.log('二维码操作了')
        // 关闭定时器
        this.clearWechatTimer()
        // 拿到token
        if (data.token) {
          // 在这里实现web登录
        }
      } else if (status === -1) {
        console.log('二维码过期了')
        this.timeOut = true
        this.clearWechatTimer()
      }
    }
  })
},
// 刷新二维码
refreshCode () {
  // 清除微信定时器
  this.clearWechatTimer()
  this.getLoginWxQrCode()
},
// 清除微信定时器
clearWechatTimer () {
  clearInterval(this.wechatTimer)
  this.wechatTimerCount = 0
},
web端效果:
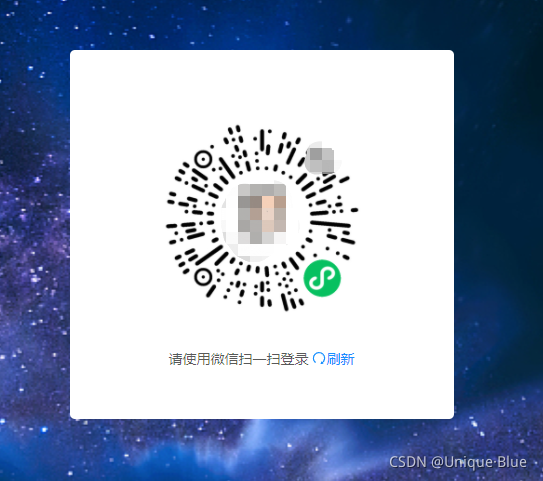
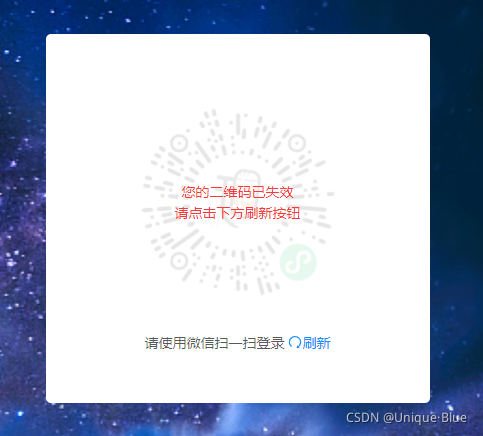
前端代码实现——小程序
扫码进入小程序,在对应页面的 onLoad 中拿到链接里拼接的参数
先看下后端使用 wxacode.getUnlimited 的二维码内容:
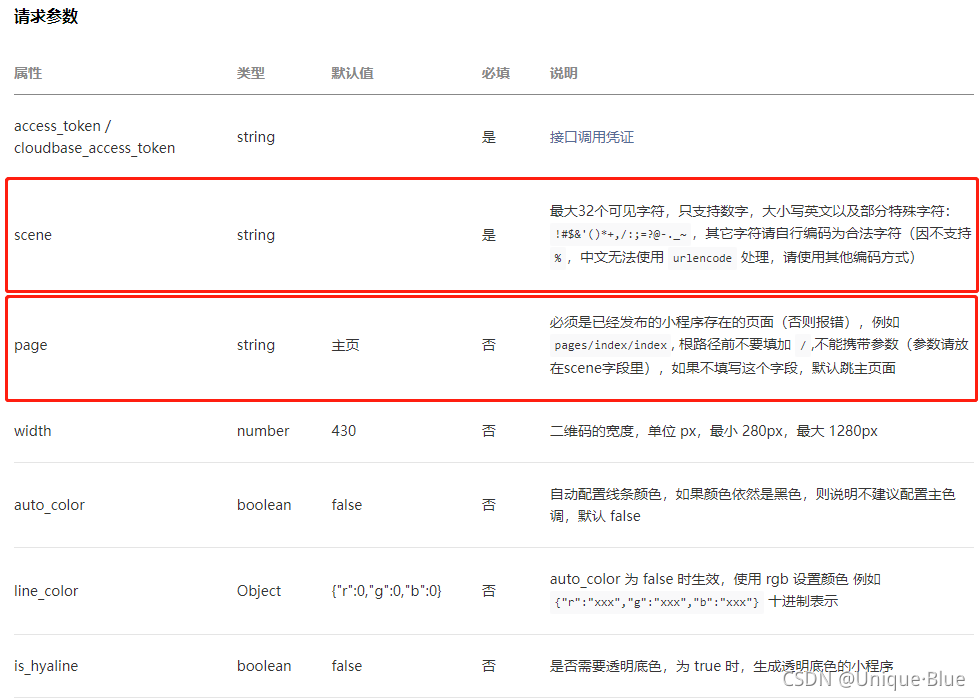
- page,是小程序的落地页,需要在前面生成web端二维码时给到后端
- scene 是二维码中的参数载体,我们在小程序中,取的就是这个参数
- 重要的是,在真机中,参数scene有可能被编码,需要兼容这个现象
- 跳转到这个页面后,我们需要重新走一遍小程序的授权登录(不管当前是否已经登录)
知道了上面这些前提,就可以码起来了
<!-- PC端扫描微信登录二维码进入的页面 -->
<view class="common-login-main">
  <!-- 开放数据 -->
  <view class='mytop-box'>
    <view class="mytop-avatar">
      <open-data  type="userAvatarUrl"></open-data>
    </view>
    <view class='mytop-username'>
      <open-data type="userNickName"></open-data>
    </view>
    <view class="desc">将使用微信登录XX平台</view>
  </view>
  <!-- 授权登录 -->
  <button class="btn" bindtap="getUserProfile">确认登录</button>
  <view class="cancle" bindtap="cancle">取消</view>
</view>
.common-login-main {
  padding-top: 200rpx;
}
.mytop-box {
  display: flex;
  width: 100%;
  height: 100%;
  align-items: center;
  flex-direction: column;
  justify-content: center;
}

.mytop-avatar {
  overflow: hidden;
  width: 130rpx;
  height: 130rpx;
  left: 50%;
  border-radius: 50%;
  box-shadow: 3px 3px 10px rgba(0, 0, 0, 0.2);
}

.mytop-username {
  font-size: 35rpx;
  color: #3E3E40;
  margin-top: 40rpx;
}
.desc {
  font-size: 28rpx;
  color: var(--descColor);
  margin-top: 40rpx;
}
.btn {
  margin-top: 80rpx;
  width: 520rpx;
  height: 72rpx;
  line-height: 72rpx;
  background-color: #FA7627;
  color: #fff;
  font-size: 28rpx;
  border-radius: 36rpx;
  margin-bottom: 40rpx;
}
.cancle {
  text-align: center;
  color: #FA7627;
  font-size: 28rpx;
}
onLoad(options) {
  // 开发时可以在这里重置数据用来测试,如:options.scene = 's=1632824497386&test=123'
  // scene中参数有可能是多个,这个开发时也需要考虑进去

  // 将场景值转为object,并兼容转码或不转码
  if (options.scene) {
    var scene = {}
    // 含有%3D,手动转换一下
    if (options.scene.includes('%3D')) {
      scene = JSON.parse(
        '{"' +
          decodeURI(
            decodeURIComponent(options.scene)
              .replace(/&/g, '","')
              .replace(/=/g, '":"')
          ) +
          '"}'
      )
    } else {
      let sceneArr = options.scene.split('&')
      sceneArr.forEach(item => {
        scene[item.split('=')[0]] = (item.split('=')[1])
      })
    }
  }


  // 将扫描成功状态告诉后端(如果 web端不需要展示是否已被扫描,这一步可以省略)
  updateWxQTokenInfoAPI({ scene.QToken })

  this.setData({
    query: scene
  })
},
// 点击确认登录(正常的走微信登录)
getUserProfile () {
  wx.showLoading()
  var p1 = new Promise(function (resolve, reject) {
    wx.login({
      success: res => {
        resolve(res)
      }
    })
  })
  var p2 = new Promise(function (resolve, reject) {
    wx.getUserProfile({
      desc: '用于完善会员资料',
      success: res => {
        resolve(res)
      },
      fail: err => {
        wx.hideLoading()
      }
    })
  });
  // 同时执行p1和p2,并在它们都完成后执行then:
  Promise.all([p1, p2]).then((results) => {
    // results是一个长度为2的数组,放置着p1、p2的resolve
    this.handleUserInfo({
   	  // 这里也可以选择性返回需要的字段
      ...results[0],
      ...results[1]
    })
},
// 组织好后端需要的字段,并调用接口
handleUserInfo (data) {
  const { code, encryptedData, userInfo, iv, rawData, signature, cloudID } = data
  const params = {
    // 这个登录时带过去,web端轮询就可以拿到已登录的状态了
  	QToken: this.data.query.QToken
	// ....
  }
  // 调用接口维护本地登录态
}
实际效果:

实现下来会发现代码并不难,主要是前面的构思阶段要考虑