0 实验环境
在Android Studio中进行有关代码的编写和界面效果展示。
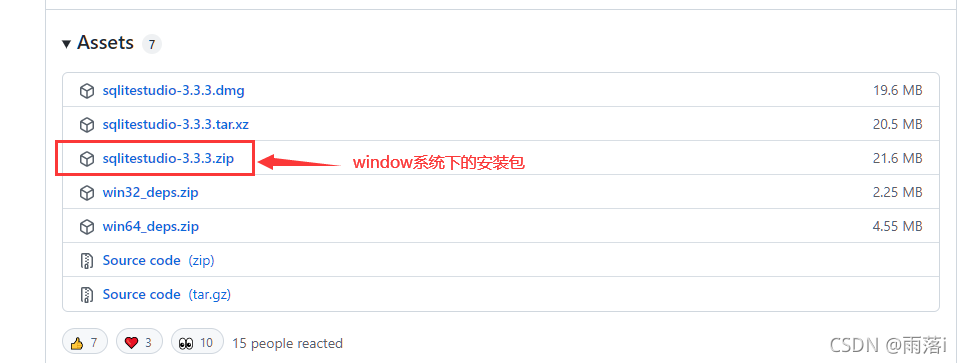
SQLite数据库的图形化工具SQLiteStudio
下载网址:SQLiteStudio官网

1 界面展示


2 功能说明
(1)需实现一个应用可供用户进行数据的录入存储
(2)能实现基础CRUD操作,对数据进行的删、查、改等操作
(3)同时要有输入栏和结果的展示。
3 设计原理
SQLiteOpenHelper 是Android 提供的一个抽象工具类,负责管理数据库的创建、升级工作。如果我们想创建数据库,就需要自定义一个类继承SQLiteOpenHelper,然后覆写其中的抽象方法。
其中DbHelper类继承了SQLiteOpenHelper 类。在onCreate()方法中通过执行sql 语句实现表的创建。MyDAO类定义操作数据库的增删改查方法,insert(),delete(),update(),select()
4 核心代码
4.1 UI设计

activity_main.xml对主界面进行设计,需要有输入栏、操作按钮、结果显示,其中结果显示使用listView组件进行展示。
部分代码:
<LinearLayout
        android:layout_width="fill_parent"
        android:layout_height="wrap_content"
        android:addStatesFromChildren="true" >
        <TextView
            android:layout_width="wrap_content"
            android:layout_height="wrap_content"
            android:text="姓名"
            android:fontFamily="@font/huawencaiyun"
            android:textColor="@color/blue"
            android:textSize="25sp"/>
        <EditText
            android:id="@+id/et_name"
            android:layout_width="wrap_content"
            android:layout_height="wrap_content"
            android:layout_weight="1"
            android:singleLine="true" />
</LinearLayout>

<LinearLayout
        android:layout_width="fill_parent"
        android:layout_height="wrap_content"
        android:addStatesFromChildren="true"
        android:gravity="center" >
        <Button
            android:id="@+id/bt_add"
            android:layout_width="wrap_content"
            android:layout_height="wrap_content"
            android:text="添加" />
    </LinearLayout>

    <ListView
        android:gravity="center"
        android:id="@+id/listView"
        android:layout_width="fill_parent"
        android:layout_height="wrap_content"
        android:padding="5dip" >
    </ListView>

对上述listView组件的item元素设计:
<?xml version="1.0" encoding="utf-8"?>
<LinearLayout xmlns:android="http://schemas.android.com/apk/res/android"
    android:layout_width="match_parent"
    android:layout_height="match_parent"
    android:orientation="horizontal" >
    <TextView
        android:id="@+id/tv_id"
        android:textSize="25sp"
        android:layout_width="50dp"
        android:layout_height="wrap_content"/>
</LinearLayout>
4.2 编写有关Java类

(1)MainActivity类,用于初始化一些变量和注册组件:

核心代码:(这里只展示 onCreate和displayRecords两个方法)
@Override
protected void onCreate(Bundle savedInstanceState) {
    super.onCreate(savedInstanceState);
    setContentView(R.layout.activity_main);
    myDAO = new MyDAO(this);  //创建数据库访问对象
    if(myDAO.getRecordsNumber()==0) {  //防止重复运行时重复插入记录
        myDAO.insertInfo("王家伟", 20);   //插入记录
        myDAO.insertInfo("结衣", 19); //插入记录
    }
    initView();
    initEvent();
    displayRecords();   //显示记录
}

public void displayRecords(){  //显示记录方法定义
    listView = (ListView)findViewById(R.id.listView);
    listData = new ArrayList<Map<String,Object>>();
    Cursor cursor = myDAO.allQuery();
    while (cursor.moveToNext()){
        int id=cursor.getInt(0);  //获取字段值
        String name=cursor.getString(1);
        //int age=cursor.getInt(2);
        @SuppressLint("Range") int age=cursor.getInt(cursor.getColumnIndex("age"));//推荐此种方式
        listItem=new HashMap<String,Object>(); //必须在循环体里新建
        listItem.put("_id", id);  //第1参数为键名,第2参数为键值
        listItem.put("name", name);
        listItem.put("age", age);
        listData.add(listItem);   //添加一条记录
    }
    listAdapter = new SimpleAdapter(this,
            listData,
            R.layout.list_item, //自行创建的列表项布局
            new String[]{"_id","name","age"},
            new int[]{R.id.tv_id,R.id.tv_name,R.id.tv_age});
    listView.setAdapter(listAdapter);  //应用适配器
    listView.setOnItemClickListener(new AdapterView.OnItemClickListener() {  //列表项监听
        @Override
        public void onItemClick(AdapterView<?> parent, View view, int position, long id) {
            Map<String,Object> rec= (Map<String, Object>) listAdapter.getItem(position);  //从适配器取记录
            et_name.setText(rec.get("name").toString());  //刷新文本框
            et_age.setText(rec.get("age").toString());
            Log.i("ly",rec.get("_id").toString());
            selId=rec.get("_id").toString();  //供修改和删除时使用
        }
    });
}
(2)DbHelper类是SQLite数据库打开助手类,用来创建和打开数据库,并创建数据表:
核心代码:
public class DbHelper extends SQLiteOpenHelper {
    public static final String TB_NAME = "friends";  //表名

    //构造方法:第1参数为上下文,第2参数库库名,第3参数为游标工厂,第4参数为版本
    public DbHelper(Context context, String dbname, SQLiteDatabase.CursorFactory factory, int version) {
        super(context, dbname, factory, version);  //创建或打开数据库
    }

    @Override
    public void onCreate(SQLiteDatabase db) {
        //当表不存在时,创建表;第一字段为自增长类型
        db.execSQL("CREATE TABLE IF NOT EXISTS " +
                TB_NAME + "( _id integer primary key autoincrement," +
                "name varchar," + "age integer"+ ")");
    }

    @Override
    public void onUpgrade(SQLiteDatabase db, int oldVersion, int newVersion) {
        // 执行SQL命令
        db.execSQL("DROP TABLE IF EXISTS " + TB_NAME);
        onCreate(db);
    }
}
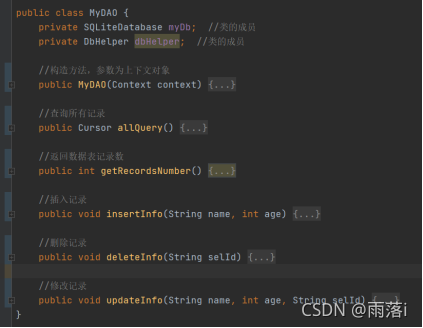
(3)MyDAO类中对数据库的进行增删查改操作进行了定义,使得可以在主程序文件中直接调用有关API接口:

核心代码:
//构造方法,参数为上下文对象
public MyDAO(Context context) {
    //第1参数为上下文,第2参数为数据库名
    dbHelper = new DbHelper(context, "test.db", null, 1);
}

//查询所有记录
public Cursor allQuery() {
    myDb = dbHelper.getReadableDatabase();
    return myDb.rawQuery("select * from friends", null);
}

//返回数据表记录数
public int getRecordsNumber() {
    myDb = dbHelper.getReadableDatabase();
    Cursor cursor = myDb.rawQuery("select * from friends", null);
    return cursor.getCount();
}

//插入记录
public void insertInfo(String name, int age) {
    myDb = dbHelper.getWritableDatabase();
    ContentValues values = new ContentValues();
    values.put("name", name);
    values.put("age", age);
    long rowid = myDb.insert(DbHelper.TB_NAME, null, values);
    if (rowid == -1)
        Log.i("myDbDemo", "数据插入失败!");
    else
        Log.i("myDbDemo", "数据插入成功!" + rowid);
}

//删除记录
public void deleteInfo(String selId) {
    String where = "_id=" + selId;
    int i = myDb.delete(DbHelper.TB_NAME, where, null);
    if (i > 0)
        Log.i("myDbDemo", "数据删除成功!");
    else
        Log.i("myDbDemo", "数据未删除!");
}

//修改记录
public void updateInfo(String name, int age, String selId) {
    //方法中的第三参数用于修改选定的记录
    ContentValues values = new ContentValues();
    values.put("name", name);
    values.put("age", age);
    String where = "_id=" + selId;
    int i = myDb.update(DbHelper.TB_NAME, values, where, null);

    //上面几行代码的功能可以用下面的一行代码实现
    //myDb.execSQL("update friends set name = ? ,age = ? where _id = ?",new Object[]{name,age,selId});

    if (i > 0)
        Log.i("myDbDemo", "数据更新成功!");
    else
        Log.i("myDbDemo", "数据未更新!");
}
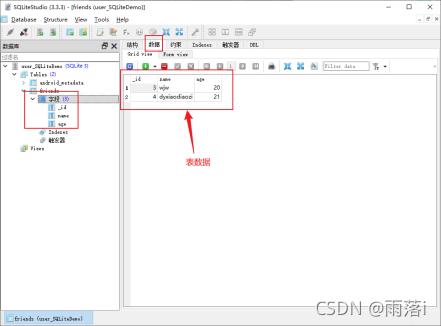
(4)使用SQLite数据库的图形化工具SQLiteStudio,来查看在应用中创建的数据文件里的表数据:
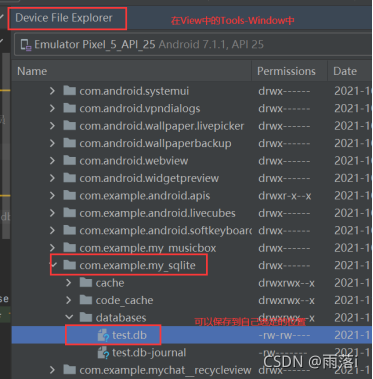
注意:创建的数据库位于:/data/data/包名/databases/目录中

最后使用SQLite数据库的图形化工具SQLiteStudio,将保存的db文件导入SQLiteStudio中,来查看在应用中创建的数据文件里的表数据
数据表的结构:

数据表的数据:

5 代码仓库
具体代码已上传至gitee代码仓库
6 总结
学习了如何创建SQLite数据库和基础CRUD操作,最后用图形化工具SQLiteStudio查看生成的数据库中的数据表!
后续会继续更新有关Android设计的内容!
(注:第21次发文,如有错误和疑问,欢迎在评论区指出!)
——2021.11.15