一直觉得自己写的不是技术,而是情怀,一个个的教程是自己这一路走来的痕迹。靠专业技能的成功是最具可复制性的,希望我的这条路能让你们少走弯路,希望我能帮你们抹去知识的蒙尘,希望我能帮你们理清知识的脉络,希望未来技术之巅上有你们也有我。

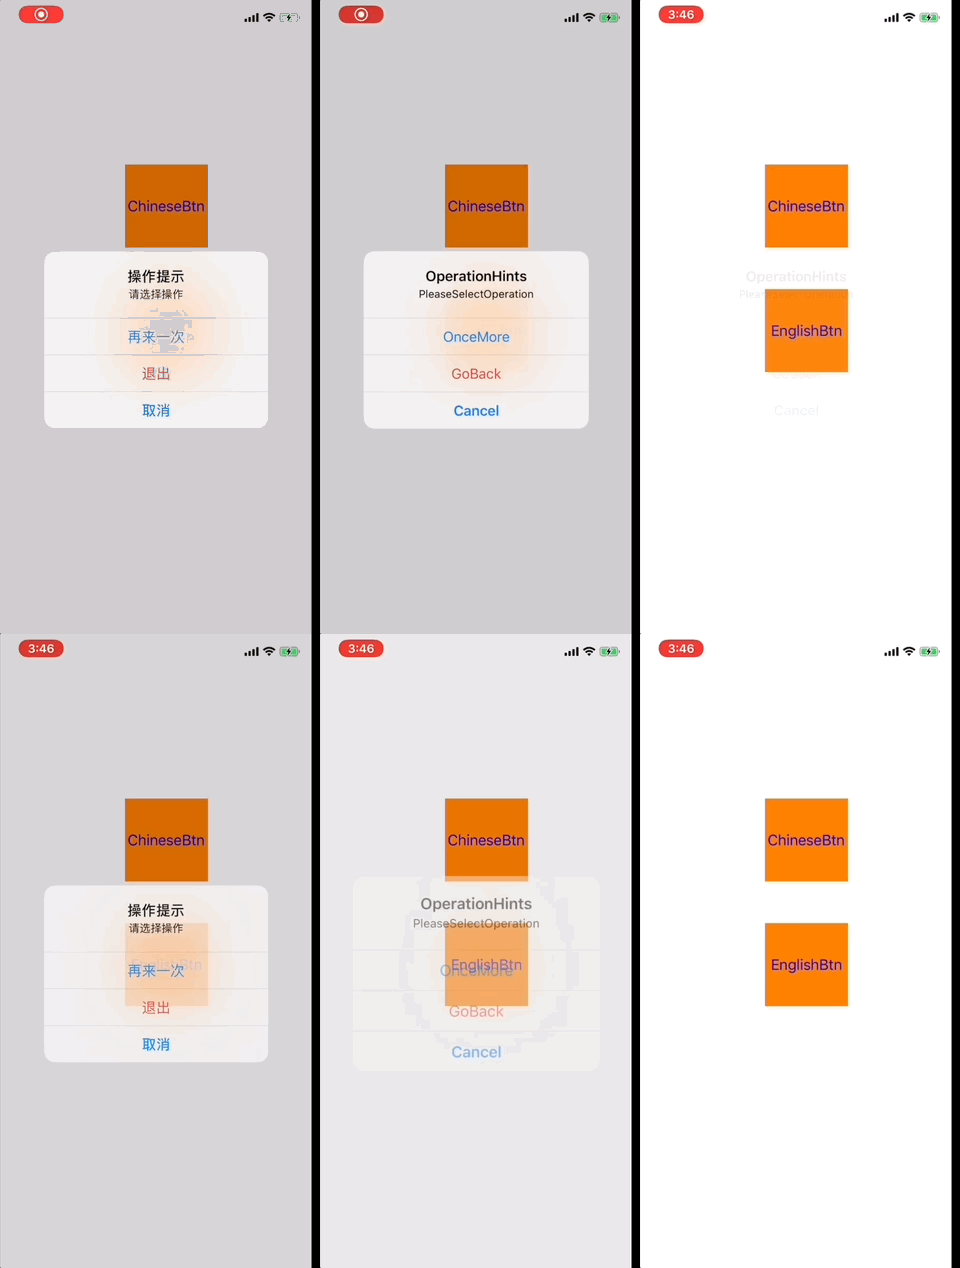
今天2021.12.02.今天讲一个项目中多语言适配的问题。之前在2018年的时候写过的,由于xcode的不断更新,现在用之前网上的方法去新建多语言文件发现搞来搞去搞不了。或者自己不会搞,现在的解决办法就是把之前2018年的demol的多语言适配文件拿到新的项目里面去。然后就可以进行多语言开发了。然后把源码跟整个操作的视频上存了一下。
下面的步骤就是从别的简书拿过来的。也是各大网站的操作步骤来的。
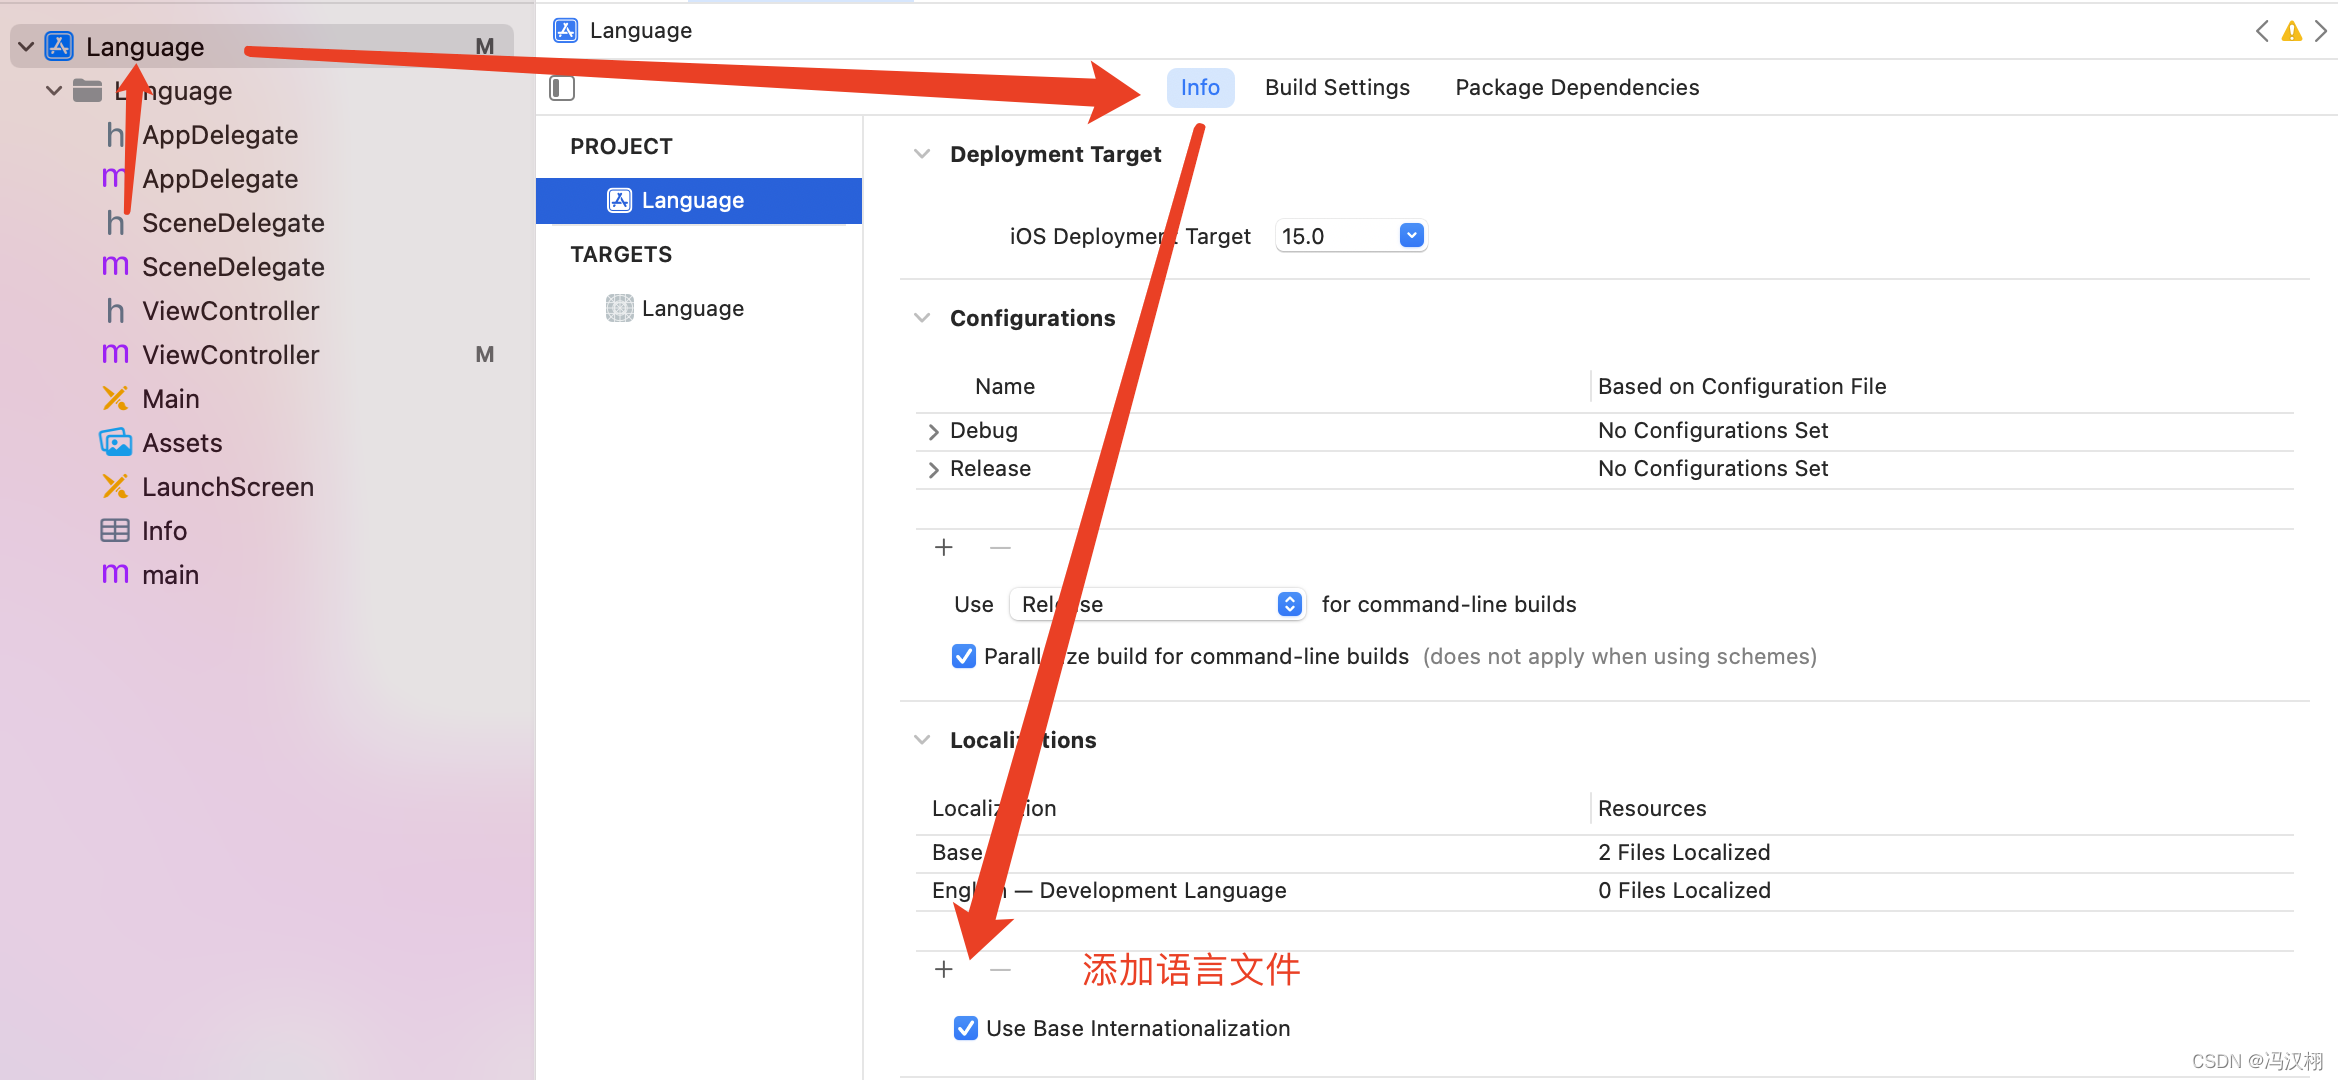
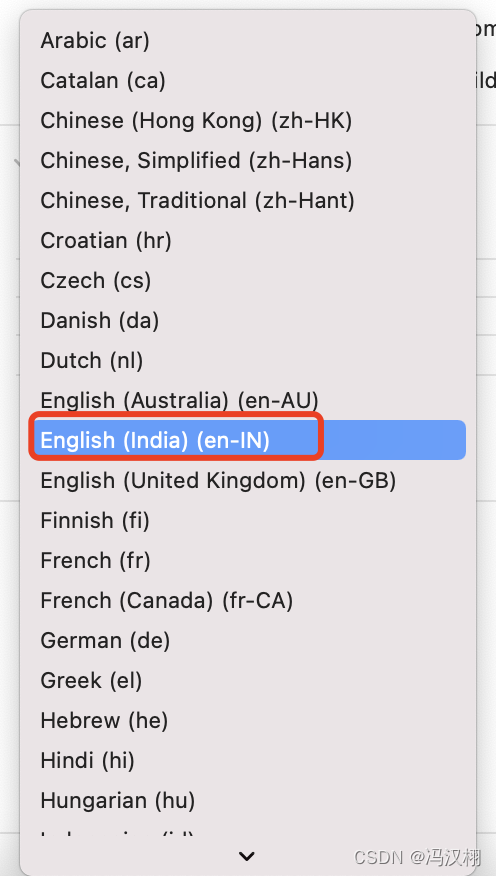
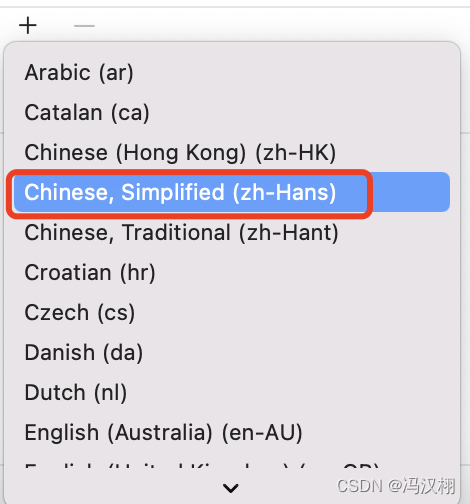
1.添加需要本地化的语言


2.创建本地化文件


到这里为止,现在创建出来之所以失败是因为,相对于2018年的时候,整个一样的操作,应该缺了好几个文件的。现在这些文件还是不够的.下面的图片对比一下以前2018年的时候的文件

现在创建出来的文件小了好几个,剩下的文件缺少的有可能我不会创建,有可能现在简便了,就用这么多就可以了。原因是什么不知道。
目前的解决办法我是拿2018年的文件直接拿过来的。然后拖到项目里面就可以。设置好对应的文本内容。
然后下面就开始写代码。直接回到ViewController。
#import "ViewController.h"

@interface ViewController ()
@property (nonatomic,strong) UIButton *ChineseBtn;
@property (nonatomic,strong) UIButton *EnglishBtn;
@end

@implementation ViewController

- (void)viewDidLoad {
  [super viewDidLoad];

  self.ChineseBtn = [[UIButton alloc] init];
  [self.view addSubview:self.ChineseBtn];
  [self.ChineseBtn setTitle:@"ChineseBtn" forState:UIControlStateNormal];
  [self.ChineseBtn setTitleColor:[UIColor blueColor] forState:UIControlStateNormal];
  self.ChineseBtn.backgroundColor = [UIColor orangeColor];
  self.ChineseBtn.titleLabel.font = [UIFont systemFontOfSize:18];
  self.ChineseBtn.frame = CGRectMake(150, 200, 100, 100);
  [self.ChineseBtn addTarget:self action:@selector(ChineseBtnClick) forControlEvents:UIControlEventTouchUpInside];

  self.EnglishBtn = [[UIButton alloc] init];
  [self.view addSubview:self.EnglishBtn];
  [self.EnglishBtn setTitle:@"EnglishBtn" forState:UIControlStateNormal];
  [self.EnglishBtn setTitleColor:[UIColor blueColor] forState:UIControlStateNormal];
  self.EnglishBtn.backgroundColor = [UIColor orangeColor];
  self.EnglishBtn.titleLabel.font = [UIFont systemFontOfSize:18];
  self.EnglishBtn.frame = CGRectMake(150, 350, 100, 100);
  [self.EnglishBtn addTarget:self action:@selector(EnglishBtnClick) forControlEvents:UIControlEventTouchUpInside];

}

- (void)touchesBegan:(NSSet<UITouch *> *)touches withEvent:(UIEvent *)event {
  //取出多语言内容                     语言的Key    提示语,可以不填
  NSString *markString = NSLocalizedString(@"mark", @"操作提示");
  NSString *contentString = NSLocalizedString(@"content", @"请选择操作");
  NSString *againString = NSLocalizedString(@"again", @"再来一次");
  NSString *backString = NSLocalizedString(@"back", @"退出");
  NSString *cancelString = NSLocalizedString(@"cancel", @"取消");

  //1.创建消息提示对象
  //1.标题
  //2.详细提示文本
  //3.消息框的类型,说明是从中间出现还是底部出现
  UIAlertController *alert=[UIAlertController alertControllerWithTitle:markString message:contentString preferredStyle:UIAlertControllerStyleAlert];
  //2.显示消息框   presentViewController:弹出控制器
  [self presentViewController:alert animated:YES completion:nil];
  //3.添加消息框的按钮
  //1.按钮的文本  2.按钮的类型  3.当前按钮的点击之后的处理代码块
  //UIAlertActionStyleDefault = 0,默认样式
  //UIAlertActionStyleCancel,取消按钮的样式,一个消息框只能创建一个取消按钮
  //UIAlertActionStyleDestructive  毁灭性的按钮,显示红色
  UIAlertAction *cancel=[UIAlertAction actionWithTitle:cancelString style:UIAlertActionStyleCancel handler:^(UIAlertAction * _Nonnull action) {
    NSLog(@"点击了取消按钮");
  }];
  //添加创建好的取消按钮到消息框
  [alert addAction:cancel];
  //创建再来一次按钮
  UIAlertAction *again=[UIAlertAction actionWithTitle:againString style:UIAlertActionStyleDefault handler:^(UIAlertAction * _Nonnull action) {

  }];
  //添加创建好的取消按钮到消息框
  [alert addAction:again];
  //创建退出按钮
  UIAlertAction *byebye=[UIAlertAction actionWithTitle:backString style:UIAlertActionStyleDestructive handler:^(UIAlertAction * _Nonnull action) {
    exit(0);
  }];
  //添加创建好的取消按钮到消息框
  [alert addAction:byebye];

}

- (void)ChineseBtnClick {
  NSString *markString = NSLocalizedStringFromTable(@"mark", @"Zh", @"操作提示");
  NSString *contentString = NSLocalizedStringFromTable(@"content", @"Zh", @"请选择操作");
  NSString *againString = NSLocalizedStringFromTable(@"again", @"Zh", @"再来一次");
  NSString *backString = NSLocalizedStringFromTable(@"back", @"Zh", @"退出");
  NSString *cancelString = NSLocalizedStringFromTable(@"cancel", @"Zh", @"取消");

  [self AlertShow:markString showContent:contentString showAgain:againString showBack:backString showCancel:cancelString];

}

- (void)EnglishBtnClick {
  NSString *markString = NSLocalizedStringFromTable(@"mark", @"English", @"操作提示");
  NSString *contentString = NSLocalizedStringFromTable(@"content", @"English", @"请选择操作");
  NSString *againString = NSLocalizedStringFromTable(@"again", @"English", @"再来一次");
  NSString *backString = NSLocalizedStringFromTable(@"back", @"English", @"退出");
  NSString *cancelString = NSLocalizedStringFromTable(@"cancel", @"English", @"取消");

   [self AlertShow:markString showContent:contentString showAgain:againString showBack:backString showCancel:cancelString];
}


  - (void)AlertShow:(NSString *)mark showContent:(NSString *)content showAgain:(NSString *)again showBack:(NSString *)back showCancel:(NSString *)cancel {

    //1.创建消息提示对象
    //1.标题
    //2.详细提示文本
    //3.消息框的类型,说明是从中间出现还是底部出现
    UIAlertController *alert=[UIAlertController alertControllerWithTitle:mark message:content preferredStyle:UIAlertControllerStyleAlert];
    //2.显示消息框   presentViewController:弹出控制器
    [self presentViewController:alert animated:YES completion:nil];
    //3.添加消息框的按钮
    //1.按钮的文本  2.按钮的类型  3.当前按钮的点击之后的处理代码块
    //UIAlertActionStyleDefault = 0,默认样式
    //UIAlertActionStyleCancel,取消按钮的样式,一个消息框只能创建一个取消按钮
    //UIAlertActionStyleDestructive  毁灭性的按钮,显示红色
    UIAlertAction *cancels = [UIAlertAction actionWithTitle:cancel style:UIAlertActionStyleCancel handler:^(UIAlertAction * _Nonnull action) {
      NSLog(@"点击了取消按钮");
    }];
    //添加创建好的取消按钮到消息框
    [alert addAction:cancels];
    //创建再来一次按钮
    UIAlertAction *agains = [UIAlertAction actionWithTitle:again style:UIAlertActionStyleDefault handler:^(UIAlertAction * _Nonnull action) {

    }];
    //添加创建好的取消按钮到消息框
    [alert addAction:agains];
    //创建退出按钮
    UIAlertAction *byebye=[UIAlertAction actionWithTitle:back style:UIAlertActionStyleDestructive handler:^(UIAlertAction * _Nonnull action) {
      exit(0);
    }];
    //添加创建好的取消按钮到消息框
    [alert addAction:byebye];

  }

@end
上面的代码是整个控制的代码。又要用到两个系统自带的宏定义。
NSLocalizedString(@"mark", @"操作提示");
上面的方法是显示中英文是有系统控制的。看下面图片。

NSLocalizedStringFromTable(@"mark", @"Zh", @"操作提示");
上面的这个方法是由App代码决定显示中英文的,一般的需求就是App设置页面,可以通过一个枚举值来控制选择中英文,然后无论当前手机系统选择中英文,当前自己的App都会显示你选择的语言。就是不受系统控制。