这是关于导航 (Navigation) 的第二个 MAD Skills 系列,本文是导航组件系列的第四篇文章,如果您想回顾过去发布的内容,请通过下面链接查看:
△ 功能模块的导航视频
概述
在 上一篇文章 中,您已经学会了如何在多模块工程中使用导航 (Navigation)。在本文中,我们将更进一步,将咖啡模块转换成功能模块 (Feature Module)。如果对功能模块不太熟悉,您可以先查看以下视频内容:
△ App Bundles
功能模块在安装时并未下载到本地,而是当应用使用到某个功能时才会下载相应的功能模块。这不仅节省了应用下载和安装时的时间和带宽,也节省了设备存储空间。
那么让我们为用户节省一些空间!现在直接开始编程吧!
功能模块
由于我在 上一篇文章 中已经将 DonutTracker 应用进行了模块化,我会从将现有的咖啡模块转换成功能模块开始。
首先,我在咖啡模块的 build.gradle 中将库插件 (library plugin) 替换为动态功能插件 (dynamic-feature plugin):
id 'com.android.dynamic-feature'
接着,我在 AndroidManifest.xml 中将咖啡模块声明为按需 (on-demand) 模块:
<?xml version="1.0" encoding="utf-8"?>
<manifest xmlns:android="http://schemas.android.com/apk/res/android"
   xmlns:dist="http://schemas.android.com/apk/distribution"
   package="com.android.samples.donuttracker.coffee">
   <dist:module
       dist:instant="false"
       dist:title="@string/title_coffee">
       <dist:delivery>
           <dist:on-demand />
       </dist:delivery>
       <dist:fusing dist:include="true" />
   </dist:module>
</manifest>
现在咖啡模块已经转换完成,我将该模块添加为动态功能 (dynamicFeature):
android {
   //...

   packagingOptions {
       exclude 'META-INF/atomicfu.kotlin_module'
   }

   dynamicFeatures = [':coffee']

}
同时在 app 模块的 build.gradle 中,我从依赖列表中移除了咖啡模块并添加了 navigation-dynamic-features 依赖:
implementation "androidx.navigation:navigation-dynamic-features-fragment:$navigationVersion"
当 Gradle 同步完成时,即可更新导航图了。我将 include 标签改为 include-dynamic,并添加 id、graphResName 以及指向功能模块的 moduleName:
<include-dynamic
   android:id="@+id/coffeeGraph"
   app:moduleName="coffee"
   app:graphResName="coffee_graph"/>
此时,我可以安全地移除 coffee_graph.xml 中 navigation 标签的 id 属性,原因在于,如果导航图是使用 include 标签引入的,那么 Dynamic Navigator 库会忽略根元素的 id 属性。
<navigation xmlns:android="http://schemas.android.com/apk/res/android"
   xmlns:app="http://schemas.android.com/apk/res-auto"
   xmlns:tools="http://schemas.android.com/tools"
   app:startDestination="@id/coffeeList">
   <fragment
       android:id="@+id/coffeeList"
       android:name="com.android.samples.donuttracker.coffee.CoffeeList"
       android:label="@string/coffee_list">
       <action
           android:id="@+id/action_coffeeList_to_coffeeEntryDialogFragment"
           app:destination="@id/coffeeEntryDialogFragment" />
   </fragment>
   <dialog
       android:id="@+id/coffeeEntryDialogFragment"
       android:name="com.android.samples.donuttracker.coffee.CoffeeEntryDialogFragment"
       android:label="CoffeeEntryDialogFragment">
       <argument
           android:name="itemId"
           android:defaultValue="-1L"
           app:argType="long" />
   </dialog>
</navigation>
在 activity_main 布局中,我将 FragmentContainerView 的 name 属性值由 NavHostFragment 改为 DynamicNavHostFragment:
<androidx.fragment.app.FragmentContainerView
       android:id="@+id/nav_host_fragment"
       android:name="androidx.navigation.dynamicfeatures.fragment.DynamicNavHostFragment"
       android:layout_width="match_parent"
       android:layout_height="0dp"
       android:layout_weight="1"
       app:defaultNavHost="true"
       app:navGraph="@navigation/nav_graph" />
与通过 include 引入导航图类似,要使动态引入 (include-dynamic) 生效,咖啡菜单项的 id 值需要与导航图名称相匹配,而不是目的地页面 id:
<menu xmlns:android="http://schemas.android.com/apk/res/android">
   <item
       android:id="@id/donutList"
       android:icon="@drawable/donut_with_sprinkles"
       android:title="@string/donut_name" />
   <item
       android:id="@id/coffeeGraph"
       android:icon="@drawable/coffee_cup"
       android:title="@string/coffee_name" />
</menu>
这就是添加动态导航所需的全部工作。现在我将使用 bundletool 来测试功能模块,您也可以使用 Play 控制台来测试功能模块。如果您想了解更多关于如何使用 bundletool 和 Play 控制台来测试功能模块安装的内容,请查看以下视频:
△ bundletool 视频
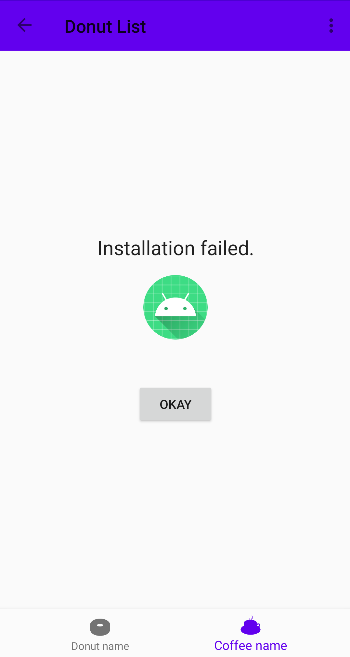
我也想测试当模块无法安装时会发生什么。为此,在 Run/Debug Configurations 弹窗中,我从待部署列表中取消勾选了 donuttracker.coffee。这时当我再次运行应用并导航到 coffeeList 页面时,将会显示一条通用错误信息。

△ 通用错误信息
至此,功能模块的设置已经完成,是时候打磨用户体验了。当功能模块处于下载过程时,向用户显示自定义反馈信息或者显示一条更有意义的报错信息而不是通用的信息会不会更好?
为此,我可以添加一个监听器,当用户停留在同一个页面时,它可以处理安装状态、进度变化或错误信息。或者,当功能模块正在下载时,我可以添加一个自定义进度 Fragment 来展示进度。
导航库已经内置了对 进度 Fragment 的支持。我所需要做的就是创建一个继承了 AbstractProgressFragment 的 Fragment。
class ProgressFragment : AbstractProgressFragment(R.layout.fragment_progress) {
}
我添加了一个 ImageView、一个 TextView 和一个 ProgressBar 来展示下载状态。
<LinearLayout xmlns:android="http://schemas.android.com/apk/res/android"
   xmlns:tools="http://schemas.android.com/tools"
   android:layout_width="match_parent"
   android:layout_height="match_parent"
   android:orientation="vertical"
   android:paddingLeft="@dimen/default_margin"
   android:paddingTop="@dimen/default_margin"
   android:paddingRight="@dimen/default_margin"
   android:paddingBottom="@dimen/default_margin">
   <ImageView
       android:id="@+id/progressImage"
       android:layout_width="wrap_content"
       android:layout_height="wrap_content"
       android:src="@drawable/coffee_cup"
       android:layout_marginBottom="@dimen/default_margin"
       android:layout_gravity="center"/>
   <TextView
       android:id="@+id/message"
       android:layout_width="wrap_content"
       android:layout_height="wrap_content"
       tools:text="@string/installing_coffee_module"/>
   <ProgressBar
       android:id="@+id/progressBar"
       style="@style/Widget.AppCompat.ProgressBar.Horizontal"
       android:layout_width="match_parent"
       android:layout_height="wrap_content"
       tools:progress="10" />
</LinearLayout>
接着,我覆写了 onProgress() 函数来更新 progressBar,我还覆写了 onFailed() 和 onCanceled() 函数来更新 TextView 以向用户展示相关反馈。
override fun onProgress(status: Int, bytesDownloaded: Long, bytesTotal: Long) {
   progressBar?.progress = (bytesDownloaded.toDouble() * 100 / bytesTotal).toInt()
}

override fun onFailed(errorCode: Int) {
   message?.text = getString(R.string.install_failed)
}

override fun onCancelled() {
   message?.text = getString(R.string.install_cancelled)
}
我需要将 progressFragment 目的地添加到导航图中。最后,将 progressFragment 声明为导航图的 progressDestination。
<navigation xmlns:android="http://schemas.android.com/apk/res/android"
   xmlns:app="http://schemas.android.com/apk/res-auto"
   xmlns:tools="http://schemas.android.com/tools"
   app:startDestination="@id/donutList"
   app:progressDestination="@+id/progressFragment">
<fragment
       android:id="@+id/donutList"
       android:name="com.android.samples.donuttracker.donut.DonutList"
       android:label="@string/donut_list" >
       <action
           android:id="@+id/action_donutList_to_donutEntryDialogFragment"
           app:destination="@id/donutEntryDialogFragment" />
       <action
           android:id="@+id/action_donutList_to_selectionFragment"
           app:destination="@id/selectionFragment" />
   </fragment>
   <dialog
       android:id="@+id/donutEntryDialogFragment"
       android:name="com.android.samples.donuttracker.donut.DonutEntryDialogFragment"
       android:label="DonutEntryDialogFragment">
       <deepLink app:uri="myapp://navdonutcreator.com/donutcreator" />
       <argument
           android:name="itemId"
           app:argType="long"
           android:defaultValue="-1L" />
   </dialog>
   <fragment
       android:id="@+id/selectionFragment"
       android:name="com.android.samples.donuttracker.setup.SelectionFragment"
       android:label="@string/settings"
       tools:layout="@layout/fragment_selection" >
       <action
           android:id="@+id/action_selectionFragment_to_donutList"
           app:destination="@id/donutList" />
   </fragment>
   <fragment
       android:id="@+id/progressFragment"
       android:name="com.android.samples.donuttracker.ProgressFragment"
       android:label="ProgressFragment" />
   <include-dynamic
       android:id="@+id/coffeeGraph"
       app:moduleName="coffee"
       app:graphResName="coffee_graph"/>
</navigation>
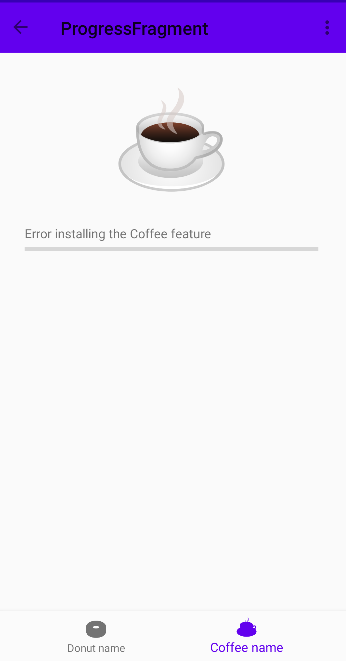
此时,我再次取消勾选咖啡模块,运行应用并导航至 coffeeList 页面时,应用展示了自定义进度页面 progressFragment。

△ 自定义 progressFragment
类似地,我可以使用 bundletool 测试应用以查看当咖啡模块正在下载时,进度条会如何工作。
小结
感谢大家!在本系列中,我们再次使用了 Chet 的 DonutTracker 应用 并添加了咖啡记录功能。因为…我喜欢咖啡。
新功能带来了新责任。为了提供更好的用户体验,首先我使用导航添加了 NavigationUI 以集成 UI 组件。然后,我实现了一次性流程和条件导航。之后,我使用了嵌套图和 include 标签来组织导航图并将应用模块化以节省用户的网络和存储空间。至此,我们已经完成了该应用,是时候去享用一杯美味的咖啡和甜甜圈了!
欢迎您 点击这里 向我们提交反馈,或分享您喜欢的内容、发现的问题。您的反馈对我们非常重要,感谢您的支持!