_OpenCV-Android教程-不使用 OpenCV Manager 环境搭建
Timeless小帅的博客-CSDN博客 https://blog.csdn.net/qq_18604209/article/details/104033944
<?xml version="1.0" encoding="utf-8"?>
<RelativeLayout xmlns:android="http://schemas.android.com/apk/res/android"
    xmlns:app="http://schemas.android.com/apk/res-auto"
    xmlns:tools="http://schemas.android.com/tools"
    android:layout_width="match_parent"
    android:layout_height="match_parent"
    tools:context=".MainActivity">

    <LinearLayout
        xmlns:android="http://schemas.android.com/apk/res/android"
        xmlns:app="http://schemas.android.com/apk/res-auto"
        xmlns:tools="http://schemas.android.com/tools"
        android:layout_width="match_parent"
        android:layout_height="match_parent"
        android:orientation="vertical"
        tools:context="com.example.opencv_practise.MainActivity">

        <LinearLayout
            android:layout_width="match_parent"
            android:layout_height="wrap_content"
            android:orientation="horizontal">
            <Button
                android:layout_weight="1"
                android:id = "@+id/btn_process"
                android:layout_width="match_parent"
                android:layout_height="wrap_content"
                android:text="GRAY"/>
            <Button
                android:layout_weight="1"
                android:layout_width="match_parent"
                android:layout_height="wrap_content"
                android:id="@+id/btn_rgb"
                android:text = "RGB"/>
        </LinearLayout>

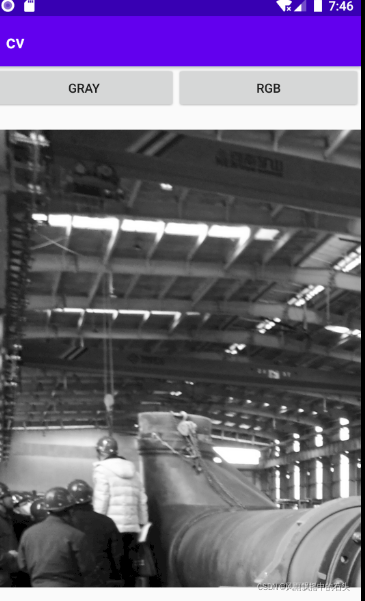
        <ImageView
            android:id="@+id/im_j20"
            android:layout_width="match_parent"
            android:layout_height="wrap_content"
            app:srcCompat="@drawable/lena" />
    </LinearLayout>

</RelativeLayout>


```java
package edu.ydk.cv;

import androidx.appcompat.app.AppCompatActivity;

import android.graphics.Bitmap;
import android.graphics.BitmapFactory;
import android.os.Bundle;
import android.util.Log;
import android.view.View;
import android.widget.Button;
import android.widget.ImageView;
import android.widget.Toast;

import org.opencv.android.BaseLoaderCallback;
import org.opencv.android.LoaderCallbackInterface;
import org.opencv.android.OpenCVLoader;
import org.opencv.android.Utils;
import org.opencv.core.Mat;
import org.opencv.imgproc.Imgproc;

public class MainActivity extends AppCompatActivity {

    ImageView iv;
    String TAG = new String("test");
    private BaseLoaderCallback mLoaderCallback = new BaseLoaderCallback(this) {
        @Override
        public void onManagerConnected(int status) {
            switch (status) {
                case LoaderCallbackInterface.SUCCESS: {
                    Log.i(TAG, "OpenCV loaded successfully");
                }
                break;
                default: {
                    super.onManagerConnected(status);
                }
                break;
            }
        }
    };
    @Override
    protected void onResume() {
        super.onResume();
        if (!OpenCVLoader.initDebug()) {
            Log.d(TAG, "Internal OpenCV library not found. Using OpenCV Manager for initialization");
            OpenCVLoader.initAsync(OpenCVLoader.OPENCV_VERSION_3_0_0, this, mLoaderCallback);
        } else {
            Log.d(TAG, "OpenCV library found inside package. Using it!");
            mLoaderCallback.onManagerConnected(LoaderCallbackInterface.SUCCESS);
        }
    }

    @Override
    protected void onCreate(Bundle savedInstanceState) {
        super.onCreate(savedInstanceState);
        setContentView(R.layout.activity_main);
        //loadOpenCV();
        iv = (ImageView) findViewById(R.id.im_j20);
        Button btn_process = (Button)findViewById(R.id.btn_process);
        btn_process.setOnClickListener(new View.OnClickListener(){
            @Override
            public void onClick(View v) {
                Togray();
            }
        });
        Button btn_rgb = (Button)findViewById(R.id.btn_rgb);
        btn_rgb.setOnClickListener(new View.OnClickListener(){
            @Override
            public void onClick(View v) {
                Torgb();
            }
        });
    }

    private void Togray(){
        Bitmap bitmap = BitmapFactory.decodeResource(getResources(),R.drawable.lena);

        Mat src = new Mat();
        Mat dst = new Mat();

        Utils.bitmapToMat(bitmap,src);
        Imgproc.cvtColor(src,dst,Imgproc.COLOR_BGR2GRAY);
        Utils.matToBitmap(dst,bitmap);

        iv.setImageBitmap(bitmap);
        src.release();
        dst.release();
    }

    private void Torgb(){
        Bitmap bitmap = BitmapFactory.decodeResource(getResources(),R.drawable.lena);
        iv.setImageBitmap(bitmap);
    }
}