目录
ArrayAdapter实现以对话框形式展示下拉框(纯文字)
简单介绍Spinner和Adapter
Spinner是下拉框,用于从一串列表中选择某项,功能类似于单选按钮的组合。下拉列表的展示方式有 两种,一种是在当前下拉框的正下方展示列表,此时把spinnerMode属性设置为dropdown;另一种是在页面 中部以对话框形式展示列表,此时把spinnerMode属性设置为dialog。
适配器Adapter的作用主要是用来给诸如(Spinner、ListView、GridView)来填充数据。常用的适配器有ArrayAdapter, SimpleAdapter和BaseAdapter。
作为初学者,今天先通过学习下拉框Spinner了解ArrayAdapter和SimpleAdapter的使用。
ArrayAdapter实现以对话框形式展示下拉框(纯文字)
java代码
public class SpinnerDialogActivity extends AppCompatActivity {

	@Override
	protected void onCreate(Bundle savedInstanceState) {
		super.onCreate(savedInstanceState);
		setContentView(R.layout.activity_spinner_dialog);
		//声明一个下拉列表的数组适配器
		ArrayAdapter<String> starAdapter = new ArrayAdapter<String>(this,
				R.layout.item_select, starArray);
		//设置数组适配器的布局样式
		starAdapter.setDropDownViewResource(R.layout.item_dropdown);
		//从布局文件中获取名叫sp_dialog的下拉框
		Spinner sp = (Spinner) findViewById(R.id.sp_dialog);
		//设置提示符
		sp.setPrompt("请选择行星");
		//设置下拉框的数组适配器
		sp.setAdapter(starAdapter);
		//设置下拉框默认显示第一项
		sp.setSelection(0);
		//设置选择监听器
		sp.setOnItemSelectedListener(new MySelectedListener());
	}

	private String[] starArray = {"水星", "金星", "地球", "火星", "木星", "土星"};
	class MySelectedListener implements OnItemSelectedListener {
		public void onItemSelected(AdapterView<?> arg0, View arg1, int arg2, long arg3) {
			Toast.makeText(SpinnerDialogActivity.this, "您选择的是"+starArray[arg2], Toast.LENGTH_LONG).show();
		}

		public void onNothingSelected(AdapterView<?> arg0) {
		}
	}

}
布局样式:
<!--item_select.xml 选择窗口字体样式-->
<TextView xmlns:android="http://schemas.android.com/apk/res/android"
    android:id="@+id/tv_name"
    android:layout_width="match_parent"
    android:layout_height="wrap_content"
    android:singleLine="true"
    android:gravity="center"
    android:textSize="17sp"
    android:textColor="#0000ff" />
<!--item_dropdown.xml 下拉窗口字体样式-->
<TextView xmlns:android="http://schemas.android.com/apk/res/android"
android:id="@+id/tv_name"
android:layout_width="match_parent"
android:layout_height="40dp"
android:singleLine="true"
android:gravity="center"
android:textSize="17sp"
android:textColor="#ff0000" />
<!--activity_spinner_dialog.xml-->
<LinearLayout xmlns:android="http://schemas.android.com/apk/res/android"
    android:layout_width="match_parent"
    android:layout_height="match_parent"
    android:orientation="vertical"
    android:padding="20dp" >

    <Spinner
        android:id="@+id/sp_dialog"
        android:layout_width="match_parent"
        android:layout_height="wrap_content"
        android:spinnerMode="dialog" />"

</LinearLayout>
声明适配器ArrayAdapter时使用了三个参数:
ArrayAdapter<String> starAdapter = new ArrayAdapter<String>(this,
				R.layout.item_select, starArray);
第一个参数指上下文对象,第二个参数指被选中的item的样式,第三个参数为数据源。
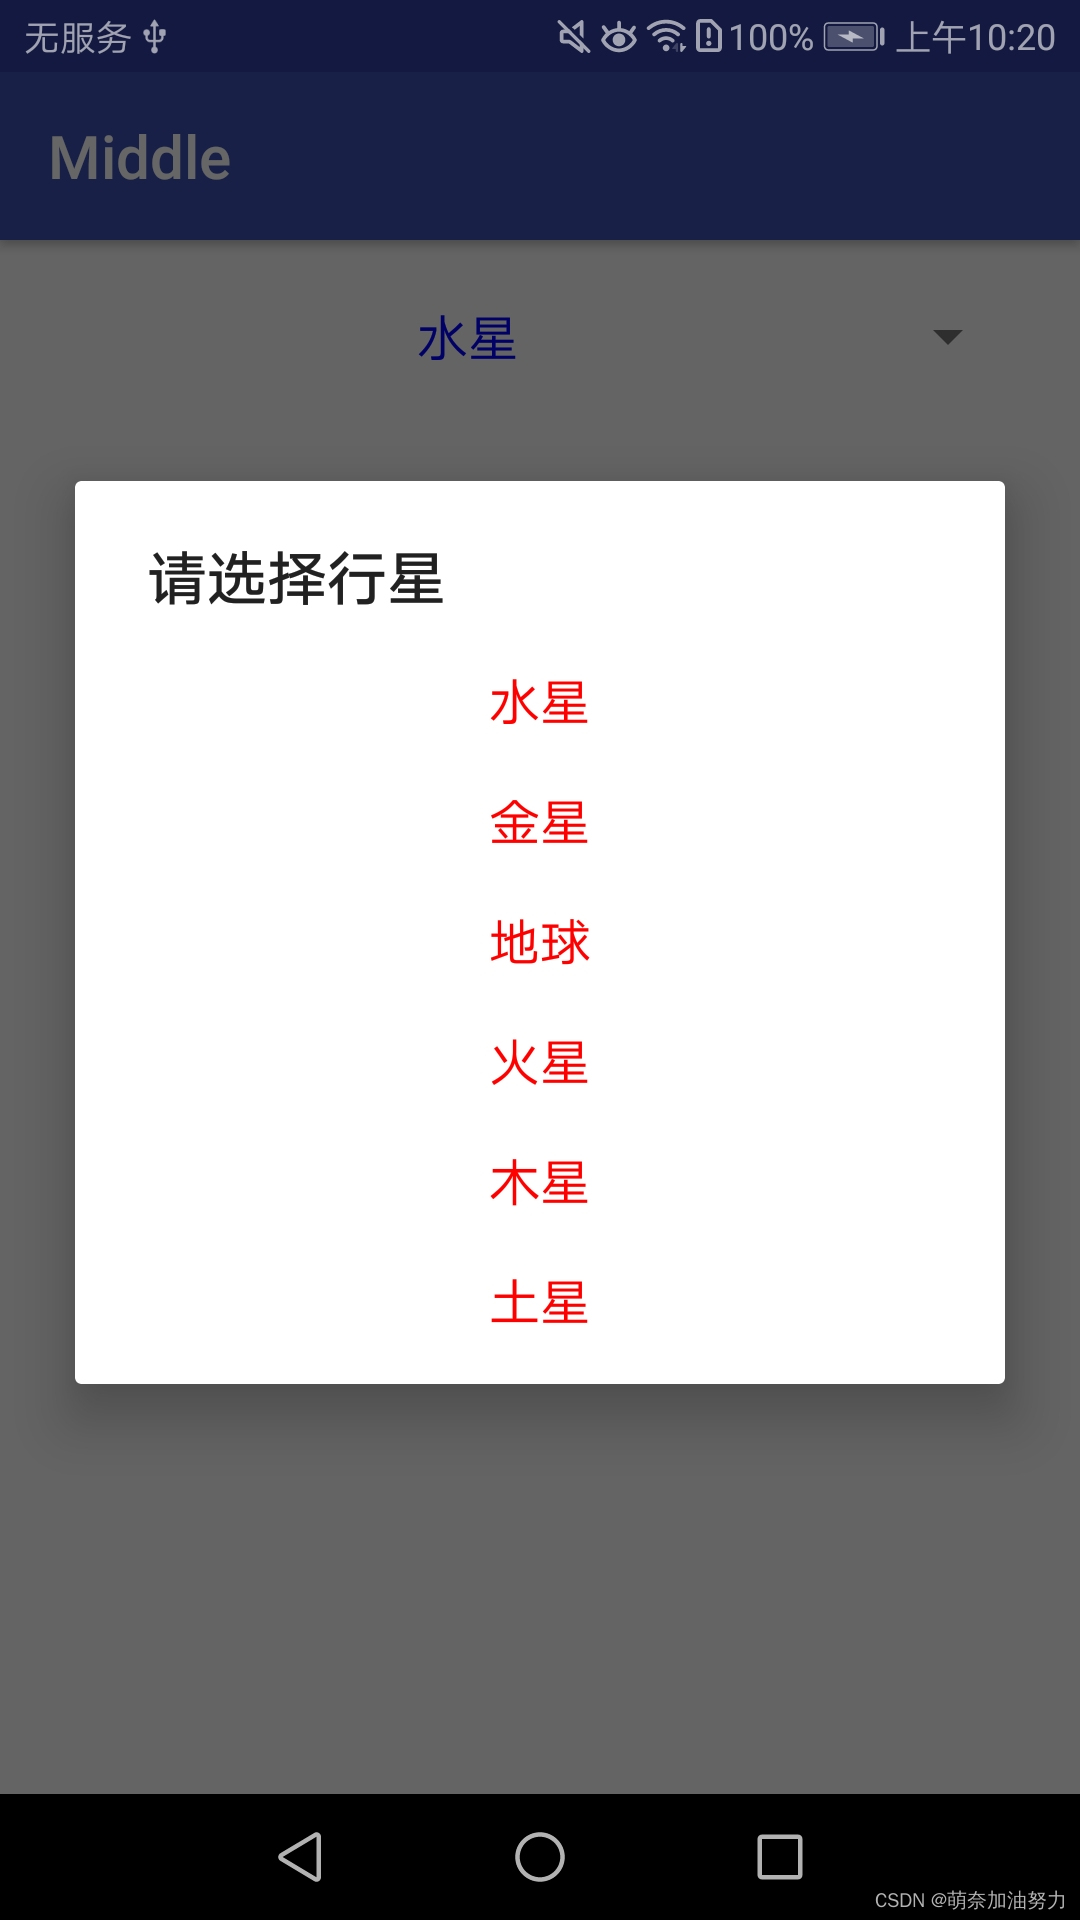
效果图:

Simple实现以对话框形式展示下拉框(图片加文字)
有时我们还想给列表加上图标,这时就可以使用SimpleAdapter,它允许在列表项中展示多个控件,包括文本与图片。SimpleAdapter的使用方式与ArrayAdapter基本类似,但有不同。下面贴上代码。
java代码:
public class SpinnerIconActivity extends AppCompatActivity {

	@Override
	protected void onCreate(Bundle savedInstanceState) {
		super.onCreate(savedInstanceState);
		setContentView(R.layout.activity_spinner_icon);
		//声明一个映射对象的队列,用于保存行星的图标与名称配对信息
		List<Map<String, Object>> list = new ArrayList<Map<String, Object>>();
       	//iconArray是行星的图标数组,starArray是行星的名称数组
        for (int i = 0; i < iconArray.length; i++) {
            Map<String, Object> item = new HashMap<String, Object>();
            item.put("icon", iconArray[i]);
            item.put("name", starArray[i]);
            //把一个行星图标与名称的配对映射添加到队列当中
            list.add(item);
        }
        //声明一个下拉列表的简单适配器,其中制定了图案与文本两组数据
        SimpleAdapter starAdapter = new SimpleAdapter(this, list,
                R.layout.item_select, new String[] { "icon", "name" },
                new int[] {R.id.iv_icon, R.id.tv_name});
        //设置简单适配器的布局样式
		starAdapter.setDropDownViewResource(R.layout.item_simple);
        //从布局文件中获取名叫sp_icon的下拉框
		Spinner sp = (Spinner) findViewById(R.id.sp_icon);
		//设置下拉框的标题
		sp.setPrompt("请选择行星");
		//设置下拉框的简单适配器
		sp.setAdapter(starAdapter);
		//设置下拉框默认显示第一项
		sp.setSelection(0);
		//设置选择监听器
		sp.setOnItemSelectedListener(new MySelectedListener());
	}

	private int[] iconArray = {R.drawable.shuixing, R.drawable.jinxing, R.drawable.diqiu,
			R.drawable.huoxing, R.drawable.muxing, R.drawable.tuxing};
	private String[] starArray = {"水星", "金星", "地球", "火星", "木星", "土星"};
	class MySelectedListener implements OnItemSelectedListener {
		public void onItemSelected(AdapterView<?> arg0, View arg1, int arg2, long arg3) {
			Toast.makeText(SpinnerIconActivity.this, "您选择的是"+starArray[arg2], Toast.LENGTH_LONG).show();
		}

		public void onNothingSelected(AdapterView<?> arg0) {
		}
	}

}
布局样式:
<LinearLayout xmlns:android="http://schemas.android.com/apk/res/android"
    android:layout_width="match_parent"
    android:layout_height="wrap_content"
    android:orientation="horizontal" >

    <ImageView
        android:id="@+id/iv_icon"
        android:layout_width="0dp"
        android:layout_height="50dp"
        android:layout_weight="1"
        android:gravity="center" />

    <TextView
        android:id="@+id/tv_name"
        android:layout_width="0dp"
        android:layout_height="match_parent"
        android:layout_weight="3"
        android:gravity="center"
        android:textSize="17sp"
        android:textColor="#ff0000" />

</LinearLayout>
声明SimpleAdapter时的五个参数:
SimpleAdapter starAdapter = new SimpleAdapter(this, list,
                  R.layout.item_select, new String[] { "icon", "name" },
                 new int[] {R.id.iv_icon, R.id.tv_name});
第一个参数:上下文对象;
第二个参数:数据源;
第三个参数:选中的item的样式;
第四个参数:new String[]数组,数组中每一项要与第二个参数中存入的集合的key值一一对应;
第五个参数:new int[],数组中的每一项要与第二个参数中存入集合的的values值一一对应。
效果图:

资料引用:
android中Adapter适配器的讲解 - 会飞的一只狼 - 博客园 (cnblogs.com)
《Android Studio开发实战:从零基础到App上线》作者:欧阳燊