Android Studio学习日记之(一)TextView控件
1.基础的TextView控件知识
TextView - - - - 点击可查阅API文档的官方解释
| XML attributes | API文档解释 | 中文释义 |
|---|---|---|
| android: layout_width | - | 组件的宽度 |
| android: layout_height | - | 组件的高度 |
| android:id | - | 为组件设置的id |
| android:text | - | 显示的文本内容 |
| android:textColor | - | 文本颜色 |
| android:textStyle | - | 文本风格,有3个可选值:normal(无效果), bold(加粗),italic(斜体) |
| android:textSize | - | 文本尺寸 |
| android:background | - | 控件的背景色,或者图片也可 |
| android:gravity | - | 控件内容的对齐方向 |
代码实现:
strings.xml
<resources>
    <string name="app_name">MyASDemo</string>
    <string name="text01">你好啊</string>
</resources>
colors.xml
<?xml version="1.0" encoding="utf-8"?>
<resources>
    <color name="purple_100">#CCCCFF</color>
    <color name="LemonChiffon">#FFFACD</color>
</resources>
activity_main.xml
<?xml version="1.0" encoding="utf-8"?>
<LinearLayout
    android:layout_height="match_parent"
    android:layout_width="match_parent"
    android:orientation="vertical"
    xmlns:app="http://schemas.android.com/apk/res-auto"
    xmlns:android="http://schemas.android.com/apk/res/android">

    <!--基础的textView内容-->
    <TextView
        android:id="@+id/text01"
        android:layout_width="match_parent"
        android:layout_height="wrap_content"
        android:text="@string/text01"
        android:textColor="@color/purple_100"
        android:textSize="60sp"
        android:background="@color/LemonChiffon"
        android:gravity="center_horizontal"
        />

</LinearLayout>
【注意】:
我们也可以根据TextView的id值,在MainActivity.java文件上添加文字,而且它会覆盖掉在activity_main.xml的原本文本值。
MainActivity.java
package com.example.myasdemo;
import androidx.appcompat.app.AppCompatActivity;
import android.os.Bundle;
import android.widget.TextView;

public class MainActivity extends AppCompatActivity {

    @Override
    protected void onCreate(Bundle savedInstanceState) {
        super.onCreate(savedInstanceState);
        setContentView(R.layout.activity_main);

        //获取activity_main.xml文件中id值为text01的组件
        TextView text1 = findViewById(R.id.text01);
        //设置text01的文本值,此处会覆盖掉activity_main.xml的文本值
        text1.setText("你好啊");
    }
}
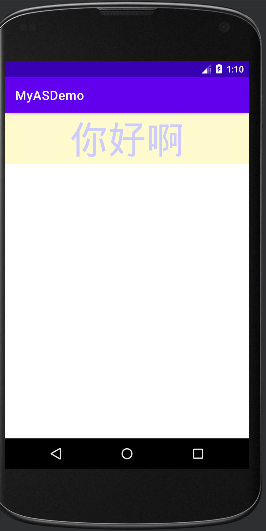
运行效果:
2.文字的阴影效果
| XML attributes | 中文释义 |
|---|---|
| android:shadowColor | 设置阴影颜色,需要和shadowRadius一起使用 |
| android:shadowRadius | 设置阴影的模糊程度 |
| android:shadowDx | 设置阴影在水平方向的偏移 |
| android:shadowDy | 设置阴影在竖直方向的偏移 |
代码实现:
strings.xml
<resources>
    <string name="app_name">MyASDemo</string>
   <string name="text02">HELLO</string>
</resources>
colors.xml
<?xml version="1.0" encoding="utf-8"?>
<resources>
       <color name="OliveDrab1">#C0FF3E</color>
    <color name="LightCyan">#E0FFFF</color>
</resources>
activity_main.xml
<?xml version="1.0" encoding="utf-8"?>
<LinearLayout
    android:layout_height="match_parent"
    android:layout_width="match_parent"
    android:orientation="vertical"
    xmlns:app="http://schemas.android.com/apk/res-auto"
    xmlns:android="http://schemas.android.com/apk/res/android">

     <!--关于阴影的特效:shadowColor、shadowRadius、shadowDx、shadowDy-->
    <TextView
        android:id="@+id/text02"
        android:layout_width="match_parent"
        android:layout_height="80dp"
        android:text="@string/text02"
        android:textSize="60sp"
        android:textStyle="italic"
        android:gravity="center"
        android:background="@color/LightCyan"
        android:shadowColor="@color/OliveDrab1"
        android:shadowRadius="10.0"
        android:shadowDx="20.0"
        android:shadowDy="20.0"
        />

</LinearLayout>
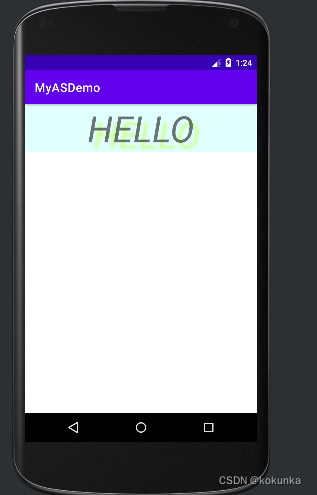
运行效果:
3.文字的跑马灯效果
| XML attributes | 中文释义 |
|---|---|
| android:singleLine | 内容单行显示 |
| android:focusable | 是否可以获取焦点 |
| android:focusableInTouchMode | 制视图在触摸模式下是否可以聚焦 |
| android:ellipsize | 省略文本的位置(当文本很长时,用…代替) |
| android:marqueeRepeatLimit | 字幕动画的重复次数 |
代码实现:
strings.xml
<resources>
    <string name="app_name">MyASDemo</string>
      <string name="text03">bonjour bonjour bonjour bonjour bonjour bonjour bonjour</string>
</resources>
colors.xml
<?xml version="1.0" encoding="utf-8"?>
<resources>
    <color name="SeaGreen">#2E8B57</color>
    <color name="LemonChiffon">#FFFACD</color>
</resources>
activity_main.xml
<?xml version="1.0" encoding="utf-8"?>
<LinearLayout
    android:layout_height="match_parent"
    android:layout_width="match_parent"
    android:orientation="vertical"
    xmlns:app="http://schemas.android.com/apk/res-auto"
    xmlns:android="http://schemas.android.com/apk/res/android">

    <!--关于跑马灯的应用-->
    <!--  android:clickable="true"是确定滑动的关键-->
    <TextView
        android:id="@+id/text03"
        android:layout_width="match_parent"
        android:layout_height="180sp"
        android:text="@string/text03"
        android:textSize="60sp"
        android:textStyle="bold"
        android:textColor="@color/SeaGreen"
        android:background="@color/LavenderBlush"
        android:gravity="center"
        android:singleLine="true"
        android:ellipsize="marquee"
        android:marqueeRepeatLimit="marquee_forever"
        android:focusable="true"
        android:focusableInTouchMode="true"
        android:clickable="true"
        />

</LinearLayout>
这里我们有3个实现跑马灯的关键方法:
- 方法1:在TextView控件里面加入 android:clickable=“true”
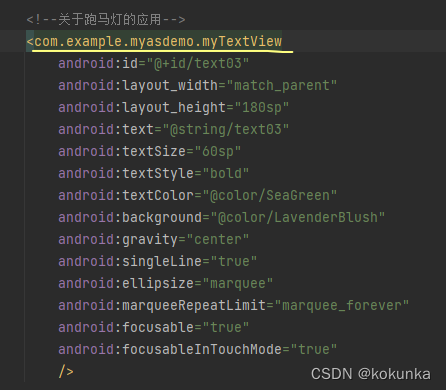
- 方法2:在java文件下新建一个.java文件,同时将< TextView />更改成该文件的名字
e.g.
myTextView.java
package com.example.myasdemo;

import android.content.Context;
import android.util.AttributeSet;


import androidx.annotation.Nullable;

public class myTextView extends androidx.appcompat.widget.AppCompatTextView {
	//创建构造方法
    public myTextView(Context context) {
        super(context);
    }

    public myTextView(Context context, @Nullable AttributeSet attrs) {
        super(context, attrs);
    }

    public myTextView(Context context, @Nullable AttributeSet attrs, int defStyleAttr) {
        super(context, attrs, defStyleAttr);
    }

	//该方法是关键!!!
    @Override
    public boolean isFocused() {
        return true;
    }
}
在activity_main.xml的对应处进行修改
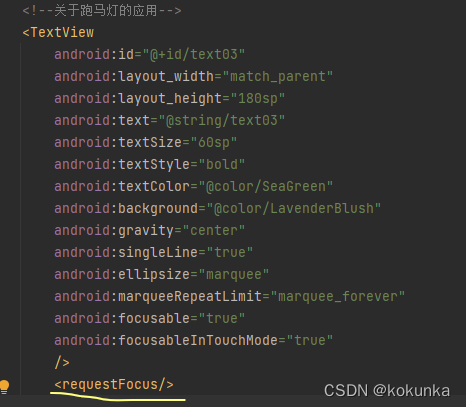
- 方法3:在TextView控件后面直接加上 < requestFocus />
运行效果:
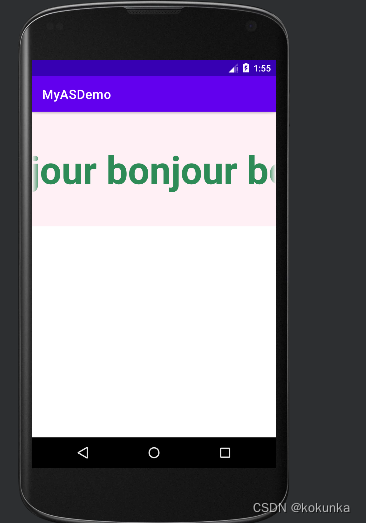
(文字滑动效果)
