适配方案一
//    今日头条屏幕适配方案
    implementation 'com.github.JessYanCoding:AndroidAutoSize:v1.2.1'
1、在build.gradle中引用
implementation 'com.github.JessYanCoding:AndroidAutoSize:v1.2.1'
plugins {
    id 'com.android.application'
    id 'org.jetbrains.kotlin.android'
}

android {
    compileSdk 32

    defaultConfig {
        applicationId "com.nyw.myuiapplication"
        minSdk 21
        targetSdk 32
        versionCode 1
        versionName "1.0"

        testInstrumentationRunner "androidx.test.runner.AndroidJUnitRunner"
    }

    buildTypes {
        release {
            minifyEnabled false
            proguardFiles getDefaultProguardFile('proguard-android-optimize.txt'), 'proguard-rules.pro'
        }
    }
    compileOptions {
        sourceCompatibility JavaVersion.VERSION_1_8
        targetCompatibility JavaVersion.VERSION_1_8
    }
    kotlinOptions {
        jvmTarget = '1.8'
    }
}

dependencies {

    implementation 'androidx.core:core-ktx:1.7.0'
    implementation 'androidx.appcompat:appcompat:1.3.0'
    implementation 'com.google.android.material:material:1.4.0'
    implementation 'androidx.constraintlayout:constraintlayout:2.0.4'
    testImplementation 'junit:junit:4.13.2'
    androidTestImplementation 'androidx.test.ext:junit:1.1.3'
    androidTestImplementation 'androidx.test.espresso:espresso-core:3.4.0'
//    今日头条屏幕适配方案
    implementation 'com.github.JessYanCoding:AndroidAutoSize:v1.2.1'
}
新创建的项目需要在settings.gradle中配制,旧项目创建的在build.gradle中配制,在这里是新创建的项目,如下
maven { url "https://jitpack.io" }
pluginManagement {
    repositories {
        gradlePluginPortal()
        google()
        mavenCentral()
        maven { url "https://jitpack.io" }
    }
}
dependencyResolutionManagement {
    repositoriesMode.set(RepositoriesMode.FAIL_ON_PROJECT_REPOS)
    repositories {
        google()
        mavenCentral()
        maven { url "https://jitpack.io" }
    }
}

rootProject.name = "MyUiApplication"
include ':app'
?2、AndroidManifest.xml? 中添加配制,这里的宽高设置可以问设计师要设计图尺寸根据实际填写
<!-- 屏幕适配宽度 -->
<meta-data
    android:name="design_width_in_dp"
    android:value="360"/>
<!-- 屏幕适配高度度 -->
<meta-data
    android:name="design_height_in_dp"
    android:value="640"/>
<?xml version="1.0" encoding="utf-8"?>
<manifest xmlns:android="http://schemas.android.com/apk/res/android"
    package="com.nyw.myuiapplication">

    <application
        android:allowBackup="true"
        android:icon="@mipmap/ic_launcher"
        android:label="@string/app_name"
        android:roundIcon="@mipmap/ic_launcher_round"
        android:supportsRtl="true"
        android:theme="@style/Theme.MyUiApplication">
        <activity
            android:name=".MainActivity"
            android:exported="true">
            <intent-filter>
                <action android:name="android.intent.action.MAIN" />

                <category android:name="android.intent.category.LAUNCHER" />
            </intent-filter>
        </activity>
        <!-- 屏幕适配宽度 -->
        <meta-data
            android:name="design_width_in_dp"
            android:value="360"/>
        <!-- 屏幕适配高度度 -->
        <meta-data
            android:name="design_height_in_dp"
            android:value="640"/>

    </application>

</manifest>
简单的配制已经完成,框架可以自行运行,可以使用了。布局文件中直接使用dp,框架可以运行适配。更多功能请查看大神的 文章。如下
GitHub - JessYanCoding/AndroidAutoSize:🔥一种低成本的Android屏幕适配解决方案(今日头条屏幕适配方案终极版,一个极低成本的Android屏幕适配方案)。
今日头条屏幕适配方案终极版正式发布! - 简书 (jianshu.com)
?适配方案二
使用smallestWidth适配屏幕
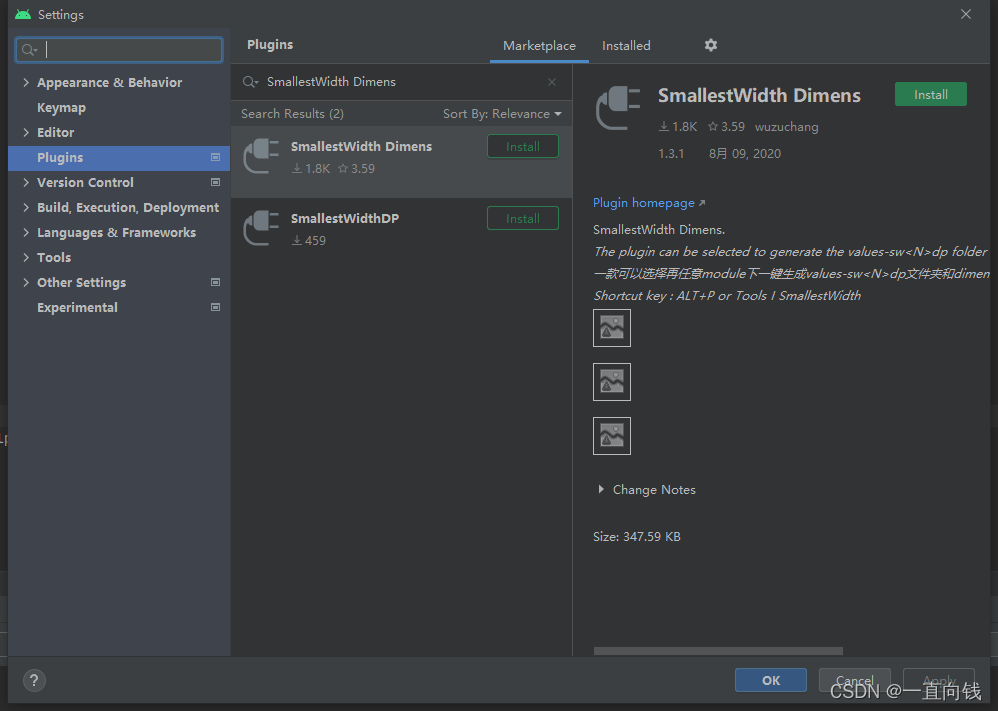
生成?dimens.xml 文件,可以使用as自带的SmallestWidth Dimens插件完成,安装插件如下图

安装完成后,重启开发工具,在Tools菜单中可以看到插件,如下图

?插件启动后可自主选择要在那个moudel下生成values-sw<N>dp文件夹,默认有一些文件夹,你也可以通过Add smallestWidth添加需要的尺寸。Design Width 为你设计稿的尺寸是必填项,我在这里填写最小单位360。
?
更多详细的可查看大神文章参考