前言
xcode 13.3
iOS 15.4
1.创建 Image
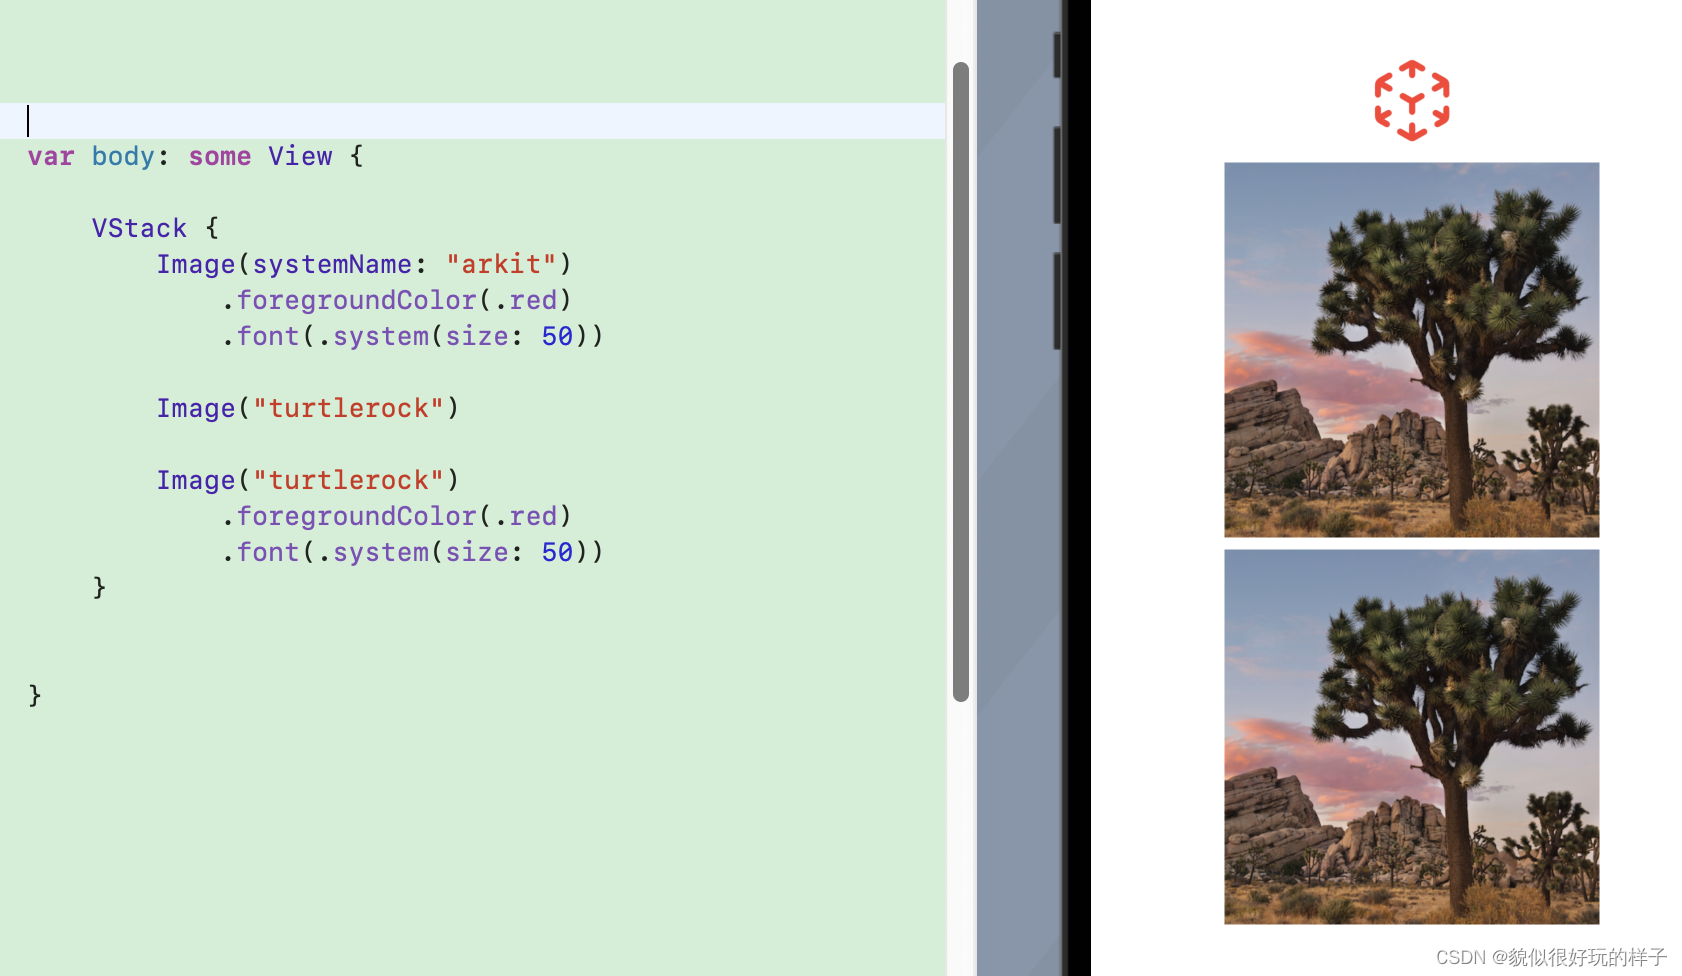
如果是创建系统符号Image,可以设置Image的颜色、大小
如果是加载本地图片,则不行
VStack {
	//创建系统符号图像。
    Image(systemName: "arkit")
        .foregroundColor(.red)
        .font(.system(size: 50)) //使用font设置系统符号大小
    //创建本地图像。
    Image("turtlerock")

    Image("turtlerock")
        .foregroundColor(.red)
        .font(.system(size: 50))
}

1.1 resizable 自动缩放、适配父视图
/// Sets the mode by which SwiftUI resizes an image to fit its space.
/// - Parameters:
/// - capInsets: Inset values that indicate a portion of the image that
/// SwiftUI doesn’t resize.
/// - resizingMode: The mode by which SwiftUI resizes the image.
public func resizable(capInsets: EdgeInsets = EdgeInsets(), resizingMode: Image.ResizingMode = .stretch) -> Image
设置resizable
Image("turtlerock")
    .resizable()


1.2 设置视图填充方式
1.2.1 fill: 图片完全撑满整个视图,保持宽高比
Image("turtlerock")
     .resizable()
     .aspectRatio(contentMode: .fill)

1.2.1 fit: 使图片保持宽高比的情况下,宽或高有一个盛满视图
Image("turtlerock")
     .resizable()
     .aspectRatio(contentMode: .fit)


2、图片色彩调整功能
2.1 模糊效果
/// - Parameters:
/// - radius: The radial size of the blur. A blur is more diffuse when its
/// radius is large.
/// - opaque: A Boolean value that indicates whether the blur renderer
/// permits transparency in the blur output. Set totrueto create an
/// opaque blur, or set tofalseto permit transparency.
///- 半径:模糊的半径大小。当模糊的半径较大时,它的漫反射性更强。
///- 不透明:一个布尔值,指示模糊渲染器是否允许模糊输出中的透明度。设置为 “true” 以创建不透明模糊,或设置为 “false” 以允许透明。
@inlinable public func blur(radius: CGFloat, opaque: Bool = false) -> some View
2.1.1 设置模糊效果半径
VStack {
    Image("home_blank")

    Image("home_blank")
        .blur(radius: 2)
}

2.1.2 设置模糊效果半径、是否透明
VStack {
    Image("home_blank")

    Image("home_blank")
        .blur(radius: 2, opaque: true)
}

2.2 设置图像亮度
/// - Parameter amount: A value between 0 (no effect) and 1 (full white
/// brightening) that represents the intensity of the brightness effect.
///- 参数量:介于 0(无效果)和 1(全白色加亮)之间的值,表示亮度效果的强度。
@inlinable public func brightness(_ amount: Double) -> some View
图片亮度默认为0
VStack {
    Image("home_blank")

    Image("home_blank")
        .brightness(0.2)
}

2.3 图像颜色翻转
对图像的颜色进行翻转,通俗点说:就是黑色和白色、黄色和紫色、橙色和蓝色等这些互补色进行相互的转换
VStack {
    Image("home_blank")

    Image("home_blank")
        .colorInvert()
}

2.4 添加颜色乘法效果
/// - Parameter color: The color to bias this view toward.
///- 参数颜色:使此视图偏向的颜色。
结果色总是比较暗的颜色,变化的幅度较为均匀,任何颜色与黑色想成产生黑色,任何颜色与白色相乘保持不变
VStack {
    Image("home_blank")

    Image("home_blank")
        .colorMultiply(.red)
}

2.5 图像对比度
	/// - Parameter amount: The intensity of color contrast to apply. negative  values invert colors in addition to applying contrast.
 ///- 参数量:要应用的颜色对比度的强度。负值除了应用对比度外,还会反转颜色。
VStack {
    Image("home_blank")

    Image("home_blank")
        .contrast(1.5)
    Image("home_blank")
        .contrast(-1.5)
}

2.6 图像色调旋转
色调旋转效果很根据您指定的角度移动视图中的所有颜色,如果将色调旋转 360 度,则和原色一样
VStack {
    Image("home_blank")

    Image("home_blank")
        .hueRotation(Angle.degrees(100))
    Image("home_blank")
        .hueRotation(Angle.degrees(360))
}

2.7 增加颜色饱和度
参数值大于 1 时,增加色彩的饱和度,参数值等于 1 时,饱和度和原色相同,参数值为 0 时,会清楚图形里面的彩色信息,仅包含灰度信息

2.8 图形应用灰度效果
/// - Parameter amount: The intensity of grayscale to apply from 0.0 to less than 1.0. Values closer to 0.0 are more colorful, and values closer to 1.0 are less colorful.
///- 参数量:灰度的强度从 0.0 到小于 1.0。接近 0.0 的值颜色更鲜艳,而接近 1.0 的值颜色较少。
2.9 给图形半透明效果添加亮度
它会在视图之外创建一个半透明的蒙版,视图中的暗区变为透明,亮区变为不透明的黑色,中等亮度区域变为灰色

3 加载网络图片
struct Login: View {

    @State private var remoteImage: UIImage? = nil
    let placeholderImage = UIImage(named: "home_blank")

    var body: some View {
        Image(uiImage: (self.remoteImage ?? placeholderImage)!)
            .onAppear(perform: fetchRemoteImage)
    }

    func fetchRemoteImage() {
        guard let url = URL(string: "https://t7.baidu.com/it/u=2621658848,3952322712&fm=193&f=GIF") else {
            return
        }
        URLSession.shared.dataTask(with: url) { data, response, error  in
            if let image = UIImage(data: data!) {
                remoteImage = image
            } else {
                print(error ?? "")
            }
        }
        .resume()
    }
}
