Activity
4个状态
running Paused Stoped Killed
生命周期
oncreate
onstart
onResume
onRestart
onPause
onStop
onDestroy
从界面1传递数据到界面2
创建second_layout xml文件;
创建SecondActivity类文件,继承自Activity
在AndroidManifest.xml做下注册;
在第一个界面定义数据,传递到第二个界面,借助于Bundle对象;
在第二个界面接受数据;
从界面2回传数据到界面1,这个我做了下简化;
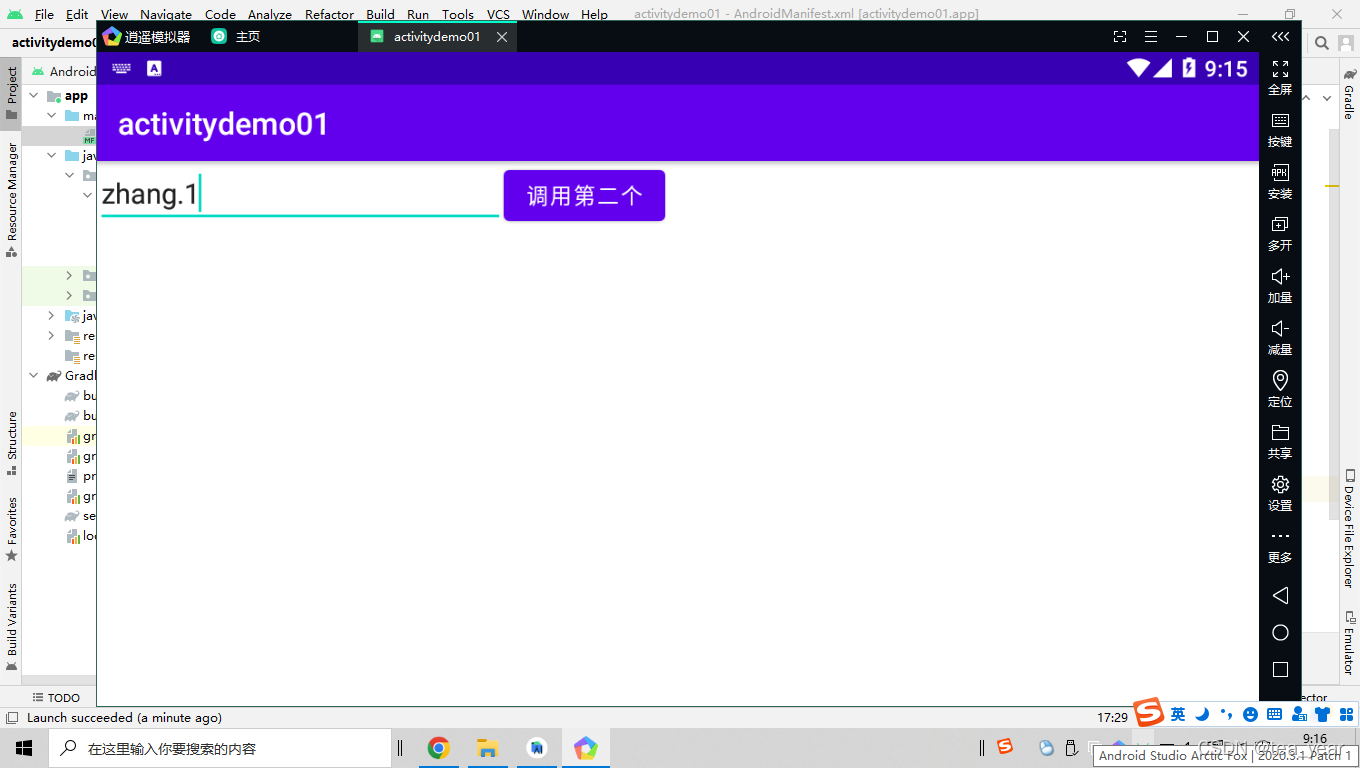
1.主界面的xml配置文件如下:
在这里插入代码片`<?xml version="1.0" encoding="utf-8"?>
<LinearLayout android:layout_width="wrap_content"
    android:layout_height="wrap_content"
    xmlns:android="http://schemas.android.com/apk/res/android">
    <EditText
        android:layout_width="300dp"
        android:layout_height="wrap_content"
        android:id="@+id/etInfo"/>
    <Button
        android:layout_width="wrap_content" android:id="@+id/btn01"
        android:layout_height="wrap_content" android:text="调用第二个"/>
</LinearLayout>`
复制
2.主界面对应的java文件
@Override
protected void onCreate(Bundle savedInstanceState) {
    super.onCreate(savedInstanceState);
    setContentView(R.layout.activity_main);
    //--------------------------声明对象;
    EditText etInfo=(EditText) findViewById(R.id.etInfo);
    Button btn01=(Button)findViewById(R.id.btn01);
    //事件监听;
    btn01.setOnClickListener(new View.OnClickListener() {
        @Override
        public void onClick(View v) {
            Intent intent=new Intent(MainActivity.this,SecondActivity.class);
            //*************************
            //传递数据到第二个界面;
            String info=((EditText) findViewById(R.id.etInfo)).getText().toString();
            Bundle bundle=new Bundle(); //可以把它当成java的Map,采用key-value格式传值;
            bundle.putString("info",info);
            //将bundle对象传递到intent里面;
            intent.putExtras(bundle);
            //******************************

            startActivity(intent);
            //开始做回传了;
            startActivityForResult(intent,100);
        }
    });
}

//第二个针对回传数据的方法;


@Override
protected void onActivityResult(int requestCode, int resultCode, @Nullable Intent data) {
    super.onActivityResult(requestCode, resultCode, data);
    //1.请求码2;返回码;3.回传数据;
    if(requestCode==100&&resultCode==AppCompatActivity.RESULT_OK){
        String dt=data.getExtras().getString("eText1");  //这个才是返回的数据值;

        EditText eText1=(EditText) findViewById(R.id.etInfo);
        eText1.setText("回传数据:"+dt);
    }
}
}
复制
3.第二个界面文件xml
<?xml version="1.0" encoding="utf-8"?>
<LinearLayout xmlns:android="http://schemas.android.com/apk/res/android"
    android:layout_width="match_parent" android:orientation="vertical"
    android:layout_height="match_parent">
    <EditText
        android:layout_width="300dp"
        android:layout_height="wrap_content"
        android:id="@+id/etInfo2"/>
    <Button
        android:layout_width="wrap_content" android:id="@+id/btn02"
        android:layout_height="wrap_content" android:text="界面2的按钮,回传数据"/>
</LinearLayout>
复制
4.第二个界面的java文件
package com.aaa.activitydemo01;

import android.app.Activity;
import android.content.Intent;
import android.os.Bundle;
import android.view.View;
import android.widget.Button;
import android.widget.EditText;
import android.widget.Toast;

import androidx.annotation.Nullable;

public class SecondActivity extends Activity {
    //重写onCreate()
    @Override
    protected void onCreate(@Nullable Bundle savedInstanceState) {
        super.onCreate(savedInstanceState);
        //初始化界面的代码;第二个layout拿过来
        setContentView(R.layout.second_layout);
        //希望从界面1Activity接受到界面2;
        Intent intent=this.getIntent();  //获取当前对象的intent,这个是传递对象;
        Bundle bundle=intent.getExtras();  //获取intent的bundle
        String info=bundle.getString("info");
        //显示到详情页面;
//        EditText etInfo2=(EditText) findViewById(R.id.etInfo2);
        ((EditText) findViewById(R.id.etInfo2)).setText("收到界面1:"+info);
        //调用Button2
        Button btn02=(Button) findViewById(R.id.btn02);
        btn02.setOnClickListener(new View.OnClickListener() {
            @Override
            public void onClick(View v) {
                Intent intentData=new Intent();//因为是回传的数据,所以,需要借助于新的intent对象;
                String editText1=((EditText)findViewById(R.id.etInfo2)).getText().toString();

                System.out.println(editText1);

                intentData.putExtra("eText1",editText1);
                //调用setResult()
                setResult(Activity.RESULT_OK,intentData);

                finish();
            }
        });
    }
}
复制
5.切记不要忘了综合配置文件:
<?xml version="1.0" encoding="utf-8"?>
<manifest xmlns:android="http://schemas.android.com/apk/res/android"
    package="com.aaa.activitydemo01">
    <application
        android:allowBackup="true"
        android:icon="@mipmap/ic_launcher"
        android:label="@string/app_name"
        android:roundIcon="@mipmap/ic_launcher_round"
        android:supportsRtl="true"
        android:theme="@style/Theme.Activitydemo01">
        <activity
            android:name=".MainActivity"
            android:exported="true">
            <intent-filter>
                <action android:name="android.intent.action.MAIN" />
                <category android:name="android.intent.category.LAUNCHER" />
            </intent-filter>
        </activity>
        <activity android:name=".SecondActivity" android:label="第二个activity">
        </activity>
    </application>

</manifest>
复制
6.效果图:


