源码地址:GitHub - hhbbeijing/flutter_app_test? ?提交日期:2022-5-10
上章我们已能够自定义图片库,本示例我们将结合ttf 自定义bottomNavigationBar,作为企业级app的一部分。
一、制作TTF
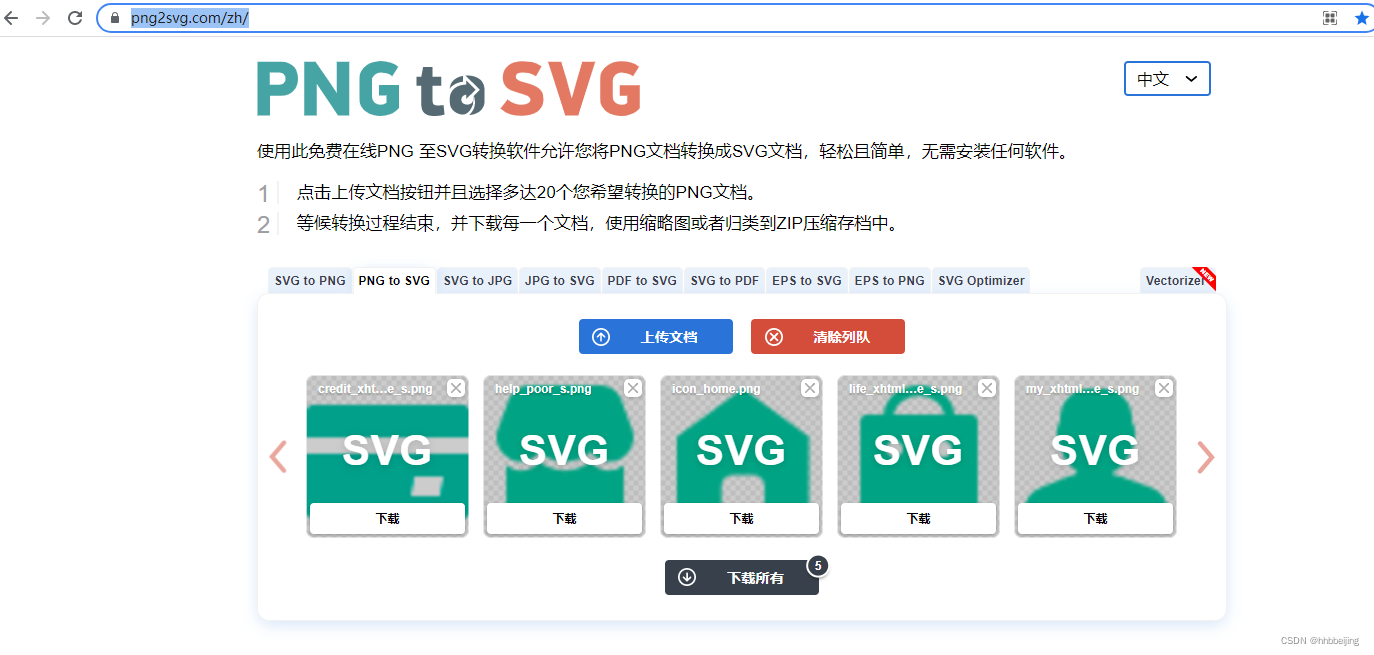
1.1 将png转换为SVG:
转换成功后能够预览图片,否则显示失败。

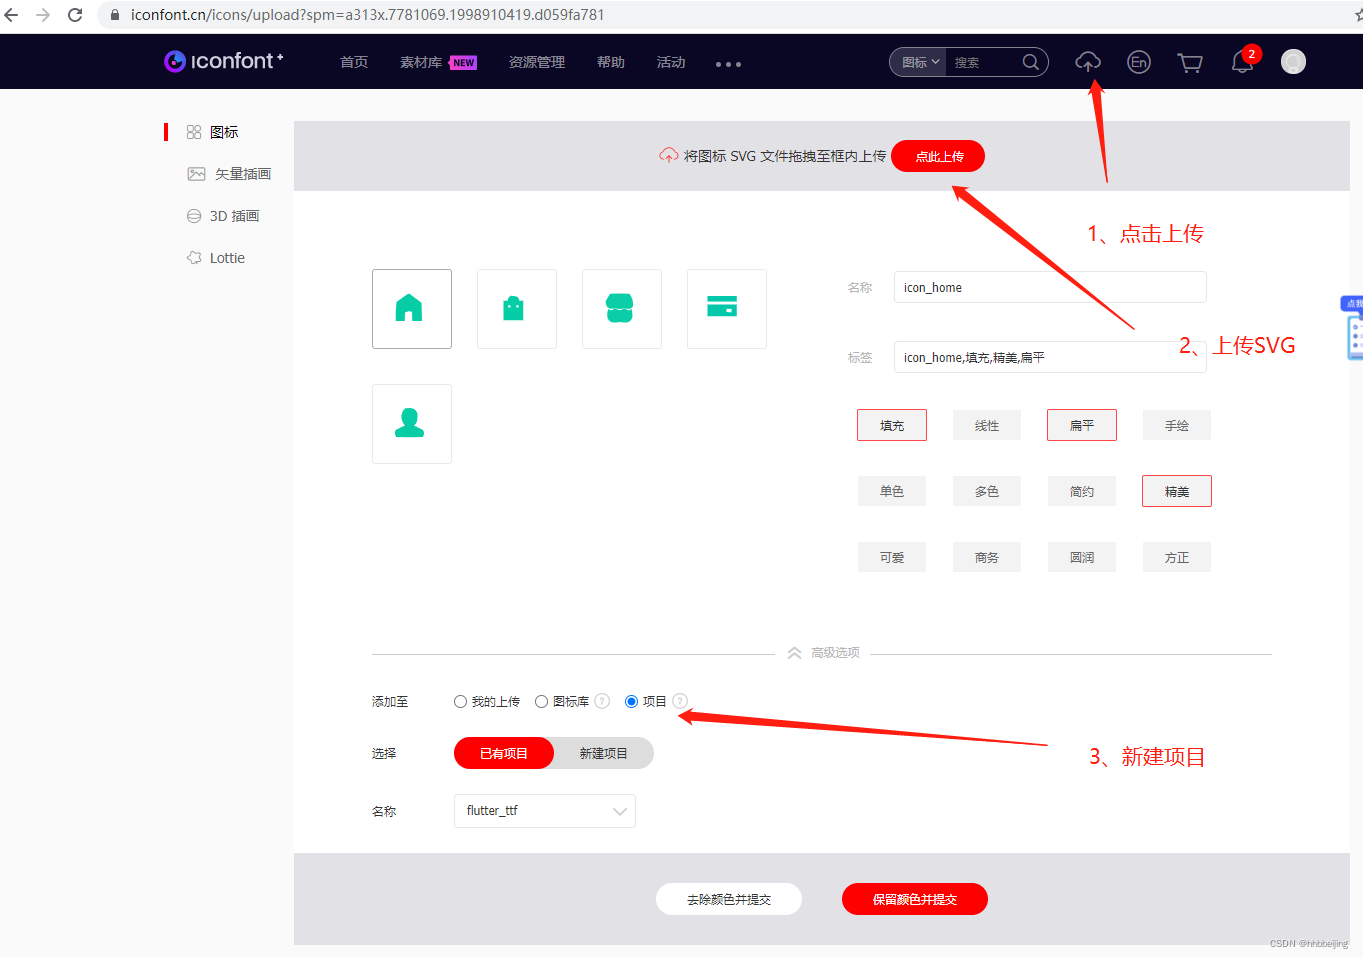
2.2 制作 TTF
登录后,上传SVG到自己的项目

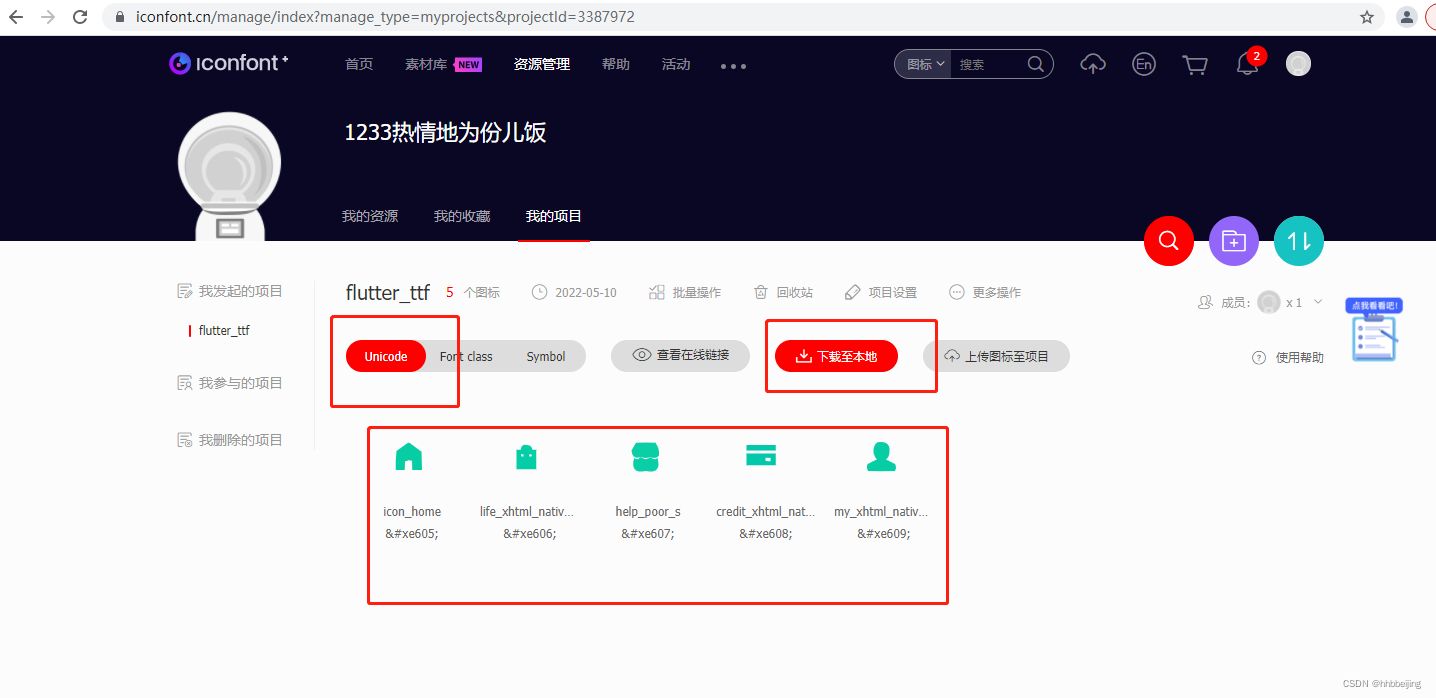
下载

?二、自定义BottomNavigationBar
2.1 自定义布局
import 'package:flutter/material.dart';
import 'package:flutter_app_test/pages/example/ttf/MyIcons.dart';

void main() {
  runApp(Main());
}

class Main extends StatelessWidget {
  @override
  Widget build(BuildContext context) {
    return MaterialApp(
        theme: ThemeData(
          primaryColor: Colors.green,
        ),
        home: MainPage());
  }
}

class MainPage extends StatefulWidget {
  @override
  _HomePageState createState() => _HomePageState();
}

class _HomePageState extends State<MainPage> {
  late int currentIndex;

  @override
  void initState() {
    super.initState();
    currentIndex = 0;
  }

  @override
  Widget build(BuildContext context) {
    return Scaffold(
      appBar: null,
      body: Container(
        padding: const EdgeInsets.all(100),
        child: Row(
          children: [
            Icon(
              MyIcons.home,
              size: 100,
              color: Colors.green,
            ),
            Text("This is a ttf!"),
          ],
        ),
      ),
      bottomNavigationBar: BottomNavigationBar(
          currentIndex: currentIndex,
          onTap: (index) {
            _changePage(index);
          },
          selectedItemColor: Colors.green,
          unselectedItemColor: Colors.black38,
          backgroundColor: Colors.white,
          iconSize: 40,
          type: BottomNavigationBarType.fixed,
          items: const [
            BottomNavigationBarItem(
                icon: Icon(MyIcons.home),
                activeIcon: Icon(MyIcons.home),
                label: "首页"),
            BottomNavigationBarItem(
                icon: Icon(MyIcons.life),
                activeIcon: Icon(MyIcons.life),
                label: "生活"),
            BottomNavigationBarItem(
                icon: Icon(MyIcons.money),
                activeIcon: Icon(MyIcons.money),
                label: "理财"),
            BottomNavigationBarItem(
                icon: Icon(MyIcons.mine),
                activeIcon: Icon(MyIcons.mine),
                label: "我的"),
          ]),
    );
  }

  /*切换页面*/
  void _changePage(int index) {
    /*如果点击的导航项不是当前项  切换 */
    if (index != currentIndex) {
      setState(() {
        currentIndex = index;
      });
    }
  }
}
属性含义:
BottomNavigationBarItem-
icon:默认图标
activeIcon:选中时的图标
label:文本
backgroundColor:BottomNavigationBarType为shifting时的背景颜色
BottomNavigationBar-
items:内部元素集合
currentIndex:当前选中项
backgroundColor:背景色
selectedItemColor:图片及文本选中项的颜色
unselectedItemColor:图片及文本未选中项的颜色
iconSize:图标大小
type:底部导航栏的类型,有fixed和shifting两个类型,显示效果不一样
onTap:点击回调函数
2.2 回调函数
靠!这是个什么玩意???
别急,往下看:
  /// Called when one of the [items] is tapped.
  ///
  /// The stateful widget that creates the bottom navigation bar needs to keep
  /// track of the index of the selected [BottomNavigationBarItem] and call
  /// `setState` to rebuild the bottom navigation bar with the new [currentIndex].
  final ValueChanged<int>? onTap;
首先看下面的定义:定义了一个修饰符未final的int类型,名为currentIndex的属性。
  /// The index into [items] for the current active [BottomNavigationBarItem].
  final int currentIndex;
好了,我们透过源码,观察如下:
/// Signature for callbacks that report that an underlying value has changed.
///
/// See also:
///
///  * [ValueSetter], for callbacks that report that a value has been set.
typedef ValueChanged<T> = void Function(T value);
final ValueChanged<int>? onTap;
尝试解释一下 :定义了一个修饰符为final的回调函数,当int类型值有改变时,触发回调。
2.3 回调函数示例
import 'dart:io';

void main(){
  BottomNavigationBar bar = BottomNavigationBar(
      changed: (index){
      print("index-->"+index);
    }
  );
  print("sleep 3 s");
  sleep(const Duration(seconds: 3));
  bar.select("40");
}

//别名函数
typedef ValueChanged<T> = void Function(T value);

class BottomNavigationBar{

  final ValueChanged<String>? changed;

  BottomNavigationBar({
    // ValueChanged<String>? this.changed,
    this.changed,
  });

  //改变状态
  void select(String index){
    print(this.changed == null);
    //this.changed 不为空 执行 call;
    // call就是将index字段值,赋予ValueChanged,可以理解为值发生了变化,便回调
    this.changed?.call(index);
  }

}
