一、实验目的
1、学习android程序GUI的开发方法。
2、学习android程序一个RelativeLayout布局的开发方法。
二、实验内容
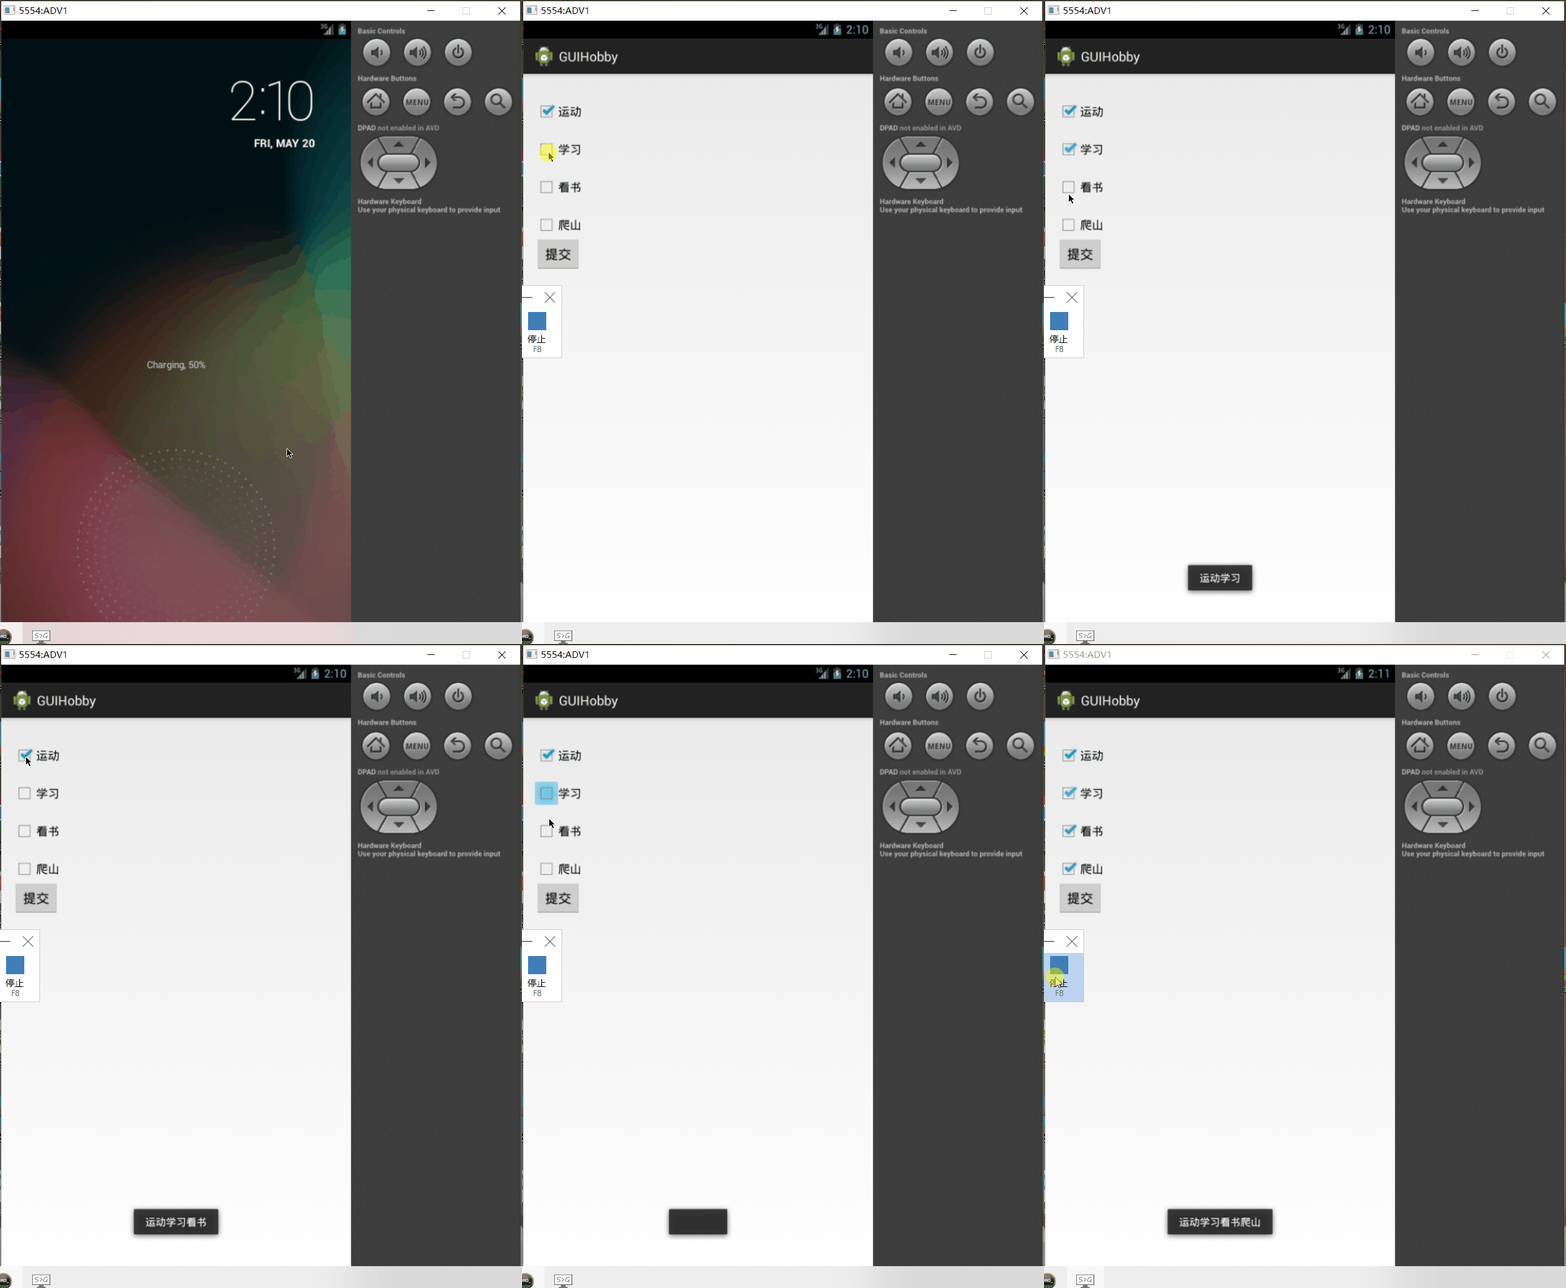
1、实现个人爱好的设置界面,包含4种个人爱好,分别为运动、学习、看书和爬山,并且用户能同时选择多个爱好。
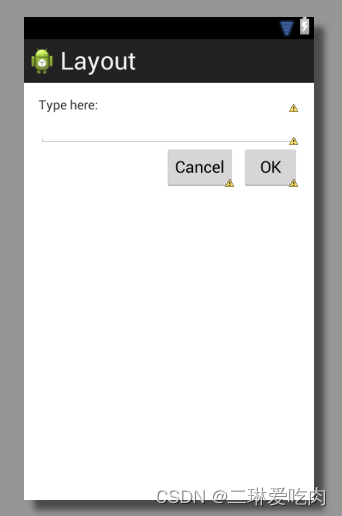
2、使用RelativeLayout布局完成如下界面的设计,可以尝试对按钮进行事件处理。

?
三、实验步骤
1、建立一个android工程,修改main.xml文件并编写程序代码,设计一个个人爱好的设置界面,包含4种个人爱好,分别为运动、学习、看书和爬山,并且用户能同时选择多个爱好,选定后点击按钮,显示选择的内容。
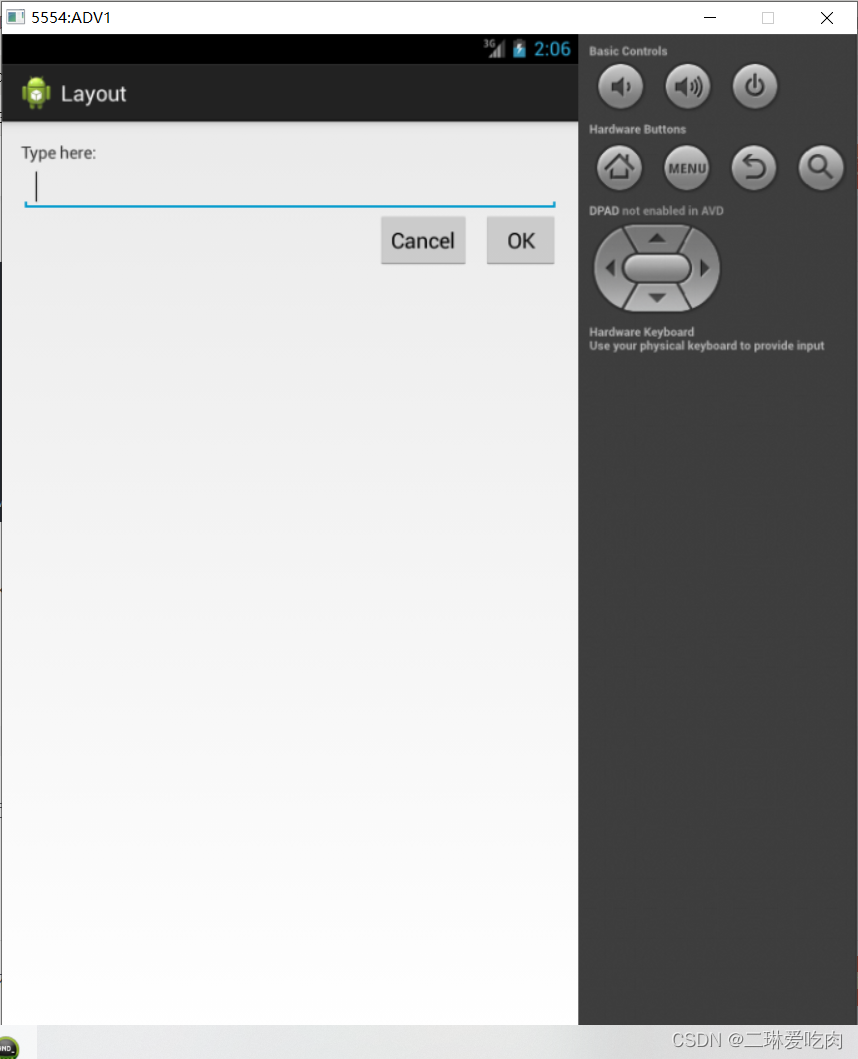
2、编写程序,实现如图所示的RelativeLayout布局。
四、考核标准
1、完成全部题目,设计合理,结果正确;评定为A。
2、完成部分题目,设计比较合理,结果正确;根据实际情况评定为B或C。
3、未独立完成实验要求;评定为D。
五、实验源码
爱好
布局
<RelativeLayout xmlns:android="http://schemas.android.com/apk/res/android"
    xmlns:tools="http://schemas.android.com/tools"
    android:layout_width="match_parent"
    android:layout_height="match_parent"
    android:paddingBottom="@dimen/activity_vertical_margin"
    android:paddingLeft="@dimen/activity_horizontal_margin"
    android:paddingRight="@dimen/activity_horizontal_margin"
    android:paddingTop="@dimen/activity_vertical_margin"
    tools:context=".MainActivity" >

    <CheckBox
        android:id="@+id/checkBox1"
        android:layout_width="wrap_content"
        android:layout_height="wrap_content"
        android:layout_marginTop="20dp"
        android:text="运动" />

    <CheckBox
        android:id="@+id/checkBox2"
        android:layout_width="wrap_content"
        android:layout_height="wrap_content"
        android:layout_alignLeft="@+id/checkBox1"
        android:layout_below="@+id/checkBox1"
        android:layout_marginTop="20dp"
        android:text="学习" />

    <CheckBox
        android:id="@+id/checkBox3"
        android:layout_width="wrap_content"
        android:layout_height="wrap_content"
        android:layout_alignLeft="@+id/checkBox2"
        android:layout_below="@+id/checkBox2"
        android:layout_marginTop="20dp"
        android:text="看书" />

    <CheckBox
        android:id="@+id/checkBox4"
        android:layout_width="wrap_content"
        android:layout_height="wrap_content"
        android:layout_alignLeft="@+id/checkBox4"
        android:layout_below="@+id/checkBox3"
        android:layout_marginTop="20dp"
        android:text="爬山" />

    <Button
        android:id="@+id/button1"
        android:layout_width="wrap_content"
        android:layout_height="wrap_content"
        android:layout_below="@+id/checkBox4"
        android:text="提交" />

</RelativeLayout>
功能实现
package com.example.guihobby;

import android.app.Activity;
import android.os.Bundle;
import android.util.Log;
import android.view.View;
import android.view.View.OnClickListener;
import android.widget.Button;
import android.widget.CheckBox;
import android.widget.CompoundButton;
import android.widget.CompoundButton.OnCheckedChangeListener;
import android.widget.Toast;

public class MainActivity extends Activity {
	private OnCheckedChangeListener checkBox_listener;

	@Override
	protected void onCreate(Bundle savedInstanceState) {
		super.onCreate(savedInstanceState);
		setContentView(R.layout.activity_main);
		checkBox_listener = new OnCheckedChangeListener() {

			@Override
			public void onCheckedChanged(CompoundButton buttonView,
					boolean isChecked) {
				if (isChecked) {
					Log.i("复选框", "选中了[" + buttonView.getText().toString() + "]");
				}

			}
		};

		final CheckBox checkBox1 = (CheckBox) findViewById(R.id.checkBox1);
		final CheckBox checkBox2 = (CheckBox) findViewById(R.id.checkBox2);
		final CheckBox checkBox3 = (CheckBox) findViewById(R.id.checkBox3);
		final CheckBox checkBox4 = (CheckBox) findViewById(R.id.checkBox4);
		checkBox1.setOnCheckedChangeListener(checkBox_listener);
		checkBox2.setOnCheckedChangeListener(checkBox_listener);
		checkBox3.setOnCheckedChangeListener(checkBox_listener);
		checkBox4.setOnCheckedChangeListener(checkBox_listener);

		// 为"提交"按钮添加单击事件监听器
		Button button = (Button) findViewById(R.id.button1);
		button.setOnClickListener(new OnClickListener() {

			@Override
			public void onClick(View arg0) {
				String hobby = "";// 保存选中的值
				if (checkBox1.isChecked()) {
					hobby += checkBox1.getText().toString() + "";// 当第一个复选框被选中
				}
				if (checkBox2.isChecked()) {
					hobby += checkBox2.getText().toString() + "";// 当第二个复选框被选中
				}
				if (checkBox3.isChecked()) {
					hobby += checkBox3.getText().toString() + "";// 当第三个复选框被选中
				}
				if (checkBox4.isChecked()) {
					hobby += checkBox4.getText().toString() + "";// 当第四个复选框被选中
				}
				// 显示被选中的复选框
				Toast.makeText(MainActivity.this, hobby, Toast.LENGTH_SHORT)
						.show();
			}
		});
	}
}
RelativeLayout布局
<RelativeLayout xmlns:android="http://schemas.android.com/apk/res/android"
    xmlns:tools="http://schemas.android.com/tools"
    android:layout_width="match_parent"
    android:layout_height="match_parent"
    android:paddingBottom="@dimen/activity_vertical_margin"
    android:paddingLeft="@dimen/activity_horizontal_margin"
    android:paddingRight="@dimen/activity_horizontal_margin"
    android:paddingTop="@dimen/activity_vertical_margin"
    tools:context=".MainActivity" >

    <TextView
        android:id="@+id/label"
        android:layout_width="fill_parent"
        android:layout_height="wrap_content"
        android:text="Type here:" />

    <EditText
        android:id="@+id/entry"
        android:layout_width="fill_parent"
        android:layout_height="wrap_content"
        android:layout_below="@id/label" />

    <Button
        android:id="@+id/ok"
        android:layout_width="wrap_content"
        android:layout_height="wrap_content"
        android:layout_alignParentRight="true"
        android:layout_below="@id/entry"
        android:layout_marginLeft="10px"
        android:text="OK" />

    <Button
        android:id="@+id/cancel"
        android:layout_width="wrap_content"
        android:layout_height="wrap_content"
        android:layout_alignTop="@id/ok"
        android:layout_toLeftOf="@id/ok"
        android:text="Cancel" />

</RelativeLayout>
六、实验效果截图
爱好

RelativeLayout布局截图

需要完整源码可私信我,看到就回。

?
