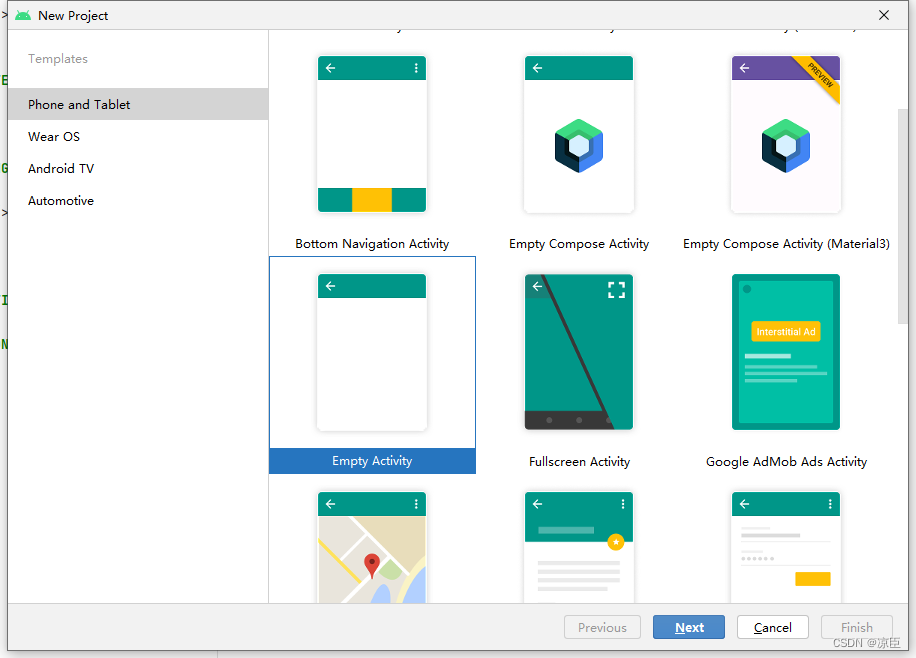
1. 使用Android studio新建工程,选择Empty Activity,点击下一步
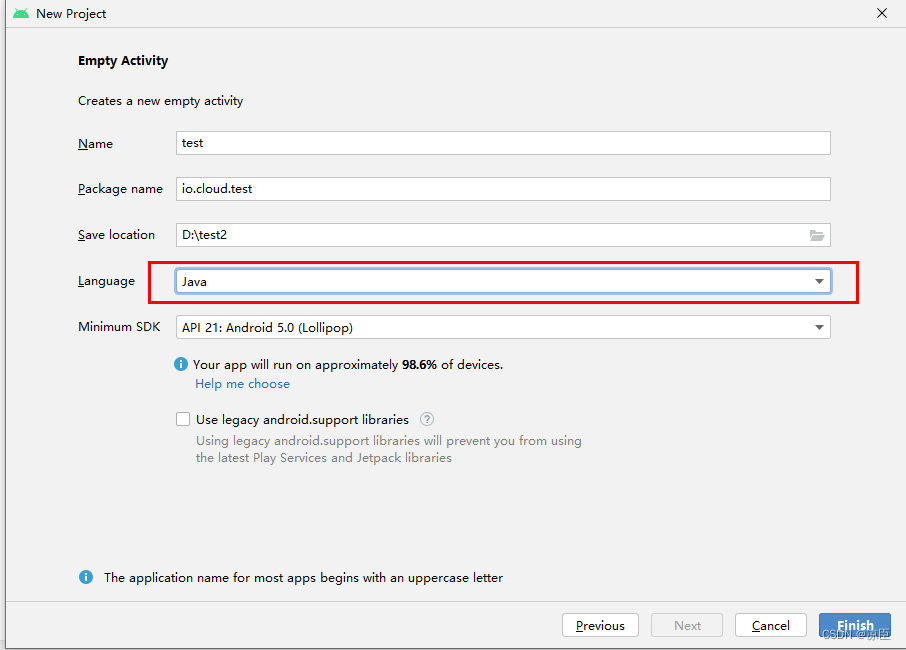
?2.配置基础参数,uniapp中不支持Kotlin,选择Java点击完成。
3.将文件目录调整到Project下,默认是APP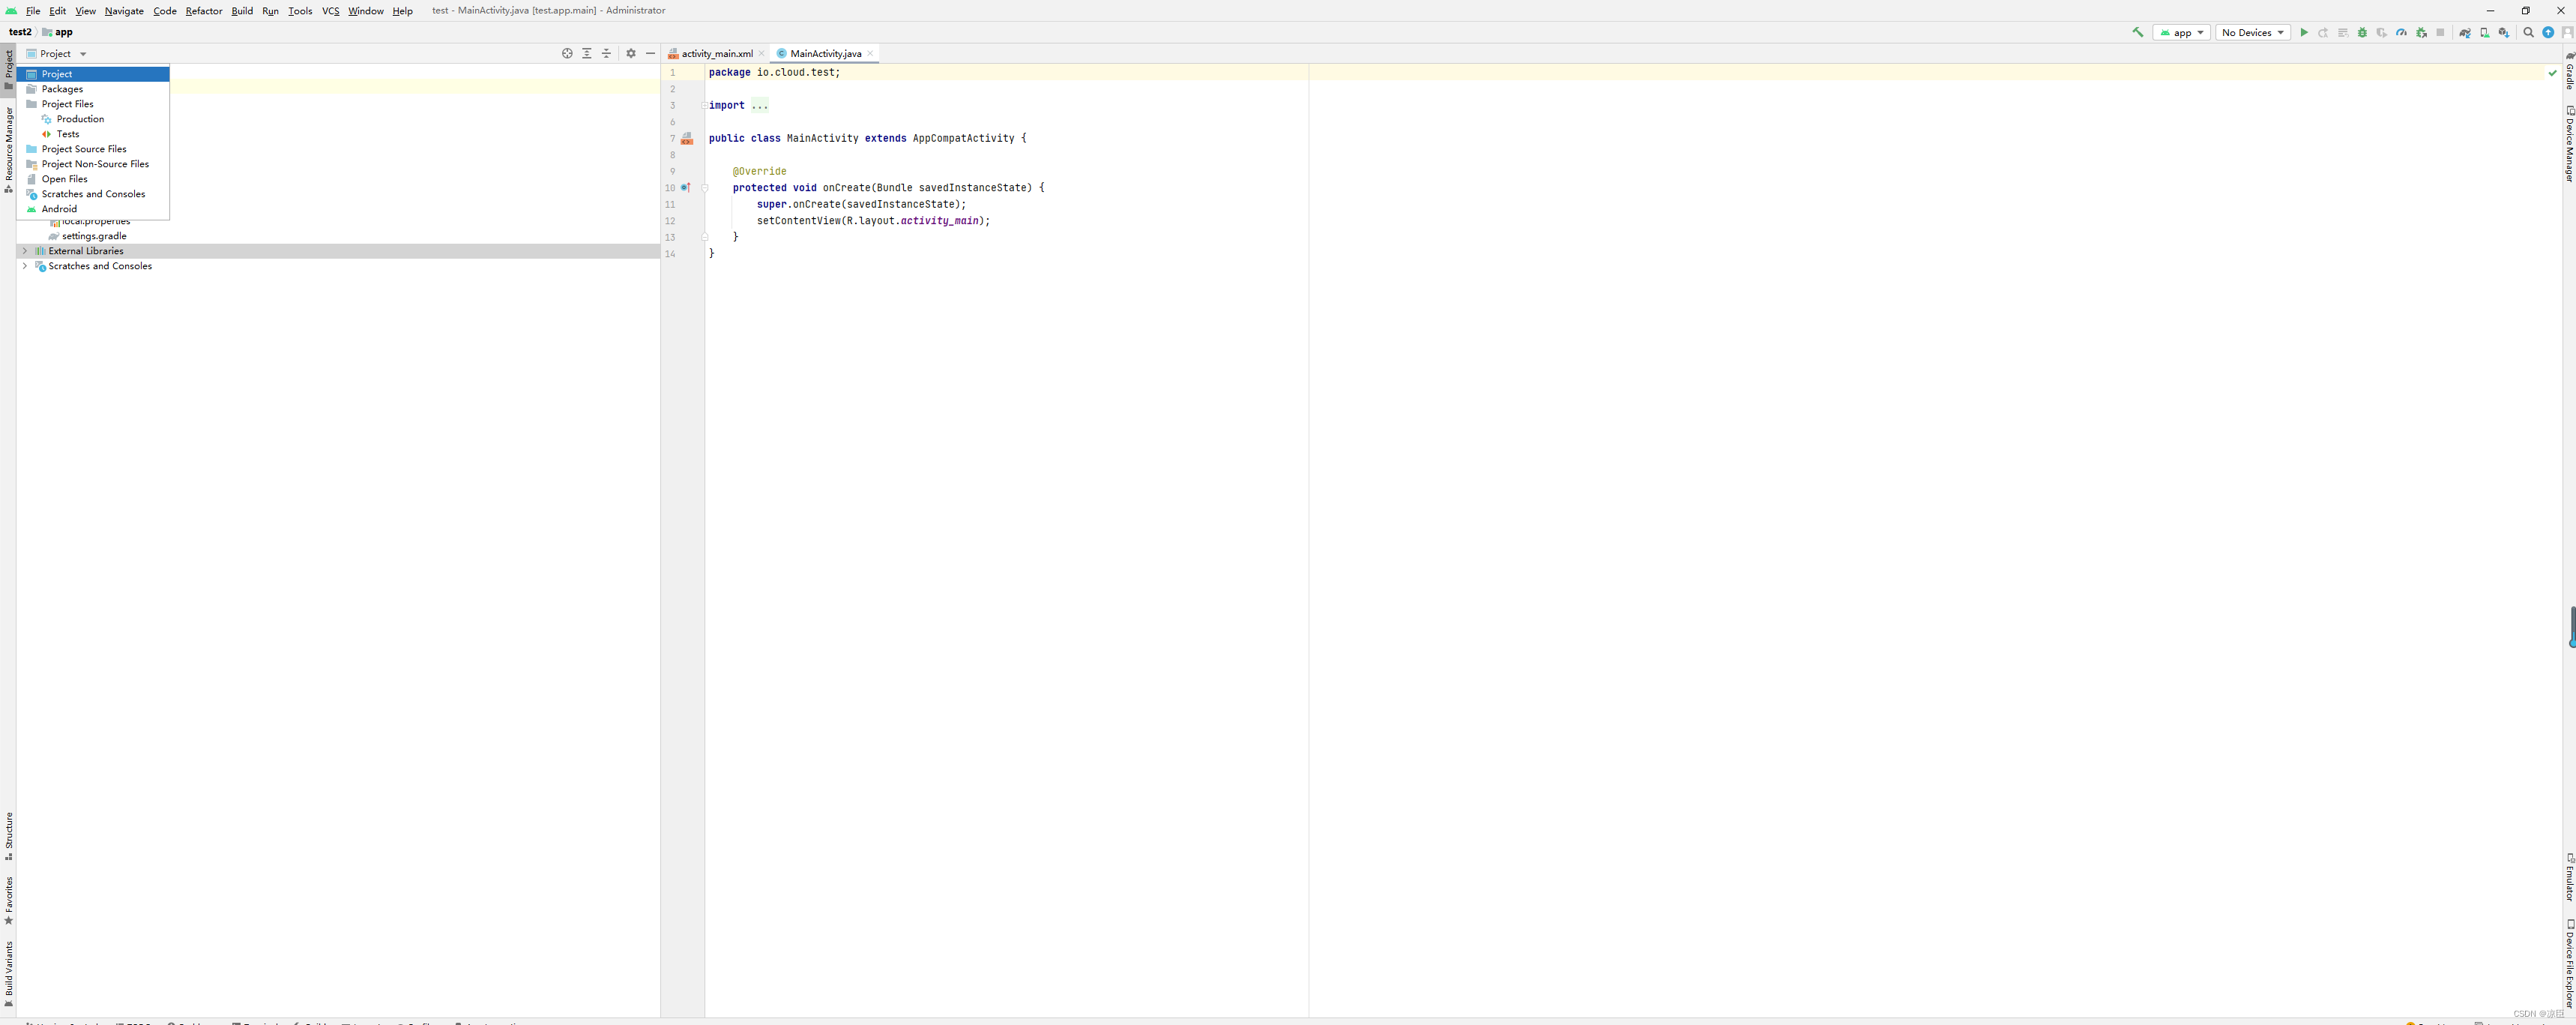
?4.下载uniapp提供的工程文件,最新版本下载如下:
Android离线SDK下载![]() https://nativesupport.dcloud.net.cn/AppDocs/download/android
https://nativesupport.dcloud.net.cn/AppDocs/download/android
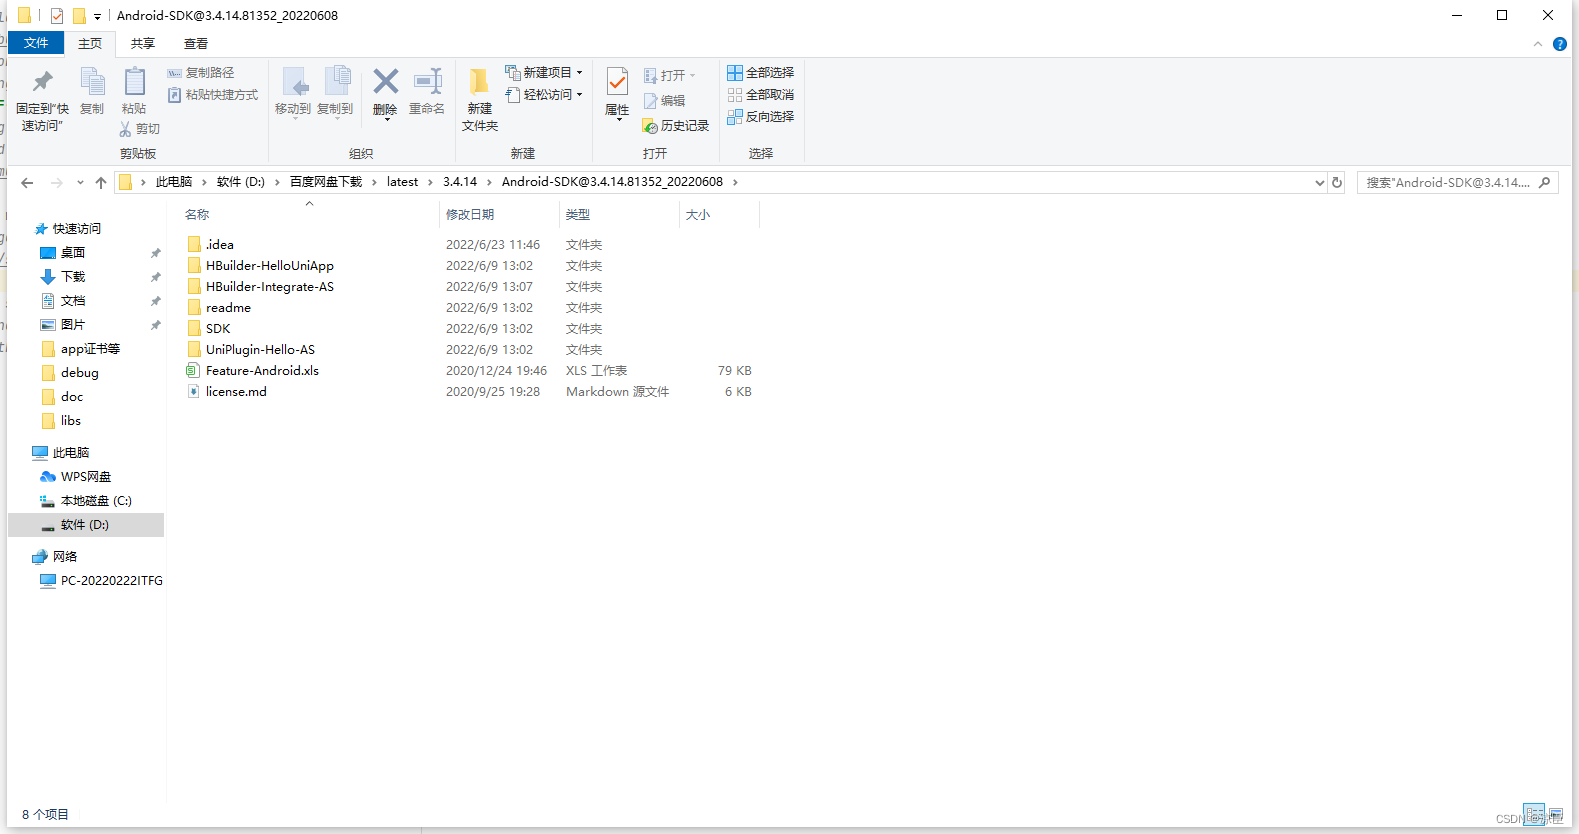
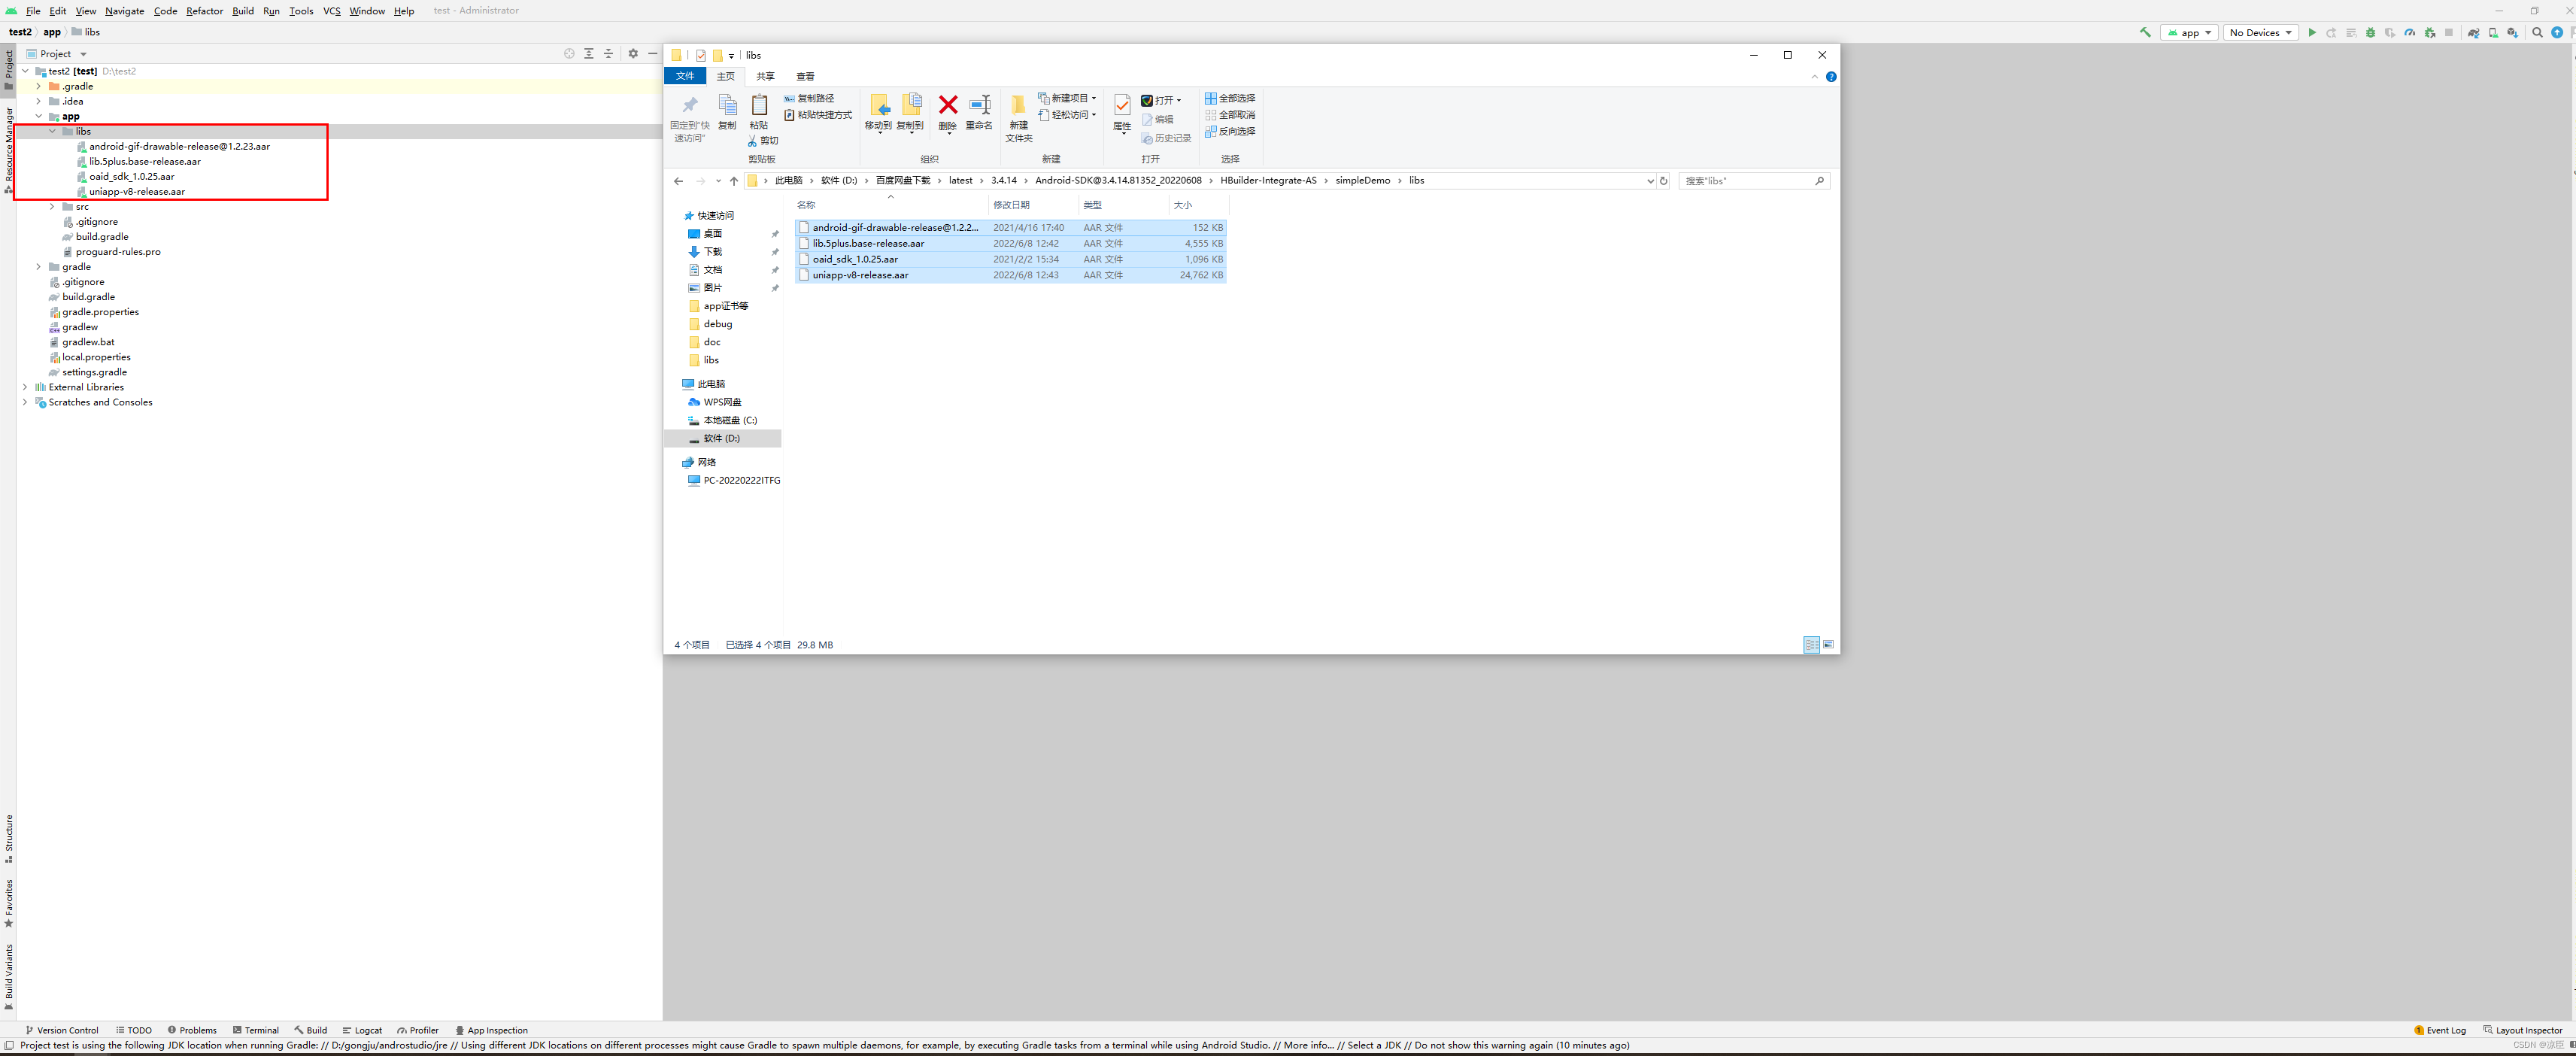
5.将latest\3.4.14\Android-SDK@3.4.14.81352_20220608\HBuilder-Integrate-AS\simpleDemo\libs中的内容放到test项目的libs文件夹下。
?6.配置打包资源?
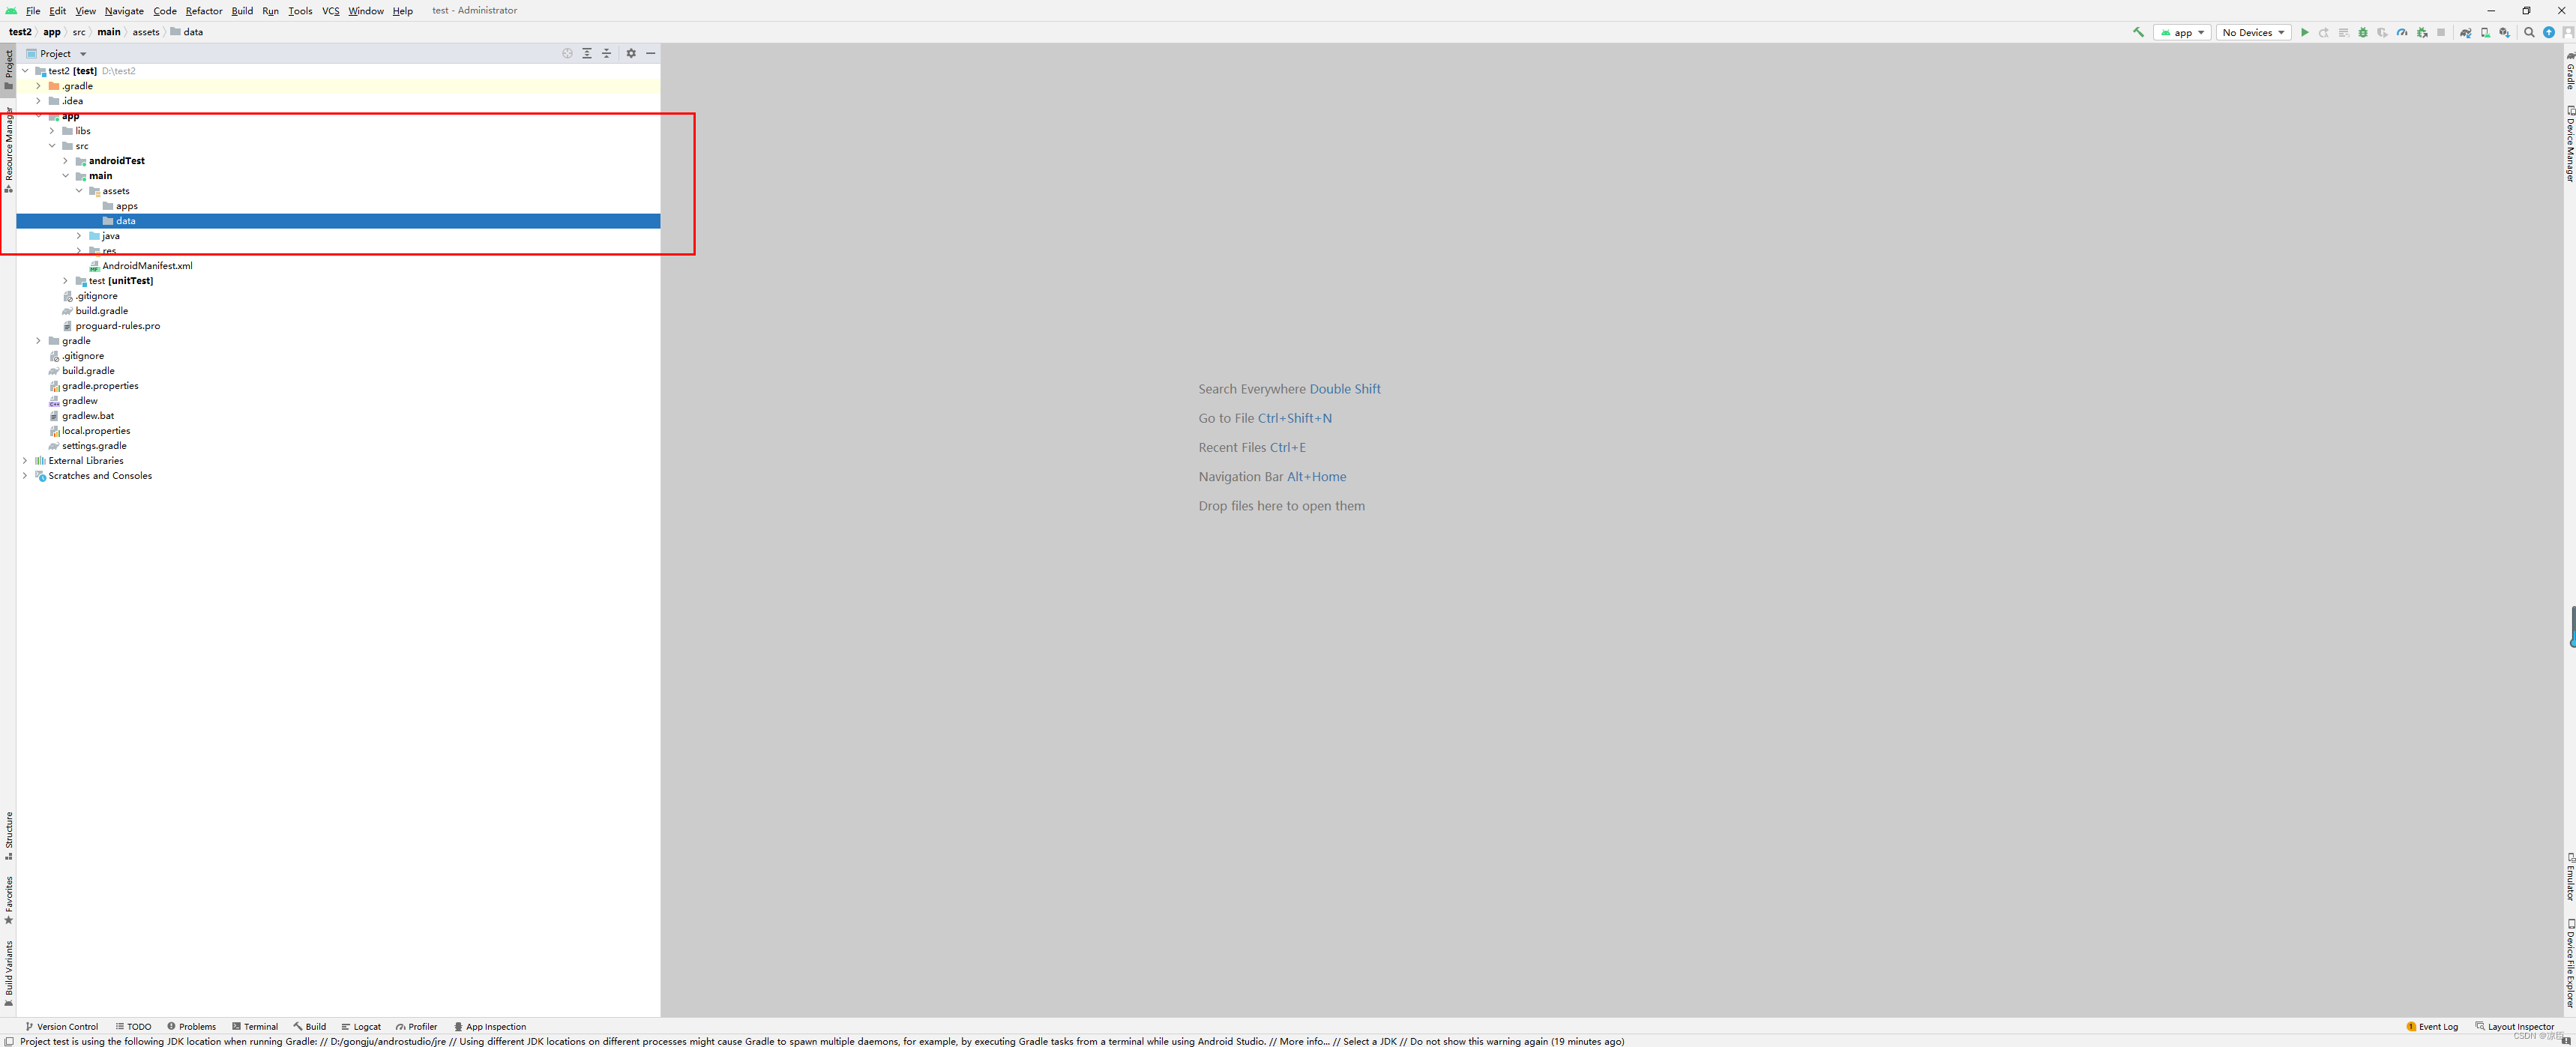
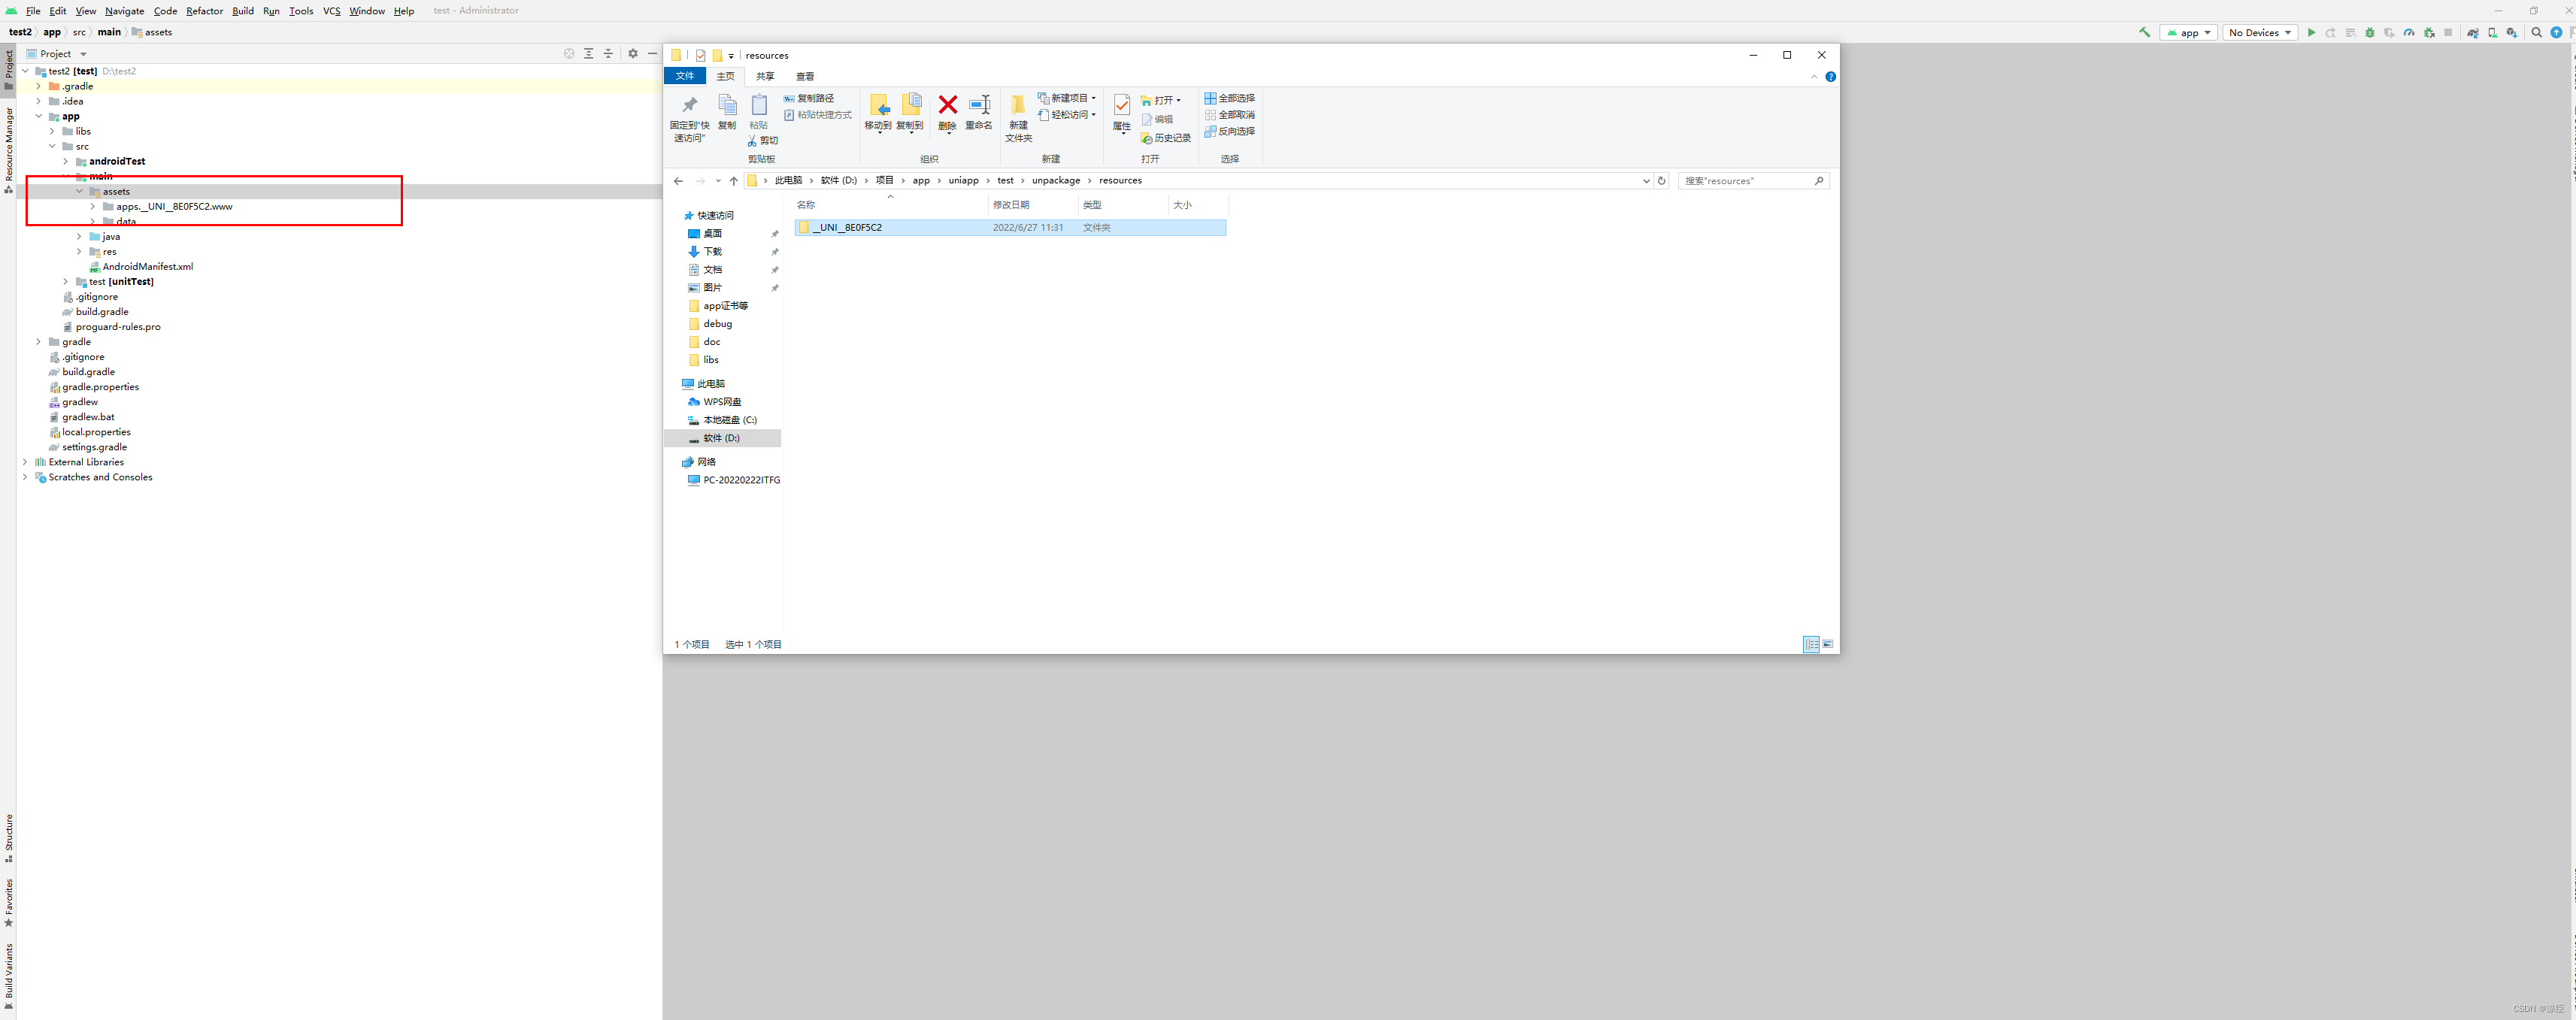
? ? ? ? 6.1. 在src/main文件夹下创建assets文件夹,在assets文件夹下创建apps和data文件夹
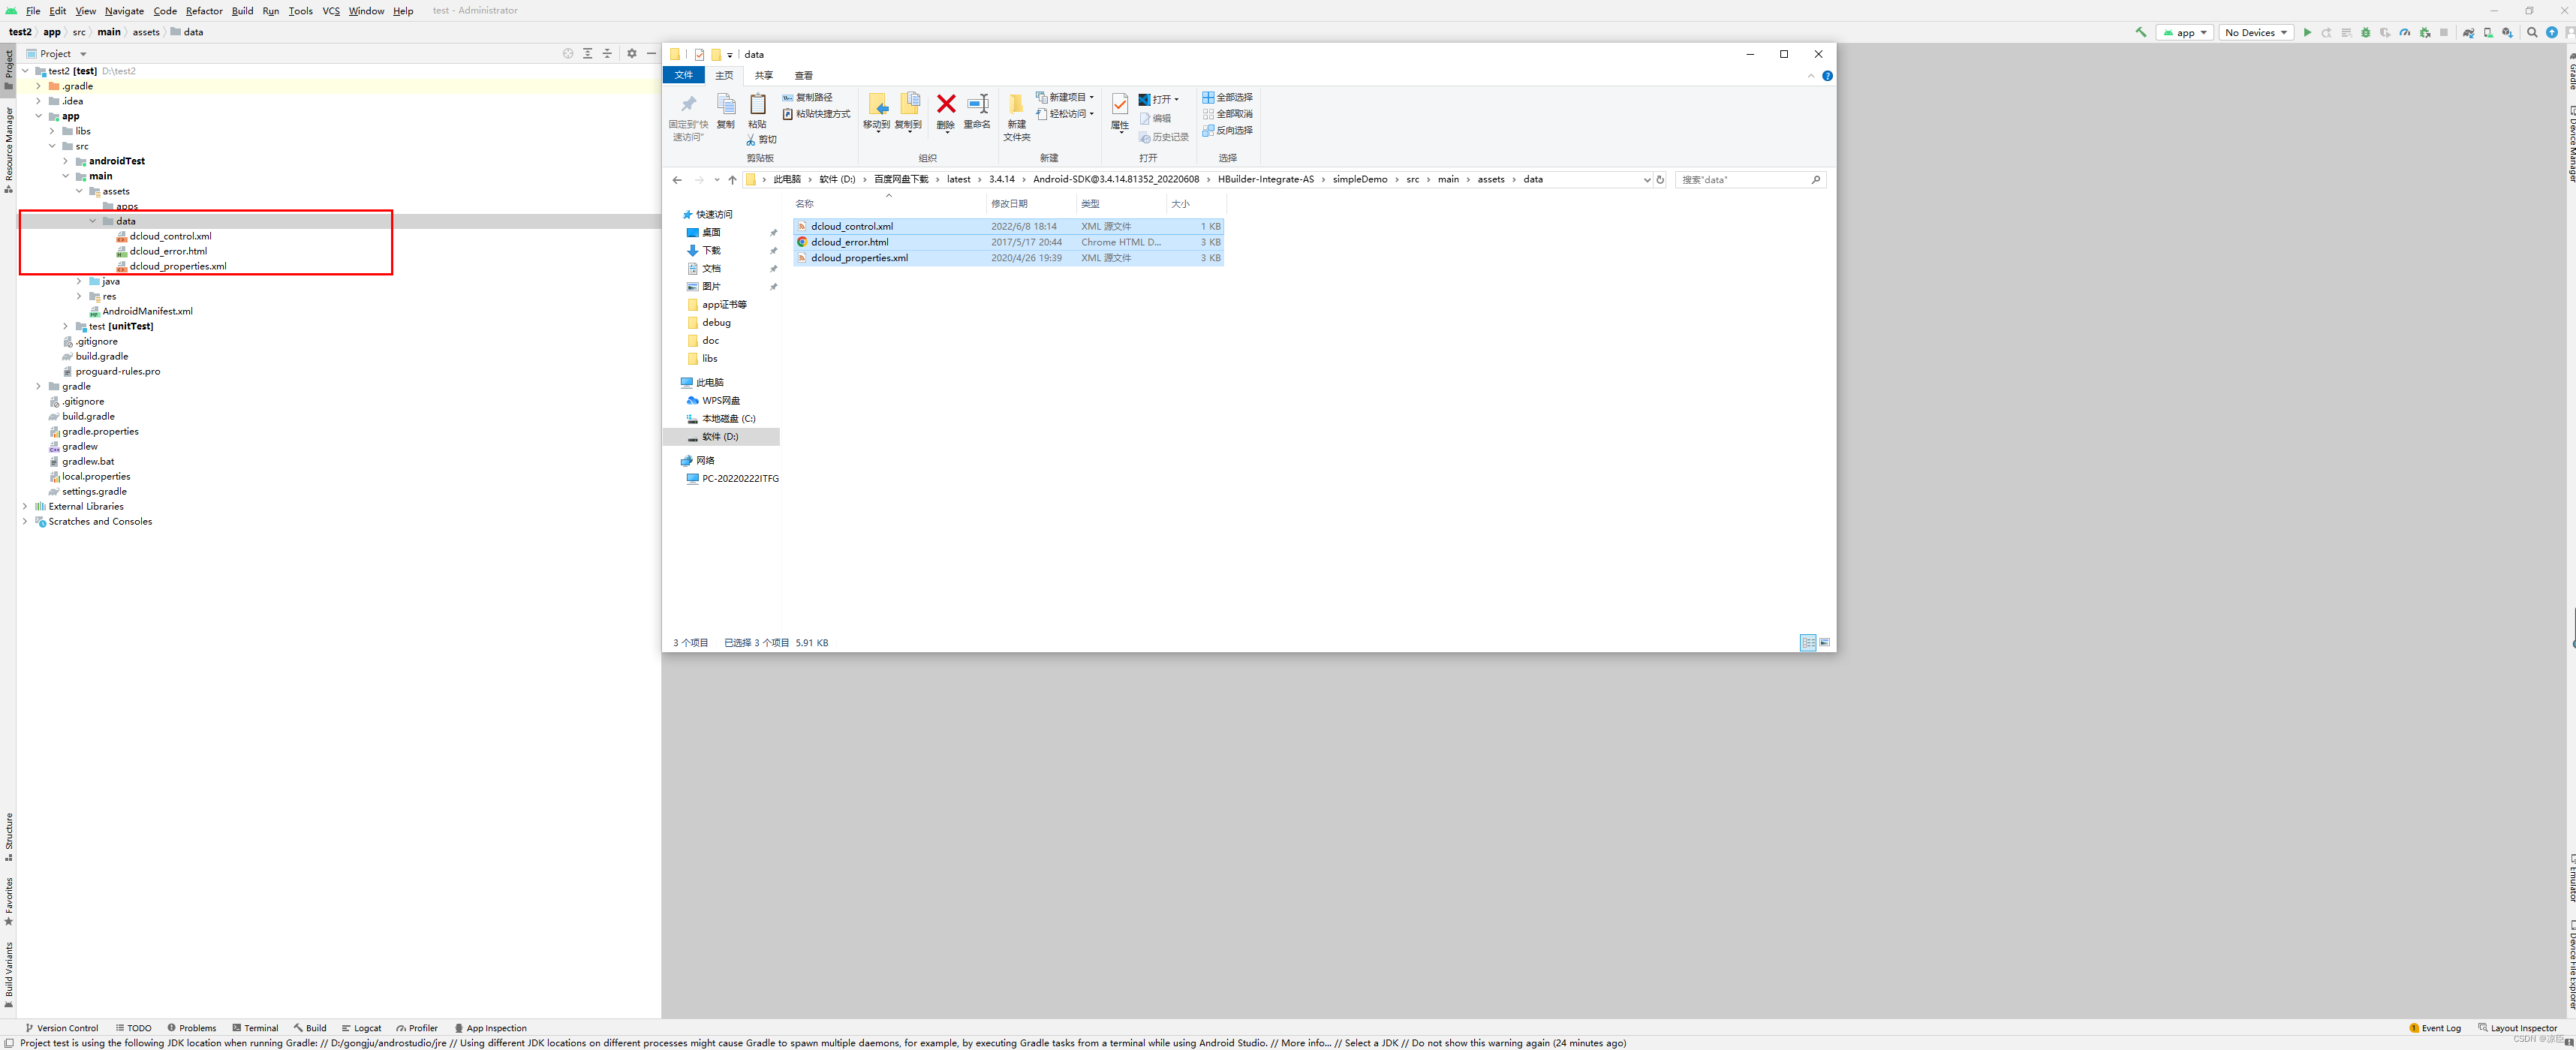
? ? ? ? 6.2.将data下面的文件导入
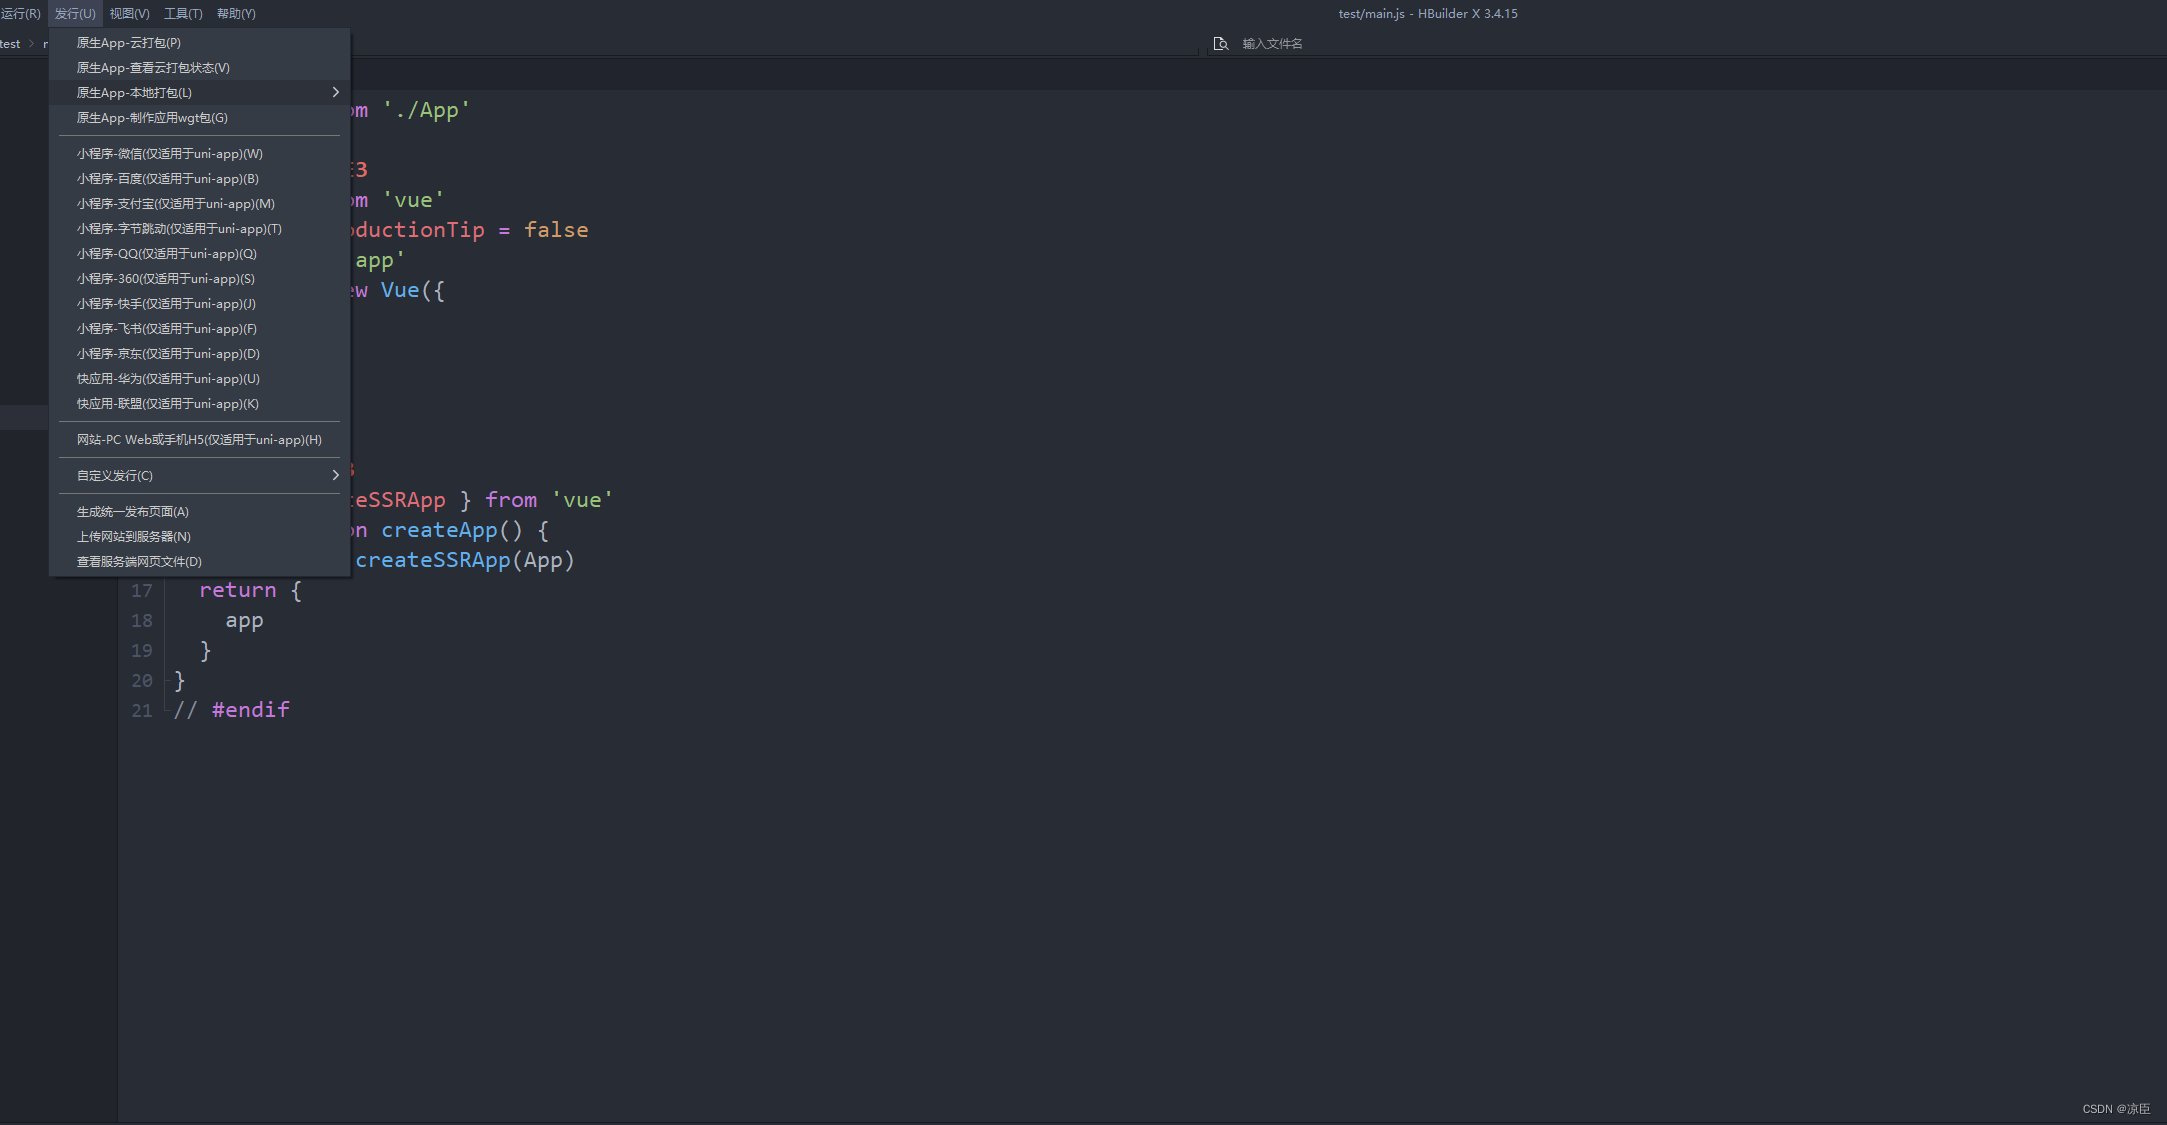
? ? ? ? 6.3.生成uniapp本地打包资源并放到apps文件夹下面
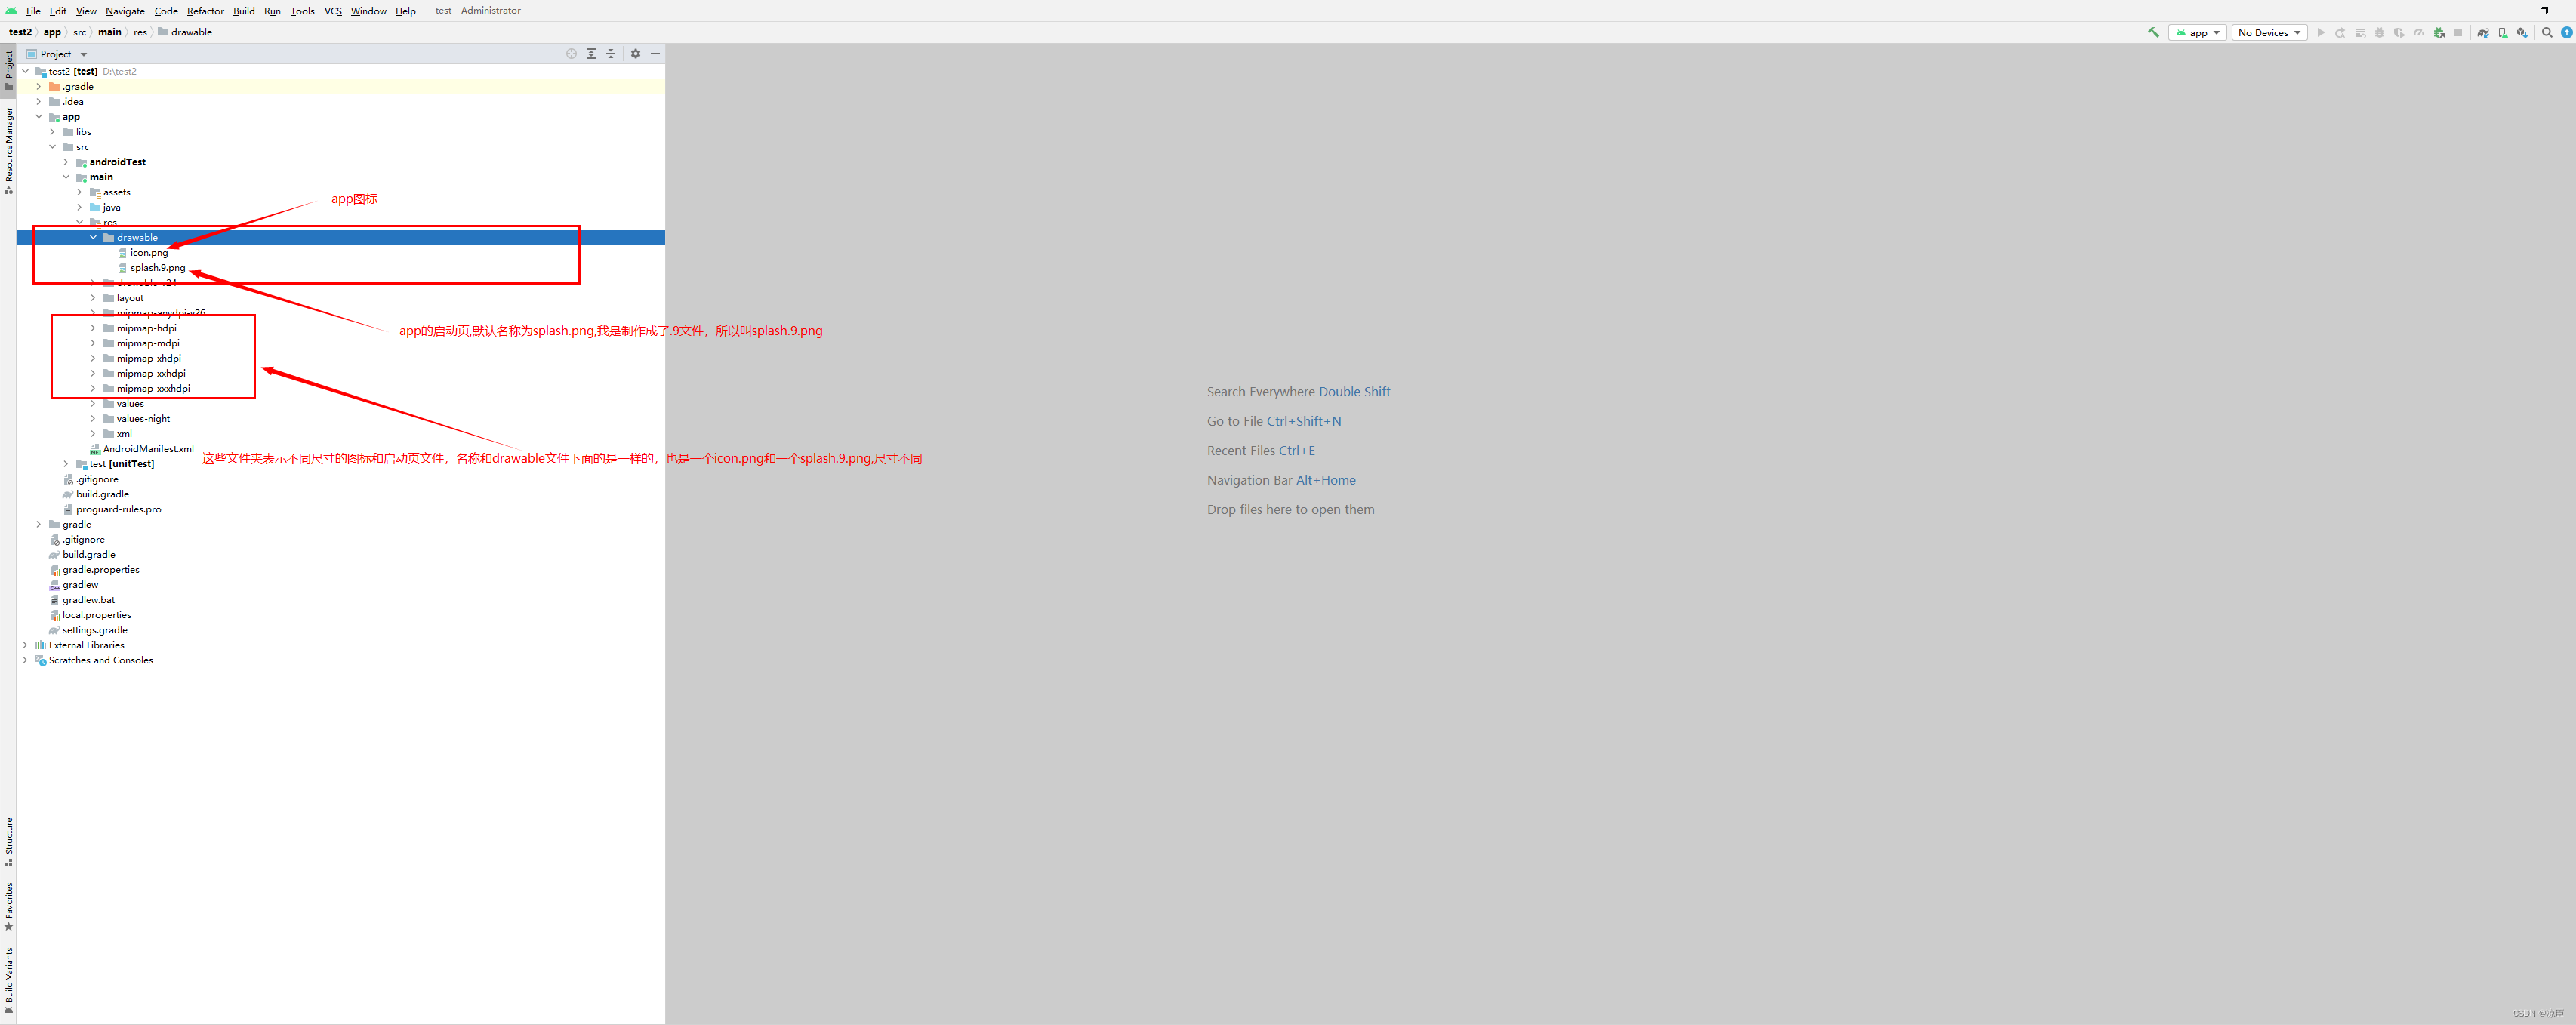
? ? ? ? 6.4. 配置app图标和启动页,不仅要把默认的drawable文件夹配置了,圈中的不同尺寸也要配置不然打包时会报错找不到图标。
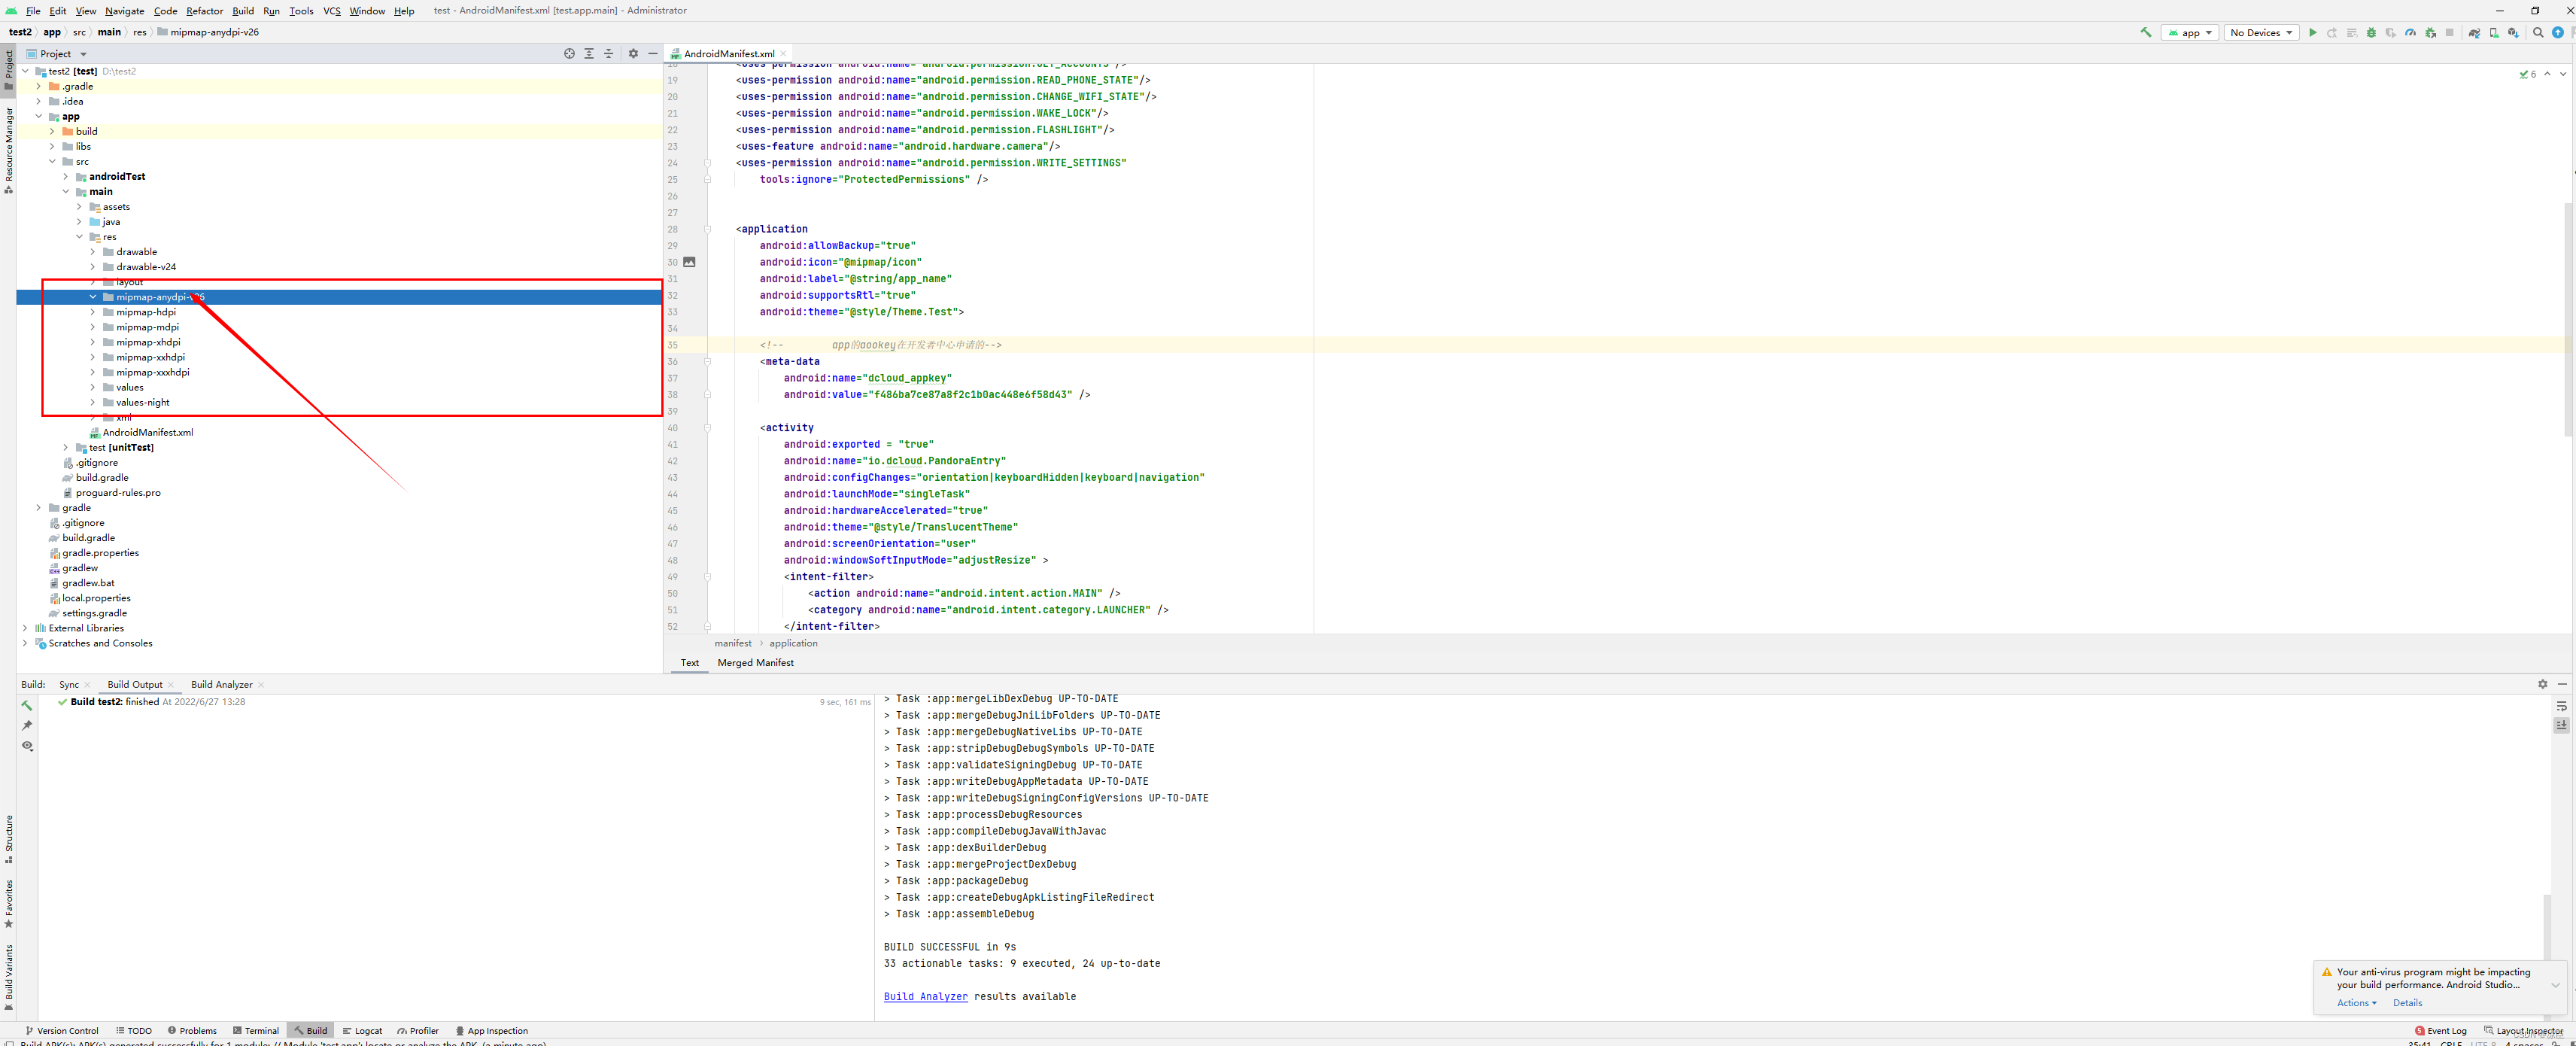
? ? ? ? ?6.5. 将mipmap-anydpi-v26文件夹下面的文件删掉。
7. 配置参数
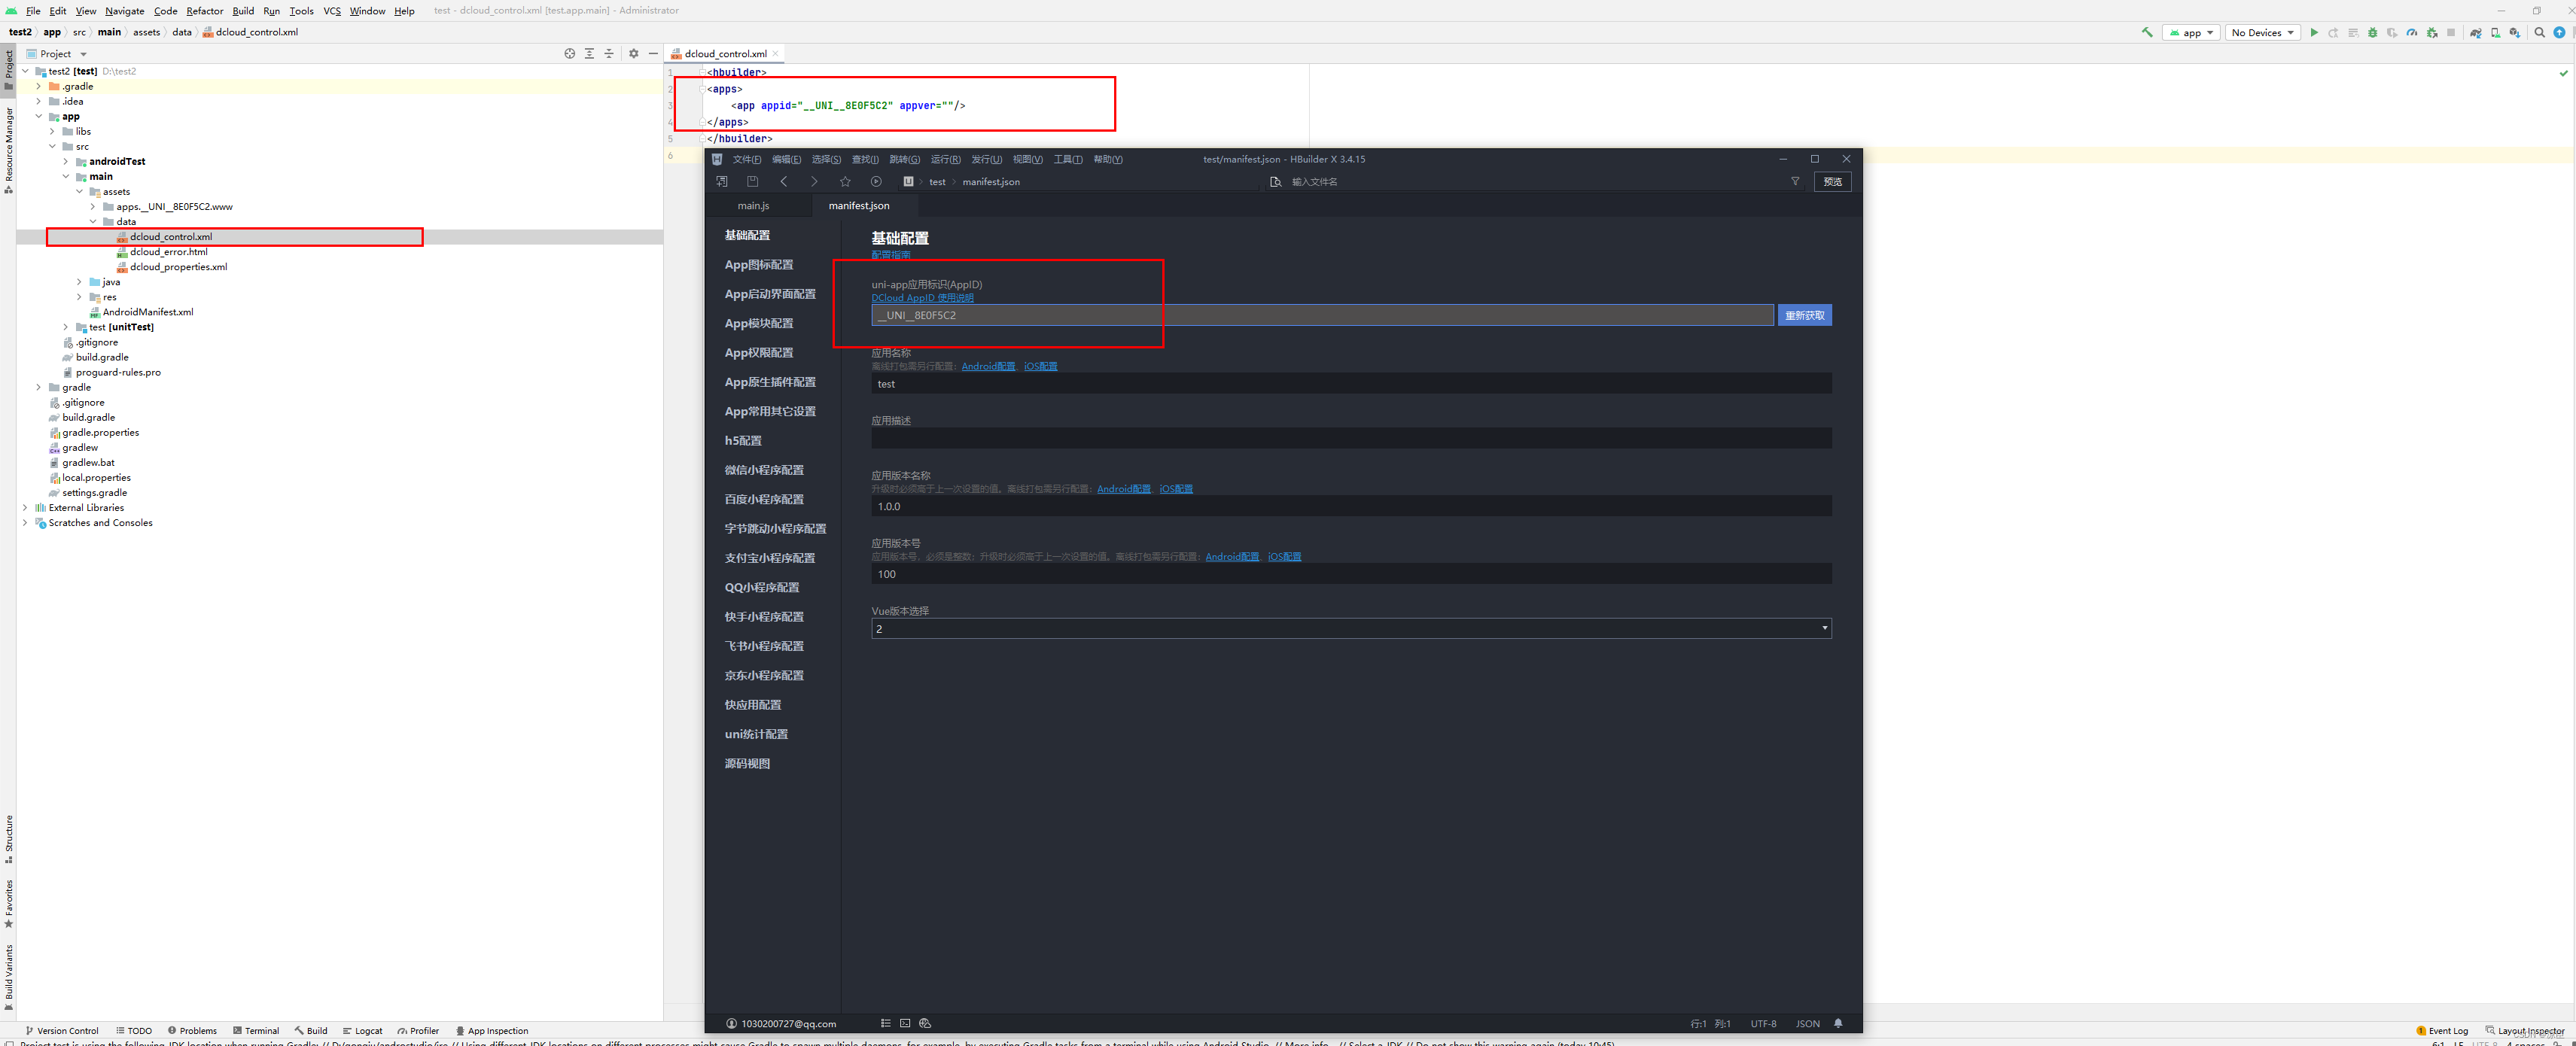
? ? ? ? 7.1. 配置dcloud_control.xml文件中的?appid
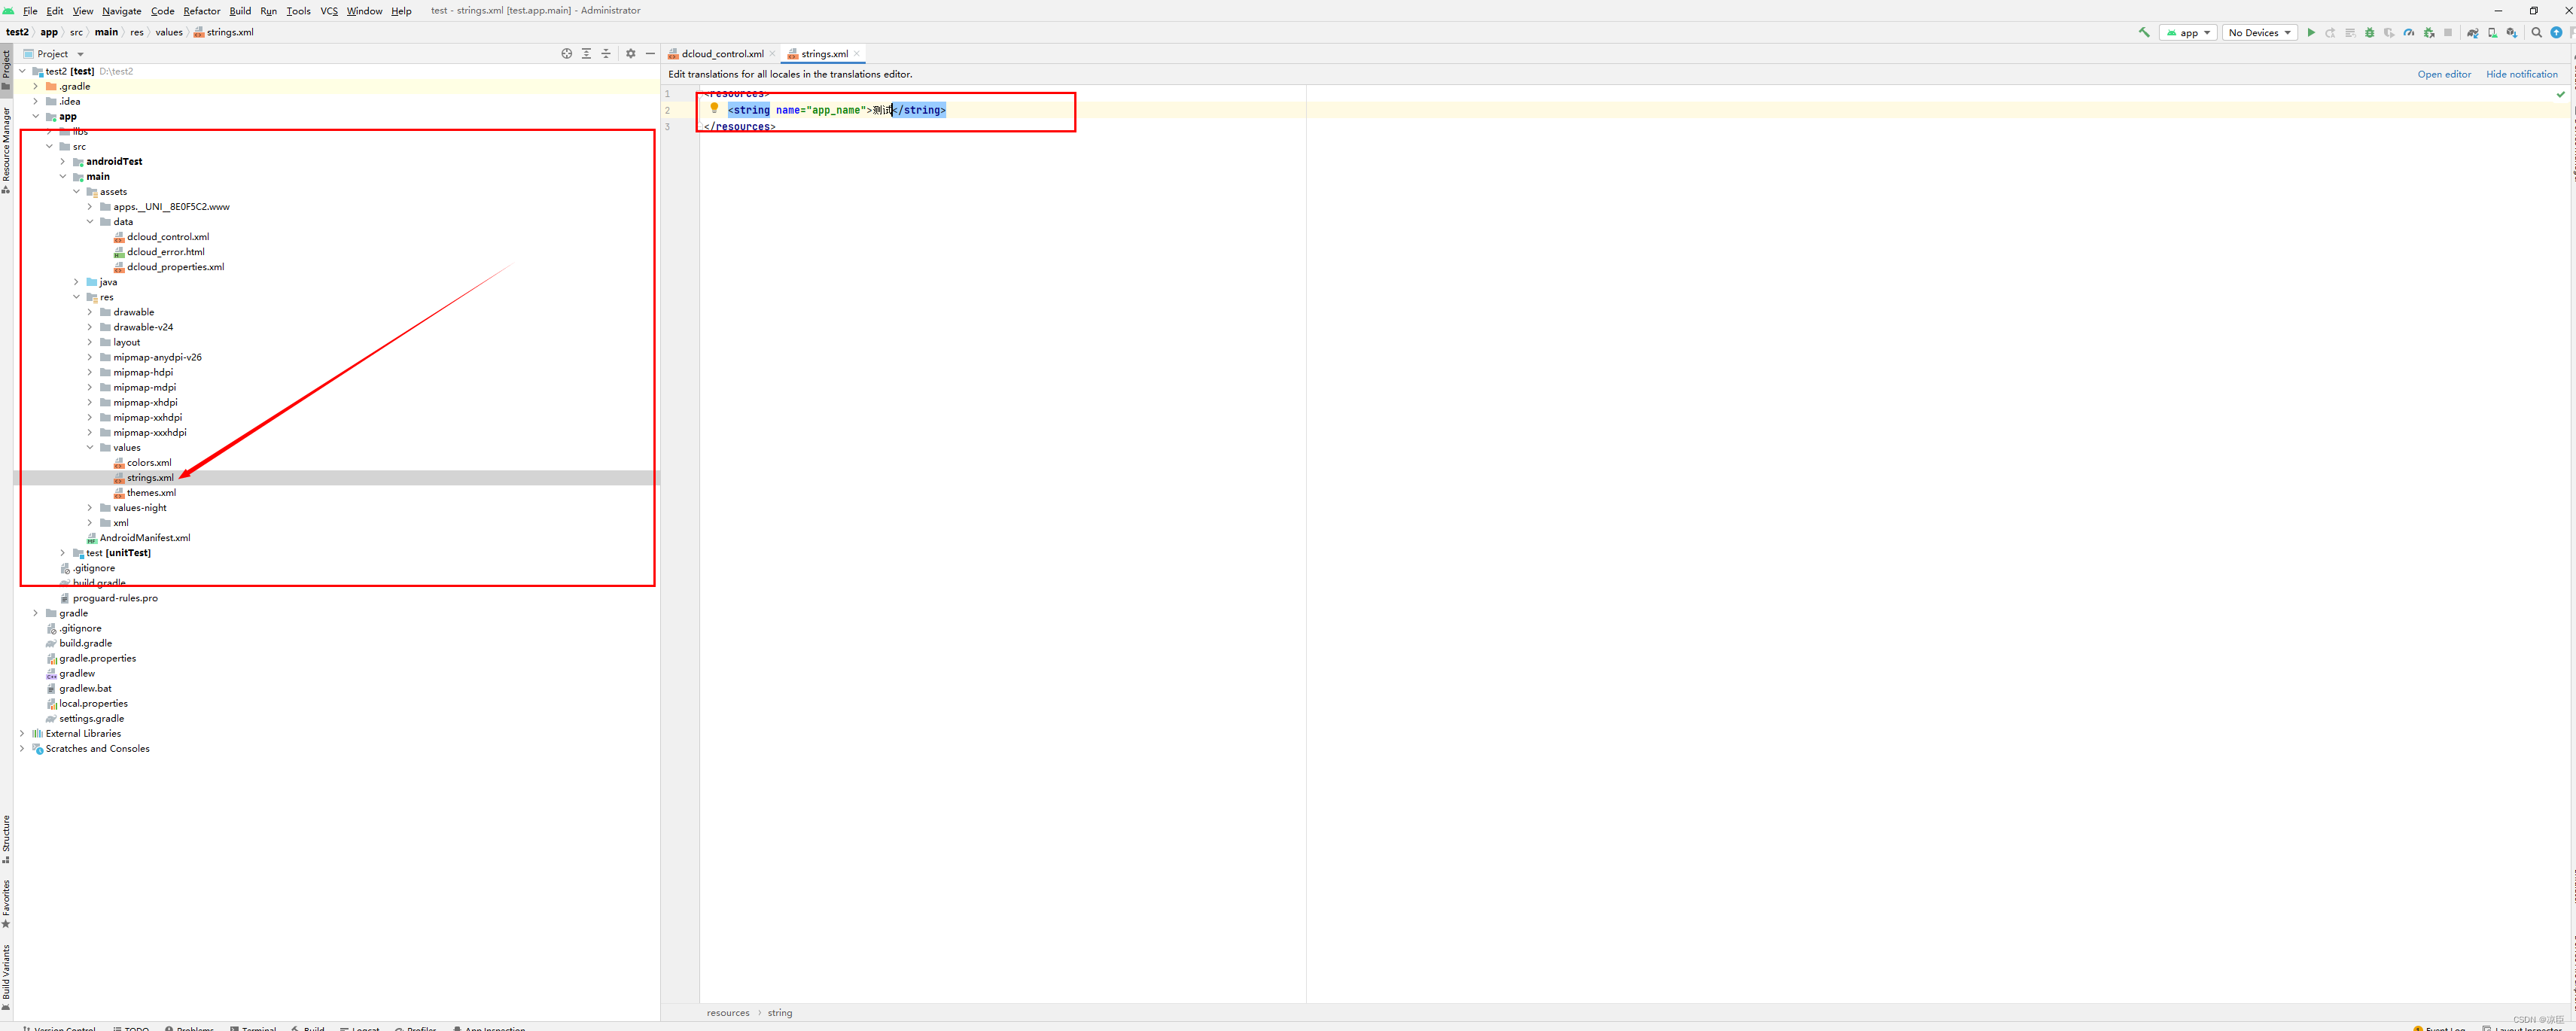
? ? ? ? ?7.2. 配置app打包后显示在手机上的名称?
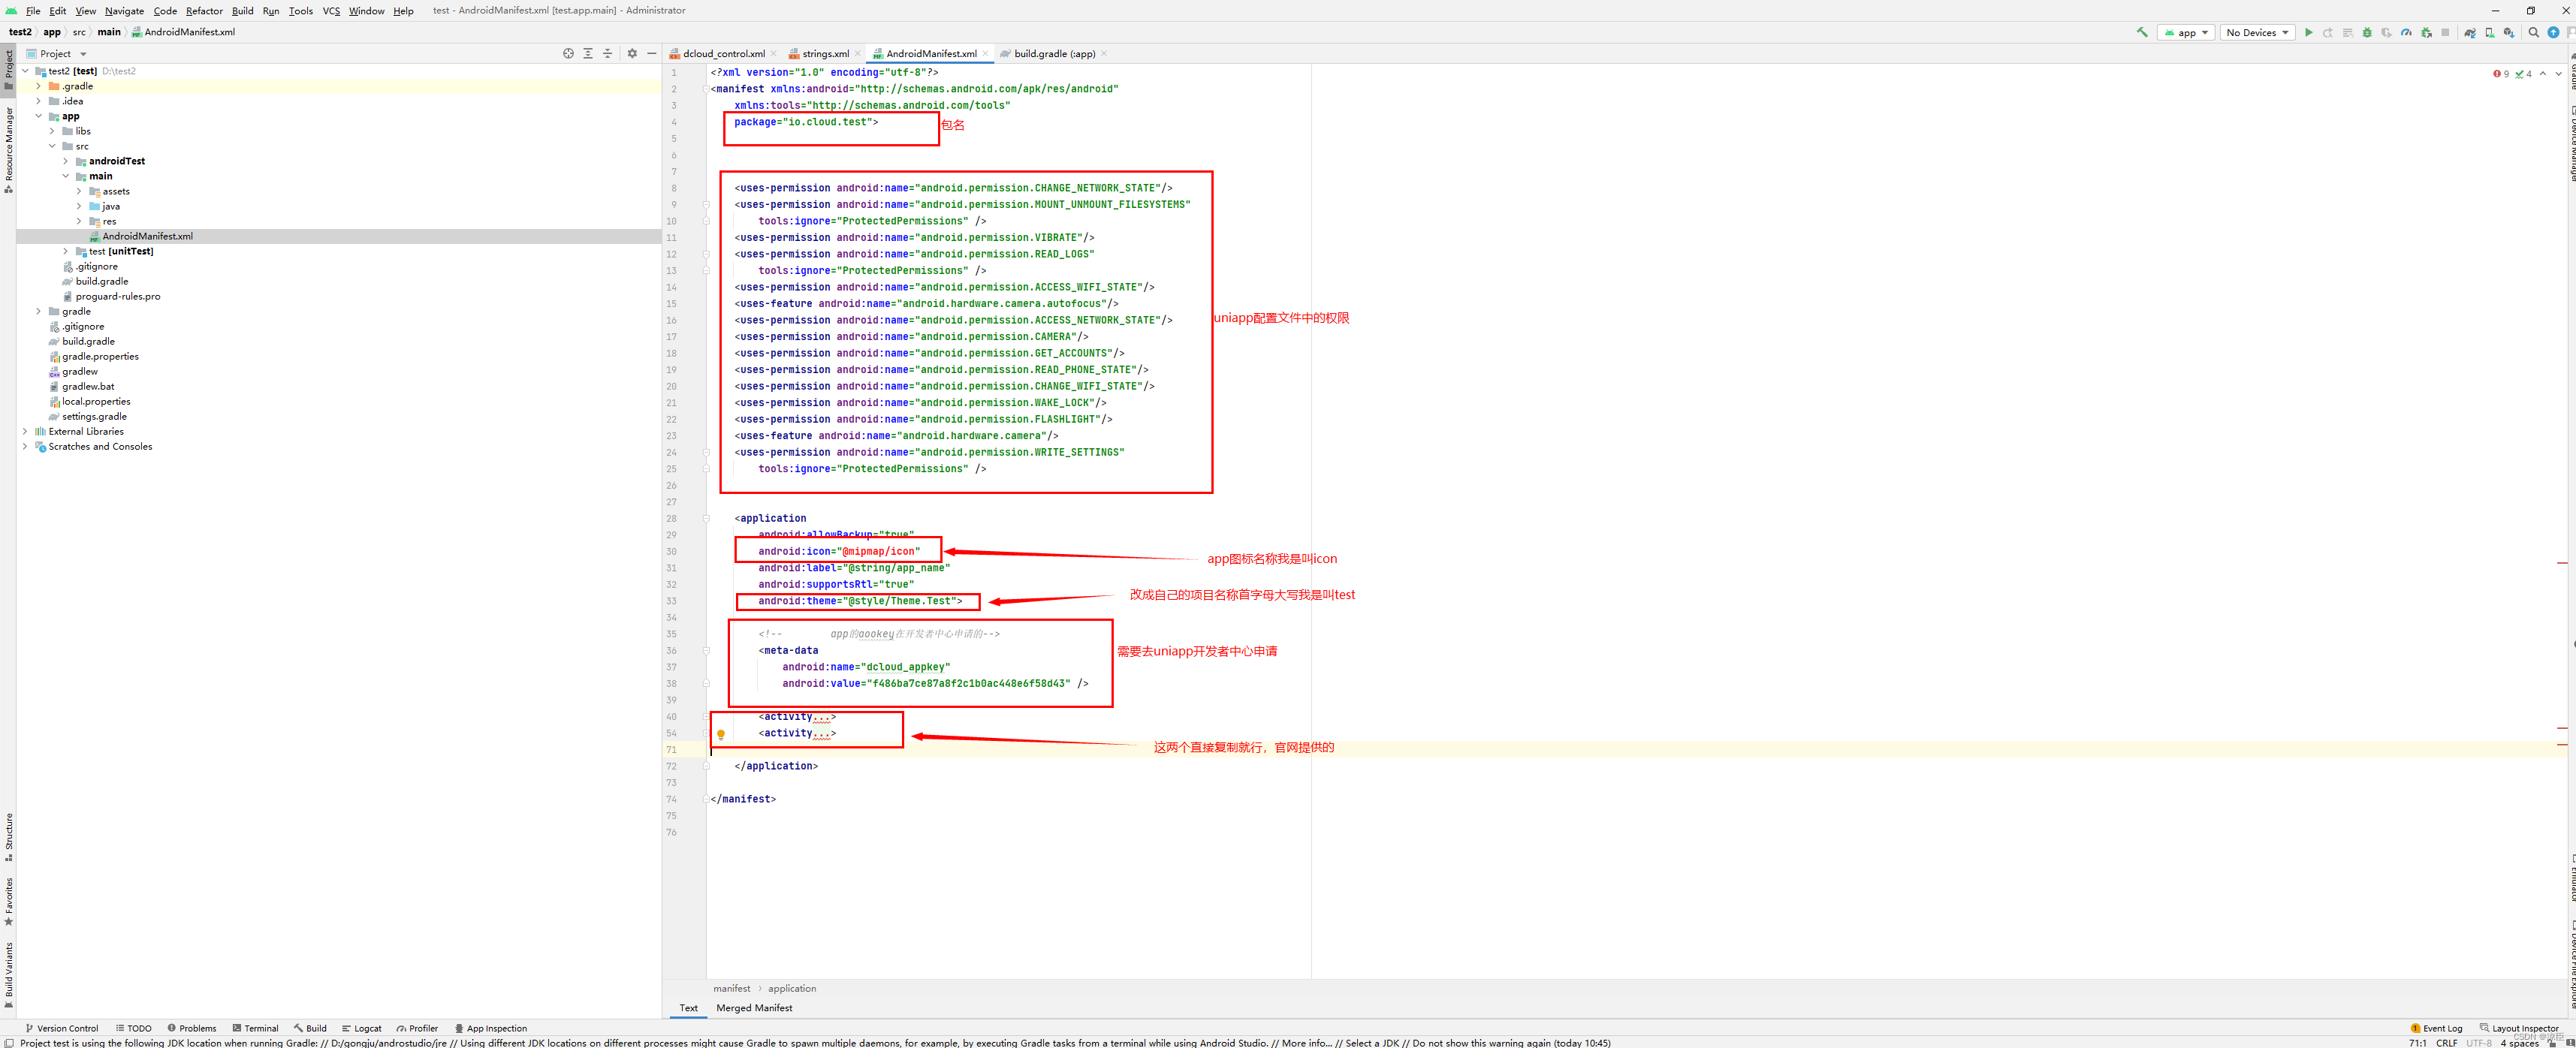
? ? ? ? ?7.3.配置AndroidManifest.xml文件中的参数,直接复制我下面的代码将原有文件覆盖,去修改 ,这里需要去申请Appkey
uniapp申请Appkey![]() https://blog.csdn.net/weixin_44871749/article/details/125482403
https://blog.csdn.net/weixin_44871749/article/details/125482403
<?xml version="1.0" encoding="utf-8"?>
<manifest xmlns:android="http://schemas.android.com/apk/res/android"
    xmlns:tools="http://schemas.android.com/tools"
    package="io.cloud.test">


    <uses-permission android:name="android.permission.CHANGE_NETWORK_STATE"/>
    <uses-permission android:name="android.permission.MOUNT_UNMOUNT_FILESYSTEMS"
        tools:ignore="ProtectedPermissions" />
    <uses-permission android:name="android.permission.VIBRATE"/>
    <uses-permission android:name="android.permission.READ_LOGS"
        tools:ignore="ProtectedPermissions" />
    <uses-permission android:name="android.permission.ACCESS_WIFI_STATE"/>
    <uses-feature android:name="android.hardware.camera.autofocus"/>
    <uses-permission android:name="android.permission.ACCESS_NETWORK_STATE"/>
    <uses-permission android:name="android.permission.CAMERA"/>
    <uses-permission android:name="android.permission.GET_ACCOUNTS"/>
    <uses-permission android:name="android.permission.READ_PHONE_STATE"/>
    <uses-permission android:name="android.permission.CHANGE_WIFI_STATE"/>
    <uses-permission android:name="android.permission.WAKE_LOCK"/>
    <uses-permission android:name="android.permission.FLASHLIGHT"/>
    <uses-feature android:name="android.hardware.camera"/>
    <uses-permission android:name="android.permission.WRITE_SETTINGS"
        tools:ignore="ProtectedPermissions" />


    <application
        android:allowBackup="true"
        android:icon="@mipmap/icon"
        android:label="@string/app_name"
        android:supportsRtl="true"
        android:theme="@style/Theme.Test">

        <!--        app的aookey在开发者中心申请的-->
        <meta-data
            android:name="dcloud_appkey"
            android:value="f486ba7ce87a8f2c1b0ac448e6f58d43" />

        <activity
            android:exported = "true"
            android:name="io.dcloud.PandoraEntry"
            android:configChanges="orientation|keyboardHidden|keyboard|navigation"
            android:launchMode="singleTask"
            android:hardwareAccelerated="true"
            android:theme="@style/TranslucentTheme"
            android:screenOrientation="user"
            android:windowSoftInputMode="adjustResize" >
            <intent-filter>
                <action android:name="android.intent.action.MAIN" />
                <category android:name="android.intent.category.LAUNCHER" />
            </intent-filter>
        </activity>
        <activity
            android:exported = "true"
            android:name="io.dcloud.PandoraEntryActivity"
            android:launchMode="singleTask"
            android:configChanges="orientation|keyboardHidden|screenSize|mcc|mnc|fontScale|keyboard|smallestScreenSize|screenLayout|screenSize"
            android:hardwareAccelerated="true"
            android:permission="com.miui.securitycenter.permission.AppPermissionsEditor"
            android:screenOrientation="user"
            android:theme="@style/DCloudTheme"
            android:windowSoftInputMode="adjustResize">
            <intent-filter>
                <category android:name="android.intent.category.DEFAULT" />
                <category android:name="android.intent.category.BROWSABLE" />
                <action android:name="android.intent.action.VIEW" />
                <data android:scheme="h56131bcf" />
            </intent-filter>
        </activity>

    </application>

</manifest>
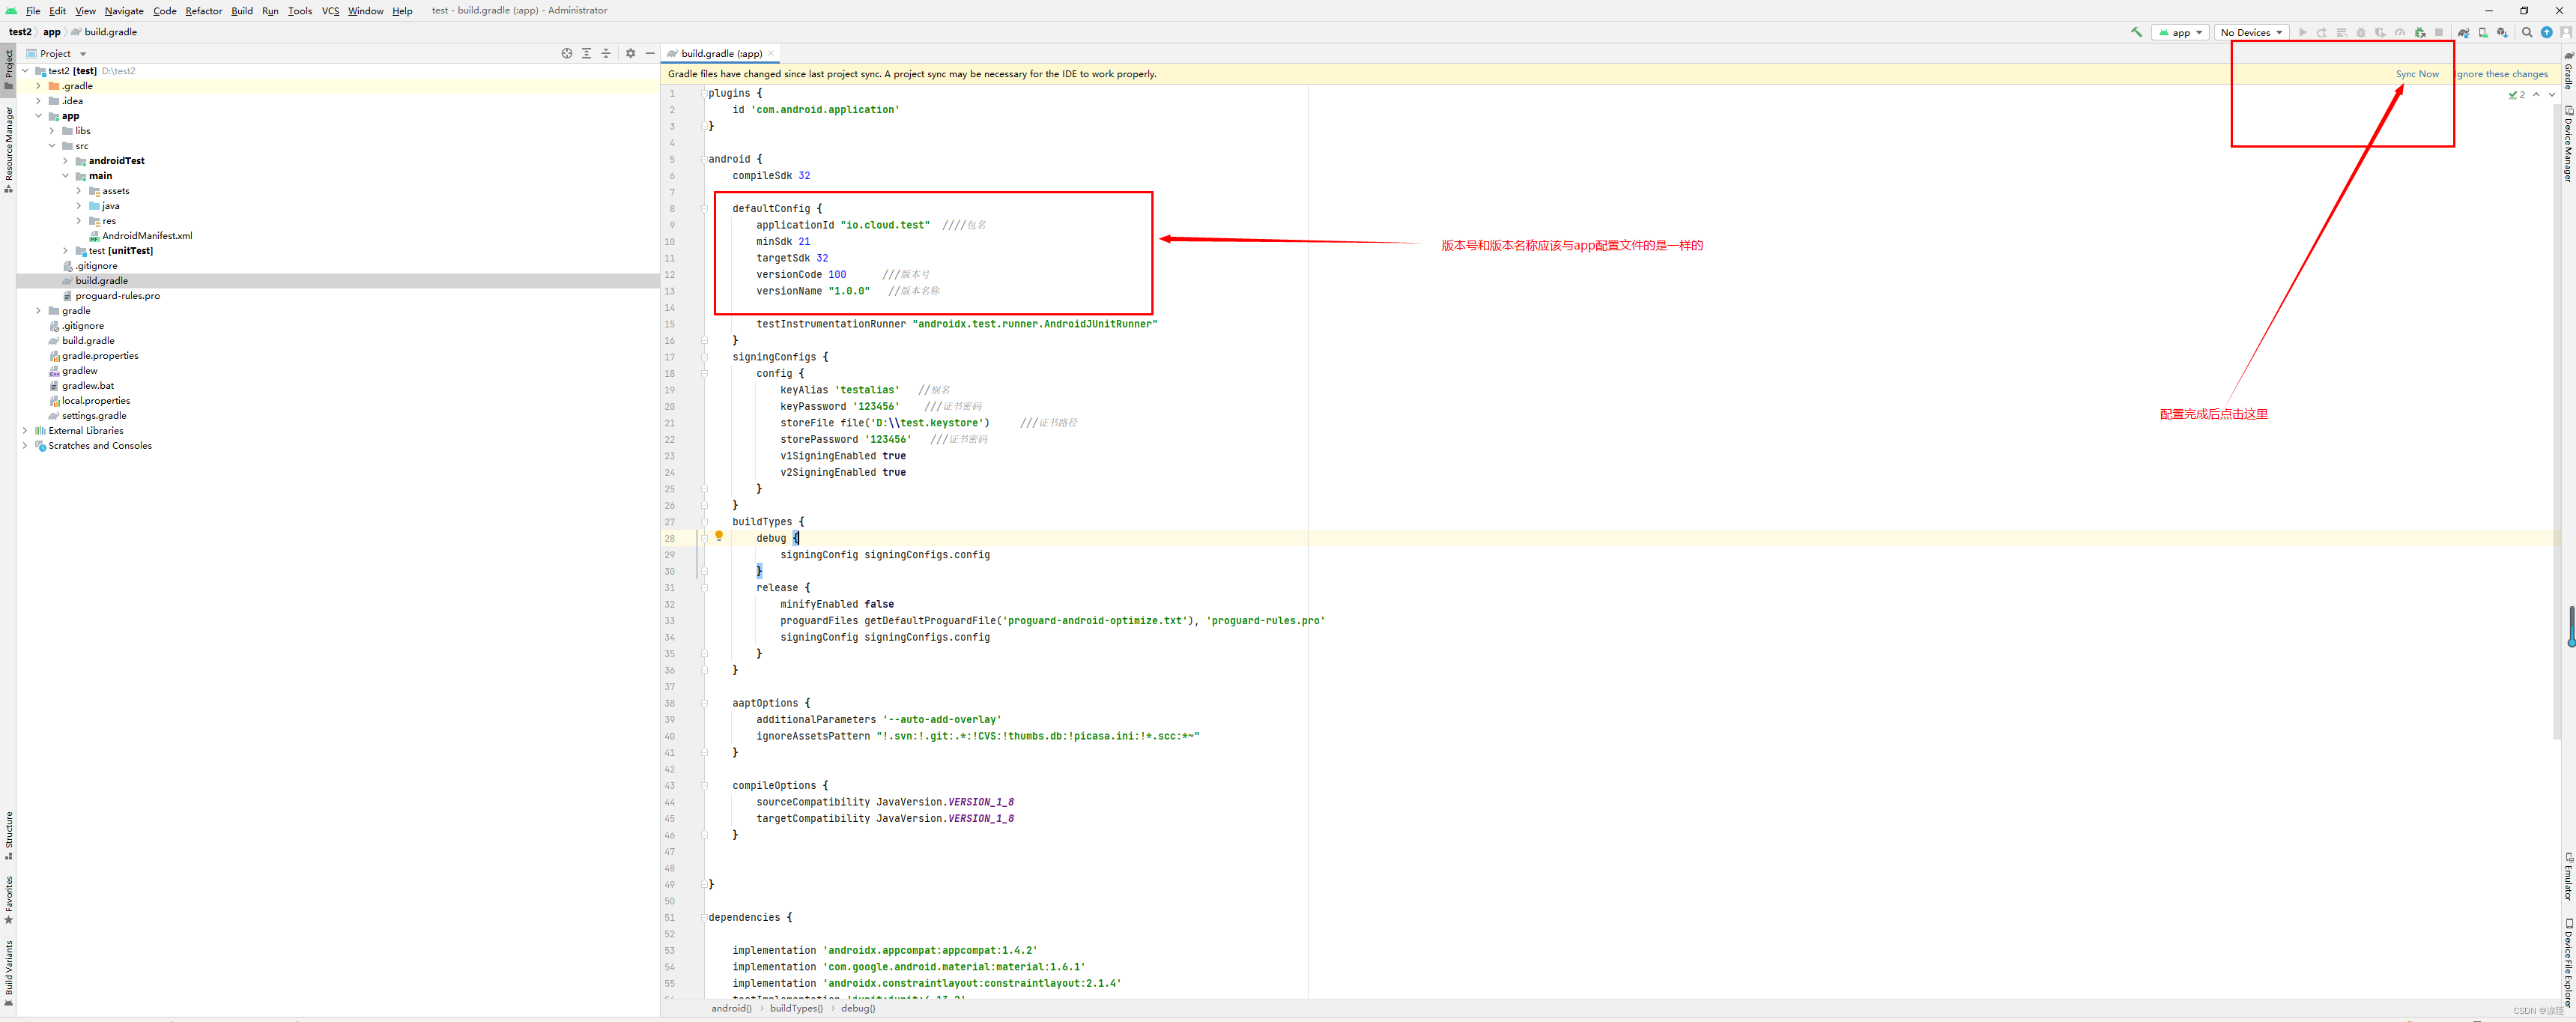
? ? ? ? 7.4. 配置app下面的build.gradle文件,直接复制我下面的代码将原有文件覆盖,去修改?
plugins {
    id 'com.android.application'
}

android {
    compileSdk 32

    defaultConfig {
        applicationId "io.cloud.test"  包名
        minSdk 21
        targetSdk 32
        versionCode 100      ///版本号
        versionName "1.0.0"   //版本名称

        testInstrumentationRunner "androidx.test.runner.AndroidJUnitRunner"
    }
    signingConfigs {
        config {
            keyAlias 'testalias'   //别名
            keyPassword '123456'    ///证书密码
            storeFile file('D:\\test.keystore')     ///证书路径
            storePassword '123456'   ///证书密码
            v1SigningEnabled true
            v2SigningEnabled true
        }
    }
    buildTypes {
        debug {
            signingConfig signingConfigs.config
        }
        release {
            minifyEnabled false
            proguardFiles getDefaultProguardFile('proguard-android-optimize.txt'), 'proguard-rules.pro'
            signingConfig signingConfigs.config
        }
    }

    aaptOptions {
        additionalParameters '--auto-add-overlay'
        ignoreAssetsPattern "!.svn:!.git:.*:!CVS:!thumbs.db:!picasa.ini:!*.scc:*~"
    }

    compileOptions {
        sourceCompatibility JavaVersion.VERSION_1_8
        targetCompatibility JavaVersion.VERSION_1_8
    }


}

dependencies {

    implementation 'androidx.appcompat:appcompat:1.4.2'
    implementation 'com.google.android.material:material:1.6.1'
    implementation 'androidx.constraintlayout:constraintlayout:2.1.4'
    testImplementation 'junit:junit:4.13.2'
    androidTestImplementation 'androidx.test.ext:junit:1.1.3'
    androidTestImplementation 'androidx.test.espresso:espresso-core:3.4.0'

    implementation fileTree(include: ['*.jar'], dir: 'libs')
    implementation fileTree(include: ['*.aar'], dir: 'libs')
    implementation 'androidx.legacy:legacy-support-v4:1.0.0'

    /*uniapp所需库-----------------------开始*/
    implementation 'androidx.recyclerview:recyclerview:1.2.1'
    implementation 'com.facebook.fresco:fresco:2.5.0'
    implementation "com.facebook.fresco:animated-gif:2.5.0"
    /*uniapp所需库-----------------------结束*/

    // 基座需要,必须添加
    implementation 'com.github.bumptech.glide:glide:4.9.0'
    implementation 'com.alibaba:fastjson:1.1.46.android'
}
? ? ? ? 7.5. 配置test下面的gradle.properties文件
# Project-wide Gradle settings.
# IDE (e.g. Android Studio) users:
# Gradle settings configured through the IDE *will override*
# any settings specified in this file.
# For more details on how to configure your build environment visit
# http://www.gradle.org/docs/current/userguide/build_environment.html
# Specifies the JVM arguments used for the daemon process.
# The setting is particularly useful for tweaking memory settings.
org.gradle.jvmargs=-Xmx2048m -Dfile.encoding=UTF-8
# When configured, Gradle will run in incubating parallel mode.
# This option should only be used with decoupled projects. More details, visit
# http://www.gradle.org/docs/current/userguide/multi_project_builds.html#sec:decoupled_projects
# org.gradle.parallel=true
# AndroidX package structure to make it clearer which packages are bundled with the
# Android operating system, and which are packaged with your app"s APK
# https://developer.android.com/topic/libraries/support-library/androidx-rn
android.useAndroidX=true
android.enableJetifier=true ///加入这个用于打包
# Enables namespacing of each library's R class so that its R class includes only the
# resources declared in the library itself and none from the library's dependencies,
# thereby reducing the size of the R class for that library
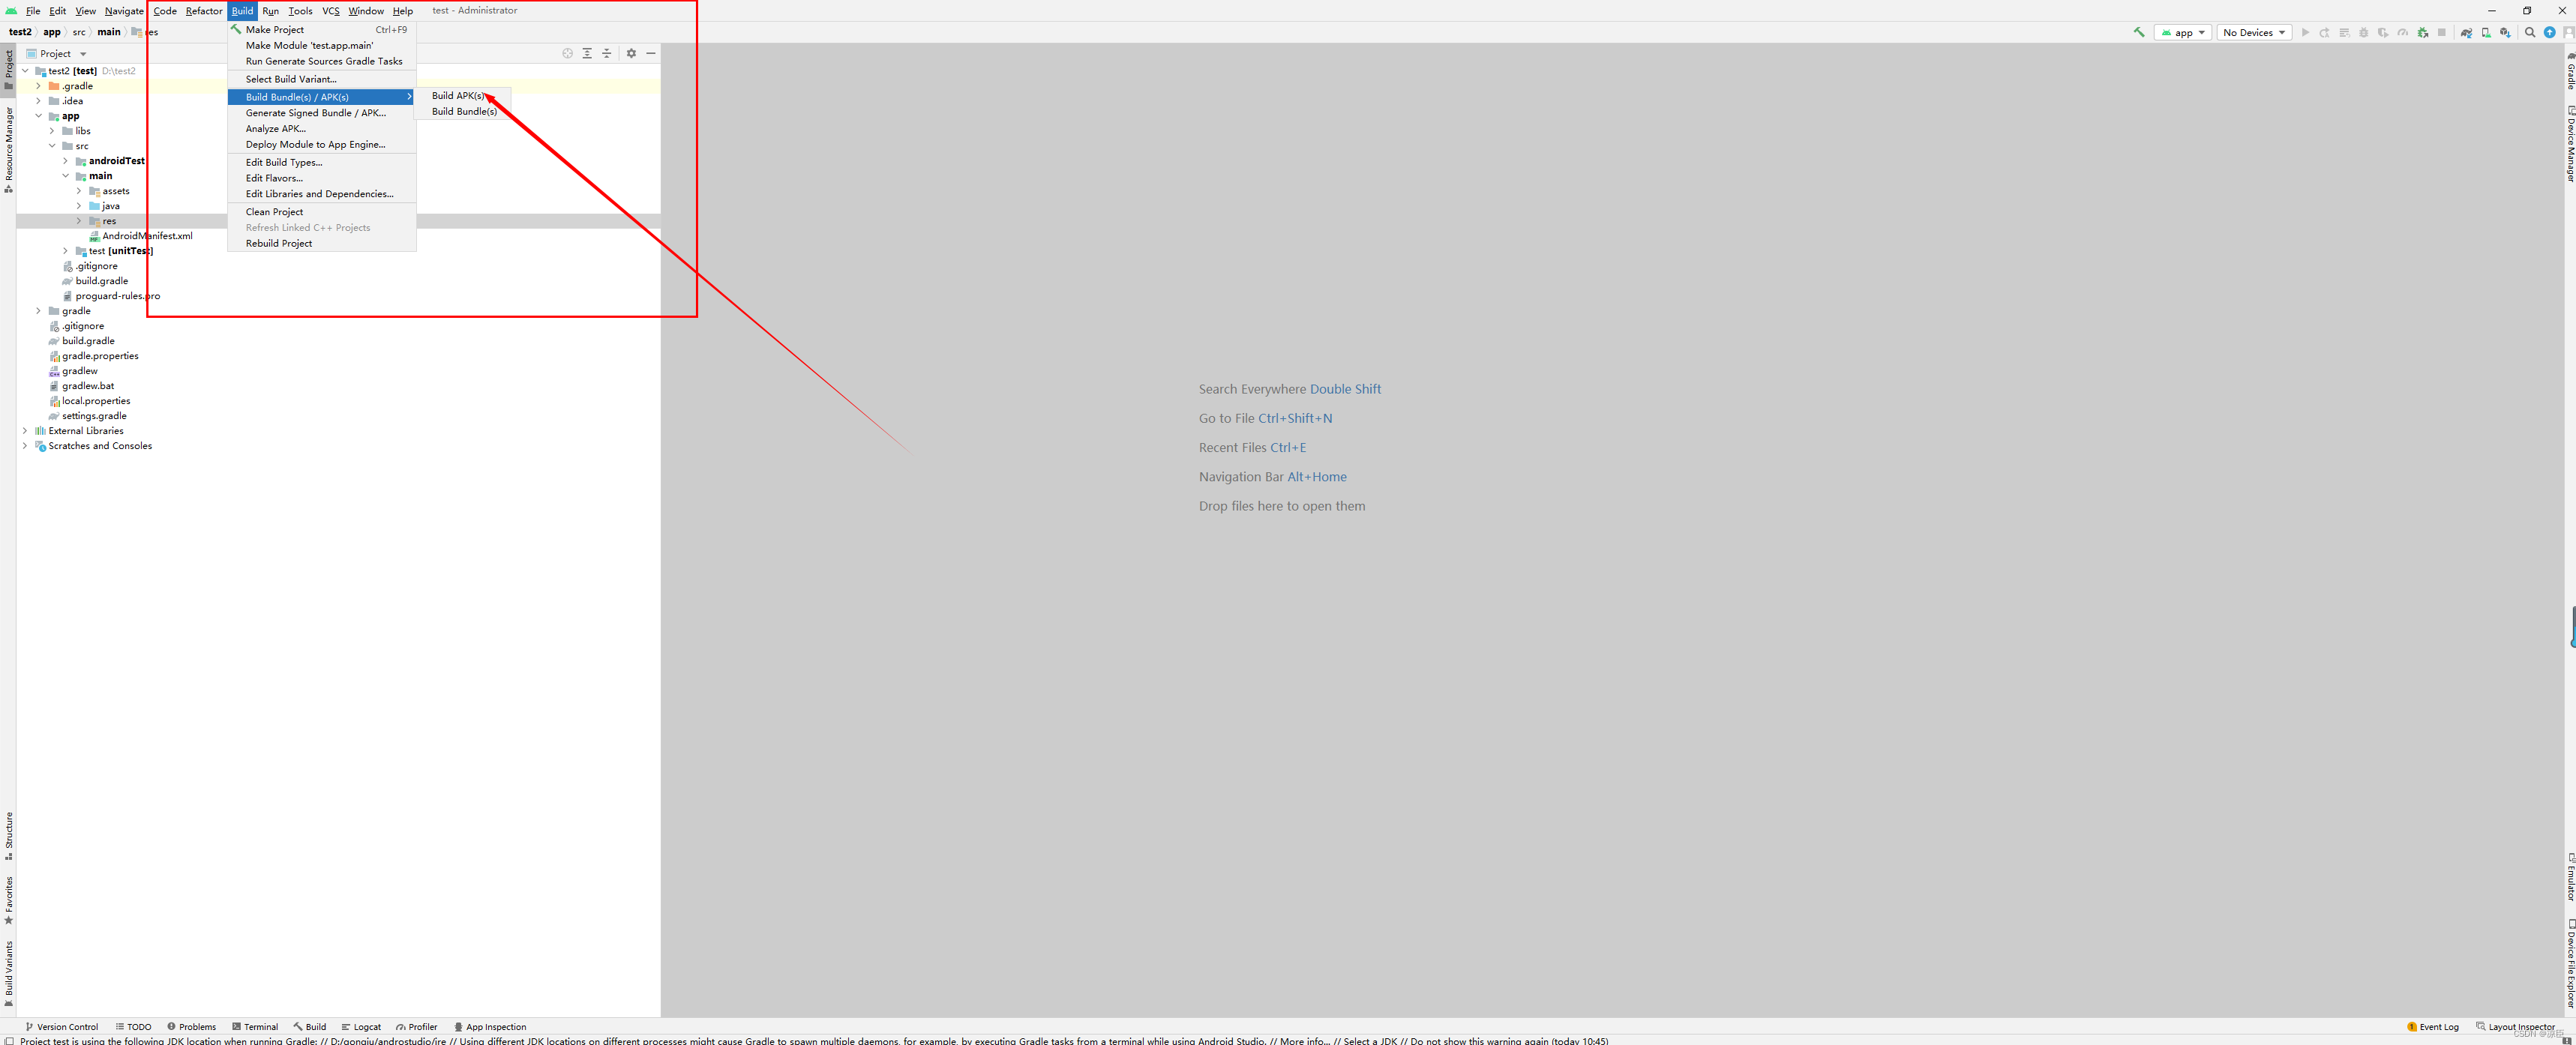
android.nonTransitiveRClass=true8.打包apk
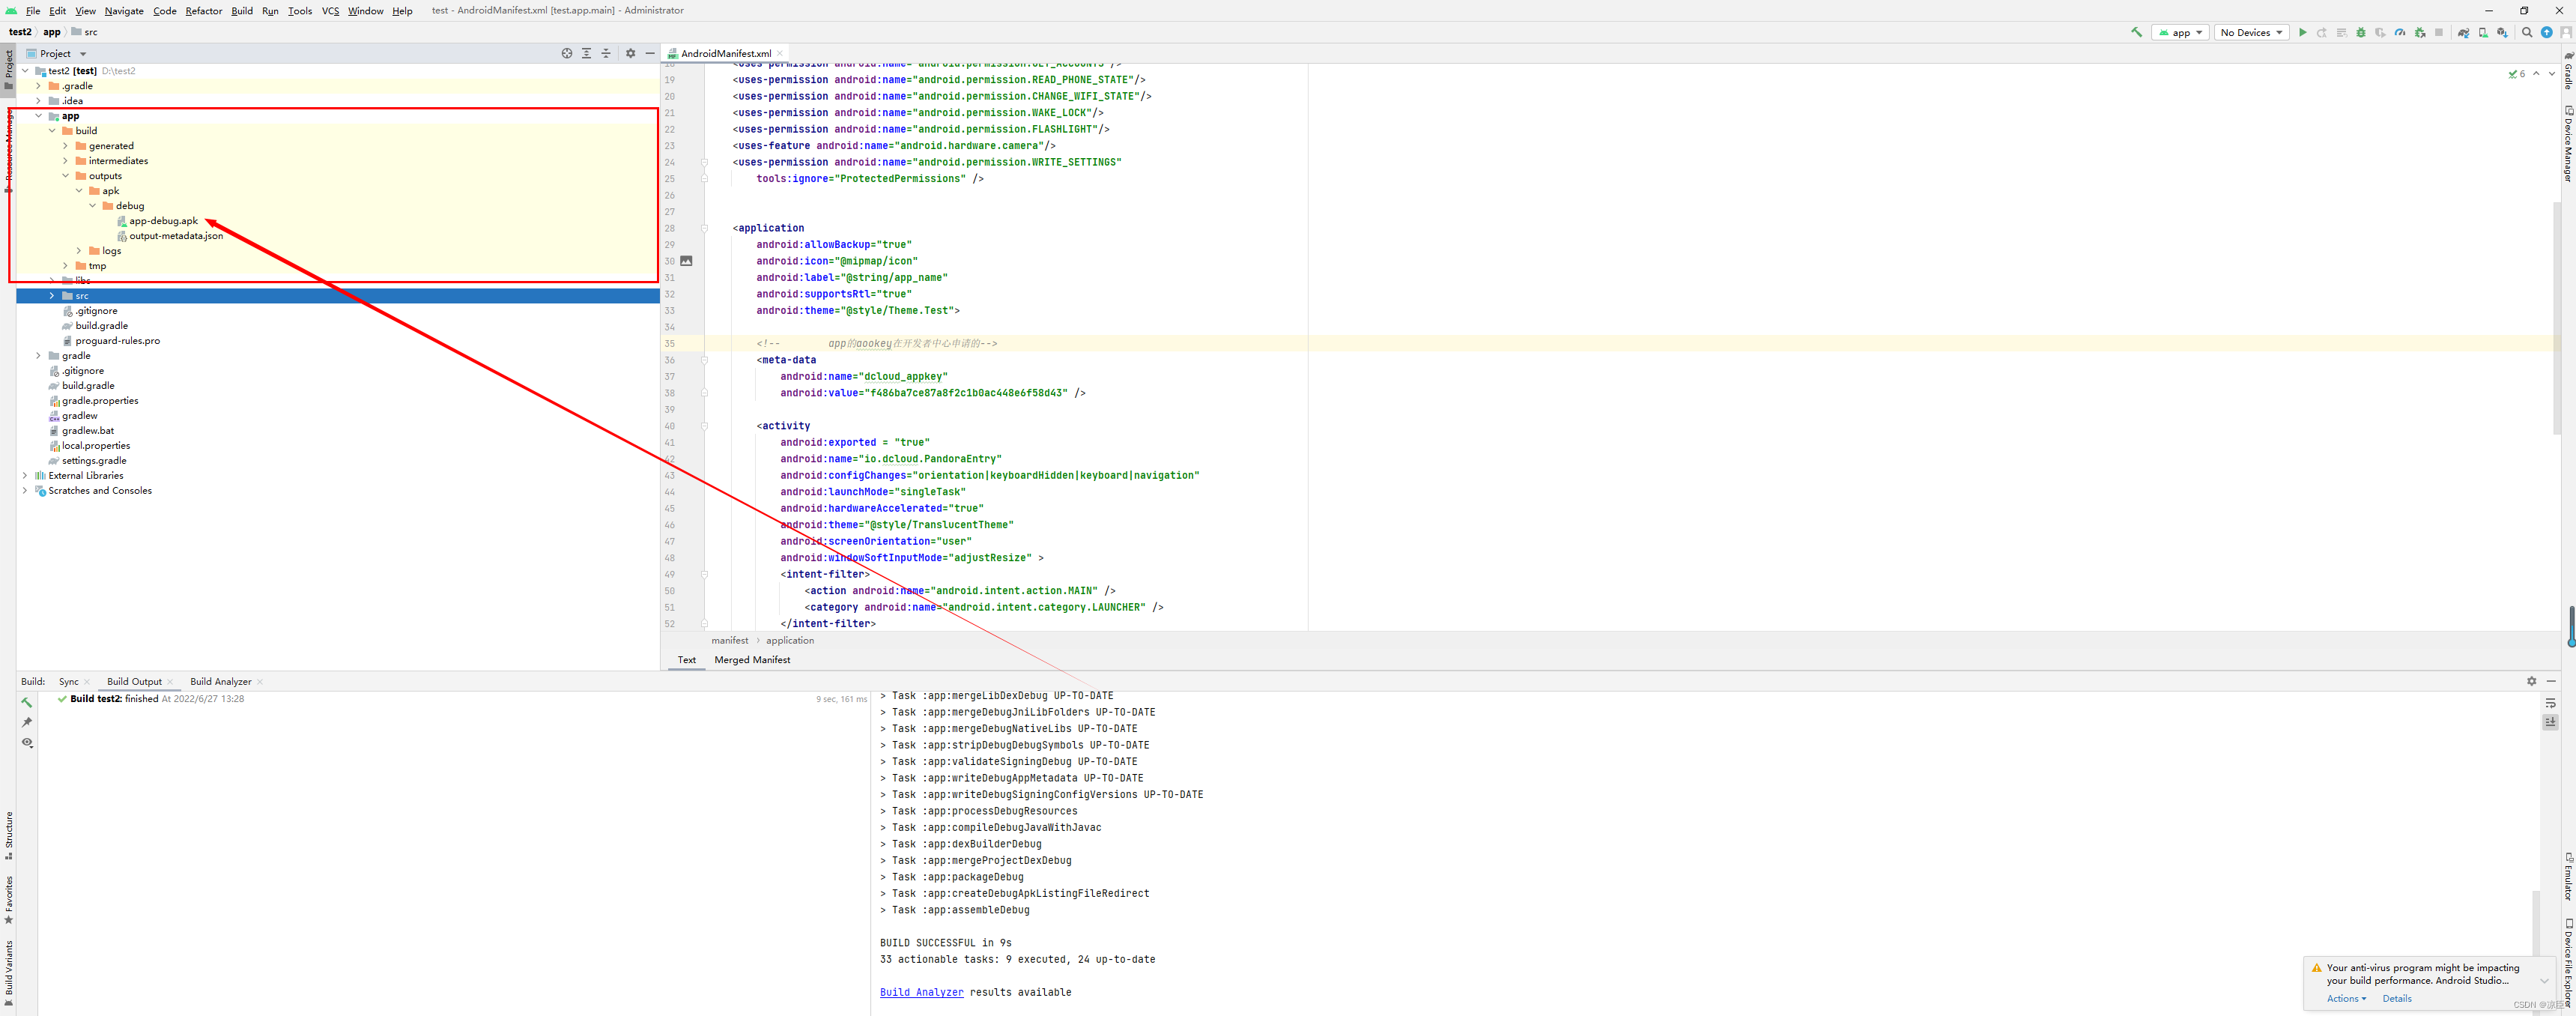
? 9. 查看打包文件
?
10.大功告成,下面附上模块配置和本地原生插件的打包教程
uniapp离线打包-模块配置![]() https://blog.csdn.net/weixin_44871749/article/details/125482899?uniapp离线打包SDK-极光推送本地插件
https://blog.csdn.net/weixin_44871749/article/details/125482899?uniapp离线打包SDK-极光推送本地插件![]() https://blog.csdn.net/weixin_44871749/article/details/125486741
https://blog.csdn.net/weixin_44871749/article/details/125486741